30+ Homemade Gift Ideas That Are Easy To Make (Even for Beginners)

Homemade Gift Ideas

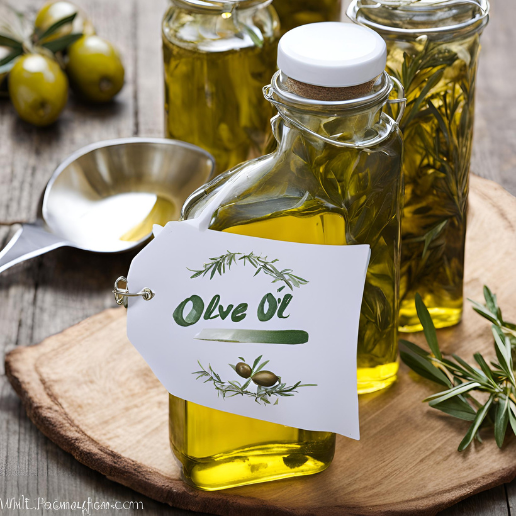
A thoughtfully crafted homemade gift can truly stand out in this fast-paced society. It shows you put extra time and effort into finding the perfect present, creating something unique that reflects the recipient’s personality and interests. Not only are homemade gifts sentimental and budget-friendly, but they’re also a fun way to express your creativity and personalize something special. But where do you even begin? Don’t worry, even if you’re a crafting novice, there are plenty of fantastic homemade gift ideas that are surprisingly easy to make. This guide will walk you through 30+ delightful DIY gift options, perfect for any occasion. 1. DIY Bath Salts (Relaxation in a Jar) Imagine a long, stressful day melting away as you soak in a warm bath filled with fragrant, calming bath salts. That’s the magic you can create with this simple yet luxurious gift. Bath salts are a combination of mineral-rich salts like Epsom salt and coarse sea salt, often infused with essential oils for added fragrance and therapeutic benefits. They exfoliate the skin, ease muscle tension, and promote relaxation. Here’s what you’ll need: Instructions: Pro Tip: For an extra touch of luxury, add a sprig of dried lavender or rosebuds to each jar. 2. Decorated Sugar Cookies (Sweet Treats with Personality) There’s something undeniably charming about homemade sugar cookies. They’re a classic gift that can be personalized to suit any taste or occasion. Plus, who can resist a delicious, beautifully decorated cookie? Here’s what you’ll need: Instructions: Tip: If you’re not comfortable with intricate frosting designs, keep it simple with colorful sprinkles or piped frosting borders. 3. Scented Candles (Aromatherapy Made Easy) The warm glow and calming fragrance of a scented candle can instantly create a relaxing and inviting atmosphere. Homemade candles are surprisingly easy to make and allow you to customize the scent and style to match the recipient’s preferences. Here’s what you’ll need: Instructions: 4. Hand-painted Flower Pots (Blooming with Creativity) Plain clay pots can be transformed into beautiful and personalized planters with a little paint and creativity. This gift is perfect for plant lovers or anyone who wants to add a touch of color and personality to their home décor. Here’s what you’ll need: Instructions: Tip: If you’re not confident in your freehand painting skills, stencils can be a great way to create crisp designs on your pots. 5. DIY Coasters (Functional and Fun) Coasters are a practical and stylish gift that anyone can appreciate. They protect surfaces from drink stains and add a decorative touch to a coffee table or side table. The beauty of homemade coasters is that you can customize them to match any style or décor. Here’s what you’ll need: Instructions: Tip: For a more polished look, you can use pinking shears to create a decorative edge on the fabric. 6. Infused Olive Oil (A Taste of Gourmet) Olive oil is a staple in many kitchens, but infused olive oil takes it to a whole new level. By adding herbs, spices, or even dried chilies, you can create a flavored oil perfect for salad dressings, marinades, or drizzling over pasta dishes. Here’s what you’ll need: Instructions: Tip: For a beautiful presentation, add a sprig of fresh herbs to the olive oil bottle before gifting. 7. Framed Pressed Flowers (A Timeless Keepsake) Pressed flowers are a beautiful and sentimental way to preserve nature’s beauty. Framed and displayed, they create a unique piece of artwork that can be cherished for years to come. Here’s what’s needed: Instructions: Tip: If the pressed flowers are particularly delicate, consider using a glass fronted frame to protect them from dust and damage. 8. Custom-Blended Tea (Aromatic and Relaxing) For the tea lover in your life, create a personalized blend of loose-leaf tea that caters to their specific tastes. This thoughtful gift allows them to enjoy a unique and flavorful cuppa. Here’s what you’ll need: Instructions: Tip: Add a handwritten label to your tin with the name of your custom blend and brewing instructions. 9. Decorative Throw Pillows (Cozy and Chic) Handmade throw pillows are a delightful way to add a touch of personality and comfort to a living space. With a variety of fabric options and simple sewing techniques, you can create beautiful pillows that match any décor. Here’s what you’ll need: Instructions: Tip: If you’re a sewing novice, consider using no-sew methods like fabric glue to create a simple pillowcase. 10. Hand-painted Mugs (Personalized and Practical) A plain mug can be transformed into a unique and personal gift with a little paint and creativity. This functional present is perfect for coffee or tea lovers and allows you to add a special message, name, or design. Here’s what you’ll need: Instructions: Tip: For a more professional look, consider using stencils or vinyl lettering to create crisp designs on your mug. 11. Personalized Bookmarks (A Reader’s Delight) For the bookworm in your life, create a beautiful and functional bookmark that they can cherish. This simple project allows you to showcase your creativity and craft a unique gift that encourages their love of reading. Here’s what you’ll need: Instructions: Tip: Consider the size of the books the recipient typically reads when determining the size of your bookmark. 12. Homemade Vanilla Extract (A Touch of Luxury) Homemade vanilla extract adds a touch of gourmet flavor to baking and desserts. It’s a surprisingly simple gift to make, and the recipient will appreciate the quality and thoughtfulness behind it. Here’s what you’ll need: Instructions: Tip: Homemade vanilla extract improves with age. The recipient can enjoy this gift for months, even years, to come. 13. DIY Bath Bombs (Fizzy and Relaxing) Bath bombs are a luxurious and pampering bath time treat. They’re surprisingly easy to make at home, allowing you to customize the ingredients and scents to create a truly unique and relaxing experience. Here’s what you’ll need: Instructions: Tip: For a touch of visual appeal, you can add a few drops of food coloring to the wet ingredients or sprinkle dried flowers or herbs on … Read more

30+ Quick Handmade Gift Ideas That Show You Care (Even When You’re Short on Time)

Handmade Gift Ideas

In our fast-paced lives, it can be easy to rely on store-bought gifts for birthdays, holidays, or just to show someone we care. But there’s something truly special about a handmade gift. It shows you put time and thought into the recipient, creating something unique and heartfelt. The problem? Time. We often feel strapped for it, making crafting seem like a luxury. Well, fret no more! This blog is here to show you that handmade gifts don’t have to be elaborate or time-consuming. We’ve compiled 30+ quick and easy gift ideas that you can whip up in no time, using readily available materials. From charming home decor to delightful treats, these gifts are sure to impress your loved ones with their thoughtfulness and creativity. 1. Decorated Coasters: A Touch of Whimsy for Every Drink Coasters are a practical and stylish gift anyone can appreciate. The beauty of making them yourself is the endless possibilities for personalization. What you’ll need: Let’s get crafting! Customization tips: 2. DIY Bath Salts: A Relaxing Gift for the Soul A luxurious bath soak is a wonderful way to unwind after a long day. Gift someone a spa-like experience with homemade bath salts infused with their favorite scents. What you’ll need: Let’s create a bathtime sanctuary! Customization tips: 3. Painted Flower Pots: A Burst of Color for Any Plant Plain terracotta pots are a common sight, but they don’t have to be boring! Transform them into vibrant and personalized planters with a little paint and creativity. What you’ll need: Let’s paint some life into those pots! Customization tips: 4. Microwaveable Bowl Cozy: A Hug in a Mug (or Bowl) Microwaveable meals are a convenient option for busy lifestyles. But hot bowls straight from the microwave can be uncomfortable to hold. Here’s where a cozy bowl cozy comes in! This simple project creates a heat-resistant barrier, making it easier and safer to grab a hot bowl. What you’ll need: Let’s stitch up some comfort! Customization tips: 5. Friendship Bracelets: A Token of Camaraderie Friendship bracelets are a timeless symbol of connection and friendship. They’re surprisingly easy to make and can be customized with endless color combinations and patterns. What you’ll need: Let’s weave some friendship! Customization tips: 6. Flavored Popcorn: A Sweet or Savory Treat Who doesn’t love popcorn? Take this classic snack to a whole new level with homemade flavored popcorn! It’s a fun and delicious gift that’s perfect for movie nights, game nights, or just a casual treat. What you’ll need: Let’s pop some flavor! Customization tips: 7. Photo Memory Jar: A Treasure Trove of Memories A photo memory jar is a sentimental and heartwarming gift that captures special moments in a unique way. It’s a lovely way to show someone you care and cherish the time you’ve spent together. What you’ll need: Let’s capture those memories! Customization tips: 8. DIY Sugar Scrub: A Touch of Spa Luxury at Home Indulge someone’s senses with a homemade sugar scrub that buffs away dead skin cells and leaves them feeling pampered. What you’ll need: Let’s create a mini spa experience! Customization tips: 9. Pressed Flower Bookmarks: A Touch of Nature for Bookworms These beautiful bookmarks featuring real pressed flowers are a unique and thoughtful gift for book lovers. What you’ll need: Let’s press some floral beauty! Customization tips: 10. DIY Candle: A Warm Glow for Any Occasion The soft glow and calming fragrance of a homemade candle make it a universally appreciated gift. What you’ll need: Let’s create a little ambiance! Safety tip: Never leave melted wax unattended on the stovetop. Customization tips: 11. Decorative Tea Towels: A Practical Gift with Personality Tea towels are a kitchen staple, but they can also be stylish and personalized. With a little fabric paint and creativity, you can create unique tea towels as thoughtful gifts. What you’t need: Let’s spruce up those dish towels! Customization tips: 12. Custom Herb Mix: A Gift that Keeps on Giving Fresh herbs elevate any dish, and a custom herb mix allows the recipient to add a burst of flavor to their cooking. What you’ll need: Let’s create a flavor explosion! Customization tips: 13. Scented Drawer Liners: A Fresh Touch for Clothes and Drawers Linen closets and drawers can often develop a stale odor. Scented drawer liners offer a practical and delightful solution, keeping clothes smelling fresh and adding a touch of fragrance. What you’ll need: Let’s freshen up those drawers! Customization tips: 14. DIY Bath Bombs: A Fizzy Escape for Relaxation Transform bath time into a luxurious spa experience with homemade bath bombs. What you’ll need: Let’s create a fizzy paradise! Customization tips: 15. Hand-Painted Coasters: A Splash of Color for Drinks Protect furniture and add a personal touch with hand-painted coasters. What you’ll need: Let’s paint some coasters! Customization tips: 16. DIY Lip Balm: A Touch of Pampering for Soft Lips This homemade lip balm recipe offers a natural and nourishing way to keep lips soft and hydrated. What you’ll need: Let’s create some lip-loving magic! Customization tips: 17. Custom Engraved Spoons: A Personalized Touch for Every Meal Gift a set of personalized spoons with a special message or design engraved on the handle. What you’ll need: Let’s get engraving! Customization tips: When life gets busy, finding time to create meaningful gifts can feel overwhelming. But even when you’re short on time, there’s something truly special about a handmade gift. Whether it’s a thoughtful touch on a simple item or a delicious treat made with love, these gifts show that you care far beyond just buying something off the shelf. The good news? You don’t need hours or complicated skills to craft something unique. Below are 17 quick handmade gift ideas that can be created in under an hour, so you can make someone’s day without sacrificing yours. 18. Customized Photo Frames A picture is worth a thousand words, but a personalized frame speaks volumes. You can easily transform a plain photo frame into a heartfelt keepsake by adding your own creative … Read more

How to Get Rid of Flies on the Patio (11 Effective Tips for a Fly-Free Zone)

How to Get Rid of Flies on the Patio

There’s nothing quite like enjoying a refreshing drink or a delicious meal on your patio. But pesky flies can quickly turn that idyllic scene into a swatting frenzy. These buzzing, disease-carrying insects not only disrupt your relaxation, but they can also pose a health risk. The good news is, there are several effective ways to reclaim your patio and create a fly-free haven. This guide explores the reasons flies find your patio attractive and equips you with 11 powerful tips to keep them at bay. Why Flies Love Your Patio Before tackling the flies themselves, it’s important to understand what draws them to your patio in the first place. Here are some common culprits: 11 Powerful Tips to Eliminate Flies from Your Patio Now that you know why flies find your patio so inviting, it’s time to turn the tables. Here are 11 effective tips to create a fly-free zone: Tip 1: Eliminate Fly Attractants – Practice Patio Hygiene The first line of defense is to remove anything that might attract flies. Here’s what you can do: Tip 2: Embrace the Power of Natural Fly Repellents Nature offers a variety of plants and scents that repel flies. Here’s how to harness their power: Tip 3: Deploy Traps and Baits – Attract and Eliminate If natural repellents aren’t enough, consider using commercial fly traps and baits. These come in various forms, each with its own advantages: Tip 4: Create a Smoke Barrier – A Time-Tested Approach While not as effective as other methods, creating a smoke barrier can help deter flies. Here’s what you can try: Citronella Candles or Incense Sticks: Citronella oil, a natural insect repellent, is a common ingredient in outdoor candles and incense sticks. Burning these on your patio can create a smoke barrier that some flies find unpleasant. While not the most long-lasting solution, it can offer temporary relief, especially during evening gatherings. Tip 5: Consider Fly Repellent Sprays – A Targeted Approach For immediate relief or stubborn fly infestations, outdoor-safe fly repellent sprays can be a powerful tool. However, it’s important to use them judiciously: Tip 6: Address Underlying Problems – Deal with the Source Sometimes, the fly problem on your patio might be a symptom of a larger issue. Here’s what to consider: Tip 7: Be Persistent – The Key to a Fly-Free Patio Getting rid of flies might require a multi-pronged approach and consistent effort. Here’s why persistence is key: Tip 8: Leverage the Power of Fans – Create a Fly Disruption Zone Flies are weak flyers and struggle to navigate strong air currents. Here’s how to use fans to your advantage: Tip 9: Embrace the Beauty and Utility of Fly-Repellent Plants Nature offers a variety of beautiful plants that not only enhance your patio’s aesthetics but also deter flies. Here are some additional options to explore: Tip 10: Light Up the Night – Strategic Lighting for Fly Control Flies are primarily active during the day. Here’s how to use strategic lighting to make your patio less fly-friendly at night: Tip 11: Embrace DIY Fly Traps – Homemade Solutions If you’re looking for a budget-friendly approach, consider creating your own DIY fly traps: Remember, consistency is key when using DIY traps. Refresh the bait or water regularly to maintain their effectiveness. Reclaim Your Patio and Enjoy the Outdoors Simply follow these tips and adopt a proactive approach to effectively eliminate flies from your patio and create a relaxing, pest-free haven. Remember, the key lies in removing attractants, utilizing repellents, and addressing underlying problems. With a little effort, you can reclaim your patio and enjoy the fresh air and sunshine without the constant buzz of unwelcome guests. Here are some additional points to consider: With these strategies and a little persistence, you can transform your patio into a fly-free oasis, allowing you to truly enjoy the beauty of the outdoors. So, grab a drink, relax in your comfortable chair, and breathe in the fresh air – fly-free!

20+ Unique Summer Aesthetic Wallpapers for your Device

Summer is a symphony of sunshine, warmth, and endless possibilities. It’s a time for carefree adventures, refreshing treats, and soaking in the beauty of the season. But how do you capture that vibrant summer feeling when you’re not basking on a beach or exploring a new city? The answer lies in the little details – like the wallpaper on your phone or computer! A well-chosen wallpaper can instantly transform your digital space, setting the mood and reflecting your personality. And when it comes to summer, there’s a whole world of unique aesthetics waiting to be discovered. So, ditch the generic landscapes and generic sunsets – it’s time to personalize your device with a summer aesthetic wallpaper that truly speaks to you! 20+ Unique Summer Aesthetic Wallpapers Here are some unique wallpapers to transform your digital space this summer: 1. Escape to a Tropical Paradise: Close your eyes and picture this: lush palm trees swaying gently in the breeze, vibrant hibiscus flowers blooming in a riot of colors, and crystal-clear turquoise waters lapping at a pristine beach. This is the essence of the tropical paradise aesthetic, a perfect escape for anyone yearning for a touch of island life. Imagine a wallpaper showcasing this idyllic scene. It could be a photorealistic image capturing every detail, or a more artistic interpretation with painterly strokes and a touch of dreamlike quality. Look for wallpapers with hidden details that add depth, like a colorful parrot perched on a branch or a lone sailboat drifting on the horizon. 2. Sun-Kissed Minimalism: Less is More For those who appreciate clean lines and a calming summer vibe, sun-kissed minimalism offers a refreshing alternative. Imagine a wallpaper bathed in warm sunlight, featuring a geometric pattern in pastel shades of pink, peach, and sky blue. Think of a minimalist interpretation of a seashell, its simple silhouette resting on a background of soft sand. The beauty of this aesthetic lies in its simplicity. It allows you to focus on the essence of summer – the warmth of the sun and the soothing feel of the beach – without the clutter of busy visuals. Look for wallpapers with a focus on negative space, where the background plays a significant role in setting the mood. 3. A Blast from the Past: Vintage Summer Vibes Channel your inner nostalgia with vintage summer aesthetic wallpapers! This category is all about evoking a sense of retro charm, transporting you back to a simpler time. Think of faded photographs with a grainy texture, depicting surfers riding waves with a carefree spirit. Imagine a faded gingham picnic blanket spread out on a sun-drenched meadow, complete with a wicker basket overflowing with fresh fruits. Embrace the playfulness of retro patterns like polka dots and stripes. Opt for wallpapers featuring vintage typefaces and hand-drawn illustrations for an authentic touch. These wallpapers are a perfect conversation starter, sparking memories of childhood summers and reminding you of the timeless beauty of the season. 4. Unveiling the Magic of Summer Nights: Let’s not forget the magic that unfolds when the sun sets and the night sky comes alive. Summer nights offer an entirely different aesthetic experience, perfect for those who find serenity and inspiration in the darkness. Imagine a wallpaper showcasing a breathtaking display of twinkling stars reflected in the calm surface of a lake. For the city dwellers, capture the vibrant cityscape bathed in neon lights, or a lone firefly dancing in a field of wildflowers, its bioluminescent glow illuminating the night. This aesthetic is all about capturing the quiet beauty and mystery of nighttime adventures. Look for deep, rich colors and soft lighting effects to create a sense of tranquility. 5. Foodie Delights: A Feast for the Eyes (and Maybe the Stomach) Summer is a time for indulging in refreshing treats and indulging your inner foodie. Take your tastebuds on a virtual journey with summer-themed food wallpapers. Imagine a close-up shot of juicy watermelon slices with a single, glistening drop of juice tempting you to take a bite. For a vibrant touch, opt for a wallpaper showcasing a vintage ice cream truck parked on a beach, its colorful exterior promising a sweet summertime treat. This aesthetic is all about capturing the joy and satisfaction of indulging in delicious seasonal foods. Look for wallpapers with a focus on texture, color, and the sheer visual pleasure of food photography. 6. Summer Adventures: Explore the Unknown Summer is the perfect time to embark on unforgettable adventures. Capture the thrill of exploration with a summer adventure aesthetic wallpaper. Imagine a photorealistic image of a vibrant hot air balloon soaring over a landscape of snow-capped mountains, the contrast between warm and cool colors creating a sense of wonder. For the ocean lovers, a close-up of colorful fish swimming around a coral reef offers a glimpse of the vibrant underwater world. This aesthetic is all about celebrating the spirit of exploration and the awe-inspiring beauty of the natural world. Look for wallpapers that capture the vastness of landscapes, the adrenaline rush of activities, and the intricate details of nature’s wonders. 7. Summer Fun: Making Memories that Last Summer is synonymous with laughter, friendship, and carefree fun. Capture the joy of the season with a summer fun aesthetic wallpaper. Imagine a roller coaster speeding through a vibrant amusement park, its twists and turns promising a thrilling experience. For a more sentimental touch, picture a group of friends enjoying a pool party, their laughter echoing through the air. This aesthetic is all about celebrating the simple joys of summertime and the memories created with loved ones. Look for wallpapers that capture the energy and excitement of summertime activities, the beauty of human connection, and the pure joy of living in the moment. 8. Sun-Drenched Architecture: Capture the essence of summer through the lens of architecture. Imagine a wallpaper showcasing a charming beach house with weathered wooden planks bathed in golden sunlight. For a touch of city life, picture a bustling outdoor market brimming with colorful flowers and fruit … Read more

The Ultimate Guide to DIY Raised Garden Beds: 15 Designs You Can Build This Weekend

DIY Raised Garden Beds

Building your own raised garden bed is one of the most empowering things you can do for your backyard. I remember the first time I ditched the traditional “in-ground” rows for a structured bed. Suddenly, my back didn’t ache after weeding, the drainage was perfect, and my neighbors actually stopped to compliment my yard. Raised beds give you total control over your soil quality and keep those pesky weeds from creeping into your veggie patch. Whether you have a sprawling suburban lot or a tiny urban balcony, there is a design here for you. In this guide, I’m walking you through 15 of my favorite DIY raised garden bed ideas. We’ll cover everything from budget-friendly pallet builds to elegant cedar-and-metal designs. Let’s get growing! Things to Consider Before You Build Before you grab your drill, you need a plan. The biggest mistake I see beginners make is putting a beautiful bed in a spot where plants can’t survive. First, look at the sun. Most vegetables need 6 to 8 hours of direct sunlight. If your chosen spot is under a giant oak tree, your tomatoes will struggle. Second, think about water. You don’t want to be dragging a heavy hose 50 yards across the yard every morning. Build your beds within reach of a spigot or an existing irrigation line. It makes the “chore” of gardening feel a lot more like a hobby. Finally, let’s talk dimensions. I always recommend keeping your beds no wider than 4 feet. Why? Because you want to be able to reach the center from either side without ever stepping on the soil. Stepping on the soil compacts it, which makes it harder for roots to breathe. For height, 6 to 12 inches is standard, but if you have back issues, 18 to 24 inches is the “sweet spot” for comfort. 15 Raised Garden Designs You Can Build This Weekend 1. The Classic Pallet Bed If you are looking for the absolute cheapest way to get started, the pallet bed is your best friend. You can often find heat-treated pallets for free behind local hardware or grocery stores. They offer a rustic, “shabby-chic” look that fits perfectly in any backyard. Just make sure the pallet is stamped with “HT,” which means it was heat-treated rather than chemically treated. To start, you’ll want to dismantle the pallets carefully using a crowbar. This is probably the hardest part of the project because those nails are stubborn! Once you have your individual slats, you can cut them to equal lengths. I like to use four sturdy 4×4 posts in the corners to give the bed structure. Next, screw the slats into the corner posts. You can leave small gaps between the boards for extra drainage, or butt them up tight for a cleaner look. Because pallet wood is usually thin, I recommend lining the inside with landscape fabric to keep the soil from washing out through the cracks. Once the frame is built, give it a quick sanding. You don’t need it to be smooth as a dining table, but removing the big splinters will save your hands later. If you want it to last more than two seasons, apply a coat of food-safe linseed oil to protect the wood from rot. Finally, set your bed in its permanent home and fill it up. This project usually takes me about two hours from start to finish. It’s a fantastic way to recycle material that would otherwise end up in a landfill, and the cost is essentially zero if you already have some screws lying around. 2. Modern Corrugated Metal and Wood This is my personal favorite because it looks like something straight out of a high-end landscaping magazine. The contrast between the warm wood tones and the cool, industrial metal is stunning. It’s also incredibly durable. While wood eventually rots, corrugated metal can last for decades. To build this, you’ll create a wooden “picture frame” for each of the four sides. Use rot-resistant wood like cedar or redwood for the best results. You’ll want to cut a groove into the wood or use small cleats to hold the metal panels securely in place. The metal itself should be galvanized to prevent rust. When cutting the metal, please wear heavy-duty gloves and eye protection. The edges are razor-sharp! I use a circular saw with a metal-cutting blade, but tin snips work too if you have strong wrists. Slide the metal into your wooden frames and secure them with roofing screws that have rubber washers to prevent leaks. Assembly is straightforward: join your four framed panels at the corners using 4×4 posts. I recommend building these on a flat surface like a garage floor before moving them to the garden. Since the metal reflects heat, these beds are excellent for heat-loving crops like peppers and eggplants. The final result is a bed that won’t bow or warp over time. It adds a sophisticated architectural element to your garden. While the materials cost more than a pallet bed, the longevity and “wow factor” make it a solid investment for any serious gardener. 3. The Waist-High Elevated Bed If you’re tired of your knees cracking every time you go to pick a radish, this is the design for you. An elevated bed is essentially a large planter box on legs. It’s perfect for patios, decks, or for anyone with mobility issues. It brings the garden up to you, rather than making you go down to it. Start by building a deep box, usually about 10 to 12 inches deep. You’ll need heavy-duty lumber for this because wet soil is incredibly heavy. I recommend using 2×6 or 2×8 boards for the sides. For the floor of the box, use sturdy slats with about 1/4-inch gaps for drainage, and cover them with a layer of landscape fabric. The legs are the most important part of this build. Use 4×4 posts and bolt them to the outside of the box using carriage bolts. Don’t … Read more

20+ Best Summer Camp Crafts: Unleashing Creativity and Making Memories

Best Summer Camp Crafts

Summer camp crafts have always been a childhood favorite—but these days, it’s all about combining creativity with modern flair. While traditional crafts like popsicle stick houses and pasta necklaces have their charm, today’s campers are embracing more stylish, functional, and skill-building projects. From colorful accessories to eco-friendly art, modern summer camp crafts reflect current trends while keeping kids happily engaged. What makes these new-age crafts even better? They use accessible materials, spark imagination, and often result in something kids actually want to use or display. Many of them also align with popular DIY aesthetics seen on social media, giving campers a sense of connection and pride in their creations. Whether you’re a camp counselor or parent planning summer activities, these fresh ideas are sure to impress. Below are 20+ modern summer camp crafts that strike the perfect balance between fun and fabulous. 1. DIY Tie-Dye Tote Bags Tie-dye has made a huge comeback—but instead of the usual T-shirts, today’s campers are customizing canvas tote bags. This not only puts a practical twist on a beloved activity but also results in a durable and reusable item kids can carry all summer long. The bag can be used to stash books, snacks, or extra camp supplies, giving it an everyday function. To make them, all you need are plain cotton tote bags, a tie-dye kit, gloves, and rubber bands. Kids can experiment with different folding techniques like spirals, stripes, or scrunches for varied effects. For added flair, encourage them to try ombré gradients or use trendy colors like lavender, mint, and peach. What’s great is that each tote turns out completely unique—and it doubles as a wearable memory from camp. These bags also make great parent gifts or group photo props. Want to take it up a notch? Have kids stencil their name or initials using fabric paint once the dye dries. 2. Shrinky Dink Keychains with Personalized Art Shrinky Dinks have been around for decades, but they’ve been reimagined for a new generation of campers. These thin plastic sheets can be drawn on, cut out, and then baked to shrink into durable charms. It’s like watching magic happen, and kids are always amazed when they see their designs shrink down into glossy, professional-looking keychains. Start by giving each child a sheet of shrink film and some permanent markers. Encourage them to draw modern icons—think emojis, pets, video game characters, or their name in bubble letters. Once cut out and punched with a hole, the designs are baked for just a few minutes and then cooled before adding key rings or backpack clips. These keychains are small but mighty—perfect as friendship gifts or souvenirs. Kids love showing them off, and because they’re easy to replicate, this craft is ideal for group projects or trading among campers. Plus, it introduces young creatives to the world of shrinking plastic art, a fun gateway into more advanced DIY techniques. 3. DIY Beaded Name Bracelets with a Twist Friendship bracelets are timeless, but modern versions use chic beads and personal touches that reflect current style trends. Think soft pastels, gold accents, and cute charms that kids can customize to match their mood or bestie group. This updated craft is perfect for teaching kids pattern-making and hand-eye coordination—all while having a blast. Provide kids with stretchy cord or string, alphabet beads, heishi beads (thin disc-shaped beads), and some colorful charms. Let them spell out their names, fun phrases like “BFF” or “VIBES,” or even create secret codes. You can also introduce a QR code charm—printed on shrink film—that links to a secret message or song. Bracelet-making stations are always buzzing with energy, as kids love trading or stacking multiple styles. These bracelets are totally Instagram-worthy and easy to replicate, making them a great low-mess, high-impact camp craft. It’s a fabulous blend of personal expression, creativity, and social bonding. 4. Air Dry Clay Trinket Dishes Working with clay is not only fun but also incredibly therapeutic—and when kids get to make something they can actually use, it takes the craft to a whole new level. Enter air dry clay trinket dishes: charming little holders for jewelry, coins, or camp treasures. Unlike traditional pottery, air dry clay doesn’t require a kiln or oven—just time to set. Kids can shape the clay by hand or press it into shallow bowls to create a base. Once the basic shape is formed, they can add texture using leaves, stamps, or textured fabrics. After drying (usually 24–48 hours), they can paint their dishes in bold colors, metallics, or even marbled effects using swirled paints. Finish the project with a clear sealant to add shine and protect the paint. These trinket dishes are ideal for older kids and tweens, especially those who love decorating their space or giving gifts. Bonus: This project introduces them to the basics of ceramics and sculptural design without needing expensive materials. 5. Recycled Bottle Cap Mosaic Art If you’re looking for a sustainable craft that gets kids thinking outside the box, bottle cap mosaics are a hit. This activity uses colorful plastic bottle caps to create vibrant wall art—either as individual pieces or a group mural. Not only does it promote recycling, but it also teaches pattern recognition and teamwork. To get started, collect a variety of bottle caps in different colors and sizes. Supply kids with a sturdy base like a cardboard square or piece of plywood and some strong glue. Campers can create abstract designs, spell their names, or recreate fun images like suns, animals, or the camp’s logo. This craft is ideal for group collaboration. Each camper could work on a square, then combine the pieces into a giant mosaic to hang in the camp lodge or rec area. It’s colorful, creative, and totally photo-worthy—a project with meaning and message. 6. Mini DIY Terrariums (No Soil Needed!) Modern terrariums don’t need to be messy. These soil-free mini terrariums use artificial moss, stones, and tiny figurines to create beautiful little worlds inside jars or clear cups. … Read more

How to Start a Flower Garden You’ll Love for Years to Come: A Detailed Guide

How to Start a Flower Garden

Have you ever dreamt of stepping into your own backyard paradise overflowing with vibrant blooms? A flower garden isn’t just a splash of color; it’s a haven for pollinators, a source of fresh-cut beauty for your home, and a space to connect with nature. But where do you even begin? This comprehensive guide will walk you through every step of creating a flower garden you’ll love for years to come. Step 1: Planning Your Dream Garden A. Choosing the Perfect Spot: The location of your flower garden is crucial for its success. Here are key factors to consider: B. Know Your USDA Growing Zone: The United States Department of Agriculture (USDA) Plant Hardiness Zone Map divides the country into zones based on average annual minimum temperatures. This information is vital for choosing plants that will survive your particular climate. Knowing your growing zone allows you to avoid planting flowers that wouldn’t tolerate your winter temperatures. You can easily find your zone by entering your zip code on the USDA website https://planthardiness.ars.usda.gov/. C. Understand Your Soil: Happy plants start with healthy soil. Good soil provides essential nutrients, drainage, and support for your flowers. Here’s a simple way to get a basic understanding of your soil: Step 2: Selecting the Stars of Your Show – The Flowers! A. Consider Your Preferences: Now comes the fun part – choosing the flowers! Here are some factors to consider: B. Choose Plants Based on Your Conditions: Not all flowers are created equal. Here’s how to match your plant selections to your specific garden environment: Step 3: Preparing Your Garden Bed A. Clear the Canvas: Before planting, prepare the bed for your floral masterpieces. This involves removing any existing vegetation, debris, and rocks. B. Amend Your Soil: Even the most beautiful flowers need a healthy foundation to thrive. Amending your soil improves drainage, fertility, and overall structure. Here’s how: Step 4: Planting Your Flowers A. Seeds or Seedlings? There are two main ways to get your flowers growing: planting seeds directly in the garden bed or using seedlings. B. Planting Techniques: Planting techniques will vary slightly depending on whether you’re using seeds or seedlings. Here’s a general guide: Step 5: Nurturing Your Blooms Once your flowers are planted, the real joy of watching them flourish begins! Here’s how to care for your blossoming haven: A. Watering: B. Weeding: Weeds are persistent unwanted guests in any garden. Regular weeding is crucial to ensure your flowers receive the sunlight, water, and nutrients they need to thrive. Some flower varieties benefit from additional care throughout the growing season: Step 6: Sit Back, Relax, and Enjoy! The most rewarding part of creating a flower garden is witnessing your hard work come to life. Take time to relax and enjoy the beauty and serenity your floral haven offers. Step 7: Maintaining Your Garden Paradise As the seasons change, so will the needs of your flower garden. Here are some tips for keeping your floral haven flourishing throughout the year: Step 8: Going Beyond the Basics Now that you’ve mastered the fundamentals of creating a flower garden, here are some ideas to elevate your floral haven: Conclusion Creating a flower garden is a rewarding and enriching experience. Simply follow these steps and nurture your plants with care to cultivate a vibrant and flourishing haven that will bring you joy for years to come. Remember, gardening is a journey, not a destination. Embrace the learning process, enjoy the beauty of your blooms, and let your flower garden become a source of personal satisfaction and a testament to your connection with nature.

11 Easiest Vegetables to Grow for Beginner Gardening

Easiest Vegetables to Grow

Welcome to the wonderful world of gardening! Growing your own food is an incredibly rewarding experience, offering fresh, delicious vegetables and the satisfaction of nurturing life from seed to harvest. However, if you’re new to gardening, the sheer number of options can be overwhelming. Don’t worry, because this guide is here to help! The Right Start for New Gardeners Beginner gardening is all about setting yourself up for success. Choosing the right vegetables to grow plays a crucial role in this. Here, we’ll focus on cool-season and warm-season vegetables to make things easier. Cool-season veggies can tolerate cooler temperatures and even a light frost, allowing for earlier planting in spring and potentially a fall harvest. Warm-season vegetables, on the other hand, thrive in warmer weather and should be planted after the last frost in spring. Now, let’s highlight our top picks for the 11 easiest vegetables to grow, perfect for beginner gardeners! 1. Lettuce: The Speedy Salad Staple (Cool-Season) Benefits of Growing: Lettuce is a versatile salad green packed with vitamins and minerals. It’s perfect for adding a fresh, crisp element to any meal. Plus, you can harvest it multiple times throughout the growing season! Planting Tips: Care Tips: 2. Radishes: The Zippy and Fast Favorite (Cool-Season) Benefits of Growing: Radishes add a delightful peppery bite to salads, sandwiches, and more. They’re also a great source of vitamins and fiber. Plus, they grow incredibly fast! Planting Tips: Care Tips: 3. Herbs: Flavorful Friends for Every Dish (Varies) Benefits of Growing: Fresh herbs elevate any dish with their vibrant flavors and aromas. Having a steady supply of homegrown herbs at your fingertips is a true game-changer in the kitchen! Planting Tips: Care Tips: 4. Spinach: The Powerhouse Green (Cool-Season) Benefits of Growing: Spinach is a nutritional powerhouse, packed with vitamins, minerals, and antioxidants. It’s incredibly versatile, perfect for salads, smoothies, stir-fries, and more. Planting Tips: Care Tips: 5. Peas: The Sweet and Nutritious Treat (Cool-Season) Benefits of Growing: Peas are a delightful addition to your garden, offering both delicious fresh pods and sweet, plump peas. They’re a good source of protein and fiber. Planting Tips: Care Tips: 6. Zucchini: The Prolific Summer Squash (Warm-Season) Benefits of Growing: Zucchini is a prolific summer squash that offers a delicious and versatile harvest. You can enjoy it grilled, roasted, stuffed, or even spiralized for a healthy pasta substitute. Planting Tips: Care Tips: 7. Tomatoes: The Rewarding Summer Staple (Warm-Season) Benefits of Growing: There’s nothing quite like the taste of a homegrown tomato! They are incredibly flavorful and versatile, perfect for salads, sandwiches, sauces, and more. While tomatoes require a bit more attention than some other vegetables on this list, the rewards are well worth the effort. Planting Tips: Care Tips: 8. Beans: The Versatile and Nitrogen-Fixing Favorite (Cool-Season and Warm-Season) Benefits of Growing: Beans come in a variety of types, from snap beans and green beans to shelling beans and lima beans. They’re a great source of protein and fiber, and nitrogen-fixing legumes that enrich the soil for future plantings. Planting Tips: Care Tips: 9. Kale: The Nutrient-Packed Superfood (Cool-Season) Benefits of Growing: Kale is a nutritional powerhouse, loaded with vitamins, minerals, and antioxidants. It’s incredibly versatile, perfect for salads, smoothies, stir-fries, and more. Planting Tips: Care Tips: 10. Cucumbers: The Refreshing Summer Vine (Warm-Season) Benefits of Growing: Cucumbers are refreshing and hydrating, perfect for salads, sandwiches, or simply enjoyed on their own. There are many varieties to choose from, offering different sizes, shapes, and flavors. Planting Tips: Care Tips: 11. Bell Peppers: The Colorful and Flavorful Addition (Warm-Season) Benefits of Growing: Bell peppers add vibrant color and a delightful crunch to salads, stir-fries, and countless other dishes. They come in various colors (red, yellow, orange, green), each offering slightly different flavor profiles. Planting Tips: Care Tips: Troubleshooting Tips for Beginner Gardeners Even the most dedicated gardeners encounter challenges. Here are some common mistakes beginners make and how to avoid them: Reap the Rewards of Your Garden Gardening is a journey of learning and discovery. These 11 vegetables are a fantastic starting point for beginner gardeners. With a little planning, care, and these helpful tips, you’ll be enjoying the bounty of your own vegetable garden in no time. Remember, gardening is about the process as much as the product. Take time to appreciate the miracle of growth, nurture your plants, and celebrate your harvest.

21 Inspiring Vegetable Garden Design Ideas & Layouts to Cultivate Your Dream Garden

Vegetable Garden Design Ideas

Transform your backyard or balcony into a flourishing oasis with a well-designed vegetable garden! More than just rows of veggies, a thoughtfully planned garden offers a bounty of fresh produce, aesthetic appeal, and a space to connect with nature. This guide explores 21 inspiring vegetable garden design ideas and layouts to spark your creativity and help you cultivate the perfect plot, regardless of your space or gardening experience. Unveiling the Magic of Design Vegetable garden design goes beyond simply planting seeds. It’s about strategically arranging your plot for optimal growth, maximizing space, and incorporating elements that make tending to your garden a joy. A well-designed garden boasts several advantages: 21 Design Ideas to Ignite Your Green Thumb Now, let’s unveil 21 inspiring design ideas to bring your vegetable garden dreams to life: 1. Maximize Your Space: Embrace the Vertical Advantage For those with limited space, vertical gardening is a game-changer. This method utilizes vertical structures to grow vegetables upwards, saving precious ground space. Here’s how to get started: 2. Organize for Success: Square-Foot Gardening Square-foot gardening is a fantastic method for beginner and experienced gardeners alike. It’s a structured approach that ensures efficient space usage and simplifies planning: 3. Raised Bed Bliss: A Fusion of Beauty and Functionality Raised beds offer a multitude of benefits and design possibilities. They elevate your garden literally and figuratively, creating a visually appealing and practical space: 4. Embrace Efficiency: Row Gardening for Classics A tried-and-true method, row gardening is ideal for certain vegetables and offers a straightforward layout: 5. Circular Symphony: Create a Mandala Garden For those seeking a unique and visually captivating vegetable garden, a mandala garden offers a delightful alternative. Inspired by the sacred circles found in various cultures, this design incorporates vegetables planted in concentric circles, creating a mesmerizing and harmonious space: 6. Pathway to Plenty: Utilize a Keyhole Garden The keyhole garden is a space-efficient and accessible design well-suited for smaller gardens: 7. Container Creations: Urban Gardening on Your Balcony Even without a dedicated plot of land, you can cultivate a flourishing vegetable garden with container gardening: 8. The Herb Spiral: Aromatic Ascent For herb enthusiasts, a herb spiral offers a visually captivating and space-saving way to grow your favorite culinary companions: 9. The Pollinator Paradise: A Haven for Helpful Buzz Vegetable gardens can be havens for pollinators like bees, butterflies, and hummingbirds, which play a vital role in plant reproduction. Here’s how to design a pollinator paradise: 10. The Edible Border: Beauty Meets Bounty Edible borders seamlessly blend ornamental plants with vegetables, creating a visually stunning and productive garden: 11. The Wavy Patch: Embrace the Unexpected Ditch the rigid rows and embrace a more whimsical approach with a wavy patch design: 12. The Children’s Corner: Cultivating Curiosity Engage youngsters in the joys of gardening by creating a dedicated children’s garden: 13. The Vertical Herb Wall: A Living Art Piece Transform a blank wall into a vibrant vertical herb garden: 14. The Succulent Sanctuary: A Textured Delight For a low-maintenance and visually striking option, consider a succulent vegetable garden: Cultivating Your Dream Garden This guide has hopefully sparked your imagination and provided you with a range of inspiring design ideas to create your dream vegetable garden. Remember, the key is to choose a layout that suits your space, preferences, and desired vegetables. Here are some additional tips to get you started: Embrace the Journey! Gardening is a continuous learning process. Don’t be discouraged by setbacks; instead, view them as opportunities to learn and improve. Experiment with different design elements and vegetable varieties to discover what works best for your space and climate. Most importantly, enjoy the process of nurturing your garden and the satisfaction of harvesting your own homegrown produce!

20+ Companion Planting Combinations We Swear By for a Thriving Garden

Companion Planting Combinations

Have you ever dreamt of a garden bursting with healthy vegetables, vibrant flowers, and minimal pest problems? Companion planting might be the key to unlocking this dream! This age-old gardening practice involves strategically placing different plants together to create a mutually beneficial ecosystem. Not only can it boost your harvest, but it also attracts helpful pollinators, deters pests naturally, and optimizes space in your garden. We’ve been using companion planting for years with fantastic results, and today we’re sharing 20+ winning combinations. Get ready to transform your garden into a thriving haven of biodiversity and abundance! 1. Tomatoes & Basil: A Classic Culinary Duo Tomatoes: These juicy summer staples require full sun and well-draining soil to produce their best fruit. Basil: This aromatic herb not only adds a delightful flavor to your dishes but also plays a vital role in keeping tomato plants healthy. Why this combination works: Basil acts as a repellent to some common tomato pests like whiteflies and hornworms. The strong scent of the herb disrupts their communication and makes them less likely to target your tomatoes. Additionally, interplanting basil among your tomato plants helps improve air circulation, reducing the risk of fungal diseases. Planting Tips: Plant basil seedlings around the base of your tomato plants, maintaining a spacing of 12-18 inches. Both plants prefer full sun and consistent watering. 2. Peppers & Marigolds: Spice Up Your Pest Control Peppers: These versatile vegetables come in various shapes, sizes, and spice levels. They thrive in warm temperatures and full sun. Marigolds: These cheerful flowers not only add a splash of color to your garden but also pack a powerful punch against unwanted pests. Why this combination works: Marigolds are renowned for their pest-repelling properties. Their strong scent deters aphids, thrips, and even whiteflies, which are common threats to pepper plants. Additionally, marigolds act as a trap crop, attracting these pests away from your precious peppers. Planting Tips: Plant marigolds around the perimeter of your pepper bed, spacing them about 10-12 inches apart. Both plants appreciate well-draining soil and full sun. 3. Beans & Corn: A Nitrogen-Fixing Powerhouse Beans: These legumes come in a variety of types, from green beans to black beans. They require moderate watering and prefer warm weather. Corn: This tall stalky plant produces delicious ears of corn and enjoys full sun with consistent moisture. Why this combination works: Beans are nitrogen-fixing plants, meaning they capture nitrogen from the air and convert it into a usable form for other plants. This can significantly improve the growth and yield of corn, which is a heavy feeder of nitrogen. Additionally, corn stalks provide much-needed support for climbing bean varieties, creating a natural trellis system. Planting Tips: Plant corn seeds in rows about 3 feet apart. Sow bean seeds in between the corn rows a few weeks later, maintaining a spacing of 4-6 inches. Ensure both plants receive full sun and consistent watering. 4. Cucumbers & Dill: A Refreshing Partnership Cucumbers: These refreshing vining vegetables thrive in warm weather and require moist, well-draining soil. Dill: This feathery herb boasts a bright, citrusy flavor and offers a surprising benefit for cucumbers. Why this combination works: Dill is known to attract beneficial insects like hoverflies and parasitic wasps, which can help control cucumber beetles, a major pest for these vining vegetables. Additionally, dill may improve the flavor of cucumbers by enhancing their natural sweetness. Planting Tips: Plant cucumber seeds in mounds spaced 3-4 feet apart. Sow dill seeds around the base of the cucumber mounds or in between the rows, maintaining a spacing of 8-10 inches. Both plants require full sun and consistent watering. 5. Lettuce & Carrots: Maximize Your Garden Space Lettuce: This leafy green is a versatile salad staple that enjoys cool weather and partial shade. Carrots: These orange root vegetables prefer cooler temperatures and well-drained soil. Why this combination works: Lettuce, with its low-growing habit, takes up minimal space above the ground. This allows carrots, which grow their edible portion underground, to thrive in the same bed without competition for light or resources. Additionally, the shade provided by lettuce leaves can help regulate soil moisture and prevent carrot roots from becoming tough or bitter. Planting Tips: Sow lettuce seeds directly in the garden bed a few weeks before the last frost. Sow carrot seeds in rows spaced 12-18 inches apart, directly seeding them where they will grow to maturity. Lettuce will provide shade for the developing carrots as the weather warms. 6. Broccoli & Cabbage: A Protective Alliance Against Caterpillars Broccoli & Cabbage: These cool-season vegetables are members of the Brassica family and are susceptible to similar pests, particularly caterpillars like cabbageworms and loopers. Why this combination works: Planting strong-smelling herbs like rosemary, thyme, or sage around your broccoli and cabbage can help deter these pesky caterpillars. The pungent aroma of these herbs confuses and disrupts the insects, making them less likely to target your brassicas. Additionally, interplanting nasturtiums within the bed can act as a trap crop, attracting the caterpillars away from your broccoli and cabbage. Planting Tips: Plant broccoli and cabbage seedlings at a spacing of 18-24 inches apart. Sow seeds or transplant seedlings for rosemary, thyme, or sage around the perimeter of your bed, maintaining a spacing of 12-18 inches. Alternatively, plant nasturtiums in between your brassicas, spacing them about 8-10 inches apart. All these plants prefer full sun and well-draining soil. 7. Onions & Beets: A Sweet and Savory Synergy Onions: These pungent bulbs thrive in cool weather and full sun. They require well-draining soil to prevent rotting. Beets: These vibrant root vegetables prefer cooler temperatures and well-drained soil. Why this combination works: Onions are known to repel some common garden pests like aphids and thrips with their strong scent. This can benefit nearby beet plants, keeping them pest-free. Additionally, beets have shallow roots that won’t compete with the deeper root system of onions, allowing them to coexist harmoniously in the same bed. Planting Tips: Sow onion seeds or plant onion sets directly … Read more