

Have you ever dreamt of a garden bursting with vibrant climbing flowers and bountiful vining vegetables? Trellises are the secret weapon to achieving this dream. These vertical support structures not only create a stunning visual impact, but also offer a multitude of benefits for your plants:
- Increased Yield: Trellises allow vining plants to grow upwards, maximizing space and promoting better air circulation, leading to increased fruit and flower production.
- Space Saving: Especially in small gardens, trellises help utilize vertical space efficiently, freeing up ground area for other plants.
- Improved Plant Health: By keeping foliage off the ground, trellises reduce the risk of fungal diseases and improve overall plant health.
- Aesthetic Appeal: Trellises adorned with climbing vines and flowers add a touch of elegance and vertical interest to your garden design.
But what if you’re on a budget and the price of store-bought trellises seems daunting? Worry not, fellow garden enthusiasts! With a little creativity and resourcefulness, you can craft beautiful and functional trellises using readily available or recycled materials. Here are 11 inspiring ideas to get you started:
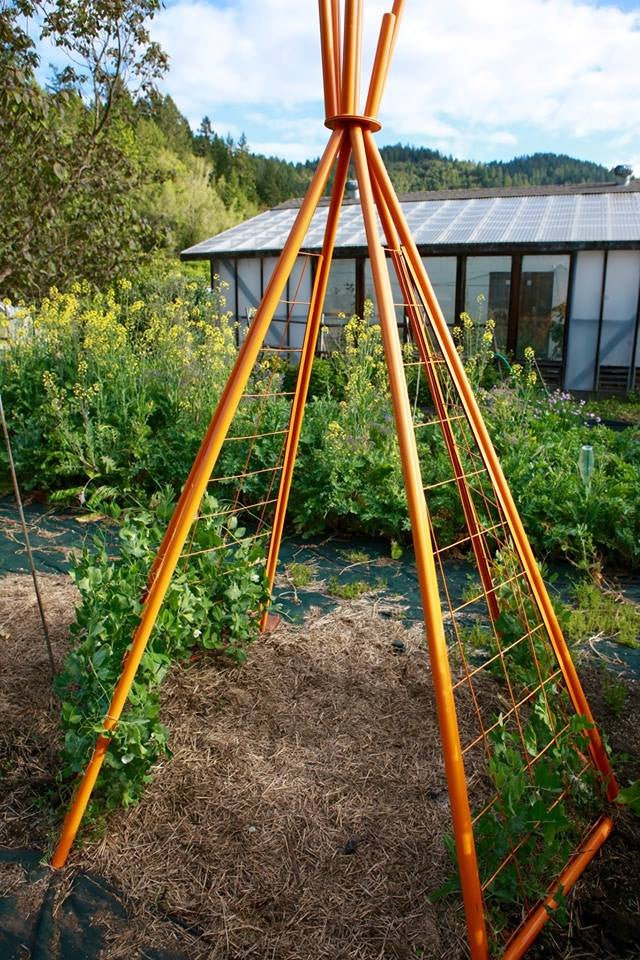
1. Teepee Trellis (Free)
This simple yet effective trellis is ideal for lightweight vining plants like peas, beans, and cucumbers.
- Materials:
- 3-4 sturdy branches or bamboo poles of similar height (around 6-8 feet)
- Strong twine or rope
- Instructions:
- Gather your branches or bamboo poles. Ensure they are relatively straight and free of major breaks.
- Lay them on the ground with the ends meeting at a central point.
- Secure the tops of the poles together firmly using twine or rope, creating a teepee shape. You can use a simple knotting technique or wrap the twine multiple times for extra strength.
- (Optional) To provide additional stability, especially for heavier vines, push the base of each pole a few inches into the ground and secure them with more twine tied to stakes driven into the ground nearby.
2. Recycled Stake & String Trellis (Low-Cost)
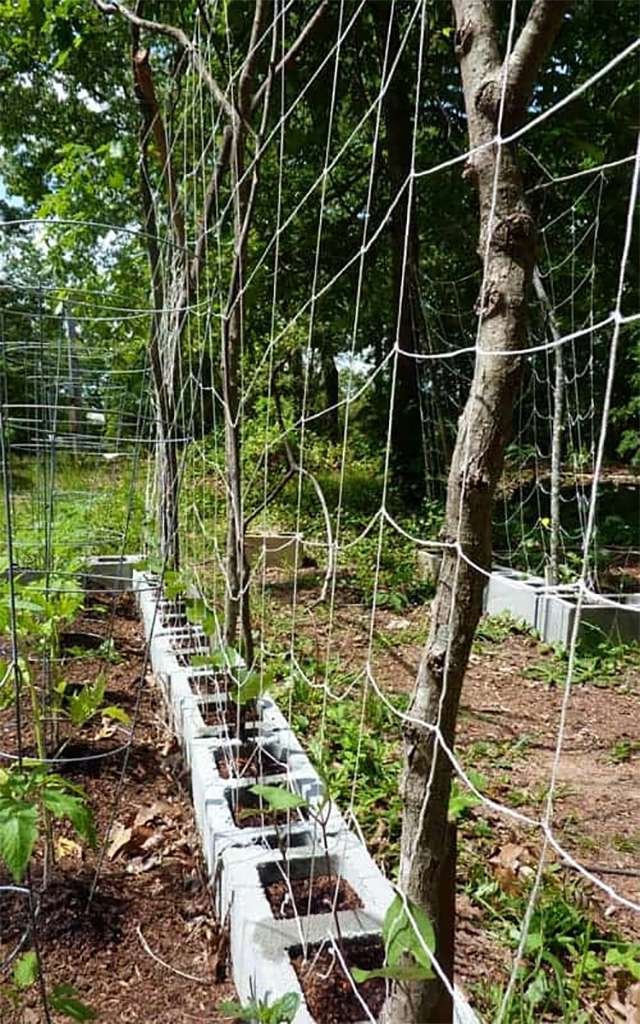
This versatile trellis is perfect for various vining vegetables and flowers. You can adjust the string spacing to accommodate the weight of your chosen plants.
- Materials:
- Reused stakes (metal or wood) from old plants, fences, or yard signs (around 4-6 feet tall)
- Twine, rope, or strong yarn
- Instructions:
- Gather your stakes. Ensure they are sturdy and free of splinters or rust (for metal stakes).
- Choose a location in your garden where you want the trellis.
- Secure the stakes upright in the ground at desired intervals, pushing them in firmly to ensure they can support plant weight.
- Starting from the bottom stake, tie one end of your twine or rope securely to it.
- Run the twine horizontally to the next stake, maintaining a consistent distance from the ground. Secure it tightly to the second stake.
- Repeat step 5, creating multiple horizontal lines of twine at increasing distances as you move up the stakes. The spacing between the strings will depend on the size and weight of the plants you intend to grow. For heavier plants, maintain a closer spacing (6-8 inches) for better support.
3. Fence Slat & Chicken Wire Trellis (Low-Cost)
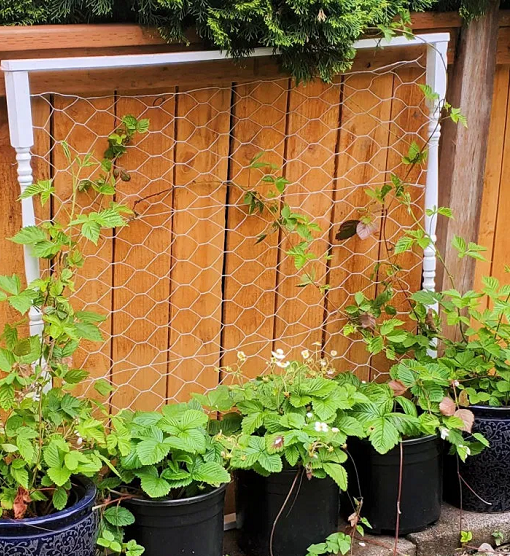
This trellis provides a sturdy support system for lighter weight vining plants like cucumbers and morning glories.
- Materials:
- Leftover fence slats (length depending on desired trellis height)
- Chicken wire (enough to cover the desired area of the fence slats)
- Staple gun
- Instructions:
- Gather your materials. Ensure the fence slats are in good condition and free of warping or rot.
- Cut the chicken wire to a size slightly larger than the fence slats, allowing for an inch or two of overlap on all sides.
- Lay the chicken wire flat on a work surface. Place the fence slats on top, ensuring the chicken wire covers the entire back of the slats.
- Using a staple gun, secure the chicken wire to the fence slats at multiple points, creating a taut and even surface.
- Attach the completed slatted panel to a sturdy fence post or stakes driven securely into the ground. You can use screws, nails, or heavy-duty zip ties for this purpose.
4. Upcycled Ladder Trellis (Free)

This quick and easy solution is perfect for creating a vertical support for a variety of climbing plants, depending on the size and sturdiness of the ladder.
- Materials:
- Old wooden ladder (sturdy and in good condition)
- Instructions:
- Locate a suitable spot in your garden for the trellis. Ideally, it should have a wall or sturdy fence structure nearby for support.
- Simply lean the ladder against the wall or fence, ensuring it’s positioned stably and at a slight angle for better plant access.
- (Optional) For added stability, especially for heavier vines or in windy conditions, you can secure the top of the ladder to the wall or fence using sturdy hooks, screws, or zip ties.
5. Tomato Cage Trellis (Low-Cost)
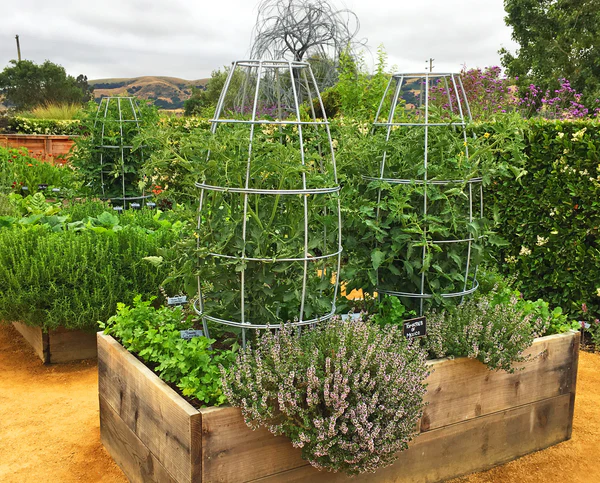
This clever idea repurposes readily available tomato cages to create a larger trellis structure, perfect for tomatoes and other bushy plants that benefit from vertical support.
- Materials:
- 3-4 wire or plastic tomato cages (depending on desired trellis size)
- Zip ties or strong twine
- Instructions:
- Gather your tomato cages. Ensure they are in good condition and free of rust or broken wires (for metal cages).
- Place two tomato cages side-by-side, with the openings facing each other.
- Using zip ties or twine, securely connect the cages at multiple points along their vertical bars, creating a stable and unified structure.
- Repeat step 3 to connect additional tomato cages if you desire a larger trellis.
- Push the secured tomato cage structure firmly into the ground for stability.
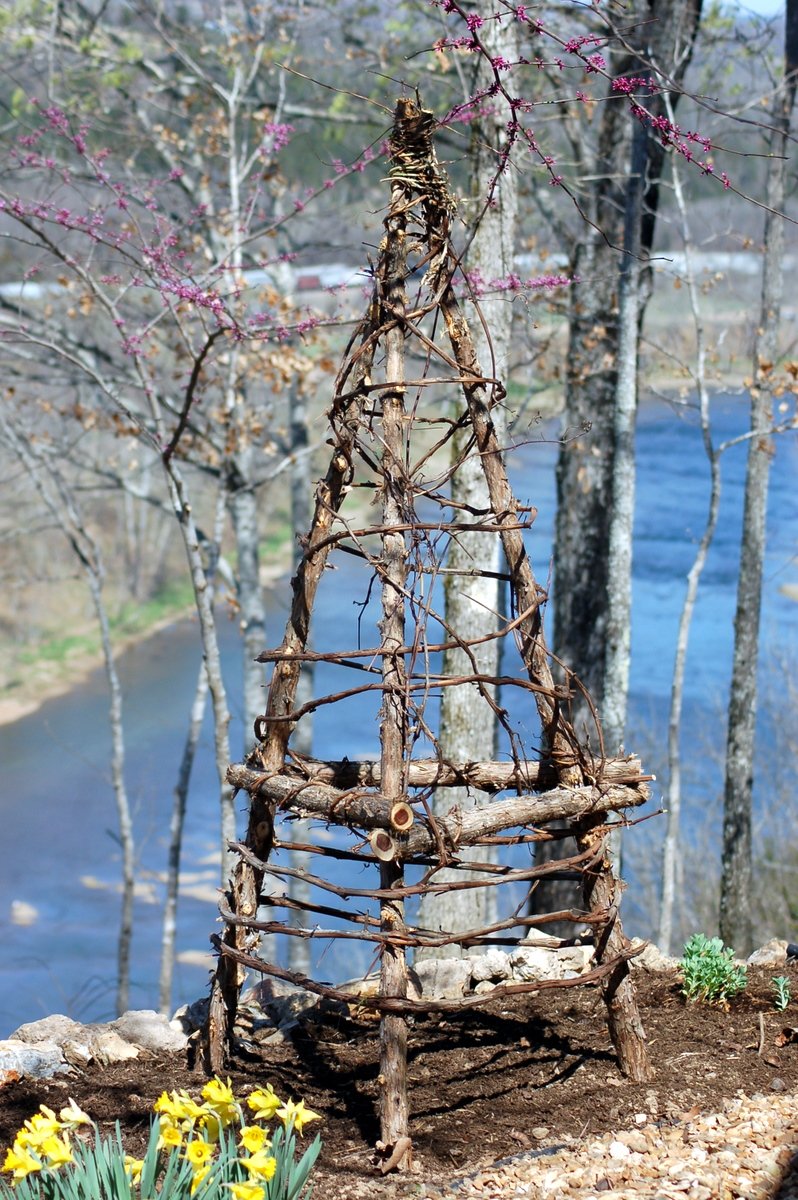
6. Branch Arch Trellis (Free)
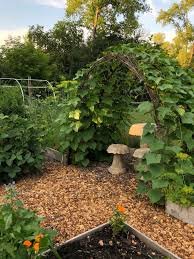
This charming trellis is perfect for creating an entryway or pathway adorned with climbing vines or flowers.
- Materials:
- 2-3 sturdy branches with natural forks at the top (around 6-8 feet tall)
- Shovel (optional)
- Instructions:
- Find suitable branches with naturally forked ends at the top. Ensure they are thick enough to provide support for climbing plants.
- Choose the location for your archway. Ideally, it should be a pathway or entrance you want to highlight.
- Dig small holes (around 12-18 inches deep) in the ground where you want to position the base of each forked branch.
- Carefully push the forked ends of the branches into the dug holes, ensuring the forks are facing upwards to create an arch shape.
- (Optional) If the ground is loose, or for added stability, you can backfill the holes around the base of the branches with tamped-down soil or gravel for extra support.
Remember: When using recycled materials for your trellises, ensure they are sturdy enough to support the weight of your chosen plants. Check for any potential hazards like splinters (wood) or rust (metal) and address them before using the materials in your garden.
7. Repurposed Net Trellis (Free)

This unique trellis option utilizes an old cargo net to create a webbed support system for lightweight, climbing plants that can weave through the mesh.
- Materials:
- Old cargo net (in good condition, with strong mesh)
- Sturdy frame (optional, made from wood or branches)
- Instructions (with frame):
- Construct a simple wooden frame using untreated lumber or sturdy branches. The size of the frame should be appropriate for the desired size of your trellis.
- Secure the cargo net to the wooden frame using staples or nails. Ensure the net is taut and evenly stretched across the frame.
- Position the completed trellis in your garden and secure it upright using stakes driven into the ground at the base of the frame.
- Instructions (without frame):
- Locate a suitable spot in your garden where you can secure the cargo net between two existing structures like fence posts or sturdy trees.
- Using strong hooks, zip ties, or rope, securely tie the cargo net at multiple points to the chosen structures, creating a taut and stable vertical support system.
8. Repurposed Door Trellis (Free)
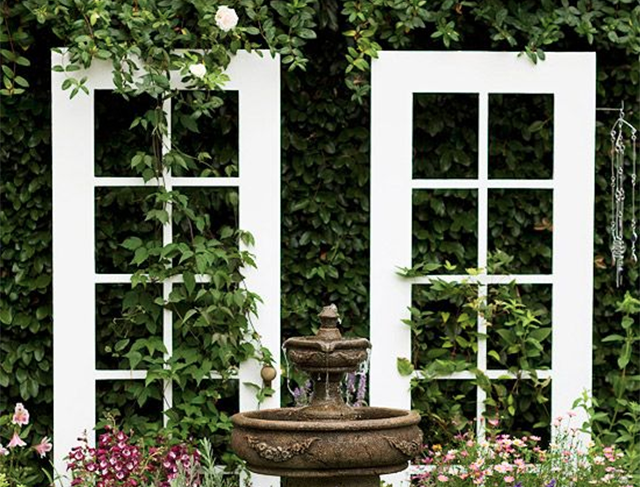
This project breathes new life into an old door, creating a charming and versatile trellis for climbing plants.
- Materials:
- Old wooden door (solid core or hollow core, depending on desired weight)
- Sandpaper (optional)
- Paint or stain (optional)
- Screws or nails
- Sturdy hinges (optional)
- Instructions:
- Locate a suitable old door. If using a hollow core door, ensure it’s sturdy enough to support vining plants. Solid core doors offer more weight capacity.
- (Optional) Depending on the condition of the door, you can sand down any rough edges and give it a fresh coat of paint or stain to match your garden aesthetic.
- Choose a location in your garden for the trellis. You can either lean the door against a sturdy fence or wall, or attach it permanently.
- For a leaning trellis, simply position the door at an angle with the top leaning against the fence or wall. Secure the top using sturdy hooks, screws, or zip ties.
- For a permanent attachment, screw or nail the door directly to the fence or wall at several points for stability. You can also add sturdy hinges to the top of the door and attach them to the fence or wall, allowing the door to swing open for easier access behind the trellis.
9. Rebar & Wire Trellis (Low-Cost)
This sturdy trellis option utilizes metal rebar for support and offers a clean, modern look.
- Materials:
- Rebar rods (length depending on desired trellis height)
- Wire mesh (galvanized steel recommended, size appropriate for plant weight)
- Zip ties or metal wire
- Metal clamps (optional)
- Instructions:
- Purchase rebar rods of the desired length for your trellis. Ensure they are thick enough to provide support for your chosen plants.
- Cut the wire mesh to a size that matches the width you want for your trellis.
- Secure the wire mesh to the rebar rods by weaving zip ties or metal wire through the mesh openings and around the rebar. Create multiple attachment points to ensure the mesh is securely fastened.
- (Optional) For added stability, especially for large trellises, use metal clamps to secure the connection points between the rebar and wire mesh.
- Push the rebar rods with the attached wire mesh securely into the ground to the desired depth.
10. String Tepee Trellis (Free)
This minimalist approach utilizes natural twine or yarn to create a delicate yet functional trellis for lightweight vining plants.
- Materials:
- 3-4 sturdy stakes (wood or bamboo, around 4-6 feet tall)
- Strong twine or yarn (multiple colors for visual interest, optional)
- Instructions:
- Gather your stakes and ensure they are relatively straight and free of major defects.
- Choose a location in your garden for the trellis.
- Push the stakes firmly into the ground at desired intervals, creating a teepee shape with the tops converging at a central point.
- Starting from the base of one stake, begin wrapping the twine or yarn diagonally around each stake, moving upwards in a spiral pattern.
- Continue wrapping the twine or yarn diagonally around each stake, maintaining a consistent tension and ensuring the twine goes around all the stakes as you move upwards.
- As you reach the top, tie off the loose end of the twine securely to one of the stakes. You can use a simple knot or tuck the end underneath a previous wrap for a cleaner look.
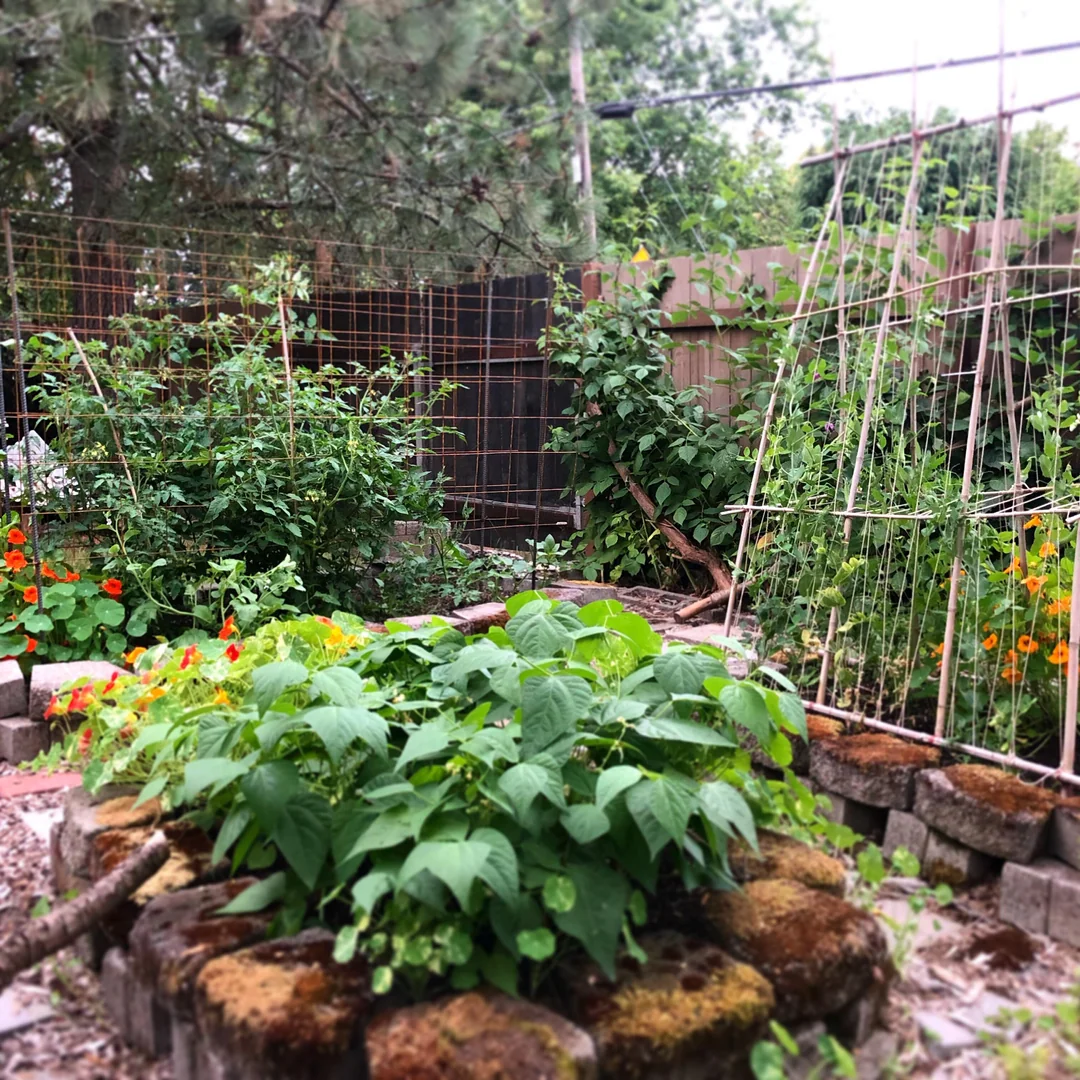
11. Bamboo Stakes Trellis Idea
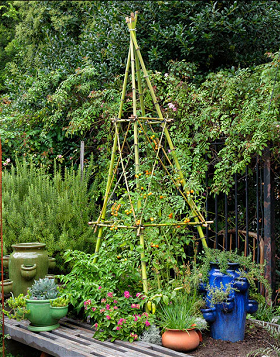
A bamboo stakes trellis is an affordable and eco-friendly way to support climbing plants in your garden. Bamboo is a strong, lightweight, and sustainable material that is perfect for creating garden structures. Here’s a detailed description of how to create a bamboo stakes trellis:
- Materials Needed:
- Bamboo stakes or poles (6-8 feet long, depending on the height you want)
- Garden twine, wire, or zip ties
- Optional: a mallet or hammer to secure the stakes into the ground
- Instructions:
- Step 1: Choose the Location: Pick a spot in your garden where you need support for climbing plants such as peas, beans, cucumbers, or flowering vines. Ensure the area receives adequate sunlight for the plants you intend to grow.
- Step 2: Place the Bamboo Stakes: Insert the bamboo stakes into the ground about 1-2 feet deep, spaced 1-2 feet apart. This will create a strong and stable base for your trellis. You can place the stakes in a straight row, a grid pattern, or even in a teepee shape, depending on your garden layout and aesthetic preference.
- Step 3: Secure the Stakes: Once the bamboo stakes are positioned, you can secure them at the top and middle using garden twine, wire, or zip ties. This will help hold the stakes in place and provide additional stability. If you’re creating a teepee or fan-shaped trellis, gather the tops of the stakes together and tie them securely with twine or wire.
- Step 4: Create Horizontal Supports: For additional support, you can add horizontal bamboo poles or crosspieces by tying them to the vertical stakes at regular intervals. This will give your plants more places to latch onto as they grow.
- Step 5: Train the Plants: As your climbing plants start to grow, gently guide their tendrils onto the bamboo stakes. The plants will naturally begin to wrap around the stakes and grow upwards, creating a lush, green trellis.
- Benefits:
- Cost-Effective: Bamboo stakes are inexpensive and can often be found at garden centers, home improvement stores, or even harvested from your own garden.
- Aesthetically Pleasing: The natural look of bamboo blends beautifully with any garden style, adding an organic touch to your space.
- Sustainable: Bamboo is a renewable resource that grows quickly, making it an environmentally friendly choice for your garden projects.
- Versatile: You can customize the size and shape of your bamboo stakes trellis to suit the needs of your plants and the layout of your garden.
A bamboo stakes trellis is a simple, yet effective way to support your climbing plants while adding a natural and charming element to your garden. Whether you’re growing vegetables or decorative vines, this DIY trellis is sure to enhance both the health of your plants and the beauty of your outdoor space.
Embrace Your Inner MacGyver!
These trellis ideas provide even more inspiration for creating unique and functional trellises using readily available or recycled materials. Remember, the key is to be resourceful and think outside the box. Explore your garden for potential materials, consider combining different techniques, and most importantly, have fun with the process!
Taking it a Step Further:
Now that you have a fantastic DIY trellis, you can elevate its aesthetics with a touch of paint or stain (if using wood or suitable materials). Choose colors that complement your garden design or create a vibrant pop of color.
For trellises exposed to wind, consider additional securing measures. You can use guy wires (sturdy ropes or twine) attached to the top of the trellis and secured to stakes driven into the ground at an angle to provide extra stability.
Embrace Your Creativity!
These are just a few ideas to spark your imagination. Don’t be afraid to experiment with different materials and come up with your own unique trellis designs. Old bed frames, bicycle wheels, or even discarded pallets can be transformed into functional trellis for your garden.