

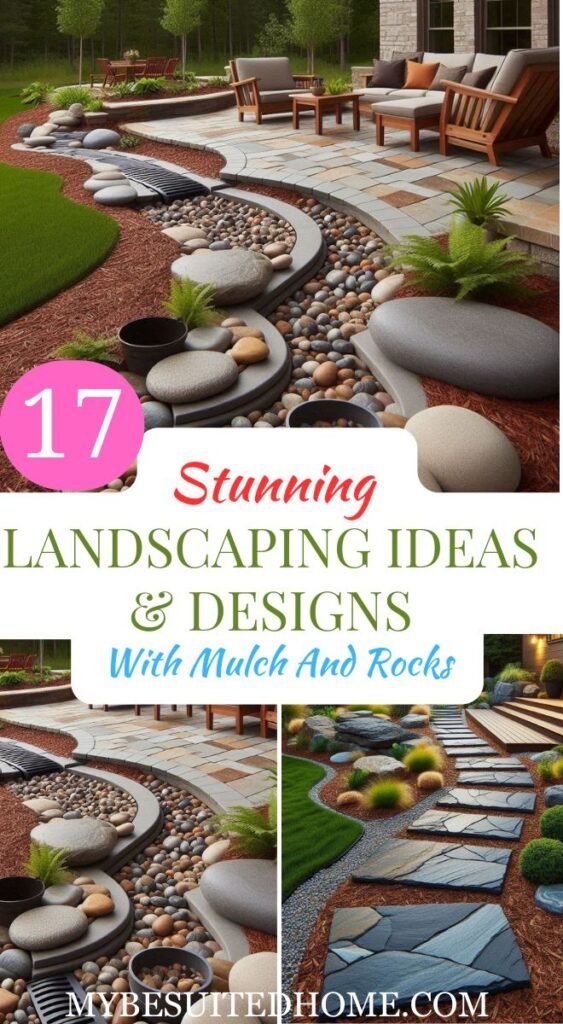
Transforming your outdoor space doesn’t always require a complete overhaul. With a touch of creativity and some readily available materials like mulch and rocks, you can create stunning and functional landscapes that enhance your curb appeal and add personality to your backyard oasis.
Mulch and rocks offer a winning combination for landscapers of all levels. They not only provide a beautiful aesthetic but also boast several practical benefits:
- Low Maintenance: Both mulch and rocks require minimal upkeep compared to traditional grass lawns. Mulch helps suppress weeds and retain moisture, while rocks offer excellent drainage and prevent erosion.
- Versatility: This dynamic duo can be incorporated into various design styles, from classic and elegant to modern and minimalist.
- Aesthetics: Mulch and rocks add texture, color, and definition to your landscape. They can be used to create borders, pathways, and decorative features, adding a whole new dimension to your outdoor space.
- Weed Suppression: Mulch acts as a natural barrier, hindering weed growth and keeping your garden beds looking neat and tidy.
17 Top Landscaping Ideas with Mulch and Rocks
Now that you’re convinced about the power of mulch and rocks, let’s explore some captivating design ideas to bring your vision to life.
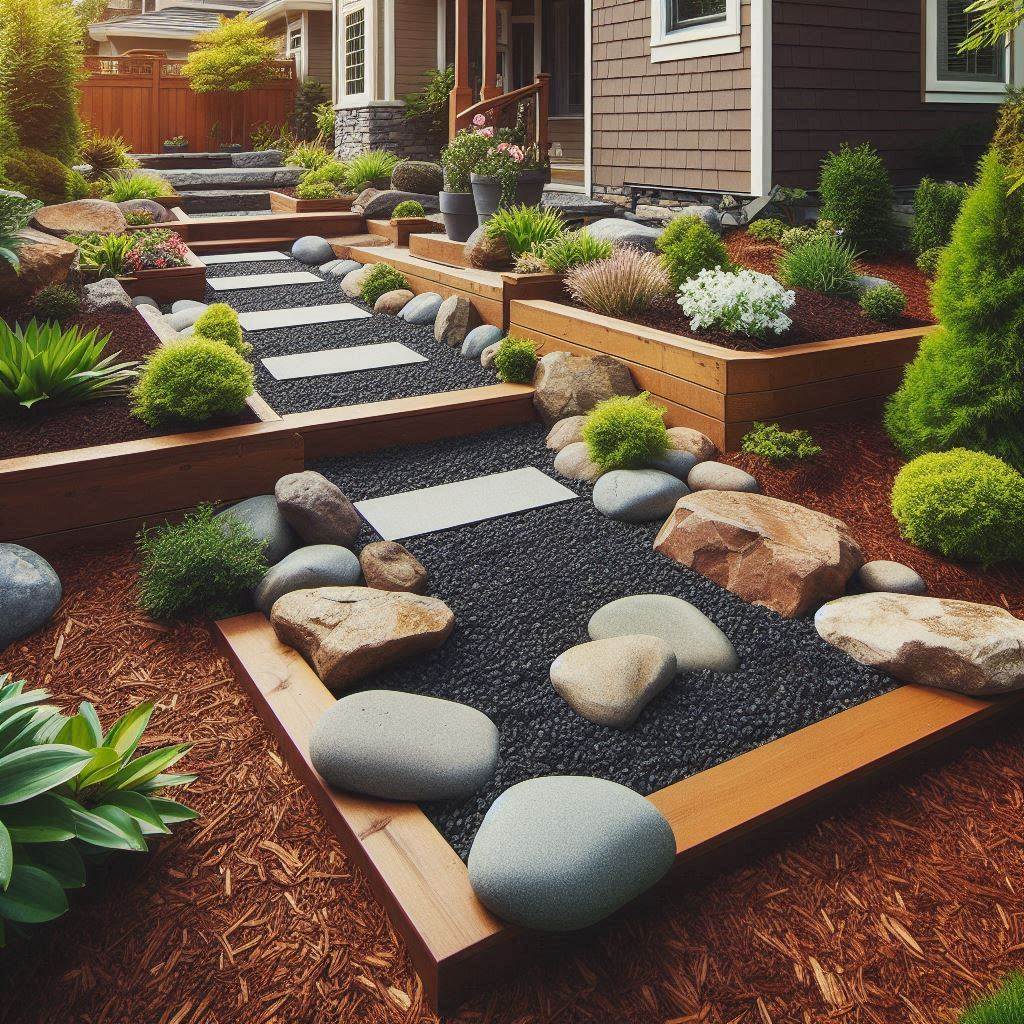
1: Stepping Stone Pathway with Mulch Infill
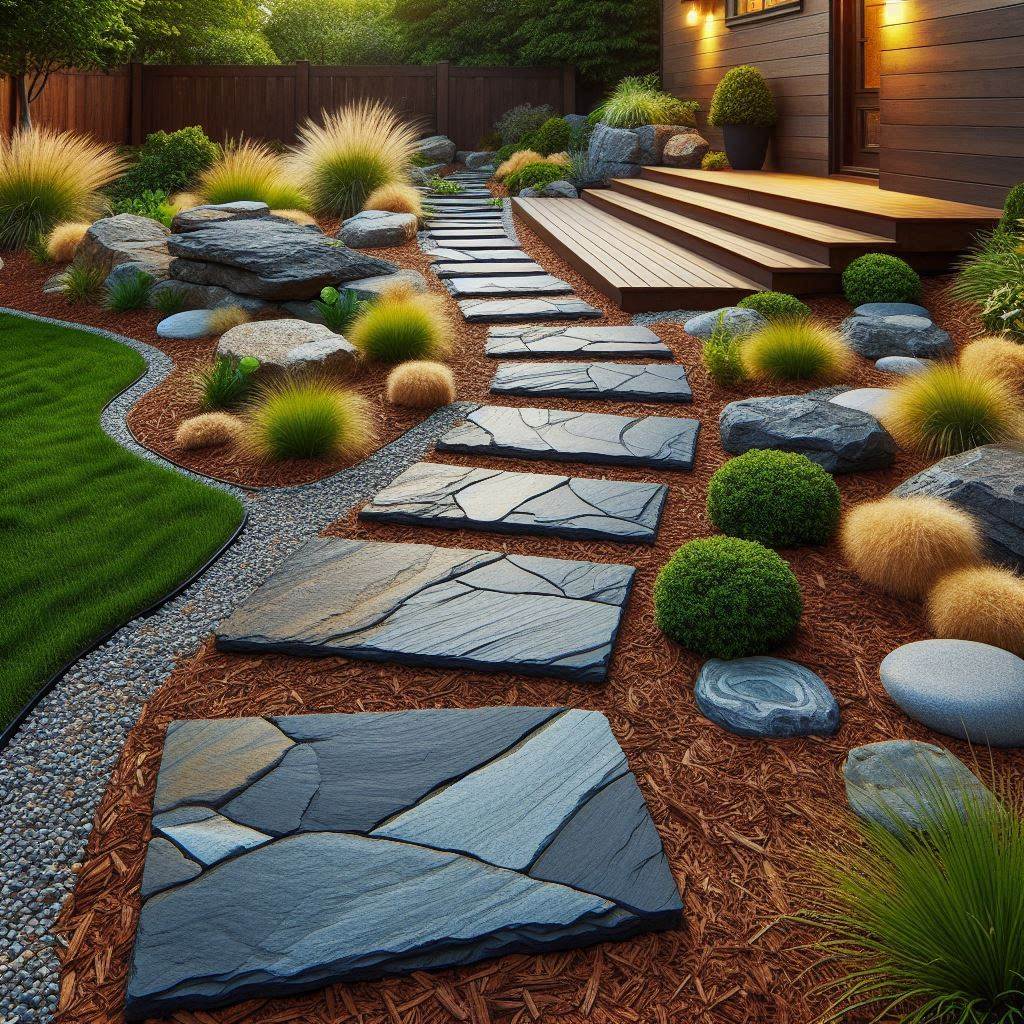
This classic design is perfect for creating a charming and inviting entrance to your home or garden. Here’s what you’ll need:
- Stepping stones: Choose flat stones made of natural materials like slate, flagstone, or precast concrete for durability. Consider the size and shape based on your desired path width and overall aesthetic. Popular options include square, rectangular, or round stepping stones.
- Mulch: Opt for shredded hardwood mulch or a similar organic material. Choose a color that complements your stepping stones and the overall color scheme of your house. Dark brown or black mulch creates a classic look, while lighter tones like cedar or red can add a pop of color.
Creating the Pathway:
- Plan your path: Sketch the desired layout and mark the placement of stepping stones. Ensure a comfortable walking stride between each stone.
- Excavate the area: Dig out a shallow trench (2-3 inches deep) along the path marking, making sure it’s slightly wider than the stepping stones.
- Lay down weed control fabric: This helps prevent weeds from popping up through the mulch. Secure the fabric with landscape staples.
- Install the stepping stones: Place the stones on the prepared base, ensuring they are level and stable. Leave some space between each stone for the mulch infill.
- Add the mulch: Fill the gaps between the stepping stones with your chosen mulch, ensuring a uniform and aesthetically pleasing layer.
2: Gravel Pathway with Mulch Edging
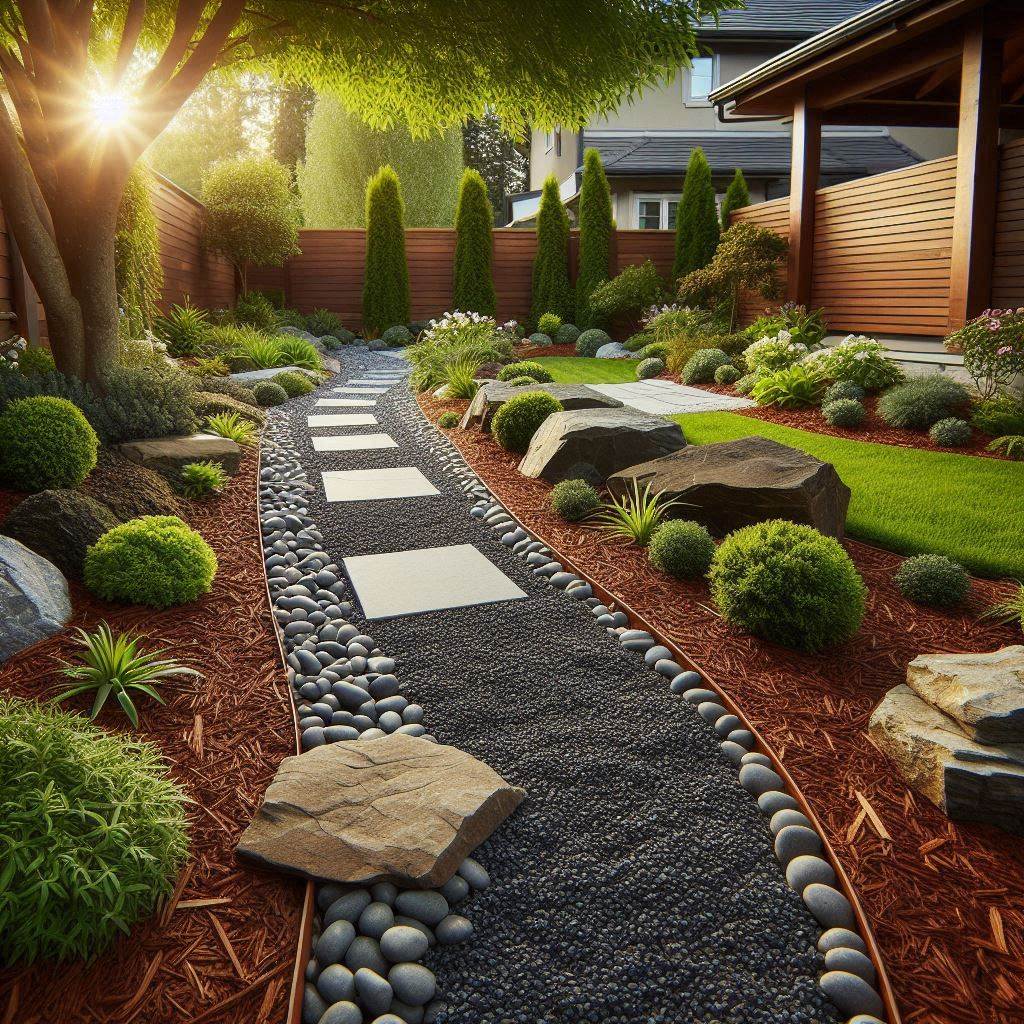
This option offers a more natural and rustic feel. Gravel provides excellent drainage and can withstand heavy foot traffic. Here’s how to achieve this look:
- Gravel: Choose pea gravel or river rock in a size that’s comfortable to walk on. Opt for neutral tones like gray or brown, or consider colored gravel for a bolder statement (ensure the color complements your landscape).
- Mulch: Select a contrasting color for the edging, like dark brown or black mulch.
Creating the Pathway:
- Plan and excavate: Similar to the stepping stone pathway, plan your path layout and excavate a shallow trench. The depth should be sufficient to accommodate the desired gravel thickness (typically 2-4 inches).
- Lay down weed control fabric: This is crucial for preventing weeds from sprouting through the gravel. Secure the fabric with landscape staples.
- Add edging: Create a defined border using your chosen mulch. You can use a trench edging tool to create a clean, crisp line.
- Fill with gravel: Spread the gravel evenly within the designated pathway area, ensuring it’s level and compacted for stability.
3: Mulch Bed with Rock Borders
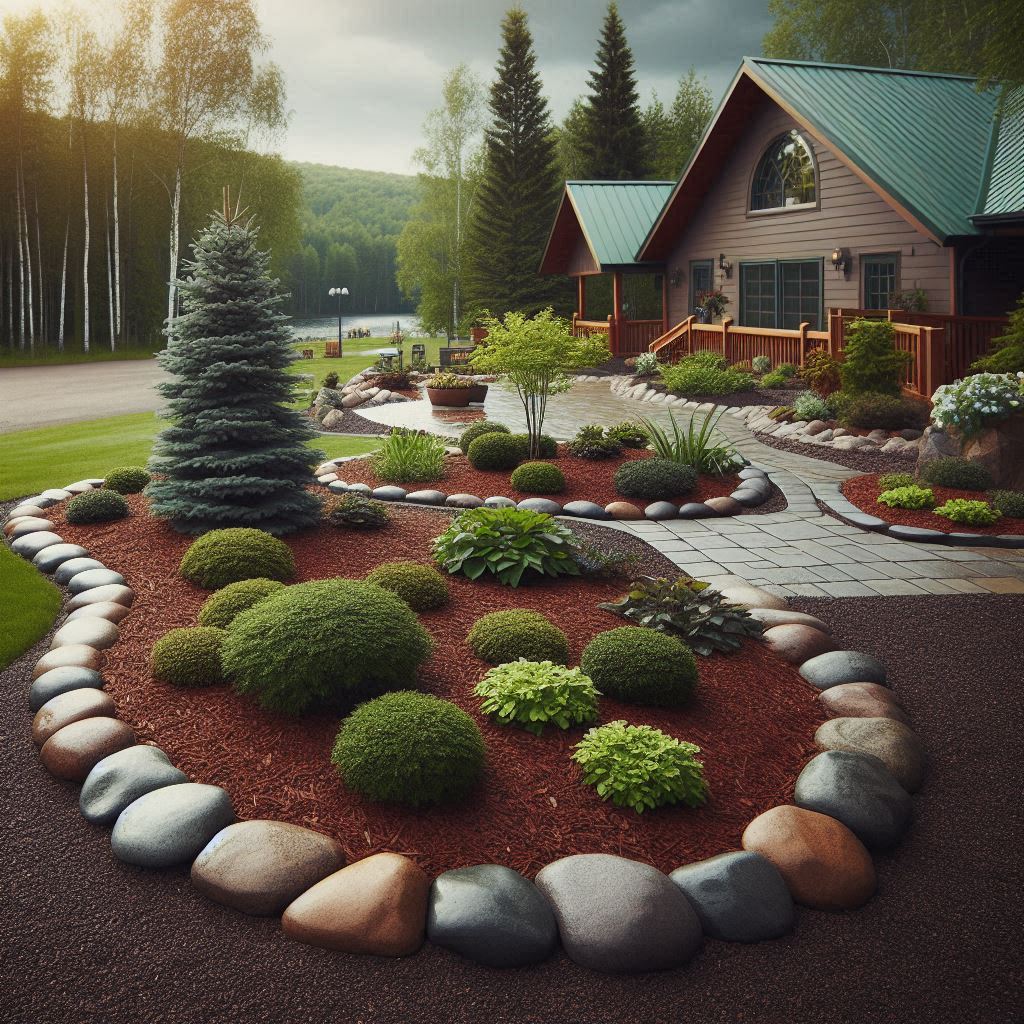
This classic design provides a clean and polished look for your flower beds and vegetable gardens. Here’s what you’ll need:
- Rocks: Choose medium-sized stones like river rock or flagstone for the borders. Opt for neutral tones that complement your plants and mulch color.
- Mulch: Select a type of mulch that suits your plants’ needs. Shredded hardwood mulch is a popular choice, but consider dyed mulch for a pop of color or cocoa mulch for added moisture retention.
Creating the Garden Bed:
- Plan and define the bed: Decide on the size and shape of your garden bed. Mark the outline using spray paint or a garden hose.
- Prepare the soil: Remove any existing weeds and debris from the designated area. Loosen the soil to a depth of 6-8 inches to improve drainage and aeration for your plants.
- Lay down weed control fabric: This helps suppress weed growth and keeps your garden bed looking tidy. Secure the fabric with landscape staples.
- Create the rock border: Place the chosen rocks along the perimeter of the garden bed, creating a neat and defined edge. Ensure the rocks are partially buried in the soil for stability.
- Fill with mulch: Spread a layer of mulch (2-3 inches thick) over the prepared soil within the garden bed. Keep the mulch away from the base of your plants to prevent moisture buildup and potential rot.
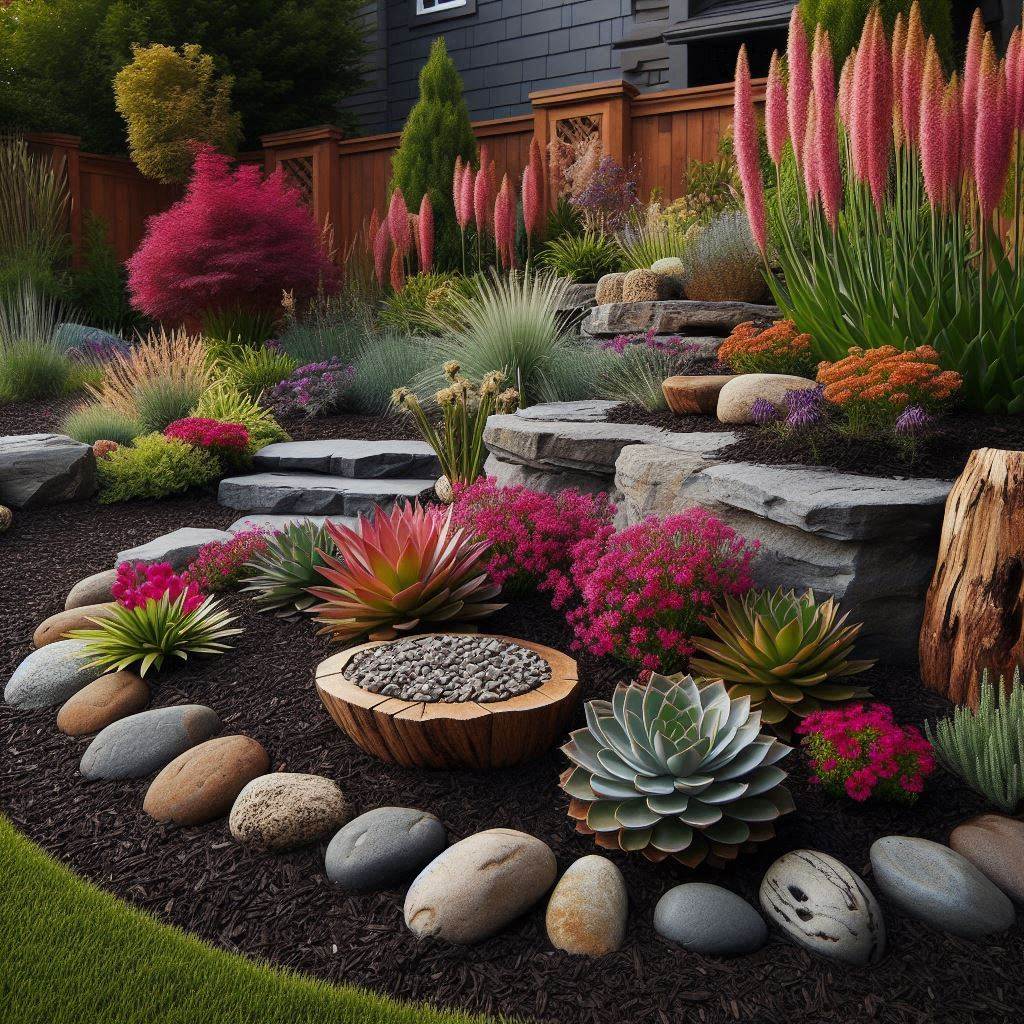
4: Rock and Mulch Garden for Specific Plant Types
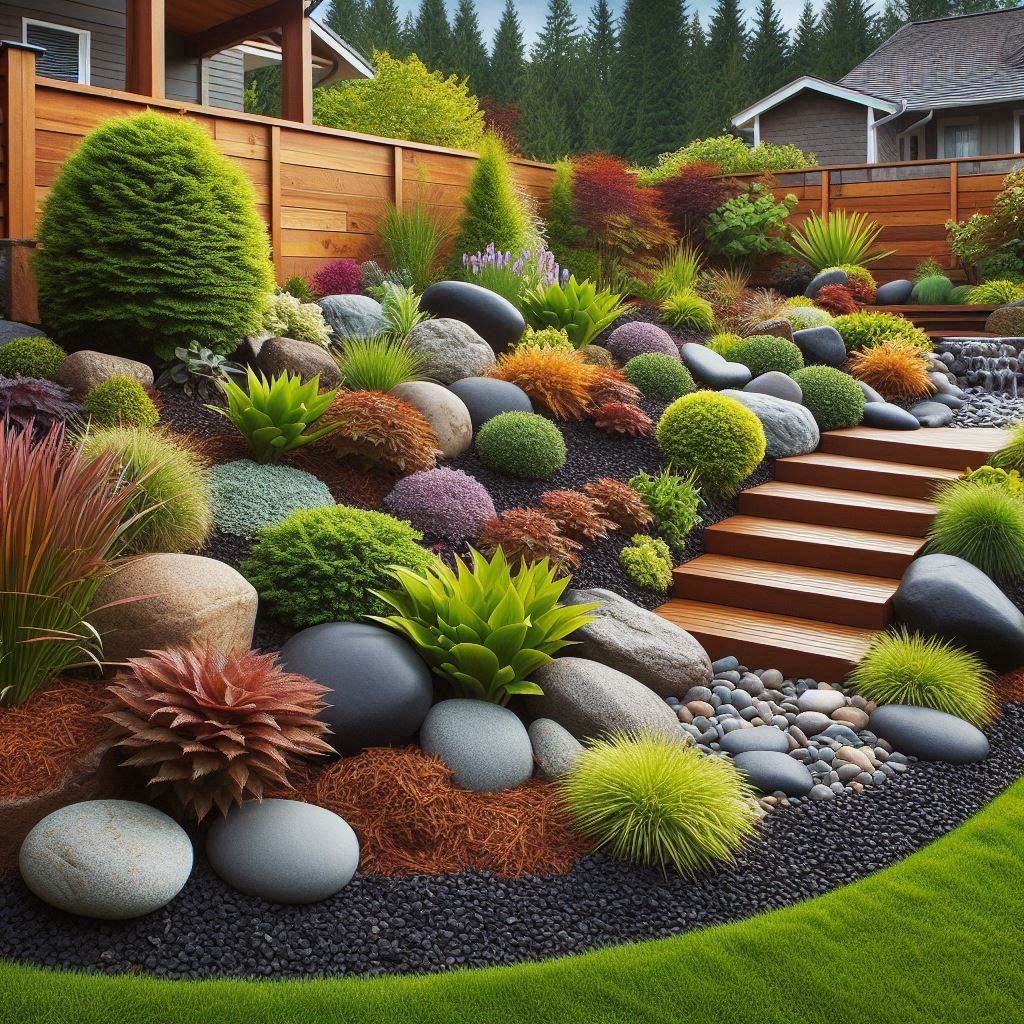
This design is particularly suitable for drought-resistant plants like cacti and succulents. Here’s why it works:
- Rocks: The use of rocks complements the natural beauty of these plants and provides excellent drainage, preventing root rot. Opt for a variety of rock sizes and textures to add visual interest.
- Mulch: While not essential for all drought-resistant plants, a thin layer of mulch (around 1 inch thick) can help retain some moisture in the soil, particularly in hotter climates. Choose a light-colored mulch that reflects sunlight and prevents the soil from overheating.
Creating the Rock and Mulch Garden:
- Choose the right location: Select a sunny spot with well-draining soil.
- Prepare the soil: Amend the soil with gravel or coarse sand to improve drainage if necessary.
- Plant selection: Opt for drought-tolerant plants like cacti, succulents, ornamental grasses, and certain flowering perennials that thrive in drier conditions.
- Arrange the rocks: Place larger rocks strategically around the planting area, creating a natural and visually appealing layout. Fill in the gaps with smaller rocks and gravel.
- Add mulch (optional): If using mulch, spread a thin layer around the base of the plants, leaving some space around the stem to prevent moisture buildup.
5: Dry Creek Bed
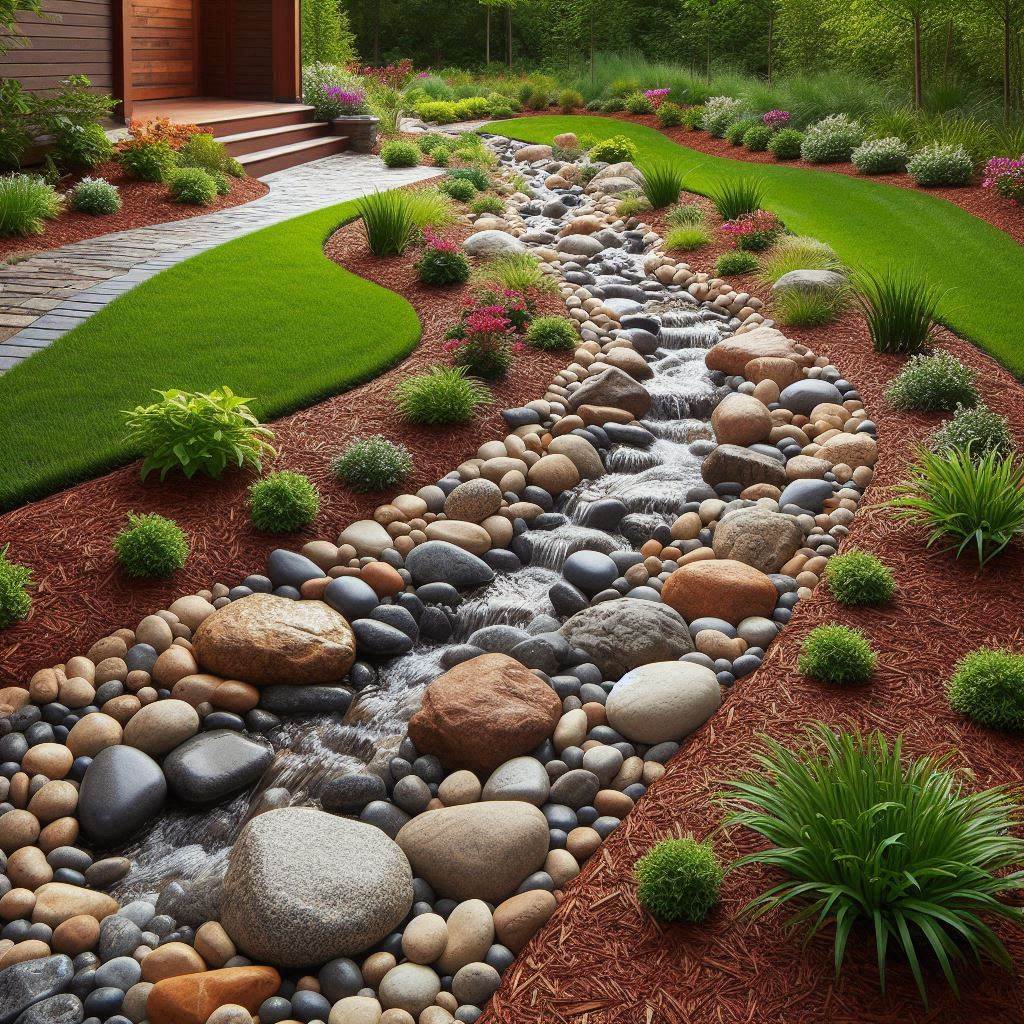
This waterless feature adds a touch of natural beauty and tranquility to your landscape. Here’s how to create a dry creek bed:
- Planning and layout: Sketch the desired path of your dry creek bed. Consider incorporating curves and bends for a more natural look.
- Excavation: Dig a shallow trench following your planned layout. The depth should be sufficient to accommodate the chosen rocks (typically 6-12 inches).
- Lay down weed control fabric: This prevents weeds from sprouting through the rocks and keeps the area low maintenance.
- Line the bed with rocks: Use larger rocks and boulders to define the edges of the dry creek bed. Arrange them in a natural, cascading fashion.
- Fill the center with gravel: Use medium-sized gravel or river rock to fill the center of the creek bed. Aim for a natural, uneven distribution.
- Mulch accents (optional): You can add a touch of greenery by planting drought-tolerant grasses or low-growing perennials along the edges of the dry creek bed, using mulch around their base for moisture retention.
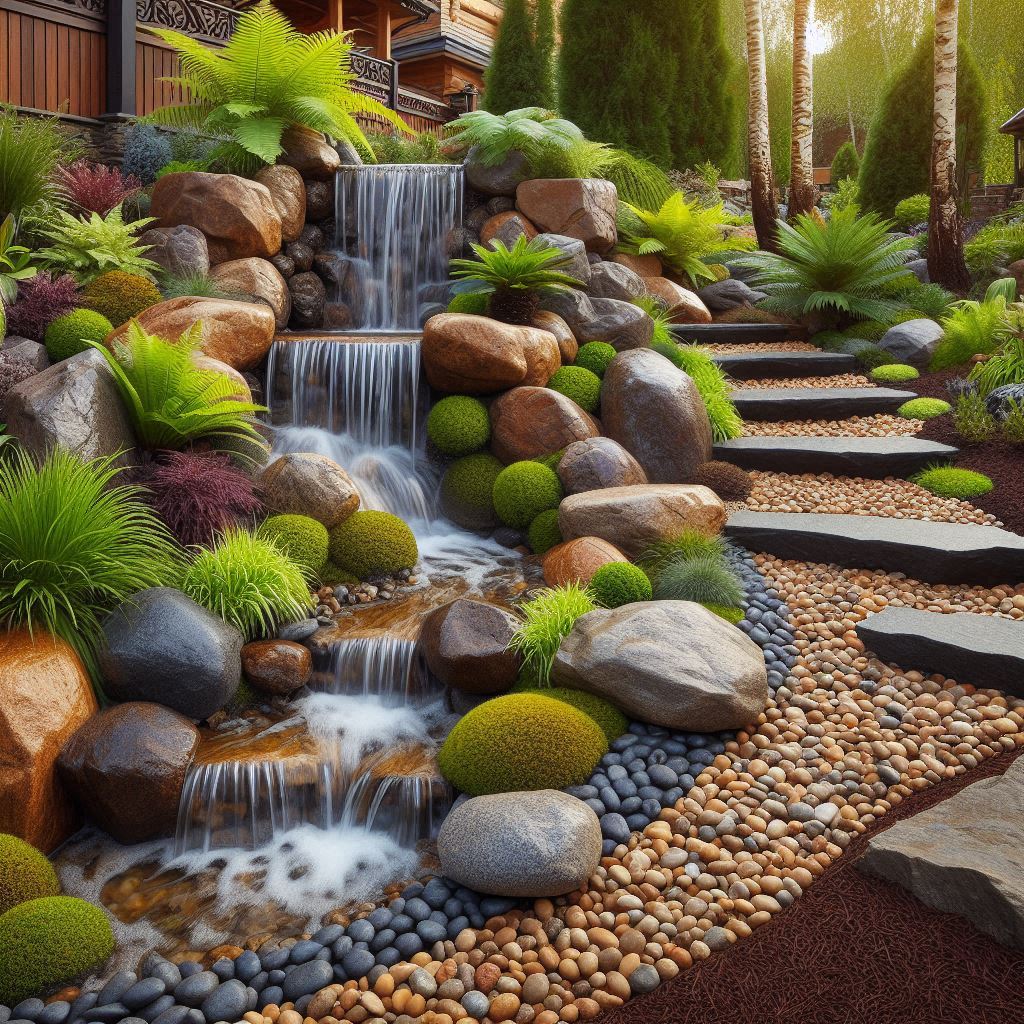
6: Rock Mulch Waterfall Feature
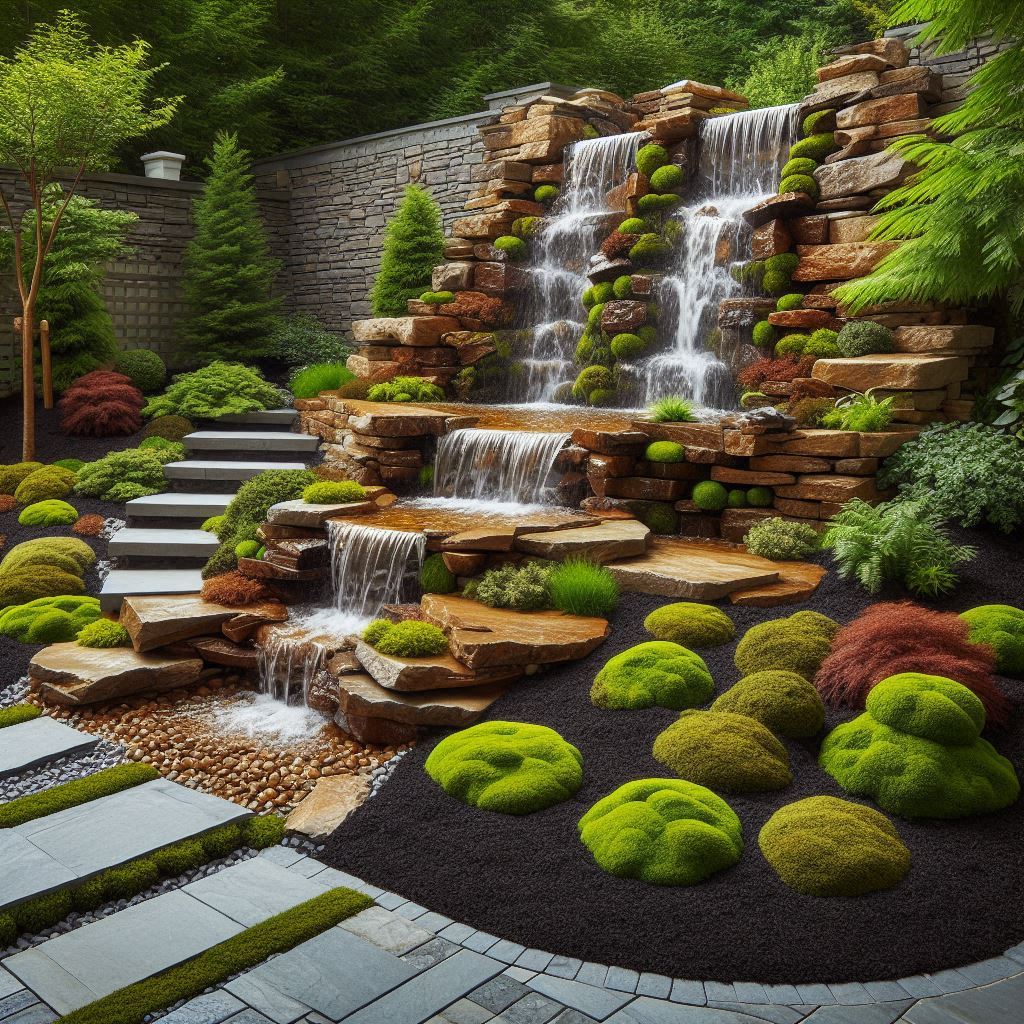
This unique feature adds a touch of drama and the soothing sound of water to your landscape. Here’s what you’ll need:
- Rocks: Choose a variety of rock sizes and textures, including larger rocks for the base and smaller stones for the waterfall effect. Opt for darker colored rocks like black or gray to create a dramatic contrast with the mulch.
- Mulch: Use black mulch to create a pond-like effect at the bottom of the waterfall.
- Water source (optional): While not essential for the visual appeal, you can incorporate a small hidden pump and reservoir system to create a trickling waterfall effect.
Creating the Rock Mulch Waterfall Feature:
- Choose the location: Select a spot with good drainage and easy access to a water source (if incorporating a pump and reservoir).
- Build the base: Create a tiered structure using larger rocks at the back for the waterfall’s base and smaller rocks stacked progressively lower towards the front. Ensure the structure is stable and secure.
- Line the bottom with weed control fabric: This prevents weeds from growing through the mulch and maintains a clean look.
- Create the “pond” effect: Spread a layer of black mulch around the base of the rock structure, creating a pool-like effect.
- Water source (optional): If using a pump and reservoir, follow the manufacturer’s instructions for installation and ensure the water feature is properly concealed behind the rocks. Let the water cascade over the rock structure, creating a trickling waterfall effect.
7. Mulch Mulching Ring Around Trees
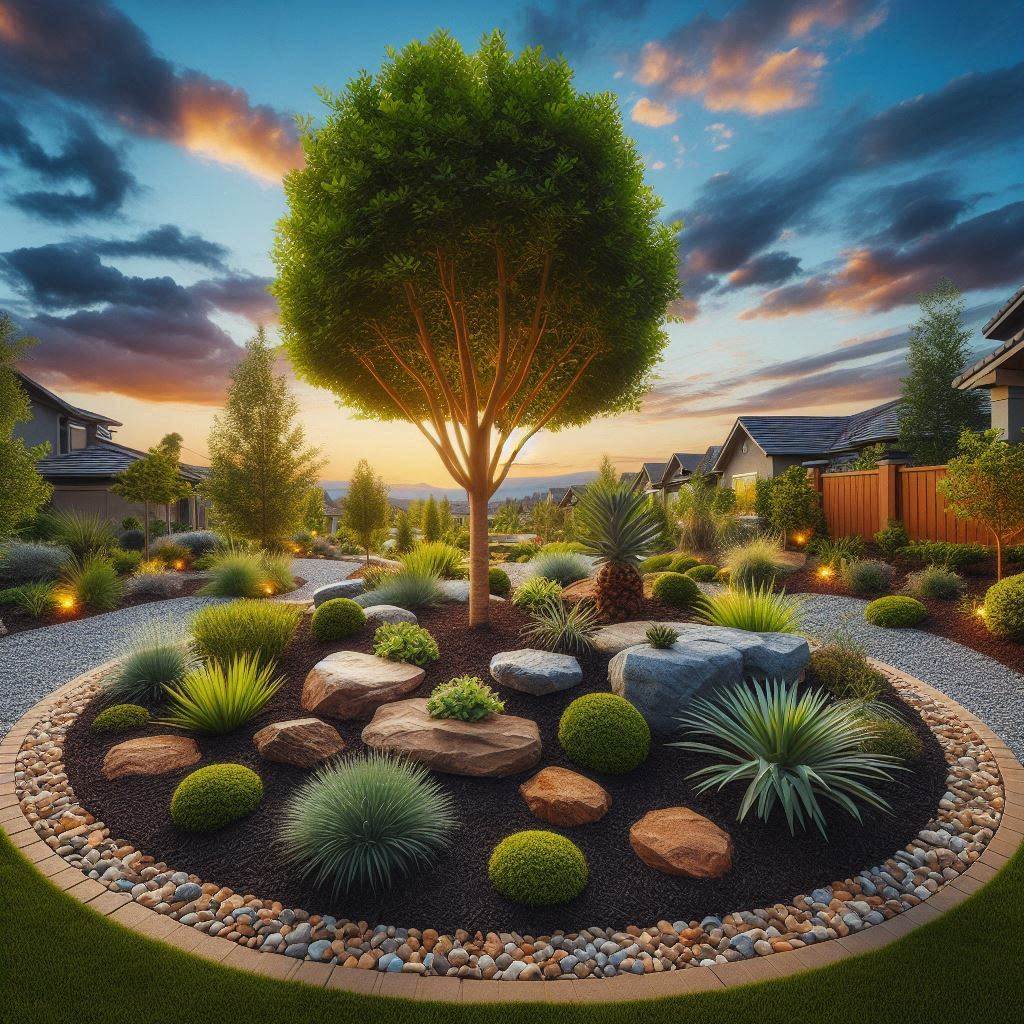
- Concept: Create a designated area around the base of your trees using mulch.
- Benefits: This design offers several advantages:
- Suppresses weed growth around the tree, reducing competition for water and nutrients.
- Retains moisture in the soil, benefiting the tree’s root system.
- Adds a clean and finished look to the landscape.
- Materials: Choose a type of mulch that complements your existing landscaping scheme. Shredded hardwood mulch or composted wood chips are popular options. Opt for a light-colored mulch to reflect sunlight and prevent the soil from overheating around the tree base.
- Creation: Clear away any weeds or debris around the base of the tree. Ensure you leave enough space between the trunk and the mulch (typically 6-12 inches) to prevent moisture buildup and potential trunk rot. Apply a 2-3 inch layer of mulch around the designated area.
8. Rock and Mulch Raised Garden Beds
- Concept: Construct raised garden beds using rocks and incorporate mulch for a unique and functional design.
- Benefits:
- Rocks provide a sturdy and visually appealing border for your raised beds.
- Mulch within the beds helps suppress weeds, retain moisture, and regulate soil temperature.
- Materials:
- Rocks: Choose stones of a suitable size and style for the desired aesthetic. Flagstone or larger river rock work well for raised bed borders.
- Mulch: Select a type of mulch suitable for your chosen plants. Opt for organic mulch like shredded hardwood mulch or composted wood chips.
- Lumber or other materials for raised bed structure (optional): You can create raised beds using wooden planks, cinder blocks, or other sturdy materials.
- Creation:
- Decide on the size and location of your raised garden beds.
- If using wooden planks or other materials, construct the raised bed structure as per your chosen design.
- Line the interior of the raised bed with weed control fabric.
- Build the rock border around the perimeter of the raised bed, ensuring the rocks are partially buried for stability.
- Fill the raised bed with good quality soil mix suitable for your chosen plants.
- Apply a layer of mulch (2-3 inches) over the soil within the raised bed.
9. Mulch Play Area with Rock Borders
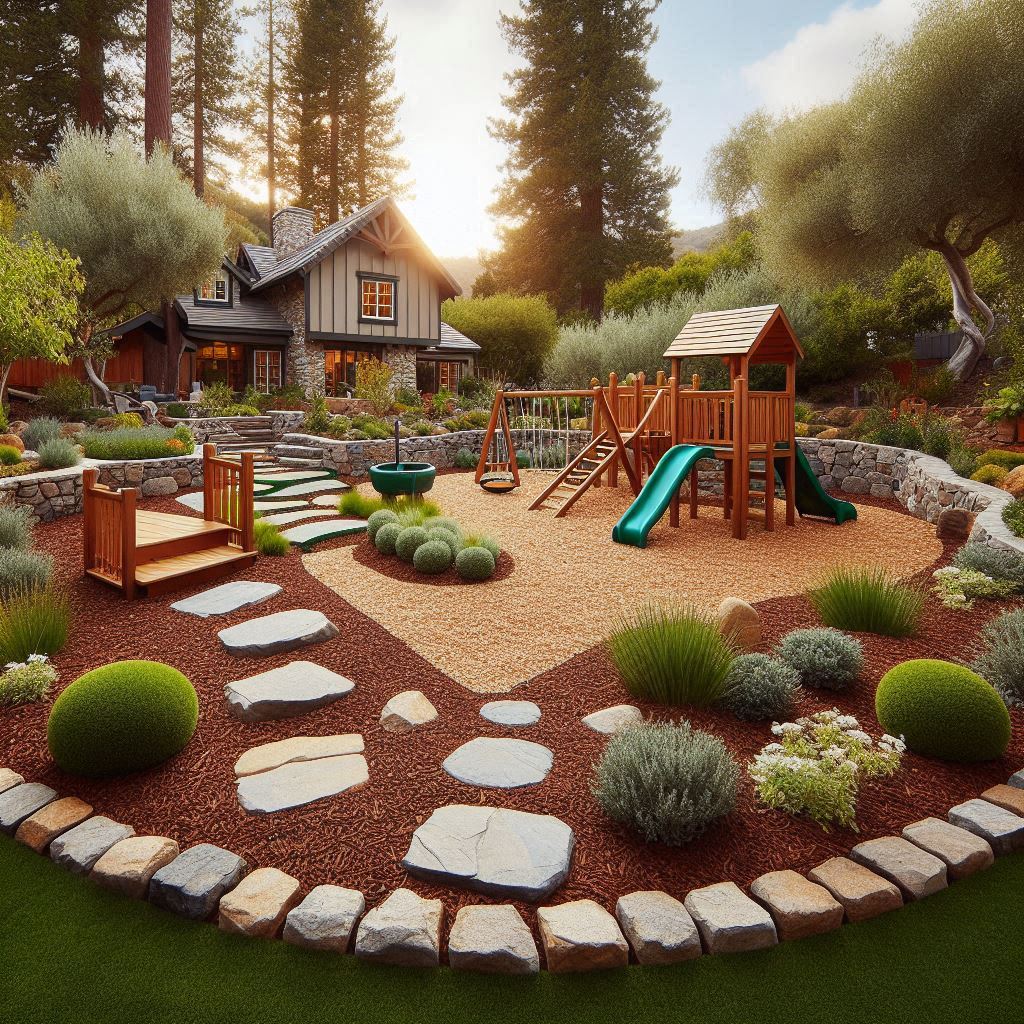
- Concept: Create a designated play area for children using mulch and define the space with rock borders.
- Benefits:
- Mulch provides a soft and comfortable surface for children to play on.
- Rock borders create a clear and defined boundary for the play area.
- Materials:
- Mulch: Opt for a playground-approved mulch like shredded rubber mulch or wood chips specifically designed for play areas. Ensure the mulch is soft and impact-absorbing to minimize injuries.
- Rocks: Choose smooth, rounded rocks for the borders to prevent any sharp edges. River rock or pea gravel are suitable options.
- Creation:
- Select a level and well-drained area for the play zone.
- Ensure the ground is free of any rocks, debris, or tripping hazards.
- Lay down weed control fabric to prevent weeds from sprouting through the mulch.
- Define the play area perimeter using the chosen rocks, creating a border that is at least 6-8 inches wide.
- Spread a layer of playground-approved mulch (6-8 inches deep) within the designated play area.
10. Rock and Mulch Fire Pit Surround
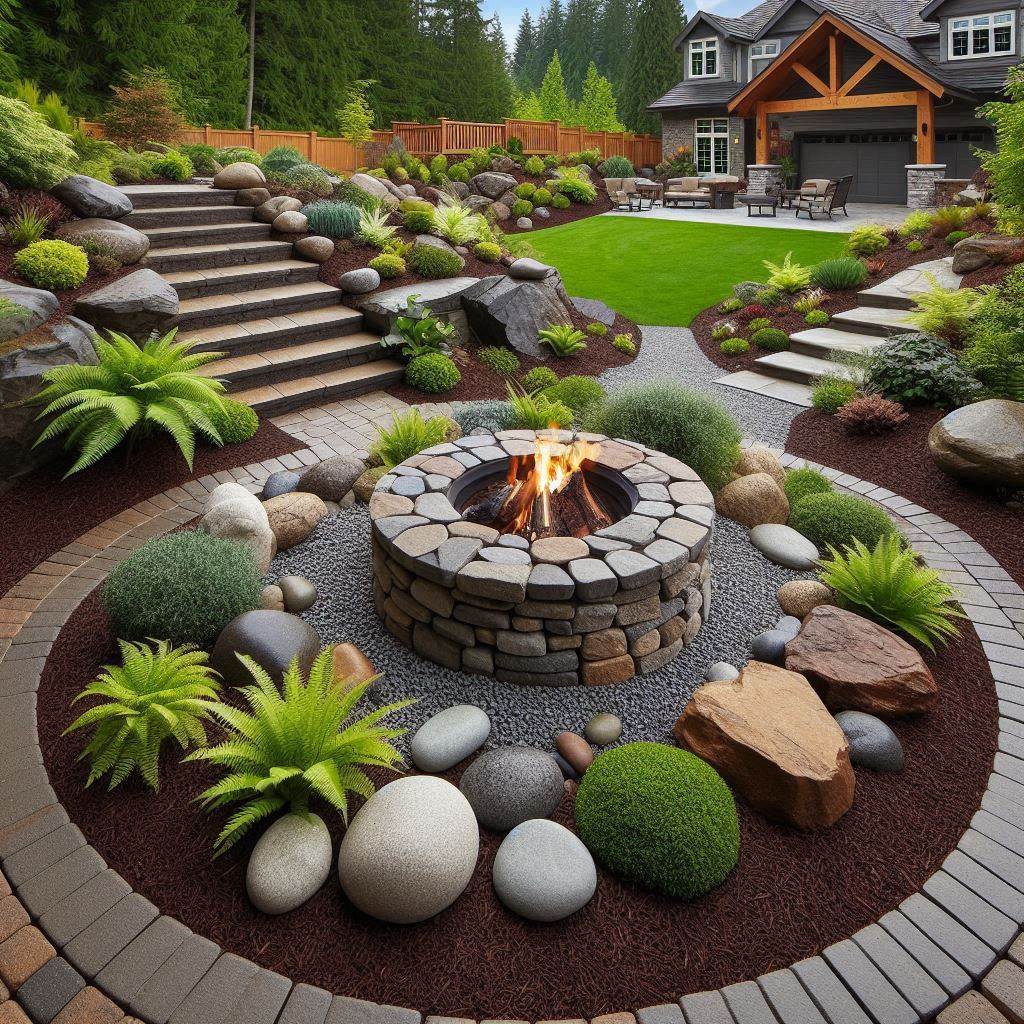
- Concept: Create a safe and stylish fire pit area using a combination of rocks and mulch.
- Benefits:
- Rocks provide a fire-resistant base for the fire pit and create a defined space for the fire feature.
- Mulch adds a decorative touch and can be used to fill in gaps between the rocks.
- Materials:
- Rocks: Choose fire-resistant rocks like crushed lava rock or pea gravel for the base and surrounding area of the fire pit. Avoid using stones that may crack or explode when heated.
- Mulch: Opt for a non-flammable mulch material like pea gravel or crushed stone in the outer area surrounding the fire pit. Avoid using organic mulch near the fire source due to fire risk.
- Creation:
- Fire code compliance: Ensure you check and comply with local fire codes regarding fire pit size, location, and safety clearances.
- Prepare the base: Clear the designated area for the fire pit, ensuring proper drainage and a level surface.
- Create the fire pit base: Using fire-resistant rocks like crushed lava rock, create a base for the fire pit according to the manufacturer’s instructions or your chosen design.
- Install the fire pit: If using a pre-fabricated fire pit, follow the manufacturer’s instructions for proper installation.
- Rock fire pit surround: Encircle the fire pit with a layer of fire-resistant rocks like pea gravel or crushed lava rock, creating a defined border that extends at least 3 feet beyond the fire pit in all directions (check local fire codes for specific requirements).
- Mulch border (optional): Beyond the fire-resistant rock border, you can add a decorative outer border using non-flammable mulch like pea gravel or crushed stone. This creates a visually appealing separation from the surrounding landscape.
11. Rock and Mulch Patio Accents
- Concept: Incorporate rocks and mulch to add texture, definition, and visual interest to your patio space.
- Benefits:
- Rocks can be used to create borders, pathways, or decorative features within your patio area.
- Mulch adds a touch of softness and complements the hard surfaces of a patio.
- Materials:
- Rocks: Choose various sizes and textures of rocks to create a layered and visually interesting effect. Consider using river rock, flagstone, or decorative stones.
- Mulch: Opt for a color that complements your patio furniture and overall aesthetic. Shredded hardwood mulch, dyed mulch, or decorative gravel are all suitable options.
- Creation:
- Get creative! Here are some ideas to get you started:
- Rock borders: Create a defined border around the perimeter of your patio using larger stones like flagstone.
- Rock pathway: Integrate a pathway leading to your patio using smaller river rock or pea gravel.
- Rock and mulch planter boxes: Construct planter boxes using stones and fill them with a combination of mulch and colorful plants.
- Mulch accents: Create pockets of mulch filled with low-growing plants or decorative elements within your patio space.
- Get creative! Here are some ideas to get you started:
12. Rock Waterfall Spillway with Mulch Stream Bed
- Concept: Take your dry creek bed design a step further by incorporating a rock waterfall spillway and a mulch stream bed.
- Benefits:
- Adds a touch of drama and the soothing sound of trickling water to your landscape.
- Creates a visually captivating water feature.
- Materials: In addition to the materials required for a dry creek bed (refer to previous section for details), you will need:
- Waterfall pump and reservoir system (optional): Creates a continuous water flow over the rock waterfall.
- Additional rocks for the waterfall structure: Larger and flatter stones are ideal for building the tiered waterfall base.
- Creation:
- Follow the steps for creating a dry creek bed, incorporating larger and flatter stones to construct the tiered base for the waterfall.
- Install a pump and reservoir system behind the rock structure if opting for a continuous water flow (ensure proper waterproofing and concealment).
- Line the bottom of the stream bed with weed control fabric.
- Fill the stream bed with a layer of black mulch, creating a natural-looking waterway.
- Allow the water to cascade over the rock structure, creating a trickling waterfall effect.
13. Rock and Mulch French Drain System with Decorative Mulch Basin
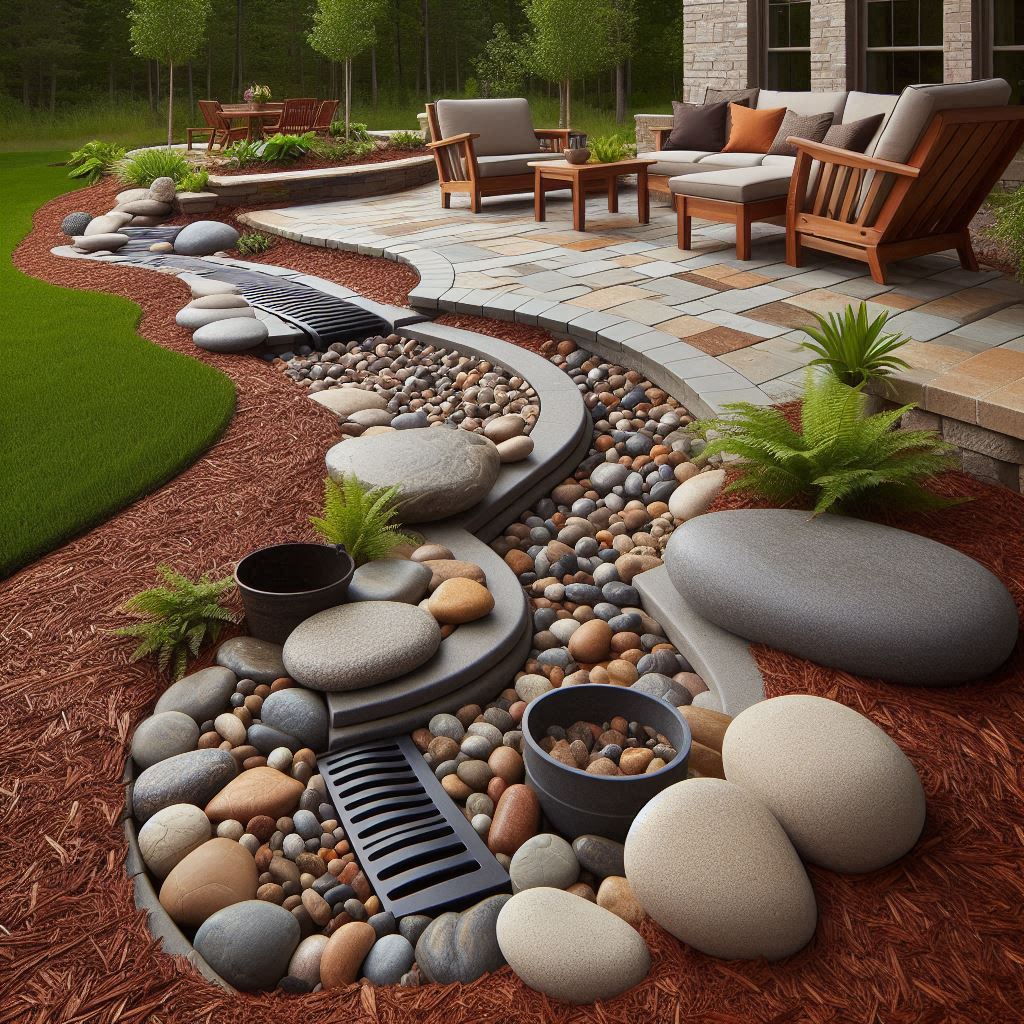
- Concept: Combine functionality with aesthetics by creating a French drain system with a decorative mulch basin using rocks and mulch.
- Benefits:
- Effectively channels excess rainwater away from your foundation, preventing flooding and protecting your property.
- Creates a visually appealing feature that blends seamlessly with your landscape design.
- Materials:
- Perforated drainage pipe
- Landscape fabric
- Gravel (various sizes)
- Rocks for the decorative basin border
- Mulch for the basin
- Creation: Important Note: While this section provides a general overview, it’s crucial to consult a professional landscaper for proper drainage system design and installation to ensure it functions effectively and complies with local regulations. Here’s a basic idea:
- Plan and trench digging: A professional will assess your drainage needs and design the French drain layout. Trenches will be dug to accommodate the perforated drainage pipe and gravel layers.
- Pipe installation: The perforated drainage pipe will be laid within the trenches, ensuring proper slope for water flow.
- Gravel layers: The trenches will be filled with various gravel sizes, creating a filtration system that allows water to drain while preventing soil clogs.
- Landscape fabric: Landscape fabric will be placed over the gravel layer to prevent soil erosion and weed growth.
- Creating the decorative basin:
- Rock border: Define the perimeter of the French drain basin using chosen rocks, creating a visually appealing border.
- Mulch basin: Fill the basin area within the rock border with a layer of mulch. Opt for a color that complements your existing landscape scheme.
14. Cascading Rock Garden with Mulch Pockets
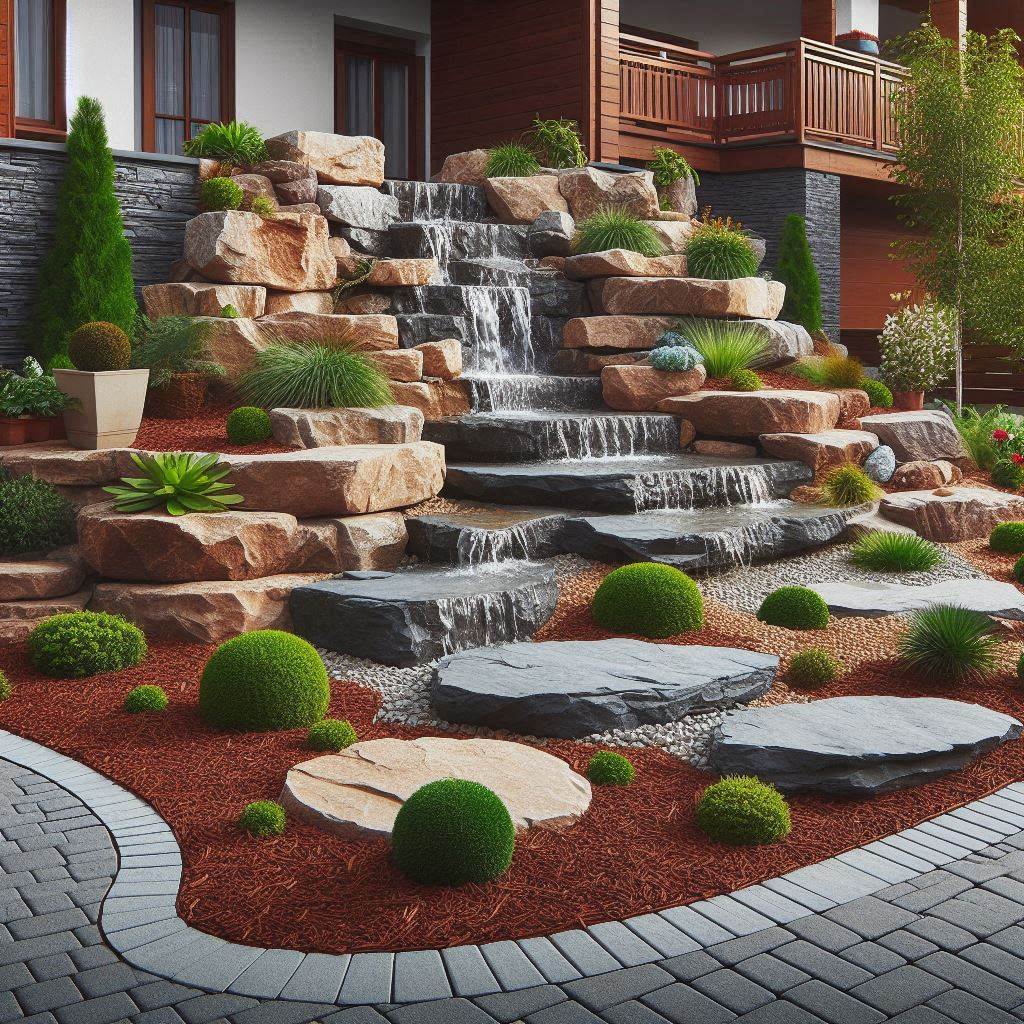
- Concept: Create a multi-tiered rock garden with cascading levels and pockets filled with colorful mulch and vibrant plants.
- Benefits:
- Adds visual interest and dimension to your landscape.
- Provides a haven for drought-resistant plants and creates a natural, eco-friendly feature.
- Materials:
- Rocks: Utilize various sizes and textures of rocks to create a layered effect. Opt for larger boulders for the base tiers and smaller stones for the upper levels.
- Mulch: Choose a variety of colors to complement your chosen plants and create a visually striking display. Shredded hardwood mulch, dyed mulch, or even decorative gravel in contrasting colors can be used.
- Plants: Select drought-tolerant and cascading varieties like succulents, ornamental grasses, creeping phlox, or trailing rosemary.
- Creation:
- Plan your design: Sketch the desired layout, considering the size and placement of rock tiers and mulch pockets.
- Prepare the base: Ensure the chosen location has well-draining soil. You may need to amend the soil with gravel or coarse sand for optimal drainage.
- Build the rock tiers: Start with the largest boulders at the base, creating stable and secure layers. Gradually work your way up, using smaller rocks for the upper tiers.
- Create mulch pockets: In between the rock layers, dig out small pockets where you’ll plant. Line these pockets with weed control fabric to minimize weed growth.
- Add mulch and plants: Fill the pockets with your chosen mulch colors, creating a vibrant and visually interesting display. Plant your drought-tolerant varieties within the mulch pockets, ensuring proper spacing and watering during the initial establishment phase.
15. Rock and Mulch Stepping Stone Pathway with Herb Spiral
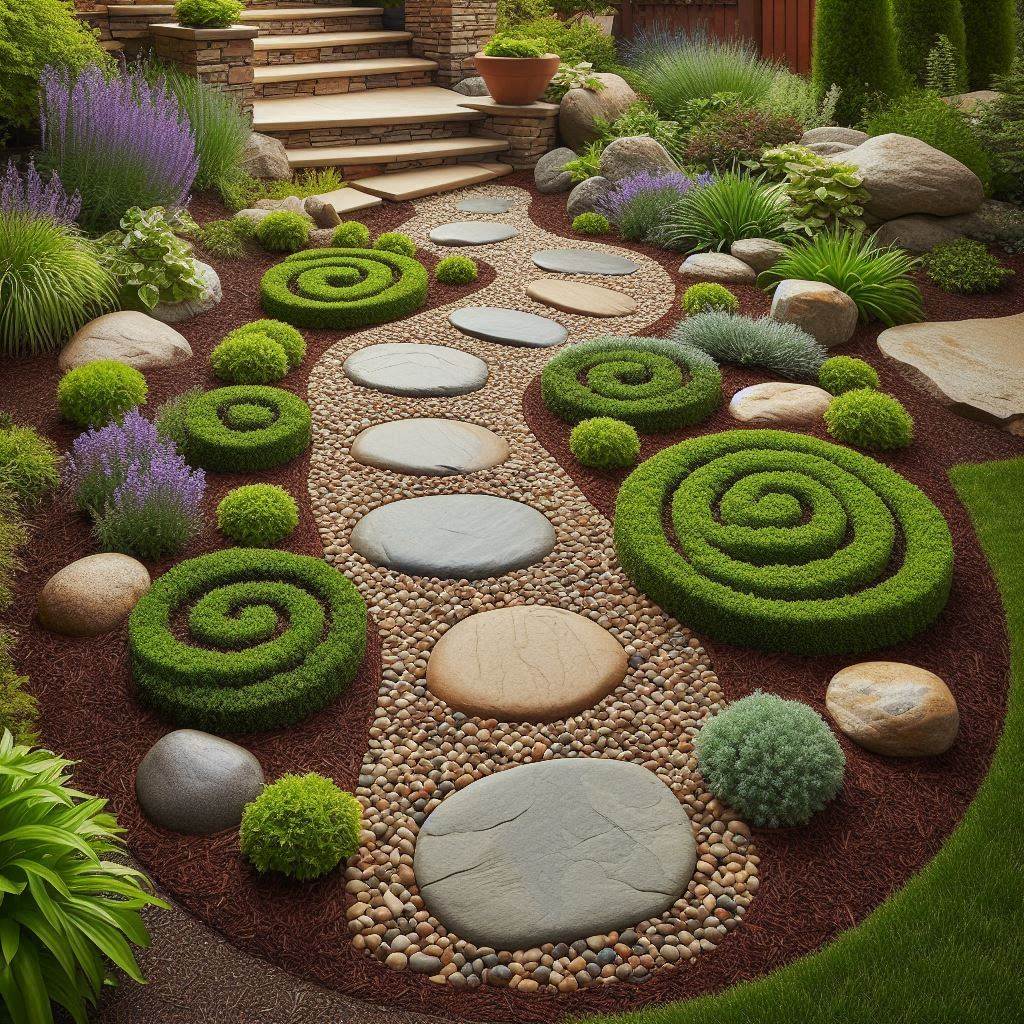
- Concept: Combine a functional stepping stone pathway with an aesthetically pleasing herb spiral, utilizing a combination of rocks and mulch.
- Benefits:
- Provides a charming and functional pathway through your garden.
- Creates a designated space for growing fresh herbs in a visually appealing spiral design.
- Materials:
- Rocks: Choose flat stones like flagstone or large slate for the stepping stones. Opt for smaller river rock or pea gravel for the pathway base.
- Mulch: Select a neutral-colored mulch like shredded hardwood mulch or composted wood chips to complement the rocks and plants.
- Herbs: Choose a variety of culinary herbs suited to your climate and preferences. Popular options include rosemary, thyme, oregano, mint, and chives.
- Creation:
- Design your pathway and herb spiral: Sketch the layout of your stepping stone pathway, incorporating a circular or spiral design for the herb area. Consider the desired size and spacing of the stepping stones.
- Prepare the pathway base: Excavate a shallow trench along the planned pathway route, ensuring proper drainage. Fill the trench with a base layer of gravel for stability.
- Create the stepping stones: Lay the chosen flat stones along the pathway, ensuring a level and stable surface. Fill the gaps between the stones with smaller river rock or pea gravel, creating a defined border.
- Build the herb spiral: Within the designated circular or spiral area, create a raised bed using smaller rocks or bricks. Start from the outside and gradually work your way inwards, creating a tiered effect. Fill the tiers with a well-draining soil mix suitable for herbs.
- Plant your herbs: Plant your chosen herbs within the designated tiers of the herb spiral, following recommended spacing guidelines for each variety. Apply a thin layer of mulch around the base of the herb plants to retain moisture and suppress weeds.
16. Rock and Mulch Border for a Moonlit Garden
- Concept: Cultivate a magical atmosphere in your evening garden with a combination of light-reflecting mulch and strategically placed rocks.
- Benefits:
- Creates a visually captivating nightscape with a play of light and shadow.
- Provides a serene and inviting ambiance for evening relaxation.
- Materials:
- Rocks: Opt for light-colored rocks like white marble or limestone pebbles. These will reflect moonlight and create a luminous effect.
- Mulch: Choose a light-colored mulch like white marble chips, light-colored gravel, or even glow-in-the-dark mulch (ensure it’s safe for plants) for a truly unique touch.
- Night-blooming plants: Incorporate fragrant and visually appealing night-blooming plants like moonflowers, evening primrose, or Nicotiana alata (sweet tobacco).
- Creation:
- Select a suitable location: Choose an area in your garden that receives moonlight, preferably near a patio or seating area where you can enjoy the evening ambiance.
- Define the border: Outline the desired garden bed using the light-colored rocks, creating a visually appealing border.
- Prepare the soil: Amend the soil within the designated area to ensure proper drainage and fertility for your chosen plants.
- Add the reflective mulch: Spread a layer of your chosen light-colored mulch within the rock border.
- Plant selection and placement: Strategically plant night-blooming flowers and fragrant herbs throughout the garden bed. Consider incorporating plants with white or light-colored flowers that will be more visible in the moonlight. Place taller plants towards the back and shorter varieties in the front for a layered effect.
- Lighting (optional): While the focus is on natural moonlight, you can add subtle lighting elements like solar-powered path lights or strategically placed uplights to further enhance the evening ambiance.
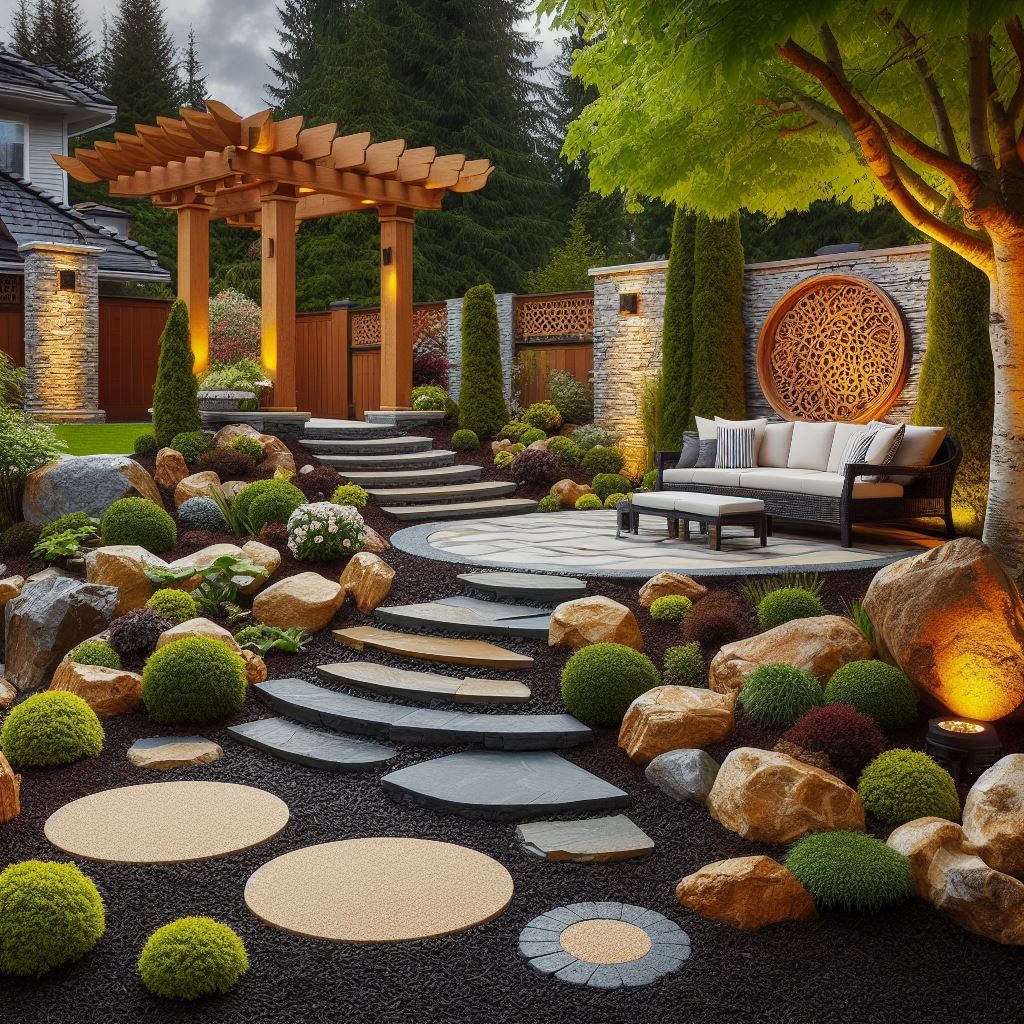
17. Rock and Mulch Zen Garden with Stepping Stones
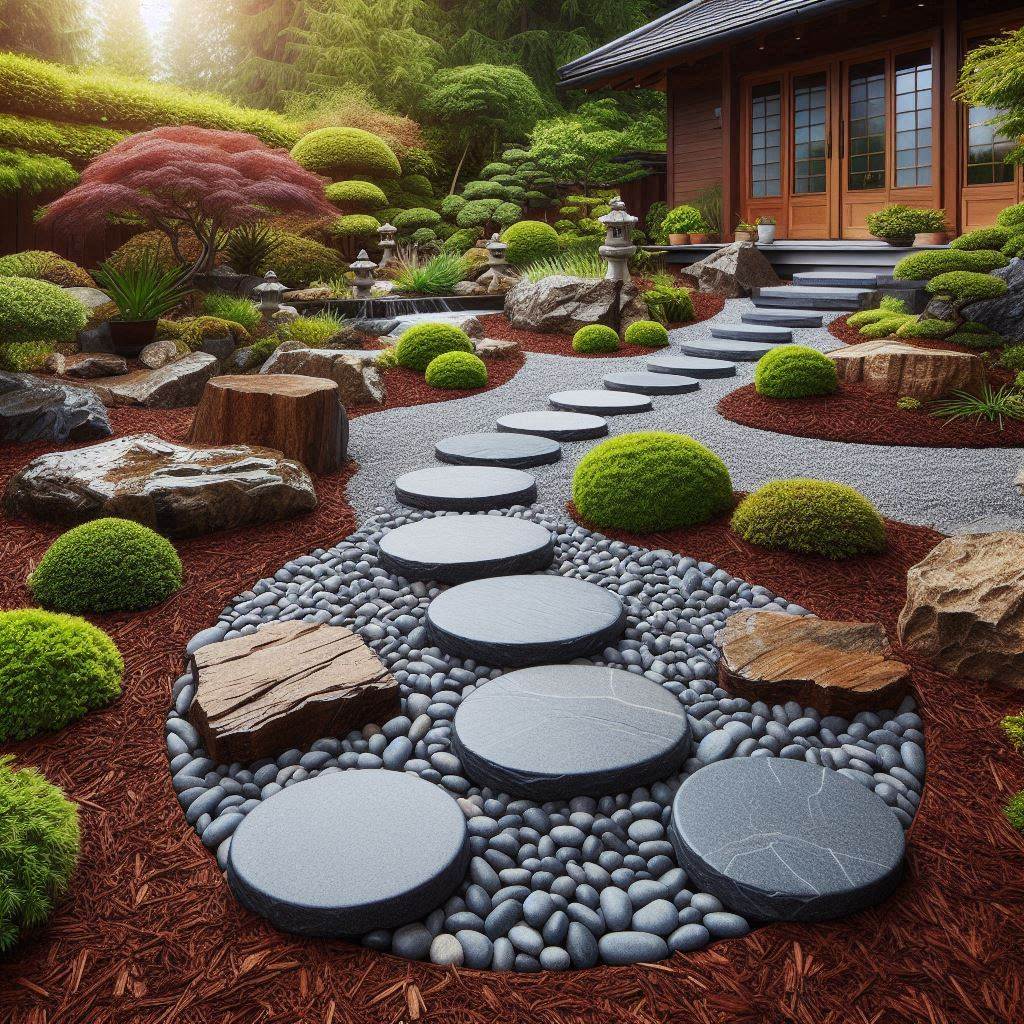
- Concept: Create a peaceful and meditative space in your landscape using a combination of rocks, mulch, and strategically placed stepping stones, inspired by traditional Zen gardens.
- Benefits:
- Provides a tranquil retreat for relaxation and reflection.
- Introduces an element of mindfulness and serenity to your outdoor space.
- Materials:
- Rocks: Utilize various sizes and textures of gravel and decorative stones. Consider incorporating smooth river rock, white marble chips, or raked gravel to create a calming aesthetic.
- Mulch (optional): A thin layer of dark brown or black shredded hardwood mulch can be used in designated areas to create contrast and define planting zones.
- Stepping stones: Choose flat stones with a natural, weathered look, such as flagstone or slate.
- Sand (optional): For a more traditional Zen garden aesthetic, consider using a designated area filled with white sand.
- Creation:
- Design your Zen garden: Sketch the layout, incorporating a rake-able area, strategically placed rocks, and stepping stones leading to a focal point or seating area.
- Prepare the base: Ensure the chosen location has well-draining soil. Consider adding a weed control fabric layer to minimize weed growth.
- Create the rake-able area: Define a designated area using edging stones or rocks. Fill this area with gravel or sand, creating a smooth and level surface suitable for raking.
- Rock placement: Arrange the chosen rocks throughout the garden, creating a sense of balance and asymmetry. Consider incorporating larger stones as focal points and smaller gravel for textured pathways.
- Stepping stones: Place the stepping stones strategically, creating a pathway that leads to a designated seating area or focal point within the Zen garden. Ensure the stones are level and stable for safe walking.
- Mulch accents (optional): You can add a thin layer of dark brown or black mulch around the base of any ornamental plants or shrubs incorporated into the design.
- Maintenance: Regularly rake the sand or gravel area to maintain a smooth and calming aesthetic.
Choosing the Right Mulch and Rocks: The Perfect Match for Your Design
Now that you’re brimming with creative ideas, let’s discuss some tips to help you choose the perfect mulch and rocks to bring your vision to life.
A. Selecting the Right Mulch
The type of mulch you choose plays a crucial role in both aesthetics and functionality. Here are some factors to consider:
- Type of mulch:
- Shredded hardwood mulch: A popular and affordable option, offering good weed suppression and moisture retention. However, it breaks down over time and requires periodic replenishment.
- Dyed mulch: Adds a pop of color to your landscape. Choose colors that complement your plants and overall design scheme. Be aware that dyed mulch may fade over time.
- Composted wood chips: A more sustainable option that breaks down slowly, adding nutrients to the soil over time.
- Rubber mulch: A long-lasting option with minimal maintenance requirements. However, it can be more expensive than other mulch types and may not offer the same aesthetic appeal as natural mulch.
- Color: Consider the overall color scheme of your landscape and your house exterior. Opt for natural tones like brown or black for a classic look, or experiment with bolder colors like red or cedar for a more vibrant statement. Remember, lighter colored mulch reflects sunlight and helps keep the soil cooler.
Selecting the Right Rocks
The size, type, and color of rocks you choose will significantly impact the overall look and feel of your design. Here are some key considerations:
- Rock type:
- Pea gravel: Small, smooth stones perfect for pathways and as a filler material in dry creek beds.
- River rock: Smooth, rounded stones available in various sizes, ideal for borders, pathways, and decorative features.
- Flagstone: Flat stones perfect for creating borders, edging, and stepping stones.
- Boulders: Large rocks that add a dramatic touch to your landscape, ideal for dry creek beds and waterfall features.
- Size: The size of the rocks should be proportionate to the scale of your landscape and the specific design element. Smaller rocks work well for pathways and borders, while larger rocks are ideal for creating dramatic focal points.
- Color: Similar to mulch, consider the overall color scheme of your landscape. Opt for neutral tones like gray or brown for a classic look, or choose contrasting colors for a bolder statement. Darker colored rocks can create a more dramatic effect, especially for water features.
Additional Tips and Considerations
- Weed control fabric is your friend: Always lay down weed control fabric under your mulch to minimize weed growth and save yourself time and effort in the long run.
- Safety first when working with rocks: Lifting heavy rocks can be a strain on your back. Use proper lifting techniques or enlist help to avoid injuries.
- Seek professional help for complex designs: If you’re tackling a particularly intricate design, consider consulting a professional landscaper for guidance and assistance. They can help you choose the right materials, ensure proper installation, and create a stunning and functional landscape.
Wrapping Up
Mulch and rocks offer a versatile and low-maintenance solution for creating beautiful and functional landscapes. With a touch of creativity and the right materials, you can transform your outdoor space into a haven of relaxation and enjoyment.
Let us see your creativity in action! Share photos of your mulch and rock landscaping projects in the comments section below. We’d love to see your unique designs and inspire others.