

A few years ago, I used to toss vegetable peels, eggshells, and coffee grounds straight into the trash without thinking twice. Then one day, I read that over 30% of household waste is compostable—and most of it comes from our kitchens. That little fact made me pause. All that “waste” could have been nourishing my garden instead of rotting in a landfill.
That’s when I decided to start composting my kitchen scraps. It’s one of the simplest, most satisfying eco-friendly habits I’ve adopted. You don’t need fancy equipment or a big backyard to do it—just a little consistency and the willingness to experiment. In this guide, I’ll walk you through everything I’ve learned about turning everyday kitchen waste into nutrient-rich compost that your plants will absolutely love.
Why Compost Kitchen Waste?
The beauty of composting lies in its simplicity—it’s a natural recycling system that returns nutrients back to the earth. When food waste ends up in landfills, it decomposes without oxygen, releasing methane, a greenhouse gas far more potent than carbon dioxide. By composting at home, you not only reduce your waste footprint but also help combat climate change in a small but meaningful way.
On a practical level, composting saves money. You spend less on fertilizers and waste disposal. Plus, the compost you create improves soil structure, boosts fertility, and retains moisture—meaning healthier plants with less effort.
For gardeners, it’s a dream come true. The first time I mixed my homemade compost into my soil beds, I noticed a huge difference—plants grew stronger, and the soil stayed moist even in the dry season. It’s honestly one of those small habits that make you wonder why you didn’t start sooner.
Understanding What You Can and Can’t Compost
Not everything from your kitchen belongs in the compost bin. Composting works best when you maintain a balance between “greens” (nitrogen-rich materials) and “browns” (carbon-rich materials).
Greens include fruit and vegetable scraps, coffee grounds, tea leaves, and crushed eggshells. These provide the nitrogen that fuels microbial activity. Browns, on the other hand, are materials like shredded paper, dry leaves, cardboard, and paper towels. They give compost its structure and help absorb excess moisture.
Avoid composting meat, fish, dairy, or oily foods—they can attract pests and produce unpleasant odors. Also skip diseased plants or pet waste. To make life easier, I keep a small “can and can’t compost” list pinned on my fridge. It’s a simple reminder that keeps my compost healthy and balanced.
Choosing the Right Composting Method
There’s no one-size-fits-all approach to composting—it depends on your space and lifestyle.
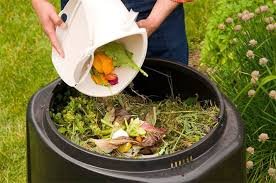
If you have a backyard or garden, outdoor composting is ideal. You can use a bin or simply create an open pile in a shaded area. Outdoor composting allows you to process larger amounts of waste, and nature does most of the work for you.
For those living in apartments or smaller homes, indoor composting is a great alternative. Countertop bins, bokashi buckets, and worm composting (vermicomposting) are compact, odor-free options. I started with a small indoor bin, and it was surprisingly easy to manage.
Here’s a quick tip: outdoor composting is low maintenance but takes longer, while indoor composting is faster but requires more attention. Choose whichever fits your routine best.
Setting Up Your Composting Bin or Area
Start by choosing a suitable location. For outdoor setups, pick a spot with good airflow and some shade to prevent the compost from drying out. Indoors, a ventilated bin placed near your kitchen sink works perfectly.
If you’re DIY-minded, you can make a simple bin using a bucket or crate with small holes for ventilation. Begin by layering browns at the bottom—they’ll absorb moisture and reduce odors. Then, add a thin layer of soil or finished compost to introduce beneficial microbes that jumpstart decomposition.
If you care about aesthetics (I do!), you can even tuck your compost bin into a corner with potted plants around it. A few creative touches can make your compost station look like part of your garden setup rather than an afterthought.
Step-by-Step: How to Start Composting Kitchen Waste
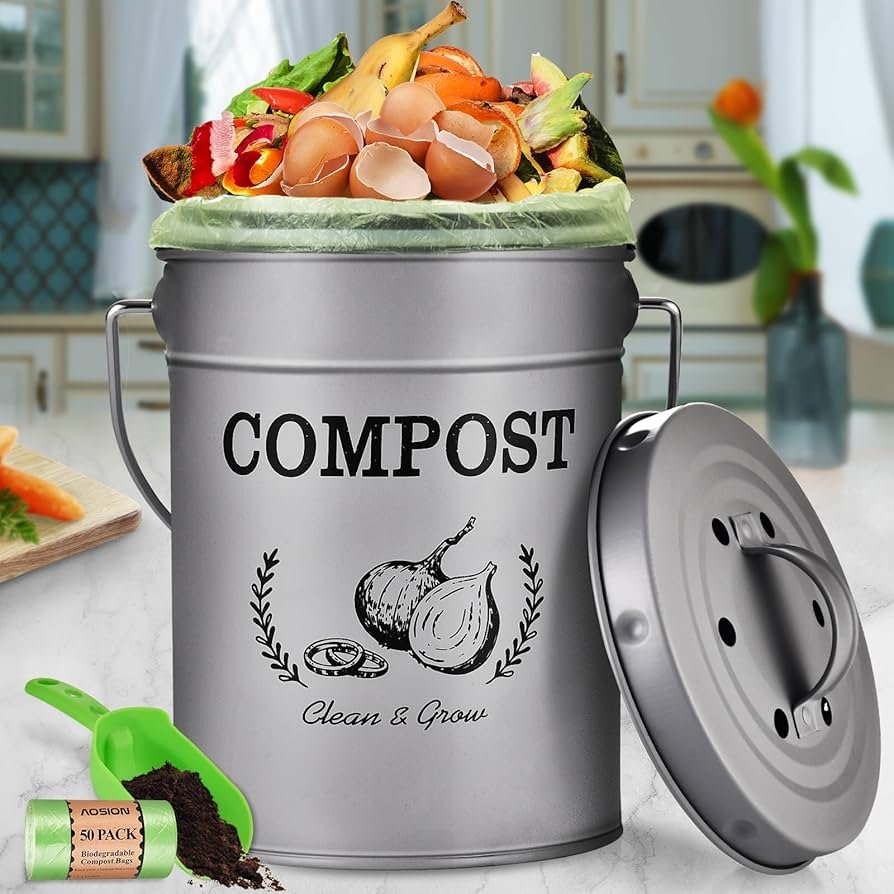
- Collect your waste: Keep a small container or compost pail in the kitchen for scraps. Empty it every couple of days into your main compost bin.
- Layer your materials: Add greens and browns in alternating layers. This balance keeps your compost healthy and prevents odors.
- Aerate: Every week or so, turn or stir your compost with a stick or shovel. Oxygen helps microbes break down waste faster.
- Check moisture: Compost should feel like a wrung-out sponge—not too wet or too dry. If it’s dry, sprinkle a little water; if it’s soggy, add more browns.
- Be patient: Composting takes time, usually between two to six months depending on conditions.
- Troubleshoot issues: If you notice bad smells, your pile might be too wet or heavy on greens. Add browns and give it a good stir.
With these steps, you’ll quickly get the hang of composting—it becomes as natural as separating recyclables.
Maintaining and Monitoring Your Compost
Think of your compost pile as a living ecosystem. It needs air, moisture, and the right balance of materials to thrive. Turn your compost weekly to maintain airflow and mix fresh waste evenly.
A healthy compost pile feels slightly warm and smells earthy—not rotten. If you see fruit flies or pests, don’t panic. They usually appear when food waste is exposed, so just bury new scraps under a layer of browns.
Every time you add new waste, remember the balance: a handful of browns for every batch of greens. It’s a small step that keeps the whole system working smoothly.
How to Know When Compost Is Ready
You’ll know your compost is ready when it looks like dark, crumbly soil and smells earthy. You shouldn’t be able to recognize the original scraps anymore. If it’s still lumpy or smells sour, give it more time.
Here’s a simple trick I use: scoop a small amount of compost into a sealed plastic bag for a few days. When you open it, if it smells clean and earthy, it’s good to go. If there’s any unpleasant odor, it needs more time to decompose.
How to Use Your Finished Compost
Now for the fun part—using your finished compost! Mix it into your garden beds or around plant roots to enrich the soil. You can also use it for indoor plants—just blend a bit of compost with regular potting soil for an instant nutrient boost.
For mulching, spread a thin layer on top of your soil to retain moisture and prevent weeds. Just make sure your compost is fully decomposed before using it, especially for young or sensitive plants.
I’ll admit, the first time I used my own compost on my herbs, I couldn’t believe how quickly they perked up. There’s something deeply satisfying about seeing your food scraps come full circle into thriving greenery.
Common Composting Problems & Easy Fixes
| Problem | Cause | Simple Fix |
| Bad odor | Too many greens or poor airflow | Add more browns and stir regularly |
| Compost too dry | Not enough moisture or too much sun | Sprinkle some water or add moist scraps |
| Attracts pests | Meat, dairy, or uncovered waste | Avoid animal products, cover with browns |
| Decomposing too slowly | Cold weather or imbalance | Turn more often, add more greens or finished compost |
Most composting hiccups are easy to fix once you understand what your pile needs—it’s like learning to read your plants.
Eco-Friendly Tips to Boost Your Composting Game
To make your composting routine even greener, use biodegradable liners or paper bags for collecting kitchen scraps. Chop or crush waste into smaller pieces—they break down faster this way.
If you’re composting indoors, keep the lid sealed and stir regularly to control odors. Encourage your family to join in—kids especially love seeing food “turn into soil.” It’s a fun way to teach sustainability in action.
Once composting becomes a habit, you’ll notice how little actual trash your household produces. It’s an empowering shift toward a cleaner, more sustainable lifestyle.
Turning Everyday Waste into Sustainable Value
Composting isn’t just about managing waste—it’s about transforming your daily routine into something purposeful. Each peel, shell, or coffee ground you save has the potential to feed the earth and reduce your footprint.
It’s a simple cycle: kitchen to compost, compost to garden, garden back to kitchen. Once you experience it firsthand, it changes the way you see “waste.”
So grab a small bin, start collecting your scraps today, and let nature do the rest. A few months from now, you’ll have something magical in your hands—dark, rich compost made from your own kitchen waste. That’s sustainability you can actually see and feel.