
Most gardeners treat hostas like the “default setting” for a shady yard. You buy a few green-and-white clumps, shove them in the dirt under a tree, and hope for the best. But then reality hits: the slugs turn your leaves into Swiss cheese, the deer treat your garden like a five-star salad bar, and suddenly your “low-maintenance” dream looks like a messy, tattered disaster.
I’ve been playing in the dirt for over twelve years now, and I’ve made every hosta mistake possible. I once tried to plant a giant ‘Sum and Substance’ in a tiny terracotta pot because it looked “cute” on a garden blog. Within two months, the roots literally cracked the pot in half like an eggshell. I’ve also planted sun-loving varieties in deep shade and wondered why they turned a sickly, pale yellow. If you want a hosta garden that actually looks intentional and stays alive, you need a plan that goes beyond just “digging a hole.”
1. Creating a Hosta Privacy Screen for Shady Property Lines
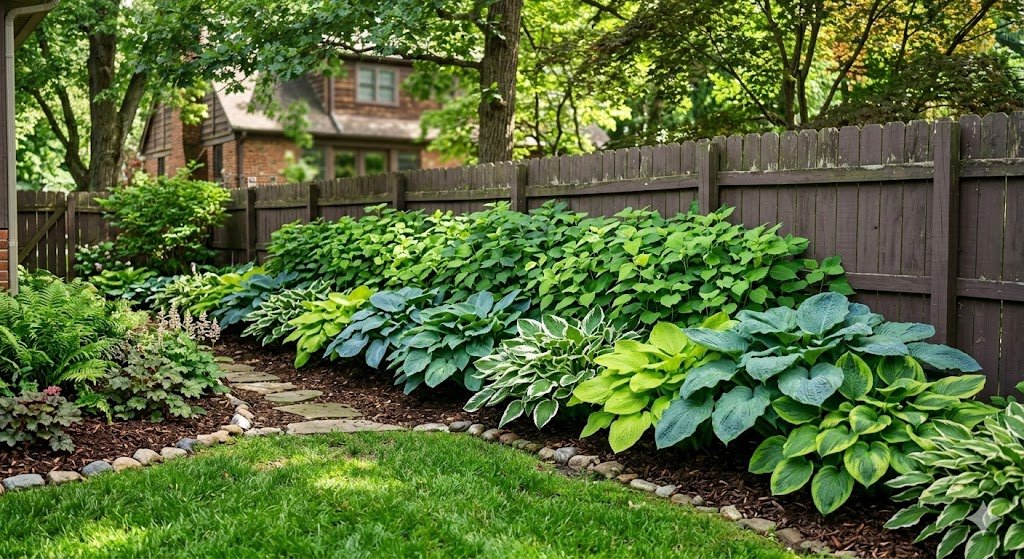
If you have a neighbor with a messy woodpile or an ugly chain-link fence, you don’t always need a row of expensive arborvitae. I’ve found that using giant hosta varieties like ‘Empress Wu’ or ‘Blue Angel’ is a total game-changer for creating a soft, living wall. These things can grow four feet tall and six feet wide. It’s like having a giant green umbrella growing out of the ground.
I usually stagger these “monster” hostas in a zigzag pattern along the fence line. Don’t plant them in a straight, boring row; it looks too corporate. When you stagger them, the massive leaves overlap and create a solid curtain of texture. I once used this trick to hide my neighbor’s “project truck” that hadn’t moved since the late nineties. It worked like a charm, and it was a lot cheaper than building a new fence.
One thing to remember: these big guys need a lot of water. Because they have so much leaf surface area, they “sweat” out moisture fast. If you don’t give them a deep soak once a week during a dry spell, the edges of the leaves will turn brown and crispy. I’ve found that a soaker hose buried under the mulch is the best way to keep them happy without standing out there with a sprayer for an hour.
Soil prep is the secret sauce here. If you just jam an ‘Empress Wu’ into hard-packed clay, it’s going to sit there and pout for three years. I dig a hole twice as big as the root ball and fill it with a mix of compost and aged manure. You want that soil to be “fluffy.” When the soil is rich and loose, those giant leaves will double in size by the second year.
2. Using Miniature Hostas for Fairy Gardens and Rock Borders

On the opposite end of the spectrum, we have the “miniatures.” These are the tiny, adorable clumps like ‘Blue Mouse Ears’ or ‘Pandora’s Box.’ I’ve found that putting these in a large garden bed is a total waste of money because they just get lost among the big plants. They’re like the “where’s Waldo” of the garden—you’ll never find them once the weeds start popping up.
The best way to use mini hostas is in “close-up” areas. Think stone troughs, fairy gardens, or right at the very edge of a flagstone path. I have a collection of them tucked into the nooks and crannies of an old rock wall. Because they stay small (usually under six inches), you can really appreciate the tiny details in their variegation.
I once made the mistake of planting ‘Blue Mouse Ears’ next to a ‘Sum and Substance.’ It was a disaster. The giant hosta basically sat on the tiny one, and I didn’t see the mini again until I did my fall cleanup. Keep your minis grouped together in their own “neighborhood.” It creates a focal point that makes people want to lean in and take a closer look.
Since they have small root systems, these little guys dry out much faster than their giant cousins. If you have them in a stone planter, you might need to water them every other day. I like to top-dress the soil with a bit of fine pea gravel. It keeps the dirt from splashing onto the tiny leaves when it rains and keeps the moisture from evaporating too fast.
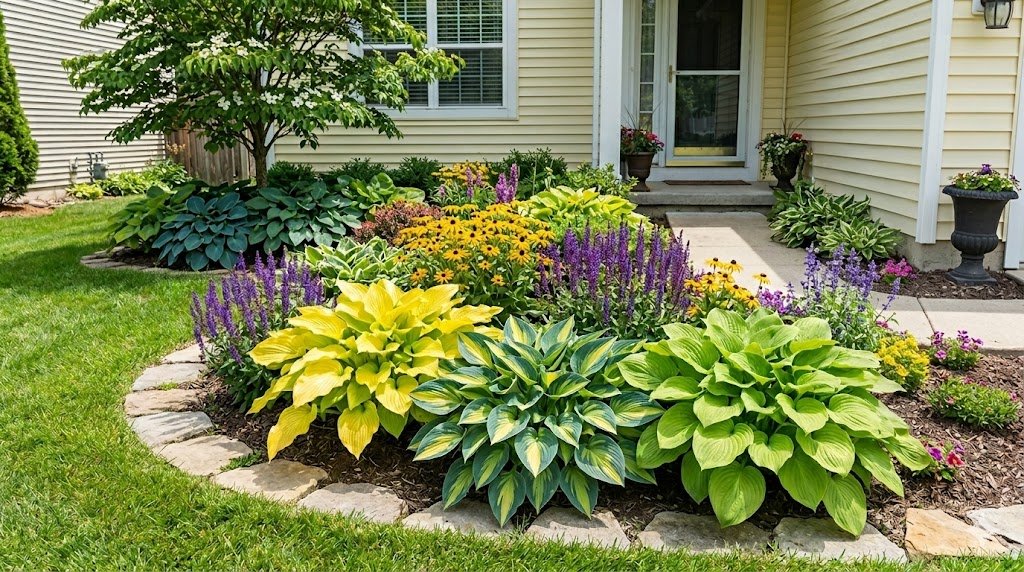
3. Mixing Hosta Leaf Textures for Visual Interest
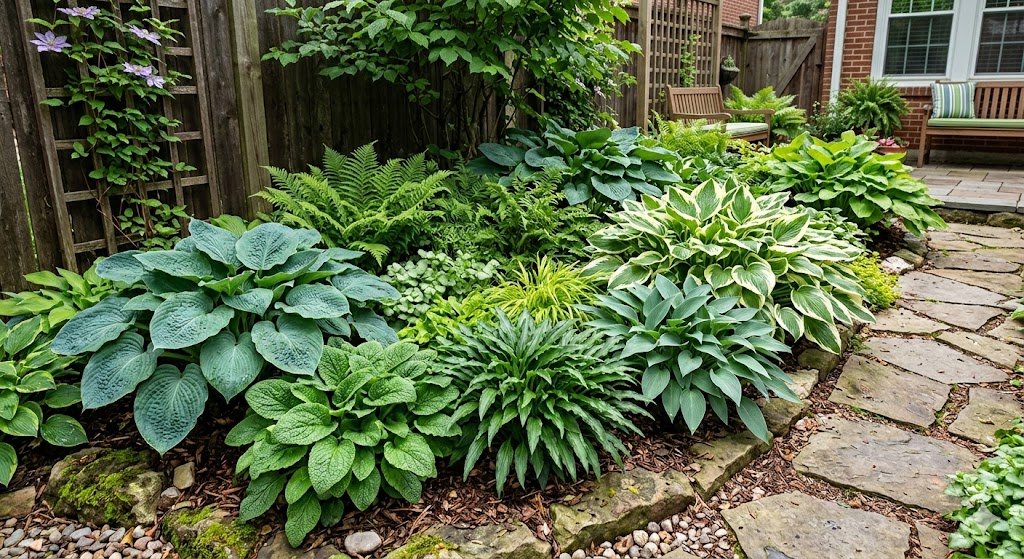
Most people just think about the color of the leaves, but the texture is what makes a shade garden look professional. I love mixing “puckered” leaves with smooth, glossy ones. Varieties like ‘Abiqua Drinking Gourd’ have these deep, cupped leaves that hold rainwater like little bowls. When you plant those next to something with long, sleek leaves like ‘Krossa Regal,’ the contrast is incredible.
I’ve found that “blue” hostas generally have a thicker, waxy coating on the leaves. This is what gives them that dusty blue color, and it’s also what makes them a bit more slug-resistant. I like to use these thick-leaved varieties as the “backbone” of my beds. Then, I tuck in the thinner-leaved, variegated types like ‘June’ or ‘First Frost’ to add some “sparkle.”
One “pro” tip: pay attention to the finish of the leaf. Some hostas are matte, while others are incredibly shiny—almost like they’ve been waxed. ‘Invincible’ is one of my favorites because it has a high-gloss finish that reflects the light in dark corners. If your shade garden feels “heavy” or “gloomy,” adding a few shiny-leaved varieties will help bounce whatever light is available.
I remember the summer my zucchini took over the entire ZIP code; I had them growing right next to my hostas. The contrast between the prickly, rough zucchini leaves and the smooth, elegant hosta leaves was actually pretty cool, even if the zucchini eventually tried to strangle the house. The point is, don’t be afraid to experiment with different leaf “feels.”
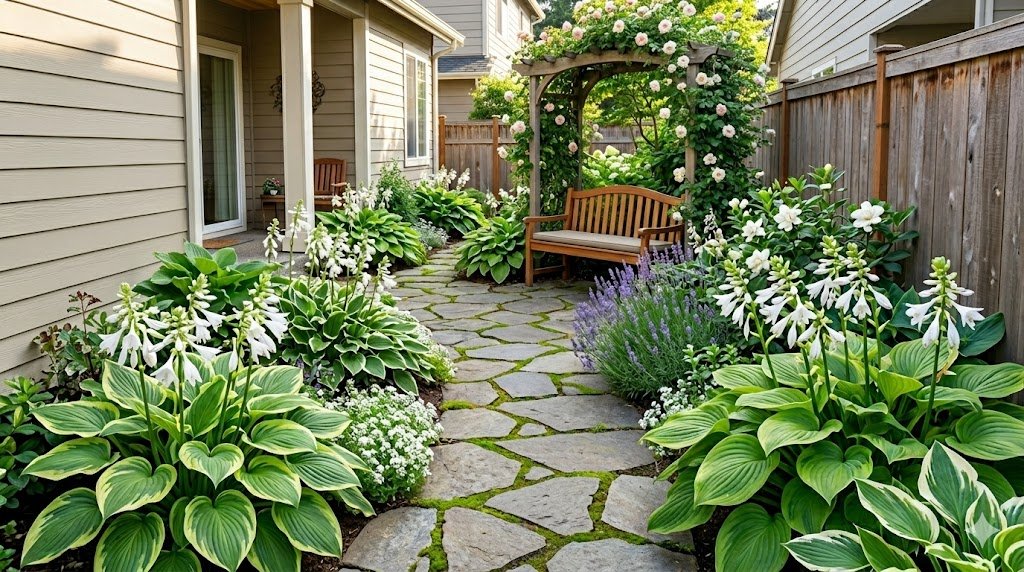
4. Edging a Walkway with “First Frost” Hostas
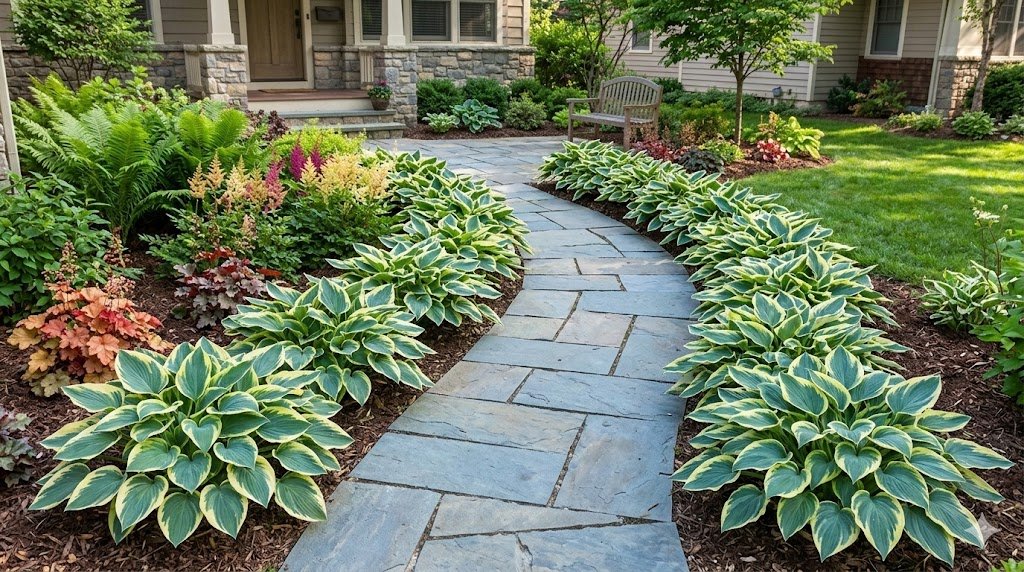
If you have a shaded path leading to your front door, you need an edge that stays tidy and bright. I’ve found that ‘First Frost’ is arguably the best hosta for this job. It has a blue center with a creamy yellow border that turns white as the summer goes on. It’s consistent, it’s hardy, and it doesn’t get “floppy” like some of the older varieties.
When you’re edging a path, spacing is everything. I see people plant them too close together all the time because they want that “instant” look. Two years later, the hostas are hanging six inches over the sidewalk, tripping the mailman and getting crushed by feet. I space mine at least 18 to 24 inches apart. It looks a little sparse at first, but by year three, they’ll be touching perfectly without invading the walkway.
I’m very opinionated about “mulch” near walkways. Don’t use that bright red dyed stuff; it looks like a crime scene and the color bleeds onto your hosta leaves. Use a dark brown shredded hardwood mulch. It makes the yellow and white edges of the hostas pop, and it stays in place better when you’re out there with a leaf blower.
Another quick side note: if your walkway gets a little bit of morning sun, ‘First Frost’ will actually keep its color better. In deep, dark shade, the yellow border can sometimes fade to a muddy green. A couple of hours of light is like a “filter” that keeps the colors sharp and vibrant.
5. Planting Hostas Under Large Trees the Right Way
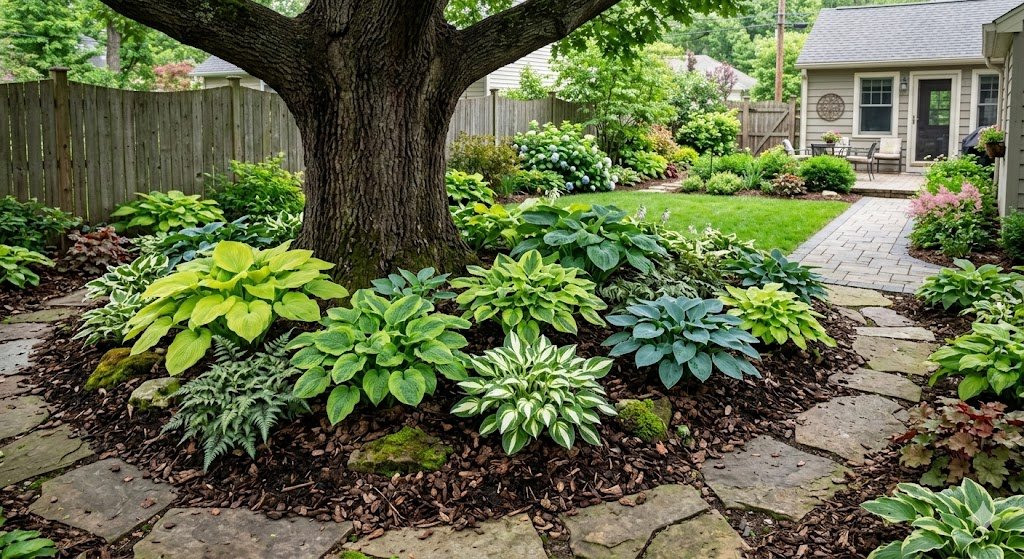
This is where most people fail. They dig a hole right next to the trunk of a giant Maple or Oak, hit a bunch of roots, and wonder why the hosta looks like it’s starving for the next five years. You have to realize that you are competing with a giant living pump that is sucking up every drop of water and every bit of nitrogen in the area.
I’ve found that “pocket planting” is the only way to make this work. Instead of trying to till up a whole area (which will kill the tree), I dig small, individual holes between the major tree roots. I use a sharp trowel and a lot of patience. If you hit a root thicker than your thumb, move over six inches. Don’t hack through the tree’s main support system for a $15 plant.
To give the hostas a head start, I often plant them in “bottomless” pots. I take a plastic nursery pot, cut the bottom off, sink it into the ground, and plant the hosta inside. This keeps the tree’s fine “feeder” roots from invading the hosta’s space for the first year or two. Eventually, the hosta will get established enough to hold its own, but that little plastic barrier is a life-saver in the beginning.
Watering is non-negotiable here. The tree canopy acts like a giant umbrella, so even when it rains, the ground under the tree stays bone-dry. I’ve found that if I don’t supplement the water, the hostas under my oaks will literally shrivel up by July. I keep a dedicated watering can nearby just for the “tree hostas.”
6. Using “Sun-Tolerant” Hostas for Brighter Spots
There is a huge myth that all hostas hate the sun. If you have a spot that gets four to six hours of sun, you can still have a hosta garden—you just have to pick the right ones. Varieties with “fragrant” flowers, like ‘Guacamole’ or ‘Stained Glass,’ actually need some sun to bloom well and keep their bright chartreuse colors.
I’ve found that ‘Sun Power’ is the king of the sunny hosta world. It has these long, wavy, gold leaves that actually get brighter the more sun they get. If you put ‘Sun Power’ in the shade, it turns a boring lime green. In the sun, it looks like it’s glowing from the inside out. I have one planted near my mailbox, and it handles the afternoon heat like a champ.
The catch? You have to keep the soil consistently moist. Sun-tolerant doesn’t mean “drought-tolerant.” If the soil dries out, the sun will scorch those beautiful gold leaves, and they’ll end up with big, ugly brown holes. I mulch heavily—at least three inches—to keep the roots cool while the leaves soak up the rays.
Real talk: even the best sun-tolerant hostas will struggle in the “blistering” 3:00 PM sun if you live in the South. If you’re in a hot climate, try to give them morning sun and afternoon shade. If you’re in the North, you can get away with a lot more. I once saw a guy in Minnesota growing ‘Guacamole’ in full, all-day sun, and they looked incredible. I tried that here in the Midwest, and they looked like they’d been through a toaster oven by July.
7. Mass Planting for a “Low-Maintenance” Groundcover
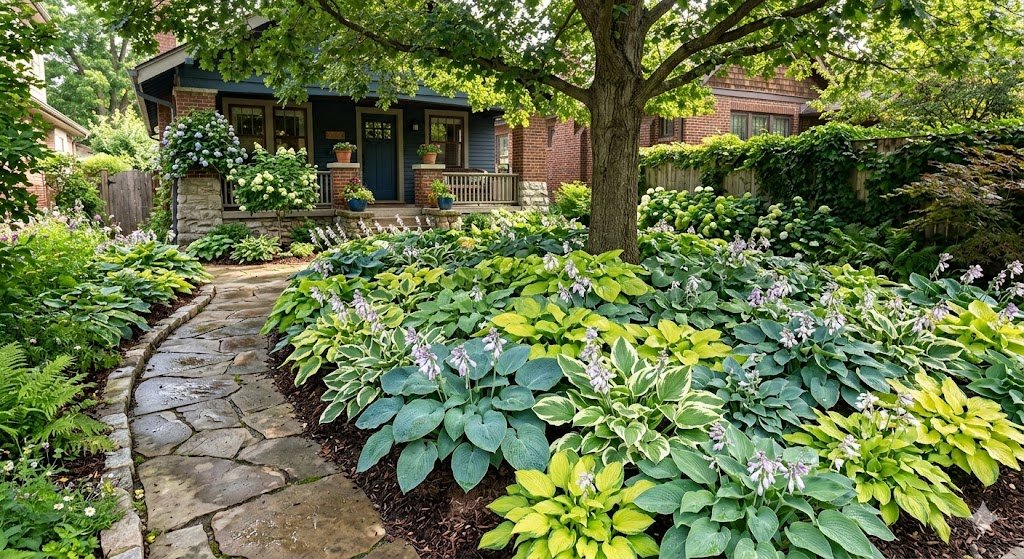
If you have a large, shady slope where grass refuses to grow, stop fighting it. Plant a mass of a single variety of hosta. I love using ‘Royal Standard’ or ‘Honeybells’ for this. They grow fast, they’re tough, and when they all bloom at once in the late summer, the scent is amazing. It looks a lot more intentional than a hodgepodge of twenty different varieties.
I’ve found that mass planting is the only time I ever “ignore” my hostas. Once they fill in and their leaves touch, they create their own mulch. The shade from their leaves keeps weeds from germinating. I spend maybe ten minutes a year weeding my mass-planted slope. It’s the closest thing to a “lazy gardener’s” dream.
Spacing for a mass planting is a little tighter than usual. I want them to touch within the first two seasons. If I’m using a medium-sized hosta, I’ll plant them on 15-inch centers. It feels like a lot of digging at first, but once they “knit” together, your work is basically done forever.
A quick side note: don’t do this with “expensive” collector hostas. Use the old-school, reliable varieties that you can find at any garden center for a few bucks. You want something that “creeps” and fills in. ‘H. clausa’ is a great one for this because it actually spreads via underground runners, making it a true groundcover.
8. Container Gardening with Hostas for Decks and Porches
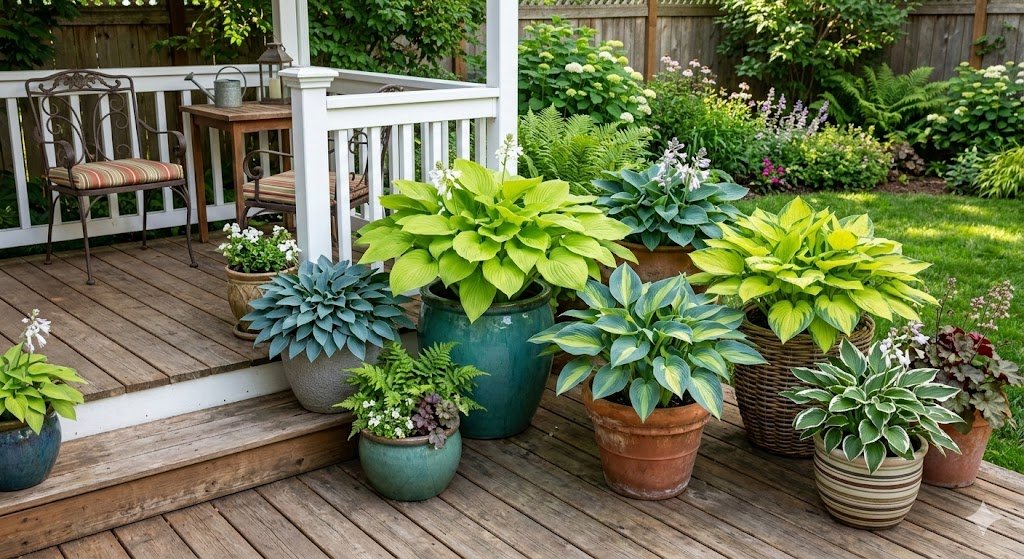
If you have a shaded deck or a north-facing porch, hostas are the ultimate container plant. They are much hardier than petunias or begonias, and they don’t care if you forget to water them for a day or two. I love using hostas in big, glazed ceramic pots. The contrast between a shiny blue pot and a chartreuse hosta like ‘September Sun’ is a total showstopper.
I’ve found that “overwintering” hostas in pots is the tricky part. If you just leave the pot on the deck all winter, the freeze-thaw cycle will turn the roots into mush. I’ve lost more than one expensive pot (and plant) by being lazy in November. You either have to bury the pot in the ground for the winter or move it into an unheated garage.
When you plant in a container, make sure you use high-quality potting soil, not “garden soil.” Garden soil is too heavy and will compact into a brick, suffocating the hosta’s roots. I like to mix in a bit of perlite for extra drainage. Hostas like moisture, but they don’t like to sit in a swamp. If the pot doesn’t have a big drainage hole at the bottom, don’t use it.
You can also do “mixed” containers. I love putting a hosta in the center and surrounding it with silver ‘Lamium’ or ‘Creeping Jenny.’ The hosta provides the height and structure, and the other plants spill over the sides. It makes your porch look like it was styled by a professional designer, even if you just threw it together in ten minutes.
9. Creating a “White Garden” for Nighttime Appeal

If you enjoy sitting outside in the evening, you need hostas with a lot of white variegation. Varieties like ‘Patriot’ or ‘Fire and Ice’ have crisp white borders that literally glow in the dark. In a “moonlight garden,” these white edges catch the light and make the shade bed look vibrant even when the sun goes down.
I’ve found that “all-white” hostas (like the ones that come up white in the spring) are a total waste of money. They don’t have enough chlorophyll to survive, so they usually turn green or just shrivel up and die by June. Stick with varieties that have green centers and wide white borders. You get the glowing effect without the heartbreak of a dying plant.
I like to pair these white-variegated hostas with white impatiens or white caladiums. It creates a very clean, “estate” look. I once did an entire bed of ‘Patriot’ hostas around a white birdbath, and it was the most complimented part of my yard. It looks expensive, but ‘Patriot’ is actually one of the cheapest and easiest hostas to find.
One “Real Talk” tip: white leaf margins are the most sensitive to “melting out.” This is when the white parts turn brown and translucent because of heat or too much sun. If you want that crisp white look to last all summer, these hostas must stay in the shade. Even a little bit of afternoon sun will “cook” the white edges.
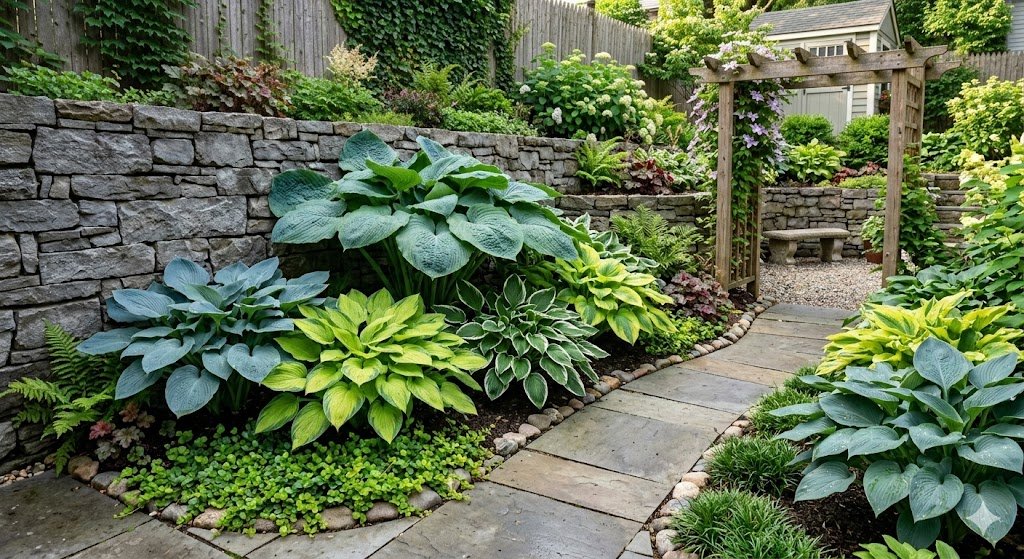
10. Using Hostas to Soften “Hard” Landscapes

If you have a concrete retaining wall or a brick foundation that looks a bit “harsh,” hostas are the perfect “softener.” Their round, flowing shapes break up the hard lines of the house. I especially like using varieties with “cascading” habits for this. ‘Niagara Falls’ is an incredible hosta that grows large and has leaves that drape downward like water over a cliff.
I’ve found that planting hostas right against the foundation of a house can be tricky because of the “rain shadow.” The eaves of your roof block the rain from hitting the first 12 inches of soil next to the wall. I see so many people plant hostas there and wonder why they’re dying while the rest of the garden is thriving. You have to be diligent about watering the “foundation hostas.”
Spacing them away from the wall is also important. If you plant them too close, the leaves will constantly rub against the brick or siding, which can lead to fungal issues and tattered foliage. I leave at least a foot of space between the center of the plant and the wall. It allows for airflow and keeps the plant looking “full” all the way around.
I once tried to hide a load-bearing stud I’d accidentally knocked out during a “quick” porch repair (don’t ask) by piling up some hostas in front of it. While they didn’t fix the structural integrity of the house, they did a great job of making the mess look “intentional” until I could get a pro out to fix my mistake. Never underestimate the power of a big leaf to hide a DIY disaster.
11. Creating a “Hosta Island” in the Middle of the Lawn
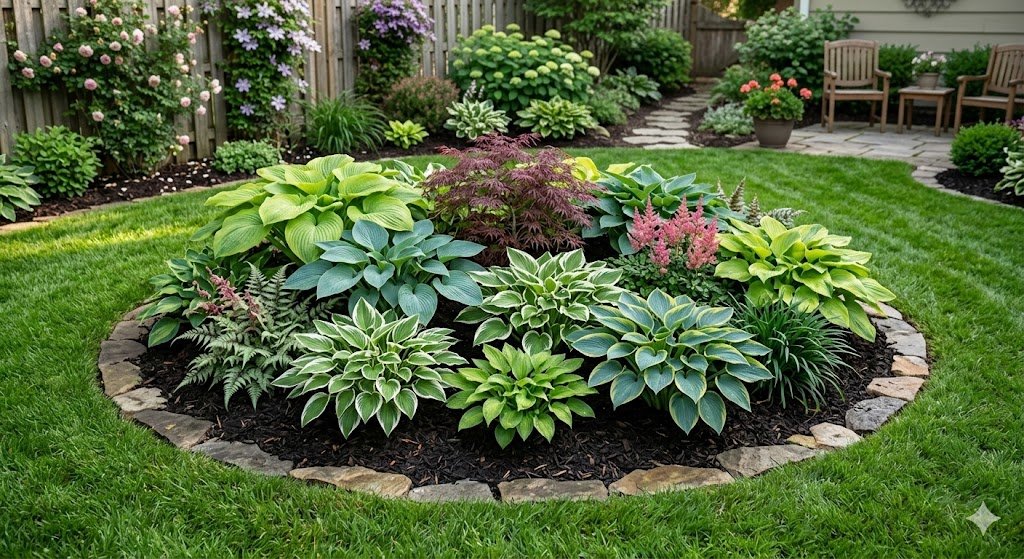
If you have a large, boring expanse of grass under a shade tree, don’t just leave it as mulch. Create a “hosta island.” I start with one giant “anchor” plant in the center—something like ‘Victory’—and then surround it with smaller and smaller varieties as I move toward the edge. It creates a tiered, 360-degree look that is visually stunning.
I’ve found that “curved” islands look much better than circles or squares. Use a garden hose to lay out a “kidney” shape on the grass before you start digging. It looks more natural and flows with the landscape. I once made a perfectly square hosta bed, and it looked like a green grave in the middle of the yard. Never again.
One side note: “edging” the island is the most important part. If you don’t create a sharp “V” trench between the grass and the mulch, the grass will invade your hostas within six months. I spend more time edging my islands than I do actually planting them. A clean, crisp edge is what separates a “garden” from a “patch of weeds.”
Don’t forget to add some height with a focal point. A large boulder, a piece of driftwood, or a simple stone lantern in the middle of your hosta island adds a sense of “history” to the bed. It makes it look like the hostas grew up around something that was already there.
12. Using Blue Hostas for a “Cool” Mediterranean Vibe
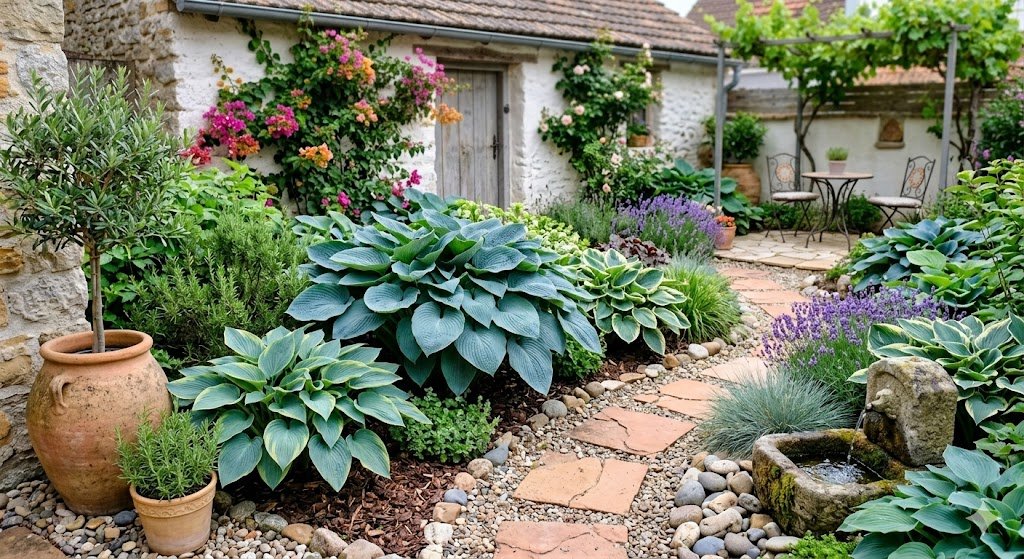
Blue hostas, like ‘Halcyon’ or ‘Blue Mammoth,’ bring a cooling effect to the garden. In the middle of a hot, humid July, a bed of blue hostas looks like a refreshing pool of water. I love pairing these blue tones with purple-leafed plants like ‘Heuchera’ (Coral Bells) or dark ‘Japanese Forest Grass.’
I’ve found that the “blue” is actually a powdery coating called “bloom.” If you touch the leaves or spray them with a high-pressure hose, you will rub the blue off and the plant will turn green. I’m very careful when I’m weeding around my blue hostas—I try not to brush against them too much. Once the blue is gone, it doesn’t come back until the following year.
These blue varieties are generally the slowest growers. While a green hosta might reach full size in three years, a blue one might take five or six. Be patient. Don’t keep moving them around because you think they aren’t “doing anything.” Every time you move a hosta, you reset its “growth clock” by a year.
Real talk: the “blue” color is a built-in sunscreen. However, if they get too much sun, the wax will melt and the plant will turn a muddy green. To keep that deep, steely blue color, you need to keep them in at least 70% shade. My ‘Halcyon’ hostas are on the north side of the garage where they never see a direct sunbeam, and they are the bluest plants I’ve ever seen.
13. Scented Hostas for a “Fragrance Garden”
Most people don’t realize that some hostas have flowers that smell better than lilies. Varieties derived from Hosta plantaginea, like ‘Royal Standard’ or ‘Aphrodite,’ have large white trumpet flowers that fill the air with a sweet, jasmine-like scent in August. Most hostas have “blah” flowers, but these are worth growing just for the smell.
I’ve found that most people cut off the flower stalks (scapes) of hostas because they think they look “messy.” For 90% of hostas, I agree—the flowers aren’t that great. But for the fragrant varieties, leave them alone! I plant these near my back porch or under a bedroom window so I can catch the scent on a warm summer evening.
These fragrant varieties are usually the most “sun-tolerant” because their parent species came from warmer climates in China. They actually need heat and a bit of sun to produce those big, scented flowers. If you put a fragrant hosta in deep, cold shade, it might never bloom.
One quick tip: if you want the flowers to be extra impressive, give the plant a little boost of phosphorus-rich fertilizer in July. It’s the middle number on the bag (like 10-20-10). It encourages “bloom” rather than just “leaf.” Most people don’t fertilize hostas at all, but for the fragrant ones, it makes a world of difference.
Real Talk: What’s Not Worth the Effort
I love hostas, but I’m not going to lie to you—they have some major “drama.” First on my “Not Worth It” list: trying to fight slugs with eggshells. I see this advice everywhere online. “Crush up eggshells and put them around your hostas; the slugs won’t cross the sharp edges!” Total waste of time. I’ve seen slugs crawl over a razor blade without flinching. If you have a slug problem, buy the “Sluggo” pellets. They’re safe for pets and birds, and they actually work. Don’t waste your morning eggs.
Second: “Deer sprays” that smell like rotten eggs. Yes, they work for about three days. Then it rains, the smell goes away, and the deer come back for a midnight snack. Unless you are willing to go out there and spray every single week and after every rainstorm, don’t bother. If you have a high deer population, your only real options are a fence or choosing the “thick-leaved” hostas that they find slightly less delicious.
Third: Buying “rare” hostas from shady online sellers. I once spent $50 on a “Red-Leafed Hosta” I saw in a Facebook ad. When it finally arrived, it was a tiny, sickly green plant that never turned red. There is no such thing as a truly red-leafed hosta (yet). Stick to reputable nurseries where you can see the plant in person. If a deal looks too good to be true, it’s probably a scam.
Lastly, don’t over-complicate the “division” process. People get terrified about digging them up and splitting them. “Am I going to kill it?” Hostas are like the zombies of the plant world—you can’t kill them. I’ve seen a hosta root ball sit on top of the ground all winter and still sprout in the spring. If it’s too big, jam a shovel through the middle of it and move half. It’s that simple.
Wrapping Up
Building a hosta garden is one of the most rewarding things you can do for a shady yard. They’re forgiving, they’re beautiful, and they come back year after year like old friends. Once you get past the “Swiss cheese” leaves and the “sun-scorched” mistakes, you’ll realize why they’re the most popular perennial in the world.
Which hosta variety are you currently struggling with—or which one is the “star” of your shade garden? Drop a comment below and let’s troubleshoot your hosta headaches together!