

It’s late on December 23rd, the roll of wrapping paper is down to a cardboard tube and a few torn scraps, and the stores are either closed or picked over. This happens every year, and it points to a real weakness in how most people handle wrapping: they treat it as a purchase instead of a design decision. A roll of kraft paper, a ball of twine, and a handful of things already in the house can produce wrapping that looks more deliberate than most printed paper does.
The ideas below range from five-minute wraps to afternoon projects. Many are inexpensive, a lot of them use materials headed for the recycling bin anyway, and several lean toward a vintage look. Each one explains what it takes and where it tends to go wrong.
Start With the Right Paper and the Right Tape
Most wrapping failures trace back to two choices: paper that’s too thin and tape that shows.
Lightweight kraft paper is the most forgiving base. It folds into crisp corners, takes ink and paint well, and suits almost any style from rustic to vintage. Thin tissue paper tears at box corners. Heavy cardstock fights you on creases. A roll of plain brown kraft covers the majority of ideas below, and it’s usually sold in craft, shipping, and hardware aisles.
For tape, double-sided is worth having. Applied along the inside of the overlap seam, it makes a wrapped box look like it was sealed by magic. Washi tape works as decoration, but it’s weaker structurally, so it shouldn’t hold a seam that carries weight.
A sizing rule of thumb: Wrap the paper around the box the short way and leave about 2 inches of overlap. At each end, the paper should extend past the box by at least half the height of the box’s end, plus about an inch. Cutting too tight is the most common reason ends look wrinkled and patched.
Other supplies that earn their space: a glue stick, a hole punch, scissors you’re willing to dull on twine, a white paint pen, and a few stamp pads or craft paint.
Five Ideas That Start With Plain Kraft Paper
1. Classic kraft with twine and an evergreen sprig

Wrap the box in plain kraft, tie jute or cotton twine around it twice in one direction and once across, then tuck a short sprig of fir, pine, or cedar under the knot. The look works because of restraint. Cut sprigs a day ahead and keep them in water or in a cool spot, since evergreens shed needles quickly once they dry and an indoor gift pile is warm. If the gift will sit for more than a few days, skip the fresh greenery or use a sprig of faux greenery instead.
2. Potato-stamped trees and dots
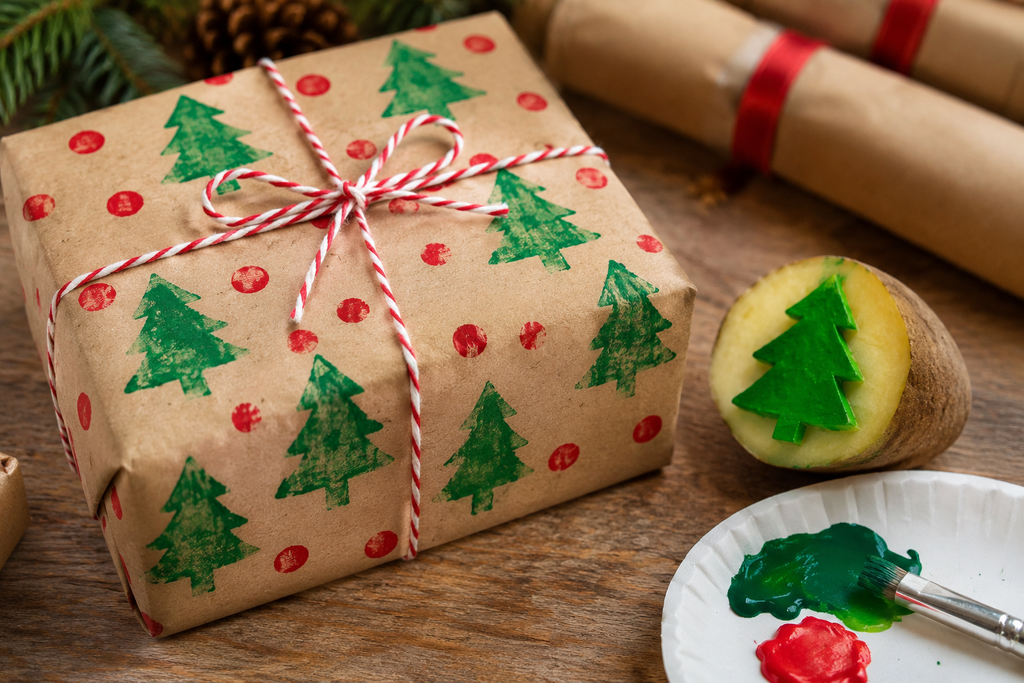
A potato cut in half gives a flat, damp surface that holds paint well. Dry the cut face with a paper towel, trace a simple shape on it with a marker (a triangle for a tree, a plain circle for a dot), carve away the surrounding area about a quarter inch deep with a small knife, and press into craft paint on a paper plate. This is a knife job, so it’s an adult task, and kids can do the stamping afterward.
Practice on scrap paper first, because the first print is almost always too wet. Blot excess paint from the stamp, and press straight down without rocking. White or cream paint reads best on kraft. Let the paper dry flat for at least an hour before wrapping, or the print can smear on the box edges.
3. Paint-pen or washi-tape plaid

Plaid is easier than it looks. Mark light pencil guides every 2 inches, then draw wide stripes in one direction with a white or red paint pen, and thinner stripes crossing them. Washi tape does the same job with less skill needed: lay down vertical strips first, then horizontal ones. Slight irregularities look charming, so don’t chase perfect lines. Paint-pen ink can take several minutes to dry on kraft, so don’t wrap until it feels completely dry to the touch.
4. Torn white paper “snowdrifts”

Tear wavy strips from plain white copy paper or a thin sketch paper, tear rather than cut so the edges feel soft, and glue them in layers across the bottom third of a kraft-wrapped box. Add a few small dots of white paint above them for snow. The torn fibers give the effect depth that a scissor cut can’t. A glue stick is neater than liquid glue here, which wrinkles thin paper.
5. A message instead of a pattern

Using a black or white marker, write a repeated word, the recipient’s name, or short greetings across the whole sheet in loose handwriting. It reads like designed paper from a distance and personal up close. Write the lettering before wrapping, since marker on a finished box smears at the folds. Original handwritten phrases are fine, but avoid copying song lyrics or poem lines, which are usually copyrighted.
Five Ideas Using Paper You Probably Already Have
6. Newspaper and comics with red twine

Newspaper is thin, so it works best on smaller boxes and soft gifts. Wrap in two layers if the print shows through a pale gift. Red baker’s twine makes the gray print look intentional. The Sunday comics are the lively option, and the financial pages give a cooler, more graphic look.
The ink matters in one case: don’t wrap food directly in newspaper. Line the gift with parchment paper or put it in a bag first.
7. Old book pages and sheet music

Pages from a damaged thrift-store paperback, an old hymnal, or a worn-out songbook make a convincing vintage wrap. Overlap several pages like shingles on a box and tape them on the underside, instead of trying to cut a single large sheet. Book pages are thin and brittle with age, so use double-sided tape sparingly to avoid tearing.
One caution: don’t cut up a book with real value to anyone. A quick look at a thrift-store paperback is usually enough to tell the difference between a ten-cent filler and something worth keeping.
8. Old maps and atlas pages

Maps are sturdier than book paper, and the coloring suits a travel-related gift or anything for a person who has moved around. Road atlases lose their usefulness fast, and an outdated one is a cheap source of large, strong pages. Use a solid color of twine or ribbon, because a patterned map plus a patterned ribbon gets visually noisy.
9. Grocery bags turned into gift bags
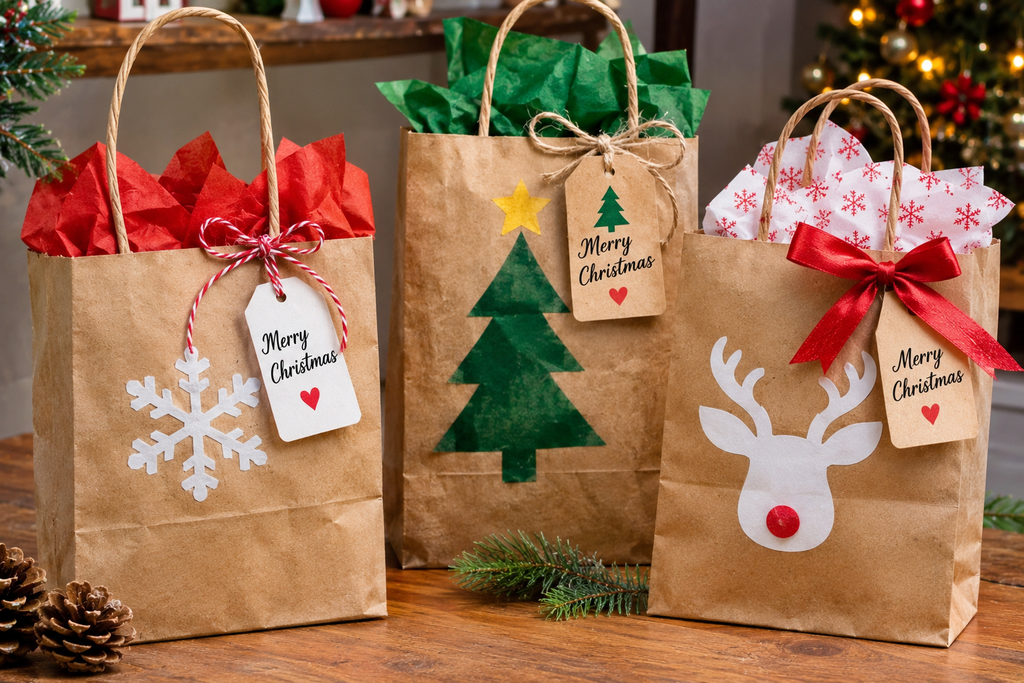
Cut a brown paper grocery bag down the side seam and open it flat. The inside is plain kraft, the outside may carry a printed logo, so wrap with the clean side out. For a gift bag instead, fold the top edge over twice, punch two holes, and thread twine through as a handle. A small stamped tree turns a utility bag into something that looks planned.
10. Kids’ drawings and calendar pages
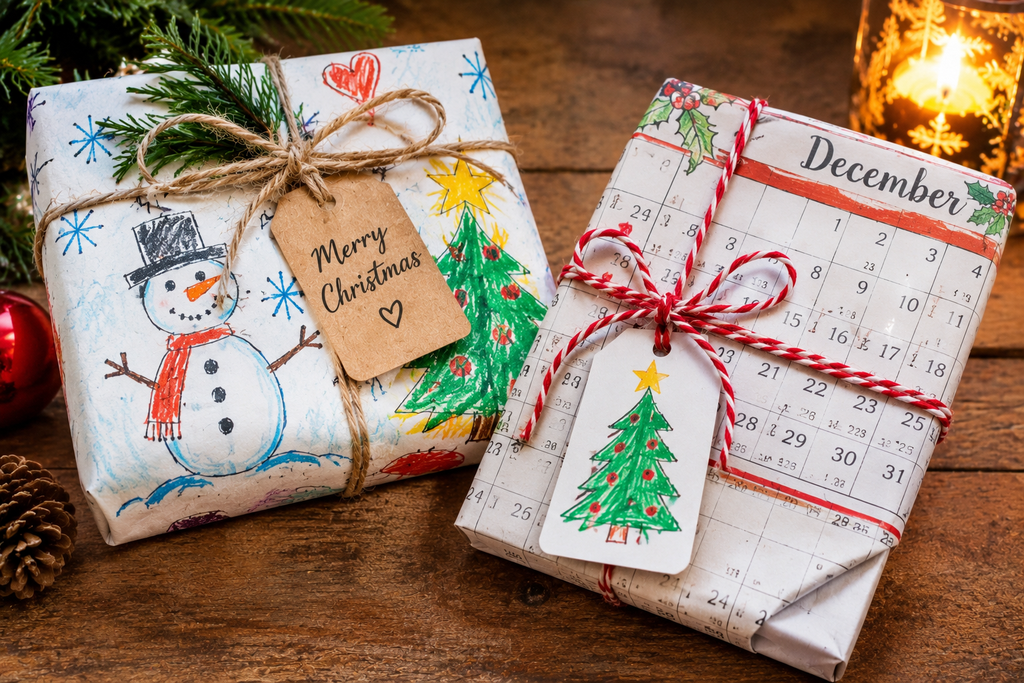
Children’s drawings make good wrapping for grandparents, and last year’s wall calendar has twelve large, glossy images that are often attractive enough to reuse. Glossy paper holds a crease less well, so score folds with the edge of a ruler first. Both kinds of paper tend to be a little stiff, so they work better on boxes than on odd shapes.
Four Fabric Wraps That Replace the Paper Entirely
11. Furoshiki, the Japanese cloth-wrapping method
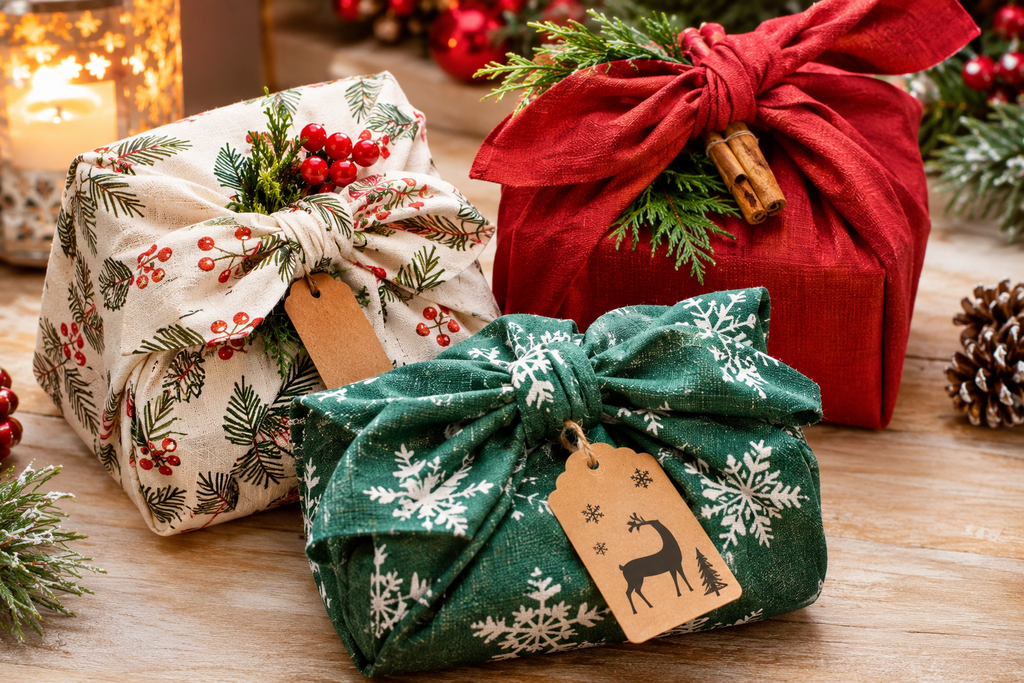
Furoshiki uses a square of fabric knotted around the gift, with no tape at all. A medium box generally needs a square roughly 24 to 36 inches on each side, a lot bigger than most people expect, because the cloth has to travel around the box and still leave enough to tie. Place the gift diagonally in the center, fold two opposite corners over it, and tie them in a simple knot. Cotton and lightweight linen hold the knot best. Slippery satin tends to unravel. The recipient can reuse the cloth, which is the whole point.
12. A tea towel or scarf as the wrapping
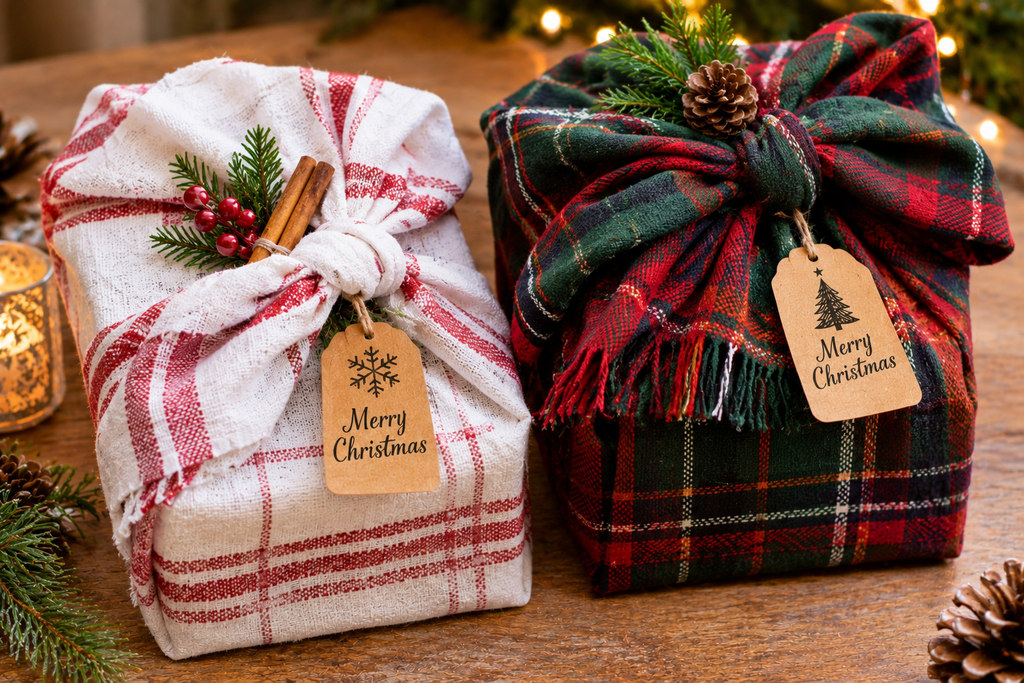
A gift hidden inside a gift. A set of wooden spoons wrapped in a dish towel, a book wrapped in a scarf, or a candle in a cloth napkin all work, and the wrapping carries real value. Fasten it with a ribbon or twine, and avoid pins that could scratch or stay behind in the fabric.
13. Flannel and felt for bottles and soft gifts
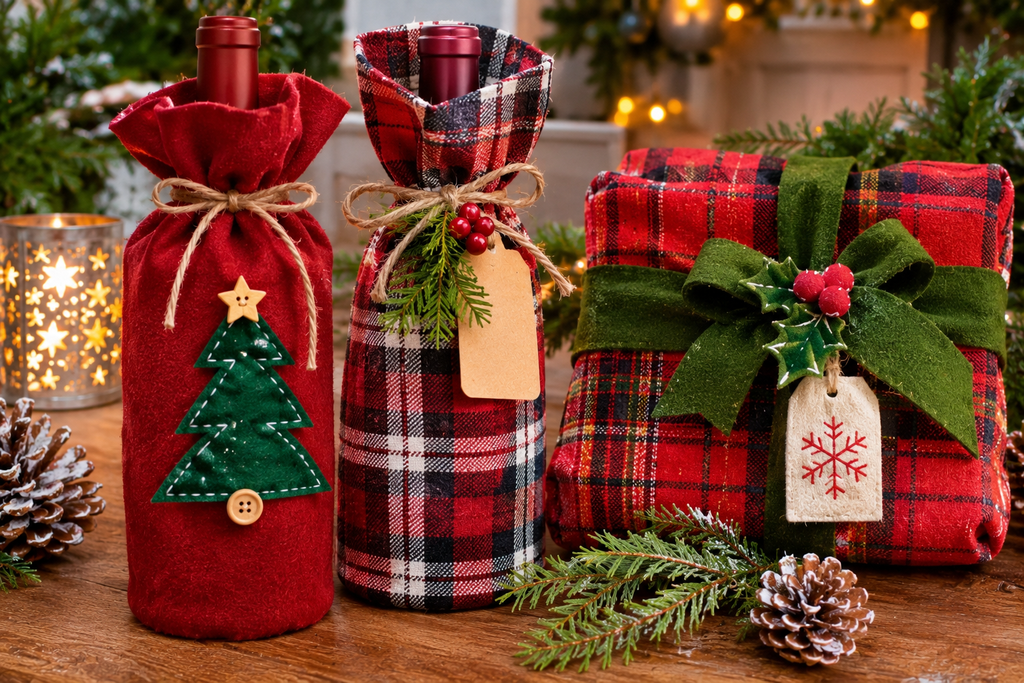
A wine bottle or a jar of preserves wraps more neatly in fabric than in paper, because a cylinder defeats flat sheets. Cut a felt rectangle tall enough to cover the bottle with a little extra at the top, wrap it around, stitch or glue the seam, and tie twine around the neck. Old flannel shirts supply plaid fabric for almost nothing. Pinking shears keep cut edges from fraying.
14. A vintage handkerchief or lace doily
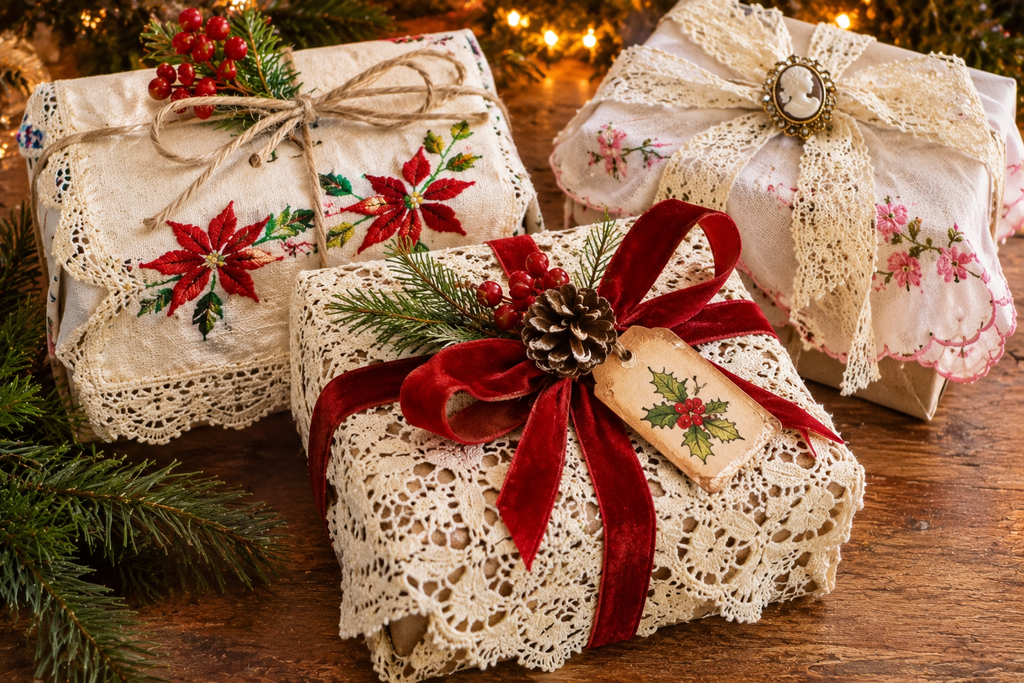
Embroidered handkerchiefs and crocheted doilies turn up in secondhand shops and in family drawers. Folded over a small gift such as jewelry, soap, or a candle, they work as a wrap that doubles as part of the present. A doily placed under a jar lid and tied with ribbon gives preserves a Victorian look in about ten seconds. Wash old linens gently before using them, since stored fabric can carry odor or dust.
Toppers and Tags That Carry the Look
15. Old Christmas cards cut into tags

Last year’s cards are some of the nicest gift tag material available. Cut out the front image with a scalloped or plain edge, punch a hole, and write the recipient’s name on the back. The punched-out cardstock is usually sturdier than store-bought tags. Choose cards with simple illustrations, which still read clearly at a small size. Cards with glitter shed everywhere, so pass on those.
16. Dried orange slices and cinnamon sticks

Slice an orange about a quarter inch thick, pat the slices dry, and bake them on a rack in a low oven, roughly 200°F, flipping them partway through. Drying usually takes somewhere between two and four hours depending on slice thickness and the juiciness of the fruit, so check often. Slices that still feel damp in the center will mold within days. Tie two or three to a gift with a cinnamon stick under the twine.
These are decorative, not meant for snacking, and an orange slice sitting under pet reach isn’t ideal. Keep them away from dogs and small children who might chew a topper.
17. Salt dough ornament tags

A common salt dough recipe is 2 cups flour, 1 cup salt, and about three-quarters of a cup of water, kneaded until smooth, rolled out to a quarter inch, and cut with cookie cutters. Poke a hole for the ribbon before baking. Bake at a low temperature, around 250°F, for a couple of hours, longer for thicker pieces, until fully hard. Let them cool completely before painting.
The salt content is the safety issue: these ornaments are toxic to dogs if eaten in quantity, so keep them off low tables and under-tree spaces if a dog lives in the house. A tag that doubles as a keepsake ornament is a useful touch for relatives who save such things.
18. Cookie cutters as gift toppers
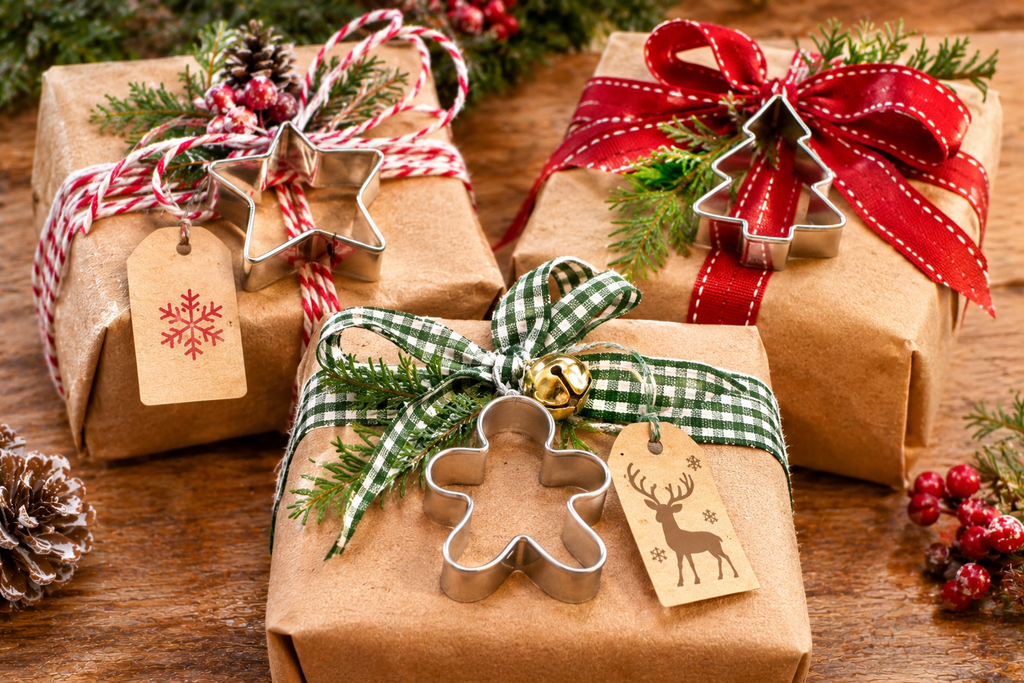
A metal cookie cutter tied to a package with ribbon does double duty as a decoration and a gift. It works especially well for anything baking-related: a jar of cookie mix, a recipe card, a rolling pin. Choose a shape that connects to the recipient, such as a star, a gingerbread person, or a tree. It adds a little weight, so use sturdy boxes underneath.
Two Ideas With a Retro Look
19. Bottle-brush trees and vintage ornaments

Tiny bottle-brush trees, often sold in packs at craft stores, can be wired or glued to the top of a box to create a small snowy forest. Vintage glass ornaments, the thin, lightweight kind found at estate sales, tie on easily with a loop of twine. Older painted decorations may carry lead-based paint, since residential lead paint wasn’t banned in the U.S. until 1978. If the gift is going to a house with a toddler, use new toppers or skip the ornament. Fragile glass shouldn’t ride on a gift that will be carried, shipped, or stacked.
20. Cardboard tube “crackers” for small gifts
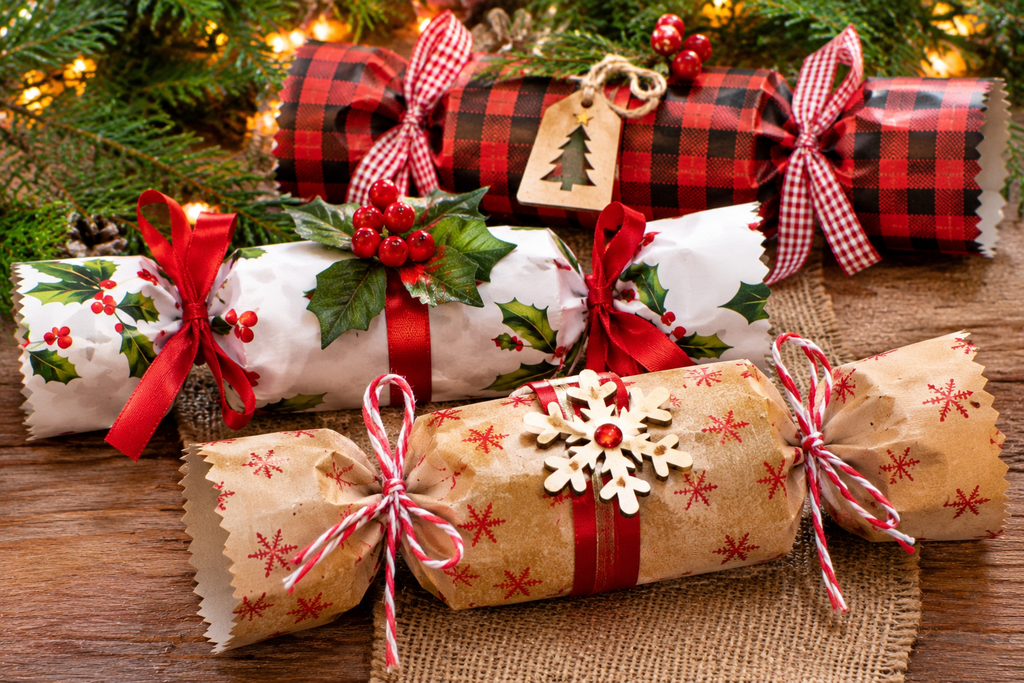
Slide a small gift into a cardboard tube from toilet paper or a paper towel roll cut in half, wrap the tube in kraft or tissue, and tie each end with string or ribbon so it looks like a Christmas cracker. These work well for jewelry, gift cards, candy, and little tools. The tube protects the contents, and tucking in a folded handwritten note adds more than a printed tag could.
Pulling Off a Vintage Look Without a Lot of Clutter
Many searches for vintage Christmas gift wrap end up with the same handful of elements, and they combine well: kraft or newsprint as the base, red-and-white striped twine, a cream or dark green ribbon, and one old-fashioned topper such as a bottle-brush tree, a handkerchief, or an old card cut into a tag.
Vintage styling usually falls apart through excess. Choose one dominant feature per package. If the paper is already printed with sheet music, the topper can be as simple as a sprig and a tag. Avoid glitter and shiny plastic ribbon, which pull the whole look toward modern.
Wrapping Awkward Shapes Without a Box
Bottles, soft sweaters, and odd-shaped gifts defeat flat paper. A few approaches work for most of them:
- Bottles: Use a felt sleeve (idea 13) or a furoshiki bottle wrap, or slide the bottle into a paper bag, fold the top, and tie it.
- Soft gifts like sweaters: Fold them into a neat rectangle and wrap in cloth, since paper wrinkles and tears around soft items.
- Large or oddly shaped gifts: Cover with a bedsheet-size piece of kraft cut from a roll, gather it above the gift like a sack, and tie it closed with a big ribbon or length of rope.
Why Homemade Wrapping Sometimes Looks Messy (and What Fixes It)
A few predictable problems account for most disappointing results.
Wrinkled kraft. Paper stored in a roll often comes out creased. Smoothing it with an iron on low heat, no steam, with a cloth between the iron and paper, usually flattens it, but test a scrap first because coatings vary.
Smeared prints. Stamping while the paper is held in the air, instead of flat on a table, leads to slips. Paint also needs time to dry before folding.
Visible tape. Double-sided tape fixes this on seams. On the ends, fold the edges into crisp triangles before taping so there’s less excess to hide.
Paper that splits at the corners. Thin or old paper tears when folded sharply. Wrap a layer of plain kraft underneath, or use fabric for that gift.
Ribbon that slides off. Slippery ribbon travels along a smooth box. A small piece of tape under the ribbon at the center holds it in place, and twine grips better than satin.
A Few Safety Notes Before You Start
- Keep gifts with paper, dried citrus, or evergreen sprigs away from candles, fireplaces, and heaters. Dry paper and evergreens ignite easily.
- Hot glue guns reach temperatures that can burn skin. Let children use cold glue or tape instead.
- Small toppers such as buttons, bells, and pinecone scales can be choking hazards for young children. Skip them on gifts for toddlers.
- Long ribbons and strings are strangulation risks for babies and pets. Keep them short on gifts for infants.
- A craft knife or potato carving knife is an adult task.
Common Questions
Is it safe to wrap food in newspaper?
Not directly. Newsprint can transfer ink, and the safety of that for food contact depends on the ink and paper, which vary. Put the food in a bag or wrap it in parchment first, then use newspaper on the outside.
Can I stamp on dark paper?
Yes, but regular craft paint can look weak. Use opaque white or metallic paint, or a paint pen, which are designed to cover darker surfaces.
Will tape and twine make the paper unrecyclable?
Local recycling programs differ, so check yours. In general, plain paper with minimal tape is easier to process than paper coated with glitter, foil, or plastic film. A common home test is to scrunch the paper in your hand: if it springs back open, it likely contains plastic or foil.
What’s the cheapest way to start if I only have one afternoon?
Plain kraft, twine, and a few paint pen dots handle nearly everything. Add one natural topper per gift and a handwritten tag, and a stack of identical-looking boxes starts looking designed.
Key Takeaways
Good DIY wrapping comes down to a few steady habits: choose a paper that folds cleanly, hide your tape, and limit each package to one main decoration. Pick two or three techniques from this list instead of trying all twenty. Kraft with stamps, a few fabric wraps, and handmade tags can cover an entire gift pile and still look unified. Test paints and ink on scraps, let everything dry before folding, and keep fire, small parts, and pets in mind when you add toppers.

About Syprose Kiche
Syprose Kiche is the creator and writer behind My Besuited Home, a practical home and garden website covering DIY projects, gardening, lawn care, landscaping, home improvement, and outdoor living. She focuses on turning everyday homeowner questions into clear, practical guides backed by careful research and useful real-world considerations.