
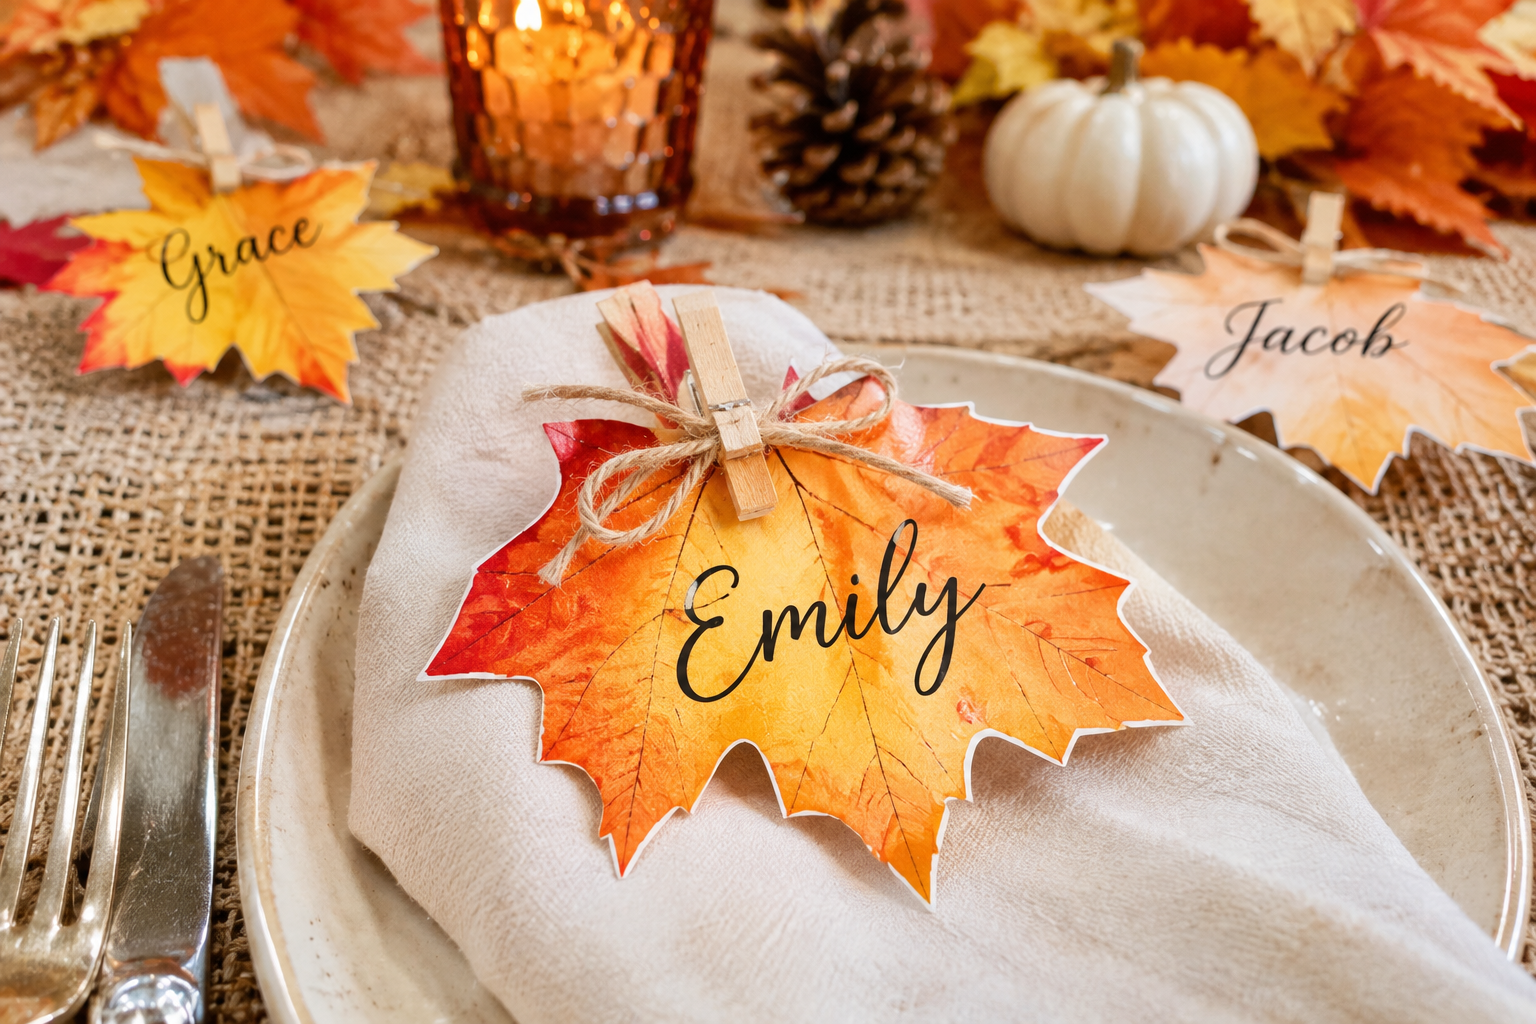
The most awkward minute of a big Thanksgiving dinner comes right before the meal. Twelve people stand behind chairs with plates in hand, nobody wants to pick the head of the table, and the host starts pointing and rearranging while the gravy cools. A small folded card at each setting settles all of it without a speech.
Place cards also do something else. They tell a guest that a seat was chosen for them, and they turn a plain table into one that looks planned, even when the plan came together on Wednesday night. This guide covers fourteen ways to make them: printable cards for people who want a clean result fast, Cricut projects for anyone with a cutting machine, and hand-made versions built from leaves, pumpkins, apples, and wood. Each idea includes the materials, the steps, and the places where it tends to go wrong.
Settle Five Things Before You Make Anything
Most place card problems come from skipping a few decisions, not from crafting skill. Spend ten minutes on these first.
Count the cards, then add spares. Make the number of guests plus two or three. Someone will bring an unexpected plus-one, a name will get misspelled, or a pen will skip halfway through a letter. A spare blank card costs almost nothing and saves a scramble.
Check spelling against a written list. Don’t write names from memory. Nicknames matter here too: a guest who goes by “Bex” will notice “Rebecca” in fancy lettering. Keep one master list and work from it.
Pick a size that fits your plates. The standard folded tent card is about 3.5 inches wide and 2 inches tall, which is roughly what most place card holders and store-bought blanks use. That size is small enough to sit above a dinner plate without crowding the glass and large enough to read from a chair. If your table is tight, go smaller. If you have room and want presence, go larger, but avoid anything taller than the water glass so it doesn’t block sight lines across the table.
Choose the position. Cards can sit above the plate, on top of the napkin, or on the plate itself. The plate works well if you want the card to be the first thing a guest sees. Above the plate is better when plates are stacked for a buffet-style serving or you need the card to survive being moved. Pick one position and use it for every seat so the table reads as consistent.
Decide how much lettering the card has to carry. A single first name in clear, medium-weight letters is easier to read than a full name in a decorative script. Guests with poor eyesight, small children, and anyone reading in dim candlelight benefit from the simpler choice.
Deciding Who Sits Where: The Part Place Cards Actually Solve
A place card is only as good as the seating plan behind it. A few practical rules save more trouble than any decoration.
Seat the host or whoever is carving and serving closest to the kitchen door, since they’ll be up and down. Put anyone who may have to leave early near the exit so they can slip out without a round of goodbyes behind twelve chairs. Guests with mobility limits are better near restrooms and away from tight gaps behind chairs. Older relatives are usually more comfortable away from a drafty door or a window with a cold glass pane.
For conversation, avoid seating two people at opposite ends who have nothing in common, and avoid putting two people with a tense history side by side. Splitting up couples is traditional for variety, though some couples prefer to sit together, so use your judgment rather than a rule. Children usually do best near a parent or a trusted adult, at a spot that can be wiped down easily.
If you’re hosting a mixed-age table, a kids’ table with its own simpler cards can also work well, and it gives children a job: they can decorate their own.
Printable Thanksgiving Place Cards
Printables are the lowest-effort route and, done carefully, they look as good as anything store-bought. The key is treating the printing step with as much care as the design.
1. Kraft-Style Tent Cards With Handwritten Names
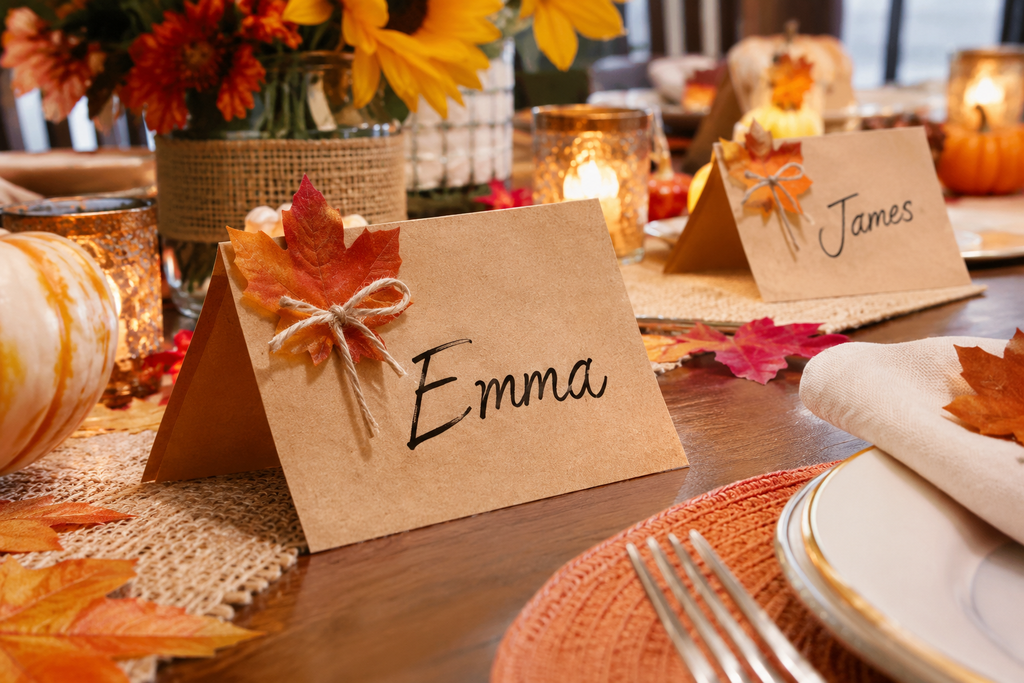
The simplest design is a plain folded card, either from a pack of blank tent cards or cut from kraft or cream cardstock. Kraft paper has a warm brown tone that suits an autumn table and hides small smudges.
What you need: Cardstock (about 65 to 80 lb is easy to fold and works in most printers), a ruler, a bone folder or the back of a butter knife, and a pen or marker.
How to make them:
- Cut pieces 3.5 by 4 inches. At least four fit on a letter-size sheet with room to trim.
- Mark the fold at the 2-inch line.
- Score along the line by running the bone folder against a ruler. Scoring creates a groove so the paper folds cleanly instead of cracking along the printed surface.
- Write the name on the front panel before folding the card closed. Letter size should be larger than you think: a first name about half an inch tall reads well across a table.
Where it goes wrong: Writing names after folding. The card slides and smears, and the lettering ends up crooked. Write flat, let ink dry, then fold.
Best for: Hosts who want a clean, restrained table, and anyone short on time. It’s also the easiest way to make cards for a gathering of twenty or more.
2. Printable Tent Cards With a Leaf or Watercolor Pattern
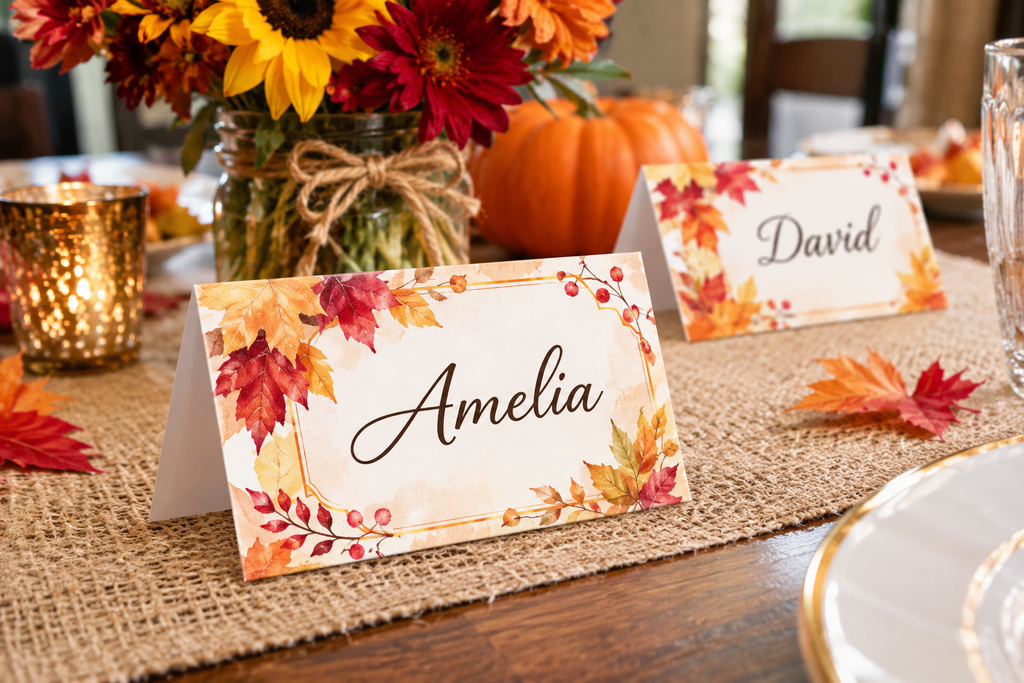
A printable template with a printed autumn motif is the fastest way to get a decorated card without drawing anything. Look for designs that put the pattern on the back or the base of the tent and leave the front panel mostly empty, so names have room.
How to get a good result:
- Open the file and check the size settings before printing. Choose “actual size” or 100 percent, not “fit to page.” Shrinking a template changes the fold position and leaves text too small.
- Run one test sheet on plain paper first to confirm that the names land inside the front panel and the fold line is centered.
- Check your printer’s manual for the heaviest paper it accepts. Many home printers handle lighter cardstock but jam on heavier stock. If yours struggles, use the manual or rear feed tray, which gives the paper a straighter path.
- Print on matte cardstock when you can. Glossy photo paper shows fingerprints and doesn’t fold well.
- Add names in the document itself if the template is editable, or leave the spaces blank and write them by hand. Typed names look neater; handwritten names look warmer.
Where it goes wrong: Printing a template at the wrong scale, or on paper heavy enough to crease unevenly at the fold. A second problem is picking a template with a busy background that makes the name hard to read.
Best for: Anyone who wants a decorated look without crafting. A single printed sheet can produce several cards in one pass.
3. Printable Cards With a Gratitude Prompt on the Back
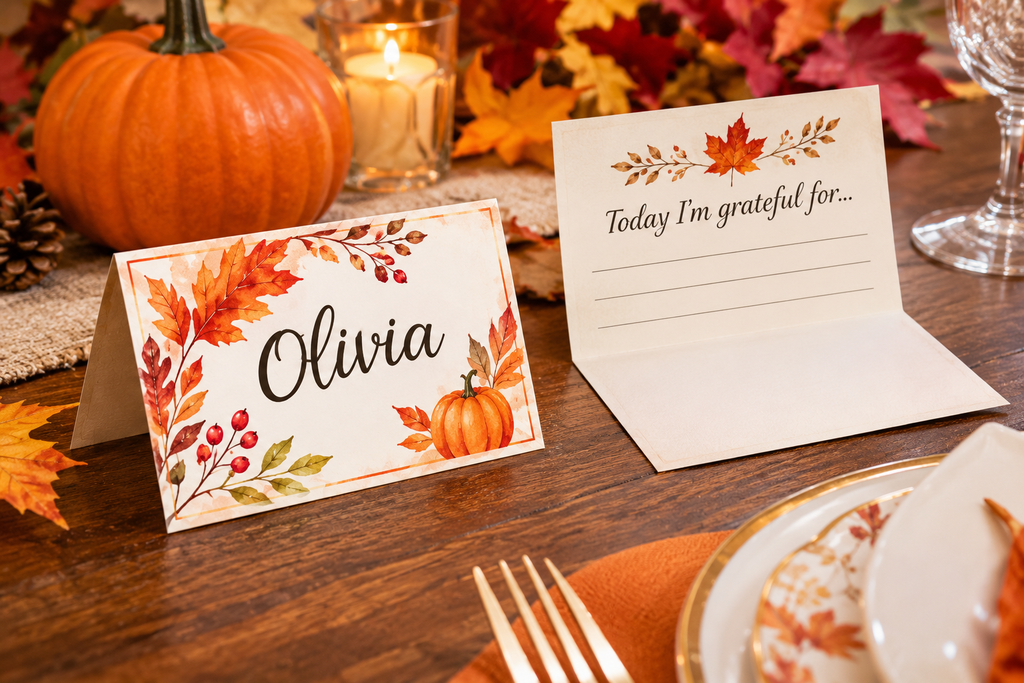
This one adds a small function: each card carries a short prompt on the inside or back, such as “What’s one thing you’re glad happened this year?” or “Name a dish you’d eat every day.” Guests flip the card over and have something to talk about during the first awkward quiet minutes.
How to make them:
- Choose a tent card layout with a clearly separated back panel.
- Write or print five or six different prompts and rotate them across the cards. Using identical questions at every seat leads to everyone answering the same thing.
- Keep prompts light. Questions that call for a story (“What’s the best meal you ever ate?”) work better than heavy ones (“What are you most thankful for in your life?”), which can put people on the spot.
- Skip anything that could expose private matters, such as questions about family conflicts or health.
Where it goes wrong: Asking guests to read their answers aloud as a formal ritual. For some people it’s a pleasant tradition; for others it’s the least appealing part of the evening. Let the prompt be optional.
Best for: Mixed groups where some guests barely know each other, and families with a lot of new in-laws.
4. Printable Leaf-Shaped Cards Cut by Hand
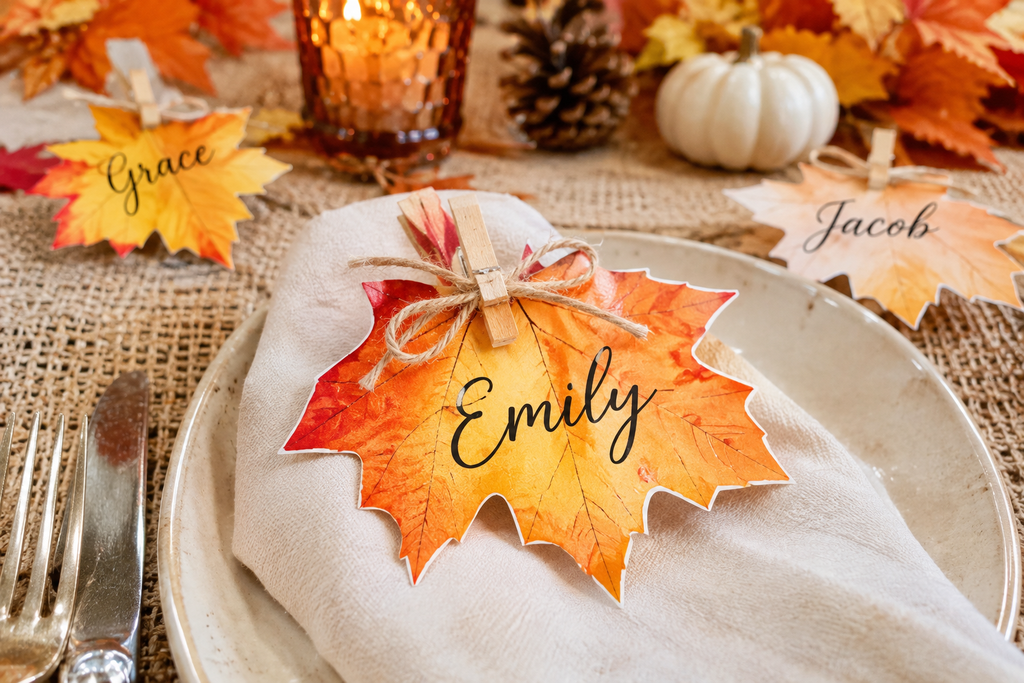
If you want a printable that looks more like an object than a folded rectangle, print a leaf outline on cardstock and cut it out.
What you need: A leaf template (oak, maple, and simple oval shapes are easiest), cardstock in rust, mustard, olive, or cream, sharp scissors or a craft knife and cutting mat, and a stand or holder to keep the leaf upright.
How to make them:
- Print the outline on lighter-colored cardstock, or trace it onto colored paper.
- Cut slowly around the edges. Maple leaves with sharp points take longer than rounded ones. If you need thirty cards, use a simpler shape.
- Write the name across the widest part of the leaf.
- Stand the leaf by gluing a small paper cone or a cut section of a drinking straw behind it, or tuck it into a napkin fold. A leaf that lies flat on the plate also works fine.
Where it goes wrong: Choosing a shape so intricate that cutting twelve takes an hour. Also, leaves cut from lightweight paper curl once the room warms up. Use cardstock.
Best for: Small tables where each place has a little more visual room, and for decorating with children, who can color or paint the leaves.
Thanksgiving Place Cards With a Cricut
A cutting machine changes the economics of place cards. The cuts are consistent, the lettering is uniform, and once a design is set up, making twenty is no harder than making four. A few settings decide whether the results look professional or frustrating. These ideas assume a standard Cricut Explore or Maker; the Joy line cuts narrower material, so check your model’s maximum width before choosing a design.
5. Cut-Out Leaf Cards With Names Written by the Machine
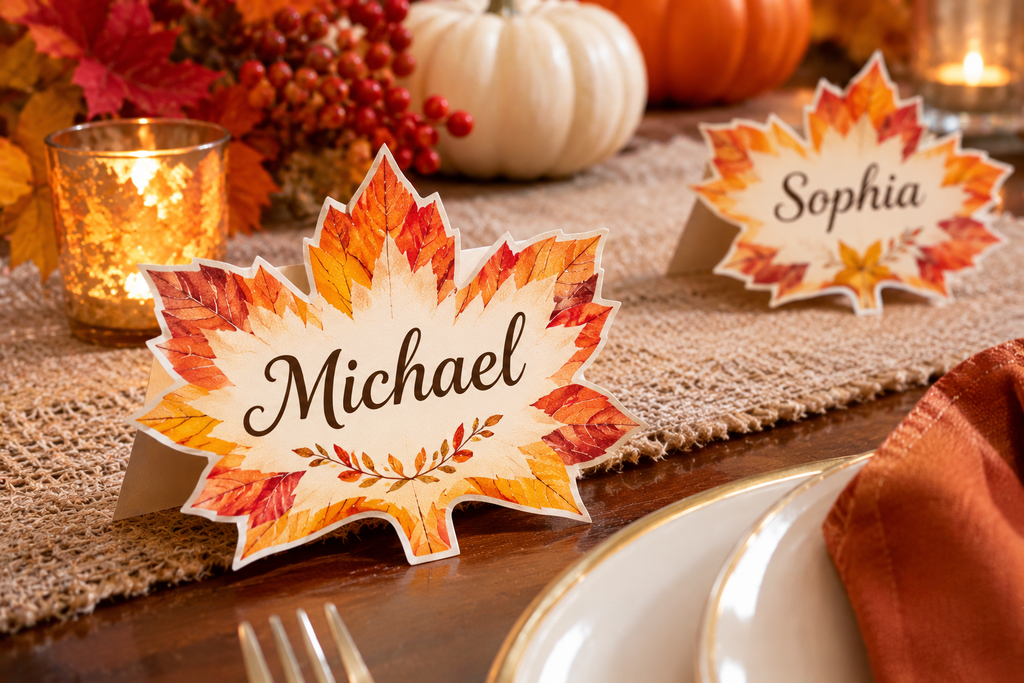
This is the best first Cricut project because the machine does the part many people dislike: consistent handwriting.
What you need: Cardstock, a standard grip mat, a Cricut pen in a dark or metallic color, and a leaf shape from Design Space.
How to make them:
- Place a leaf shape on the canvas and size it to roughly 3 to 4 inches.
- Add a text box with each guest’s name. Choose a font from the “writing” category. Writing fonts are drawn as a single stroke, which the pen follows cleanly. A regular decorative font will make the pen outline each letter’s shape, which produces a hollow, uneven look.
- Select the text and change the operation to “Draw.” Select the leaf and set it to “Cut.”
- Select the text and the leaf and use “Attach.” Without attaching, the software may rearrange the layers on the mat, and the name could land off the leaf.
- Load the pen first when prompted, let it draw, then switch to the blade for the cut.
- Remove the leaf with a spatula tool rather than peeling the mat away, which curls thin cardstock.
Where it goes wrong: Forgetting to attach layers, using a regular font, or putting a worn-out pen in the clamp. Test one card before running the batch. Another frequent mistake is cutting a stack of leaves in a single color, then finding the writing disappears. Match pen color to paper: dark ink on light paper, metallic on dark.
Best for: Making ten to thirty cards quickly with identical results.
6. Print Then Cut Name Cards With Layered Shapes
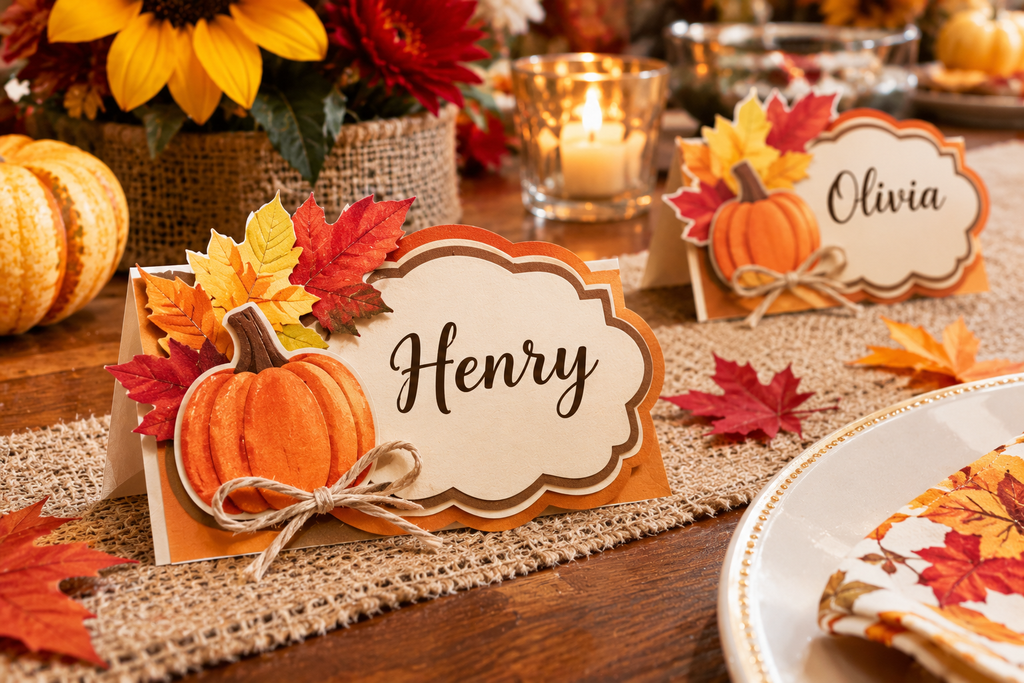
Print Then Cut lets the machine cut around a printed design, which gives you cards with a painted or patterned look that would take hours to cut by hand.
What you need: An inkjet printer (Cricut recommends inkjet for this feature), white printable cardstock or sticker paper, and a Cricut Explore or Maker.
How to make them:
- In Design Space, build a shape such as a pumpkin, a leaf cluster, or a banner. Fill it with a pattern or color.
- Add each guest’s name as printable text.
- Send the design to your printer. The machine will add black registration marks around the edge so the sensor can find the cut path.
- Load the printed sheet on the mat and let the machine scan the marks.
- Cut. Mount the finished shape on a folded card or glue it to a small stand.
What to know: The printable area is limited, roughly 6.75 by 9.25 inches on letter paper, so check the exact figure in Design Space for your machine. Avoid putting a design too close to the border, and avoid bright sunlight or a glossy tabletop under the mat, since reflected light can interfere with the sensor reading the marks.
Where it goes wrong: Registration mark errors. They’re often caused by a crooked sheet, a smudged mark, or poor lighting. Reprint the sheet rather than forcing the cut.
Best for: Cards with full-color designs that would be impractical to draw or paint individually.
7. Foil or Vinyl Names on Mini Pumpkins or Wood Slices
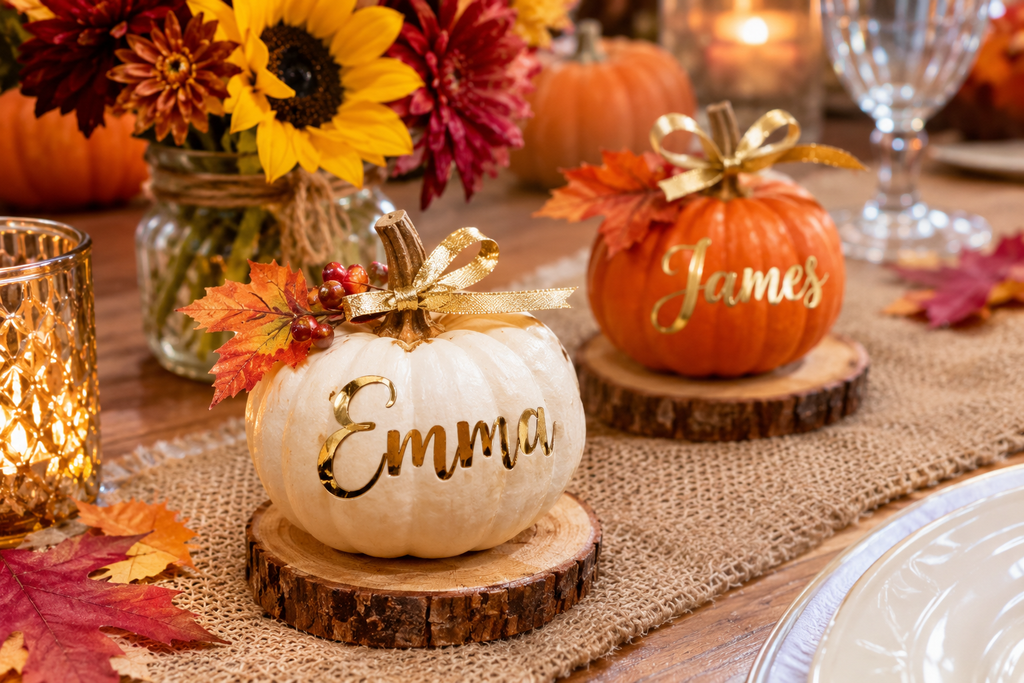
Cricut vinyl lets you put a perfectly spaced, clean-edged name on a curved or uneven surface, which is exactly where handwriting is hardest.
What you need: Permanent or removable adhesive vinyl, transfer tape, a weeding tool, small pumpkins or wood slices, and a Cricut.
How to make them:
- Cut each name in vinyl. Mirror the design only when the project calls for it; for standard vinyl transfers, you don’t need to.
- Weed away the excess so only the lettering remains on the backing.
- Apply transfer tape, smooth it down with a scraper, peel the backing, and press the lettering onto the pumpkin or wood slice.
- Peel the transfer tape slowly at a low angle so the letters stay on the surface.
Surface notes: Vinyl sticks better to smooth, dry, clean surfaces. Wipe pumpkins with a damp cloth and let them dry fully. A pumpkin’s skin has a waxy bloom that can resist adhesive, and vinyl may lift along curves. Flat, sanded wood slices are easier.
Where it goes wrong: Using letters that are too small. Fine script strokes tear during weeding and don’t grip the curve. Choose a bold, thick font.
Best for: Tables where the place card doubles as a small decoration.
8. Layered Cardstock Turkey Feather Fans
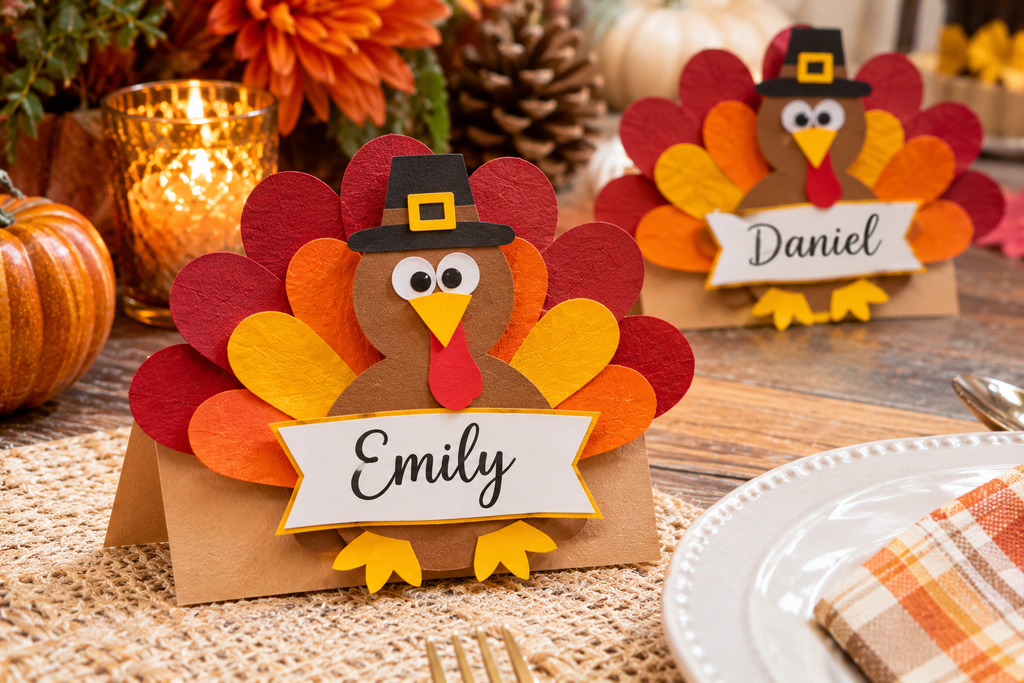
This design uses the machine for what it does best: cutting repeating shapes with precision.
What you need: Cardstock in five or six fall colors, a feather or leaf shape, a brad or glue dot, and a folded card base.
How to make them:
- Cut seven to nine feather shapes per card in graduated sizes and mixed colors.
- Fan them out and fasten the base with a brad or a small dot of craft glue.
- Attach the fan to the back of a tent card so it rises behind the name.
- Write or draw a name on the front panel.
Where it goes wrong: Gluing too many layers so the card grows heavy and tips forward. Stick to five to seven feathers and make the card base wide enough to stay steady.
Best for: A children’s table, a casual meal, and any host who wants something playful without it looking juvenile.
DIY Thanksgiving Place Cards From Natural and Edible Materials
Handmade place cards ask for a little more patience but rarely need special equipment. Most are made from things sold in the produce aisle or found at a craft store.
9. Pressed Leaf Cards With a Paint Pen
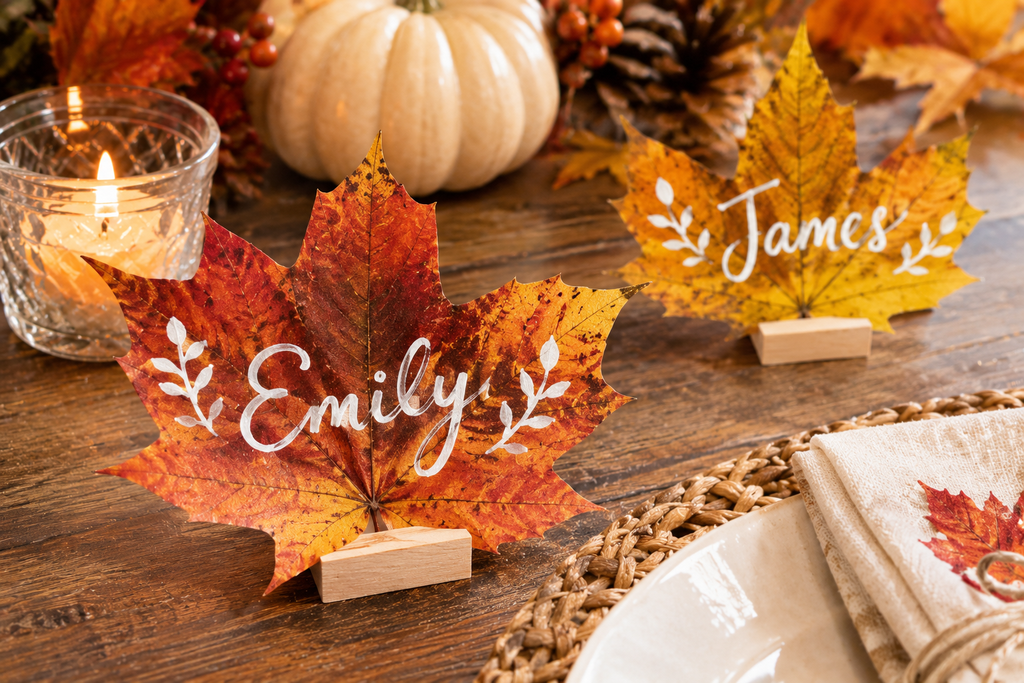
A real leaf gives a place card color and texture that paper can’t copy. The catch is preparation: a fresh leaf curls and darkens within a day.
What you need: Leaves, heavy books or a flower press, paper towels or plain paper, an opaque paint pen (water-based or oil-based paint markers both work on leaf surfaces), and clear spray sealer if you want a longer-lasting card.
How to make them:
- Pick leaves that are still flexible, not brittle and fully dried on the tree. Maple, oak, and ginkgo hold their shape well.
- Press them between sheets of paper under a stack of books for several days, until they feel dry and flat.
- Write the name on the smoothest area with a paint pen. Opaque pen colors like white, gold, or silver show best on dark leaves.
- Let the ink dry, then spray with a light coat of sealer outdoors or in a ventilated space. Follow the product label.
- Prop the leaf against the glass or tape a small piece of cardstock to the back to make it stand.
Safety note: Only collect leaves you can identify. Poison ivy turns red in fall, and touching it can cause a rash. Avoid gathering from roadsides or treated lawns, and wash your hands after handling.
Where it goes wrong: Writing on a leaf that hasn’t been pressed yet, so the paint beads or the leaf curls as it dries. Also, pressing means waiting. Start about a week before the dinner, not the night before.
Best for: A rustic or outdoor-feeling table. Not ideal if you need cards a day ahead of time with no prior pressing.
10. Mini Pumpkin Place Cards
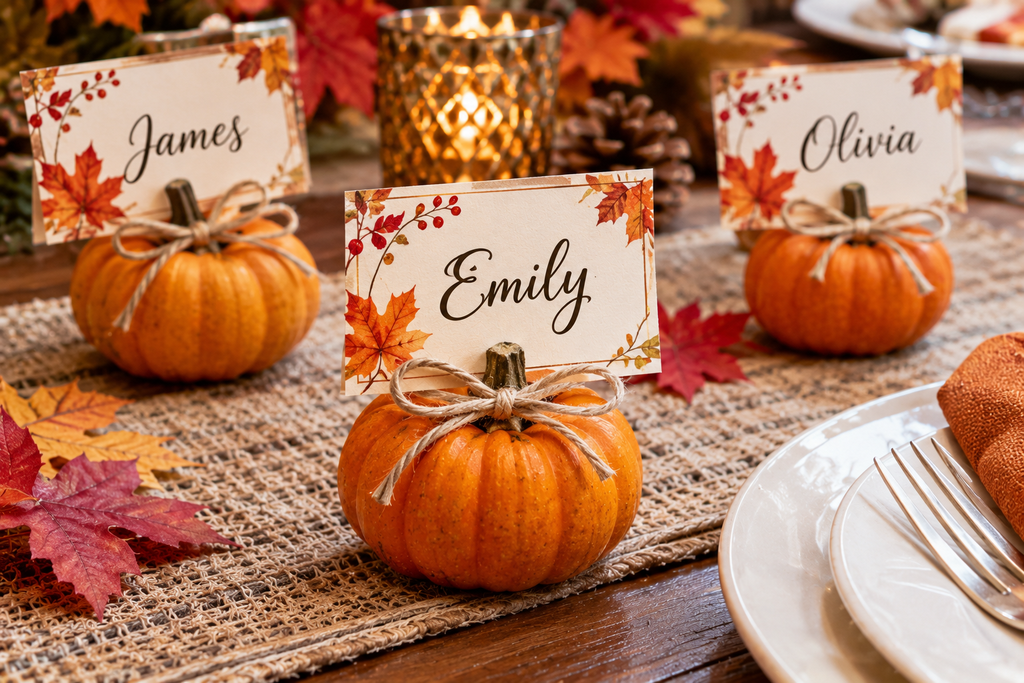
Small pumpkins and gourds are easy to find and sturdy enough to survive a busy table.
What you need: Mini pumpkins, a paint pen or a fine permanent marker, and a damp cloth.
How to make them:
- Wipe each pumpkin and let it dry fully.
- Choose a smooth section and write the name in the widest area. Curved lines are easier to read when you write horizontally across the fullest part.
- White and metallic pens show well on orange and deeper-colored gourds. Dark pens suit white or pale pumpkins.
- Let the ink dry before stacking or carrying.
Where it goes wrong: Writing on a pumpkin that’s still damp or dusty, which causes smearing. If a mini pumpkin rocks on its base, slice a thin sliver from the bottom to create a flat spot, or set it on a small ring of twine.
Best for: Buffet-style tables, families with children, and hosts who want the place card to be the centerpiece accent. Painted names on whole pumpkins stay legible for days, so you can set them out early.
11. Wood Slice Place Cards
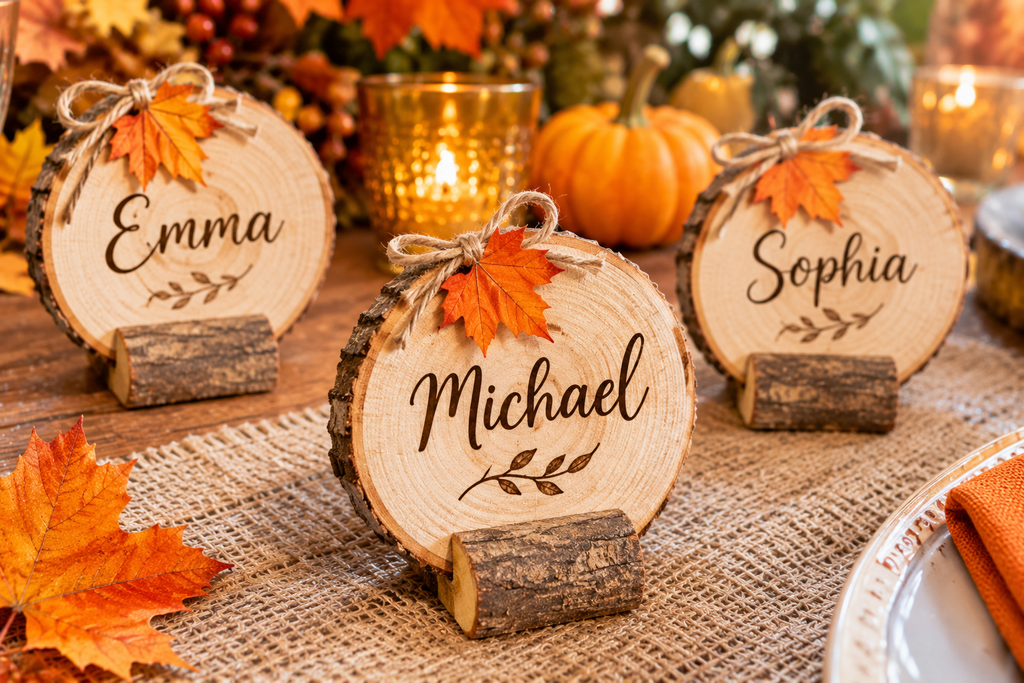
Thin slices of wood give a table a natural base and a surface that’s fun to write on.
What you need: Pre-dried wood slices from a craft store (fresh-cut ones can crack as they dry), fine sandpaper, a paint pen, and a clear sealer if desired.
How to make them:
- Sand the surface lightly until it feels smooth. Wipe away the dust.
- Write the name in paint pen. A bold, simple style reads better than a thin script on the grain.
- Add a small sprig of greenery, a dried berry, or a tiny pumpkin on top for decoration.
- If you want to protect the surface, apply a light coat of clear sealer, following the directions on the label.
Where it goes wrong: Writing on bark-side surfaces or heavily grained slices where the ink bleeds. Also, wood slices are thick, so place them where they won’t wobble on the table. Use pieces of about the same thickness for the whole set.
Best for: A woodsy, informal table. These are also easy to reuse next year if you write on one side with a washable pen and sand it clean later.
12. Apple or Pear Holders
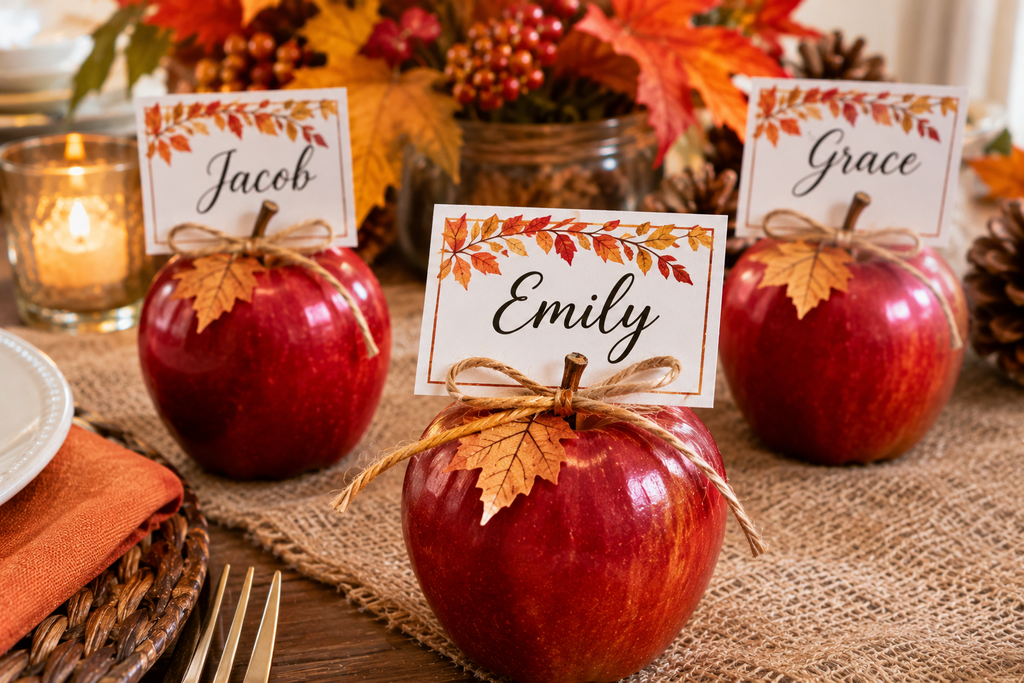
An apple that holds a folded card looks seasonal and costs very little. It also serves as a tiny piece of tableware: guests can eat the fruit afterward.
What you need: Firm apples or pears, a paring knife, lemon juice, and cardstock tent cards or small flat cards.
How to make them:
- Use fruit that stands upright on its own. If it rocks, cut a thin slice from the base.
- Cut a slit about half an inch deep in the top of the apple or on one side.
- Brush the cut edge with a little lemon juice to slow browning.
- Slide a flat card into the slit so it stands up.
Where it goes wrong: Setting them out too early. Cut fruit browns and softens. Prepare these the morning of the meal, or no more than a few hours ahead. If you want zero waste in the plan, use whole, uncut apples and rest a folded tent card against each one.
Best for: Casual meals and tables where the produce also works as a decoration.
13. Herb Sprig and Twine Napkin Tags
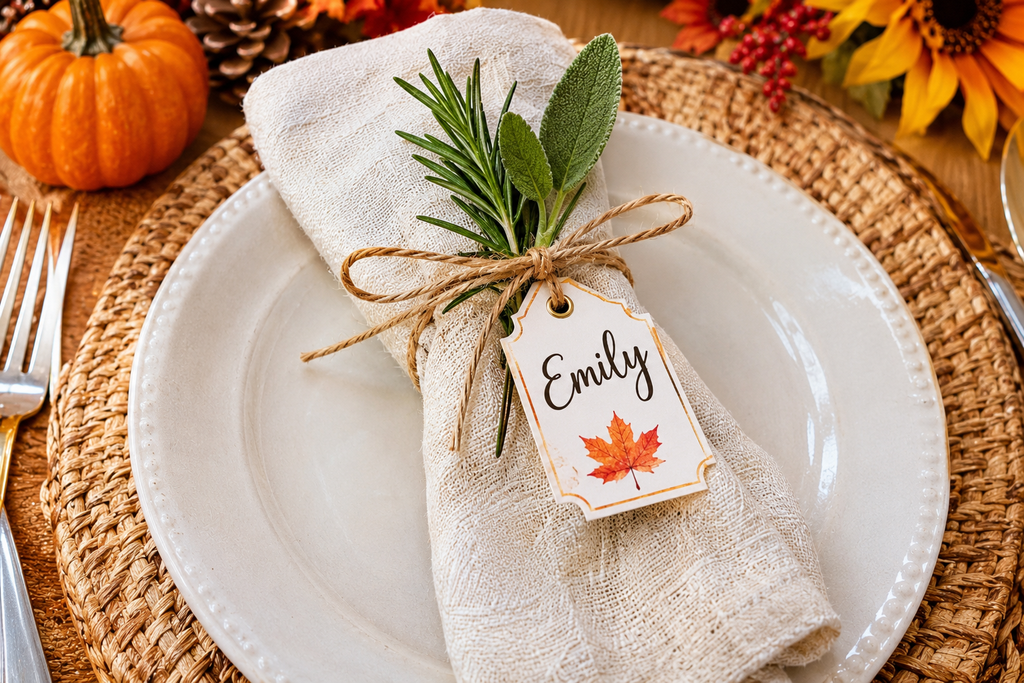
For a table that already has a lot going on, a small tag tied to the napkin takes up almost no space.
What you need: Small kraft tags or cut cardstock rectangles, a hole punch, twine or ribbon, and fresh rosemary, sage, or thyme sprigs.
How to make them:
- Write each name on a tag.
- Punch a hole and thread twine through it.
- Wrap the twine around a rolled napkin and tuck a sprig of herb under the knot.
- Place the bundle on the plate.
Notes: Fresh herbs add scent and green color, and they’re easy to find in grocery stores in November. Rosemary and sage hold up well on a table, while thinner herbs wilt faster. Keep sprigs away from candle flames, since dried herbs and twine can catch easily.
Best for: Large tables where place settings are tight, and for making many cards at once.
14. Sugar Cookie Place Cards
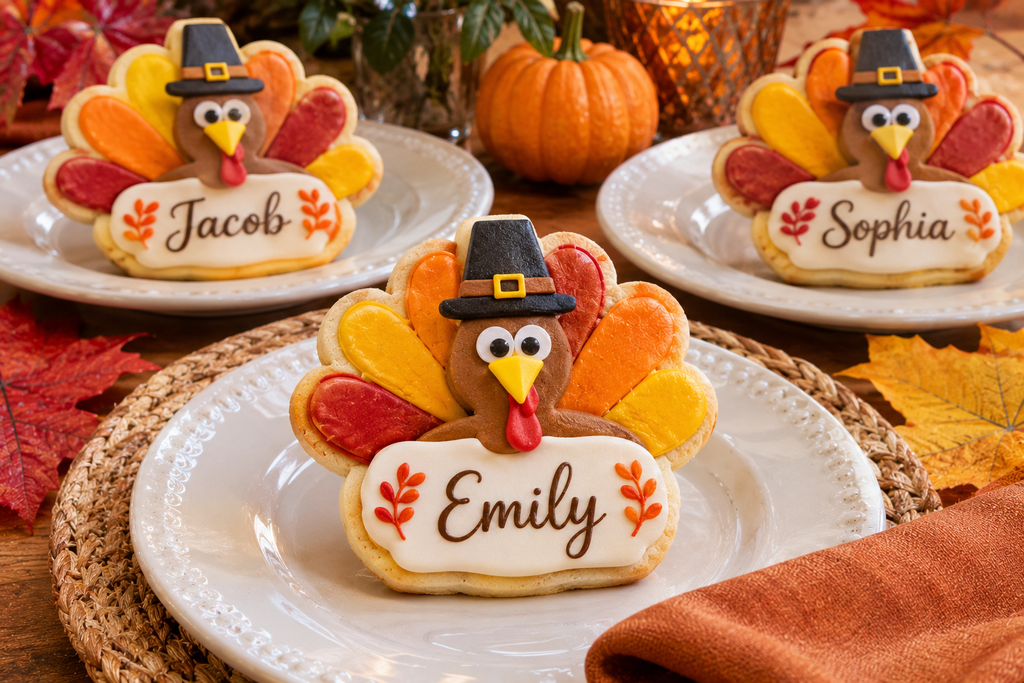
A cookie with a guest’s name written in icing doubles as a place card and a small dessert.
What you need: A sugar cookie recipe, a leaf or pumpkin cutter, royal icing (made from meringue powder if you’d rather avoid raw egg whites), and a fine piping tip or an icing pen.
How to make them:
- Bake and cool the cookies completely. Warm cookies melt icing.
- Outline and fill the cookie with a base color, then let it set.
- Pipe each name on the dried surface. Royal icing generally takes several hours to dry hard, and many bakers let it set overnight.
- Place each cookie on a small plate or slide it into a clear bag for transport and freshness.
Allergen note: Cookies commonly contain wheat, eggs, milk, and sometimes nuts. If you have guests with allergies, label each one or choose a different design. Never assume a food-based place card is safe for everyone, and keep nut-containing cookies separate from nut-free ones.
Where it goes wrong: Piping onto an icing base that hasn’t fully set, so the names spread and blur. Practice a few letters on parchment first, and keep names short.
Best for: Hosts who enjoy baking and want something to give guests to take home.
Quick Comparison: Which Type Suits Your Table?
| Place card | Skill level | Make ahead? | Best table style |
| Kraft tent cards | Beginner | Weeks ahead | Minimal, modern |
| Patterned printable tent cards | Beginner | Weeks ahead | Traditional, polished |
| Printable with prompt | Beginner | Weeks ahead | Mixed or new groups |
| Hand-cut paper leaves | Beginner | Weeks ahead | Small tables, kids |
| Cricut leaf with pen lettering | Intermediate | Weeks ahead | Large tables |
| Print Then Cut shapes | Intermediate | Weeks ahead | Full-color designs |
| Cricut vinyl on pumpkin or wood | Intermediate | Days ahead | Rustic, decorative |
| Cricut feather fans | Intermediate | Weeks ahead | Casual, family |
| Pressed leaves | Beginner, with patience | Start a week ahead | Rustic, natural |
| Mini pumpkins | Beginner | Days ahead | Buffet, casual |
| Wood slices | Beginner | Weeks ahead | Woodsy, reusable |
| Apple or pear holders | Beginner | Same day | Simple, edible |
| Herb and twine tags | Beginner | Same day | Crowded tables |
| Sugar cookies | Intermediate | A day ahead | Dessert lovers |
The make-ahead column is a planning guide rather than a measurement. Humidity, temperature, and materials vary, so test one early.
Lettering and Legibility: Small Choices That Decide Whether Cards Get Read
A card that nobody can read has failed, regardless of how well it was made. A few habits make the lettering work.
- Size: Aim for letters at least a quarter inch tall for hand lettering, and larger if the card sits at the far side of a wide table. For printed text, 24 to 36 point works for a first name on a small tent card.
- Contrast: Dark ink on light paper is the safest choice. Gold on cream, white on kraft, and silver on dark green can look lovely, but they’re harder to read in candlelight.
- Fonts: Decorative scripts with long loops look elegant and are tough to read quickly. If you love a script style, use it for a small heading and print the name itself in a clean font.
- Consistency: Keep one lettering style across all the cards. Switching between handwriting and print makes a table look unplanned.
- First names only: Unless people don’t know each other, first names are enough and easier to fit.
Setting the Cards at the Table
Placement affects how the cards look and how quickly guests find their seats. Walk around the table before guests arrive and check each setting from a seated height. A few things often show up only at that angle: cards hidden behind glasses, cards facing the wrong direction, or lettering that’s upside down from the chair’s point of view.
Face every card toward the guest. Keep them level with each other so the line of cards reads cleanly. If you use candles, place them at least a hand’s width away from natural materials such as dried leaves, herbs, or twine. Real flames and dry foliage are a known fire risk, and an unattended table is the wrong place to find that out.
If you’re mixing materials, such as pumpkin cards at one end and paper at the other, repeat one element throughout, like the same ribbon, the same ink color, or the same sprig of greenery. A shared detail ties the table together.
Common Questions About Thanksgiving Place Cards
How far ahead can I make place cards?
Paper, cardstock, and wood versions can be finished weeks ahead and stored flat in a box. Pressed leaves need about a week of drying time, so start early. Anything with fresh fruit, fresh herbs, or icing should be made as close to the meal as the recipe allows. Mini pumpkins hold up well for a few days.
What size should a Thanksgiving place card be?
A folded tent card of about 3.5 by 2 inches is a common standard and fits most place settings. Smaller cards save space; larger ones make a bolder statement. Keep the card shorter than the glasses on the table so it doesn’t block views.
Can I print place cards on regular printer paper?
You can, but standard copy paper is thin and floppy, so a tent card made from it won’t stand up. Use cardstock. Check your printer’s manual for the maximum paper weight it handles, and try one sheet before printing the full batch.
Do I need a Cricut to make nice place cards?
No. Every design in the printable and DIY sections works without a cutting machine. A Cricut mainly saves time on repeated shapes and gives neat, uniform lettering for larger guest lists.
What if I misspell a name or someone cancels?
That’s why spare cards help. For cards with permanent materials like paint pen on pumpkin, keep a few extra blanks in the same style so you can replace one without redoing the set.
Final Thoughts
For most tables, the decision comes down to time and guest count. If you have a few evenings and a small group, a pressed leaf, a painted pumpkin, or a cookie makes the card part of the decoration. If you have twenty guests and one free night, a printable tent card or a Cricut batch gives you consistent results with little effort. Whatever you choose, work from a written guest list, test one card before making the set, and make a few spares. Then set the cards at seat height and check them from each chair before the first guest arrives.

About Syprose Kiche
Syprose Kiche is the creator and writer behind My Besuited Home, a practical home and garden website covering DIY projects, gardening, lawn care, landscaping, home improvement, and outdoor living. She focuses on turning everyday homeowner questions into clear, practical guides backed by careful research and useful real-world considerations.