
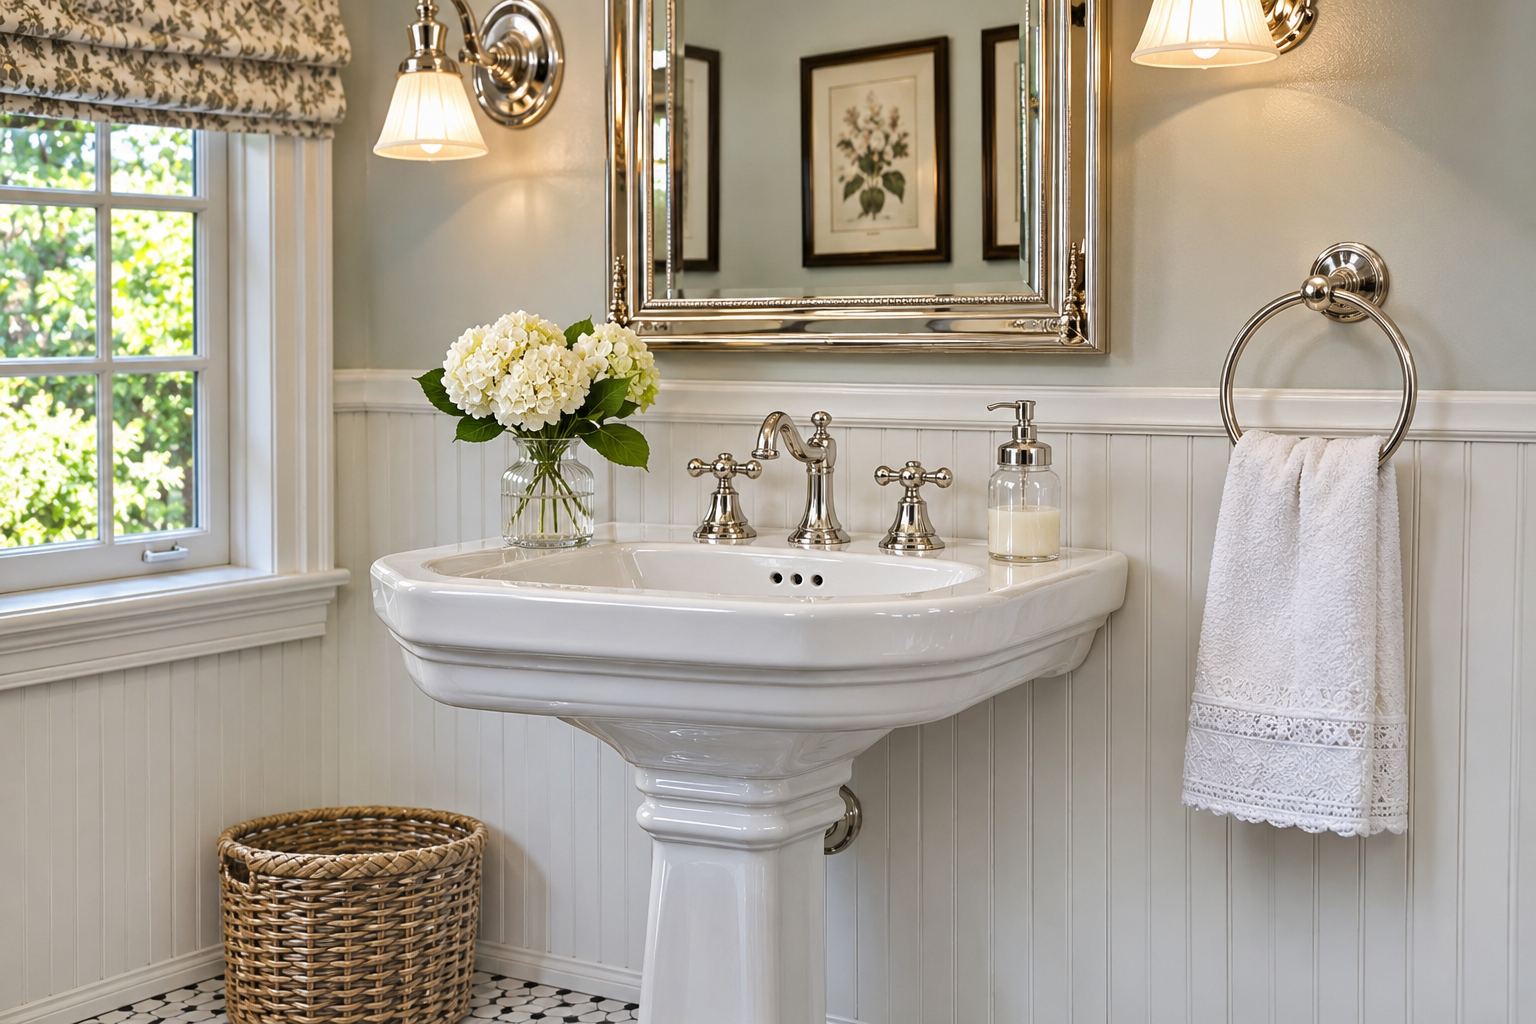
Most people searching for retro bathroom ideas are in one of two situations. Either the house came with original pink tile from the 1950s and the question is whether to tear it out or build around it, or the bathroom is a blank modern box and the goal is some period character without a full gut renovation. Those are different projects with different budgets, and mixing them up is where money tends to get wasted.
The styles below run from the 1920s through the 1980s, then into two revival looks that borrow from older rooms: moody vintage and grandmillennial. Each one comes with the details that make it look right, the practical problems it brings, and what to watch for if you are working with original materials rather than reproductions.
Original, Reproduction, or Inspired: Decide This First
There are three ways to get a vintage bathroom, and the right one depends on what you already have.
Keep what is original. An original 1920s bathroom with intact hex tile and a cast iron tub is worth keeping if the tile is sound, the tub is not rusting through, and the plumbing works. Original materials were often thicker and more durable than their modern counterparts, and they cannot be replaced once removed. Cracks, loose tiles, and failing grout can usually be repaired. A leaking supply line or a corroded drain is a plumbing problem, not a style problem, and should be fixed regardless of what you decide about the look.
Install reproductions. If the room has been remodeled and nothing original remains, reproduction fixtures and tile give you the look with modern performance. This is also where code matters most. Toilets made before the mid-1990s used far more water per flush than the federal 1.6-gallon limit on new residential toilets, and some states set stricter limits. A salvaged toilet may not be legal to install in your area, so check local rules before buying one.
Borrow the feeling. Paint, lighting, hardware, a mirror, a rug, and a single statement tile or wallpaper can suggest an era without committing to it. This is the cheapest route and the easiest to reverse, which makes it the sensible choice for renters and for anyone unsure how long they want the look to last.
One rule applies across all three: pick one era and stay loosely inside it. A 1920s pedestal sink beside a 1970s gold faucet and a mid-century walnut vanity reads as an accident, not a collection.
The 1920s and 1930s: Where Most Vintage Bathrooms Begin
This is the period most people picture when they say vintage. Bathrooms were becoming standard in American houses, and the materials were chosen for being washable: glazed tile, porcelain, enameled iron, and plated metal.
1. White subway tile with a black-and-white hex floor
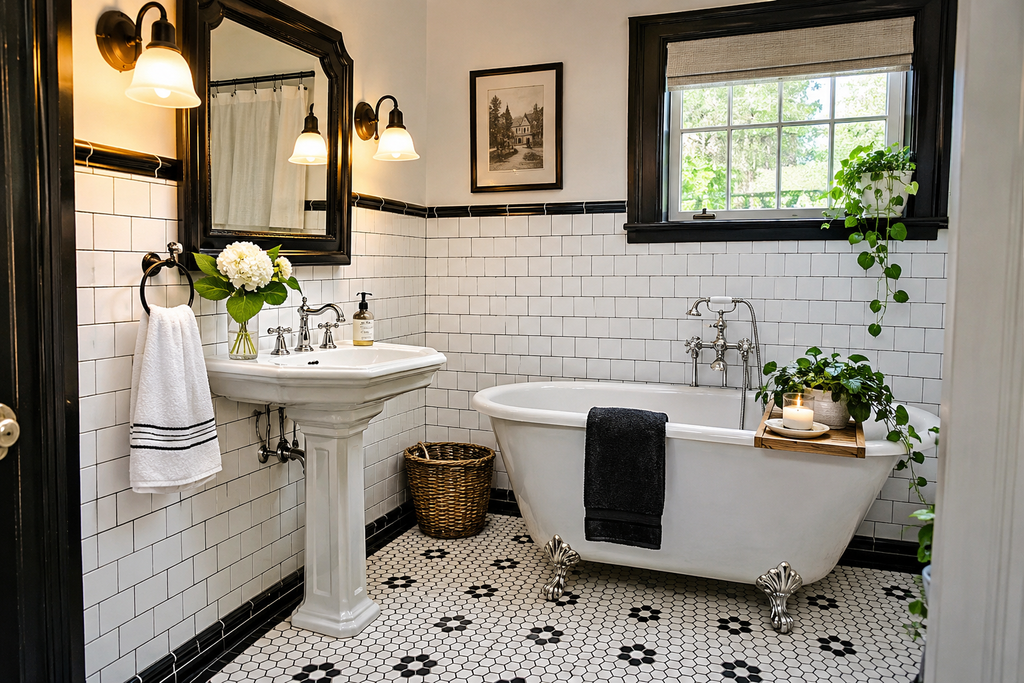
The core 1920s look is glossy white wall tile, commonly the 3-by-6-inch format, over a floor of small hexagonal mosaic tile in white with a black border or a simple black pattern. Black bullnose trim along the top edge of the wall tile finishes it.
If the floor is original, clean it thoroughly before deciding it needs replacing. Old grout darkens and stains in ways that look worse than the tile underneath. Individual cracked hex tiles can sometimes be replaced from salvage, though color and size rarely match perfectly. For a reproduction floor, porcelain hex tile is the practical choice, and the many small grout lines give extra traction on a wet floor.
The common mistake is choosing a stark, bright white for new tile and placing it next to original tile that has aged to a creamy tone. Bring samples and hold them against the existing material in daylight before ordering.
2. Clawfoot tub with exposed plumbing
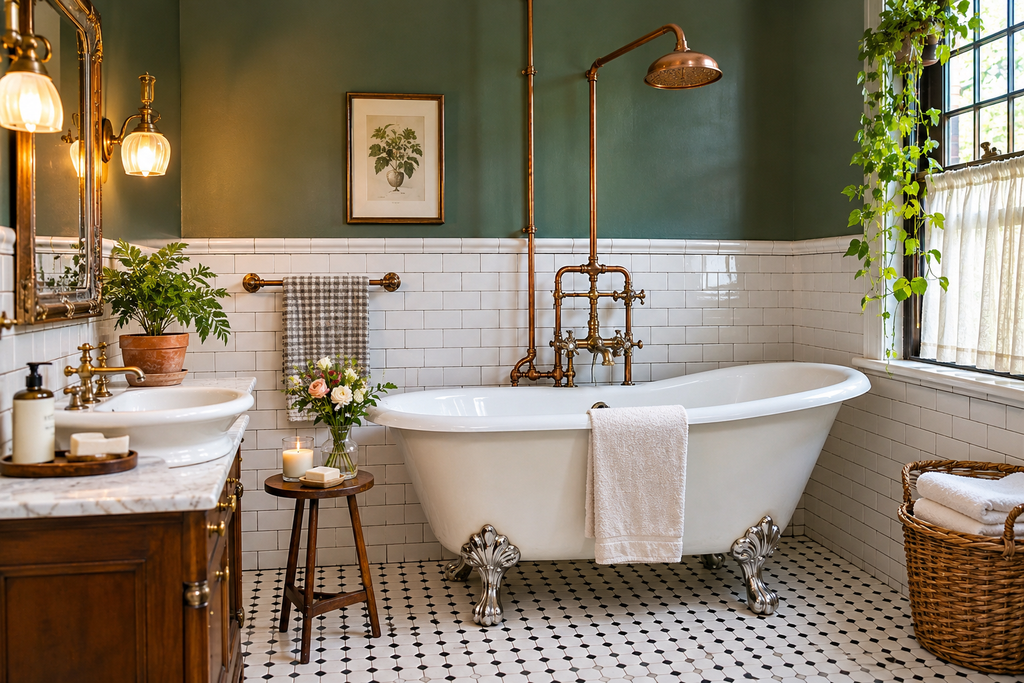
A freestanding tub with feet is the single most recognizable vintage fixture. Cast iron versions weigh several hundred pounds empty, and a full tub with a bather adds substantially more, so older floors need a structural check before installation. Acrylic reproductions are much lighter and keep water warm reasonably well, which makes them easier to place on an upper floor.
The plumbing is part of the look. Exposed supply risers and a floor-mounted or deck-mounted faucet are typical. If the tub will also be used for showering, it needs a ring-style curtain rod, and the curtain must hang inside the tub to keep water off the floor. Even then, splash is common, so water-resistant flooring matters more here than in a standard alcove tub.
Refinishing an old tub is possible but the coating is generally less durable than the original porcelain enamel. The products give off strong fumes, so follow the label for ventilation and respiratory protection, and keep children and pets out of the area while curing.
3. Pedestal sink, cross-handle faucets, and nickel finishes
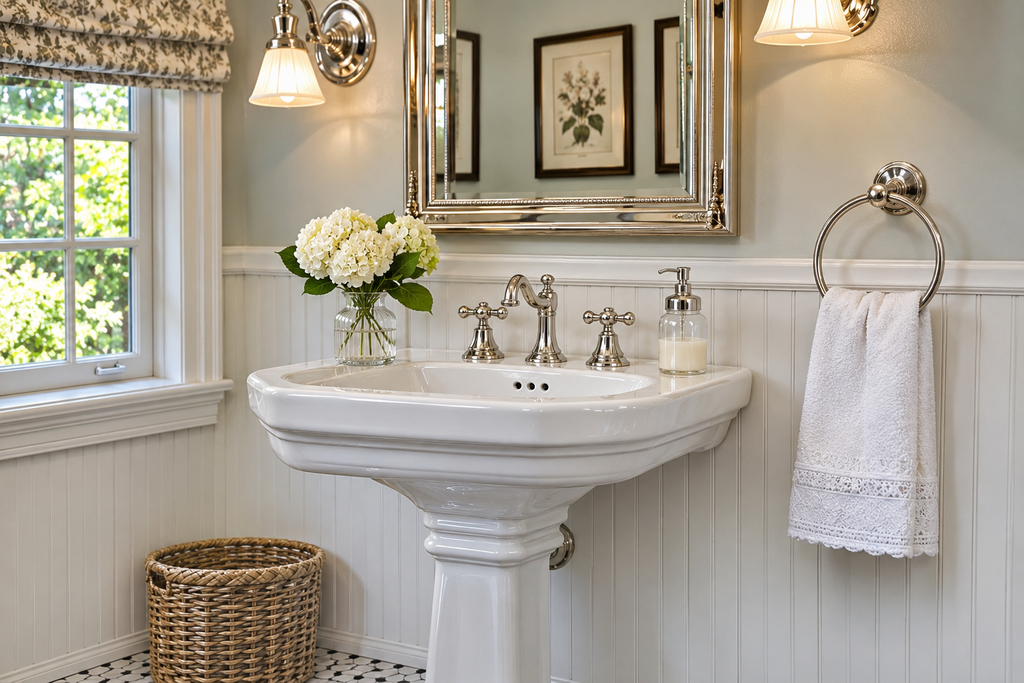
A pedestal sink suits a small bathroom because it takes up less visual space. It offers no storage, though, so pair it with a recessed medicine cabinet or a narrow shelf.
Cross-handle faucets with separate hot and cold taps look right but are awkward in daily use, since water mixes only in the basin and can run uncomfortably hot or cold at the spout. A vintage-style single-spout mixing faucet keeps the appearance and fixes that problem. Polished or brushed nickel is the usual period finish. Exposed supply lines and the trap under the sink should match the faucet.
Wall-mounted sinks, a close relative of the pedestal, need solid blocking inside the wall to carry their weight. Confirm that before choosing one.
4. Art Deco in black, chrome, and mirror
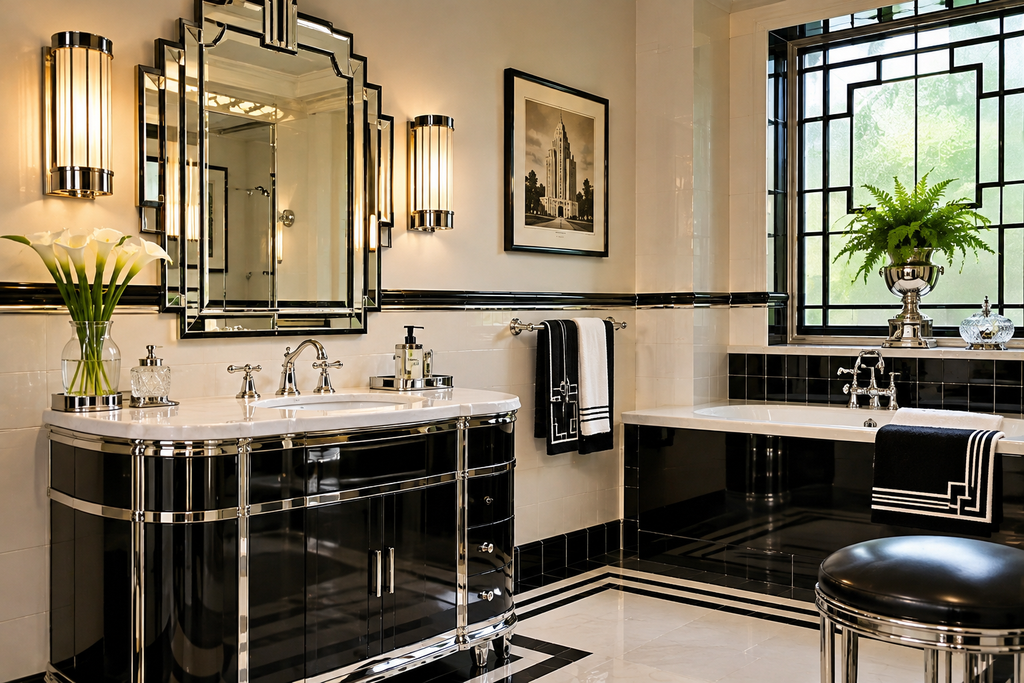
The 1930s brought geometry: stepped forms, fan and sunburst shapes, black tile, chrome, and mirrored panels. A deco bathroom depends on contrast, so black or deep green tile against white fixtures and bright metal trim is typical.
The style rewards restraint. One geometric element, such as a stepped mirror, a sunburst tile inset, or frosted-glass wall sconces, carries the idea. Covering every surface in pattern turns it into a theme room. Black tile also shows soap film and water spots quickly, so a squeegee habit or a glossy-but-textured finish helps.
5. Soft 1930s color: jade, butter yellow, and contrast trim
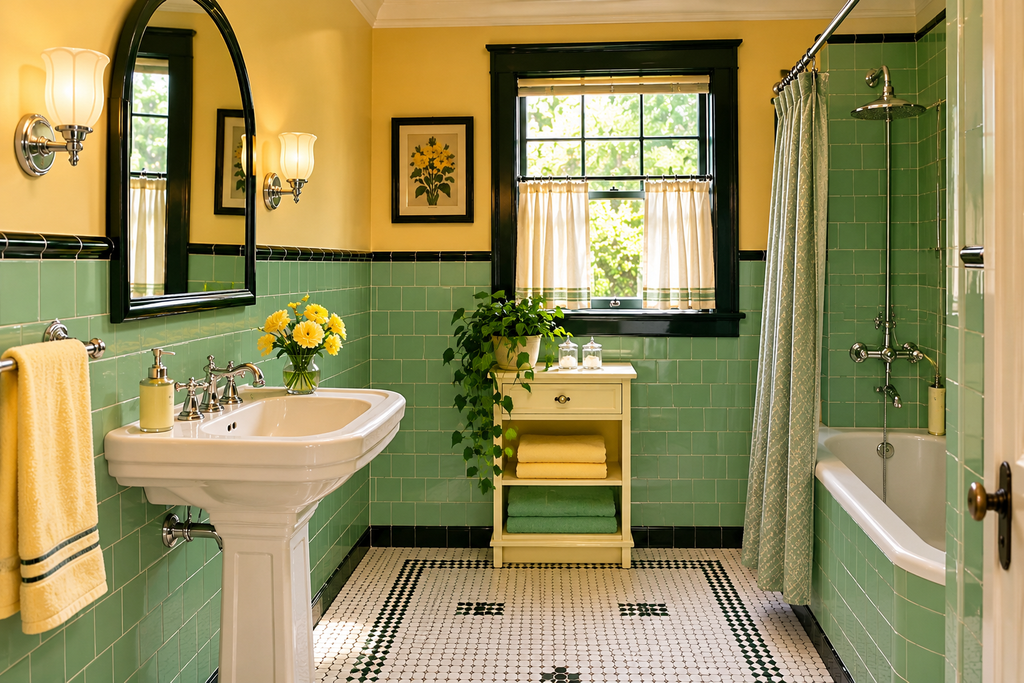
The period also produced bathrooms in soft green, pale yellow, and sometimes lavender, usually finished with a contrasting border or trim line in black or a darker shade. The effect is cheerful and surprisingly calm.
For new work, two or three colors is plenty. Choose a trim color from the tile family rather than a random accent. If original colored fixtures are present, remember that matching replacements in these shades are hard to find. Reproduction makers do offer some colors, but availability changes, so verify before planning around it.
The 1940s and 1950s: Pastel, Chrome, and Checkerboard
Postwar bathrooms leaned on colored fixtures and glossy tile, often in a single dominant color with black or white trim.
6. Pink bathroom with black trim
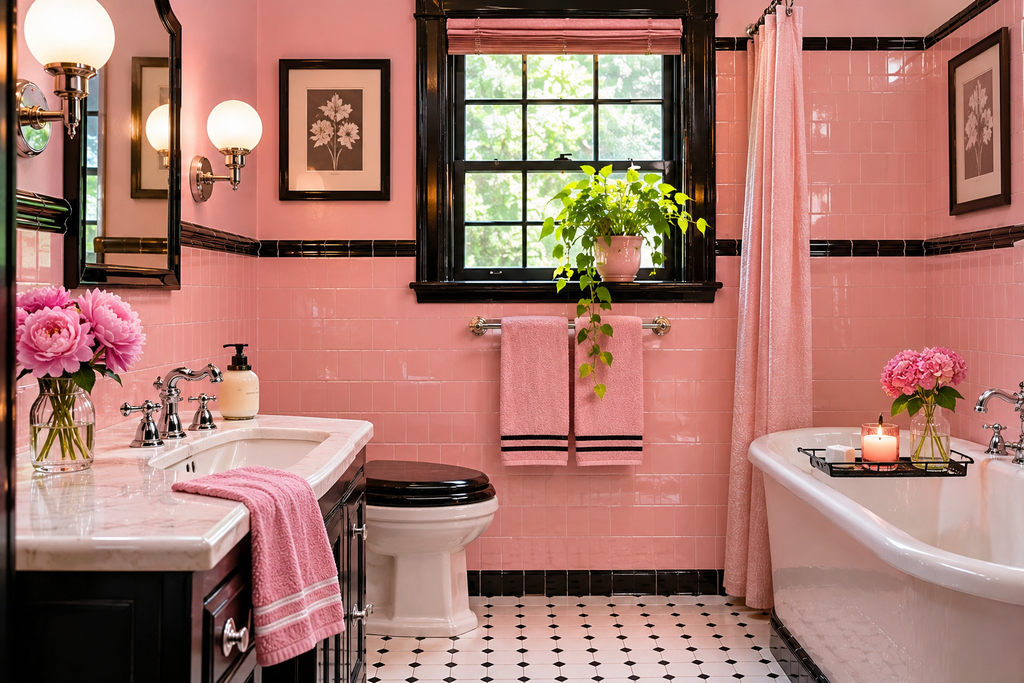
The pink bathroom is the image most tied to the 1950s. The shades vary widely, from a dusty salmon to a bubblegum tone, and the undertone decides what works around it. A warm salmon pink pairs well with cream and brown. A cooler, bluer pink looks better against gray, charcoal, or deep green.
If the pink is original, the usual approaches are leaning in fully, with black trim, a checkerboard floor, and chrome, or toning it down by painting the walls a soft neutral and letting the tile and fixtures be the accent. Pink on pink on pink, with matching towels, rugs, and walls, tends to overwhelm. Add crisp white and one dark element to give the eye somewhere to rest.
7. Turquoise and aqua with chrome
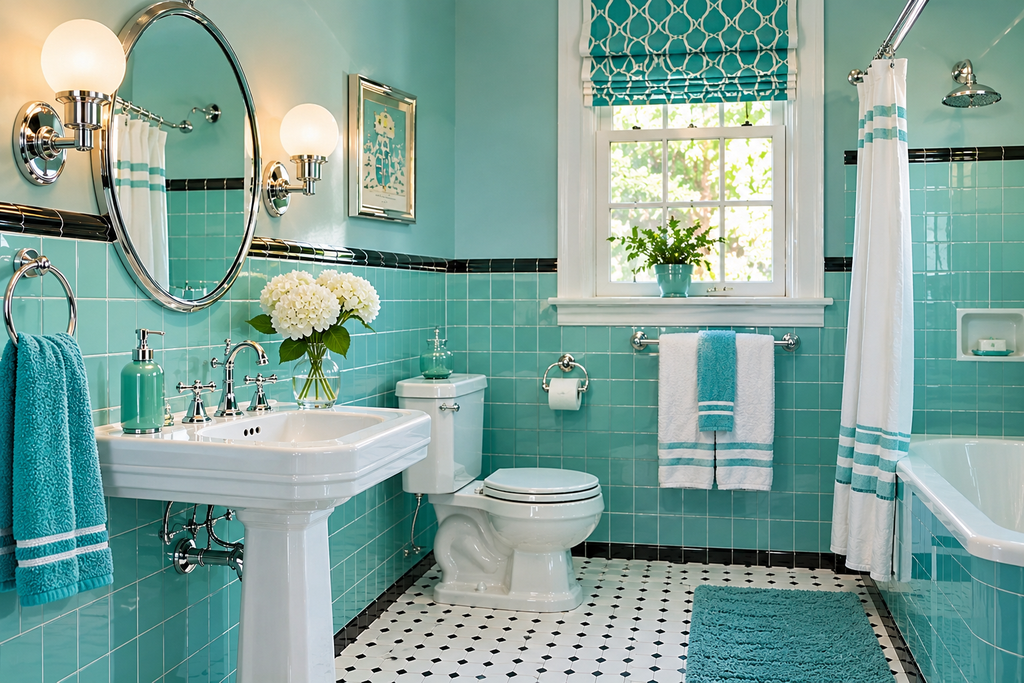
Turquoise and aqua were nearly as common as pink and are easier for many people to live with. Against white fixtures and chrome, the color reads fresh and a little coastal. Because blue is a cool color, warm wood tones, such as a walnut stool or a teak mirror frame, keep the room from feeling cold. A soft yellow or coral accent adds period flavor without much effort.
8. Checkerboard floor with red accents
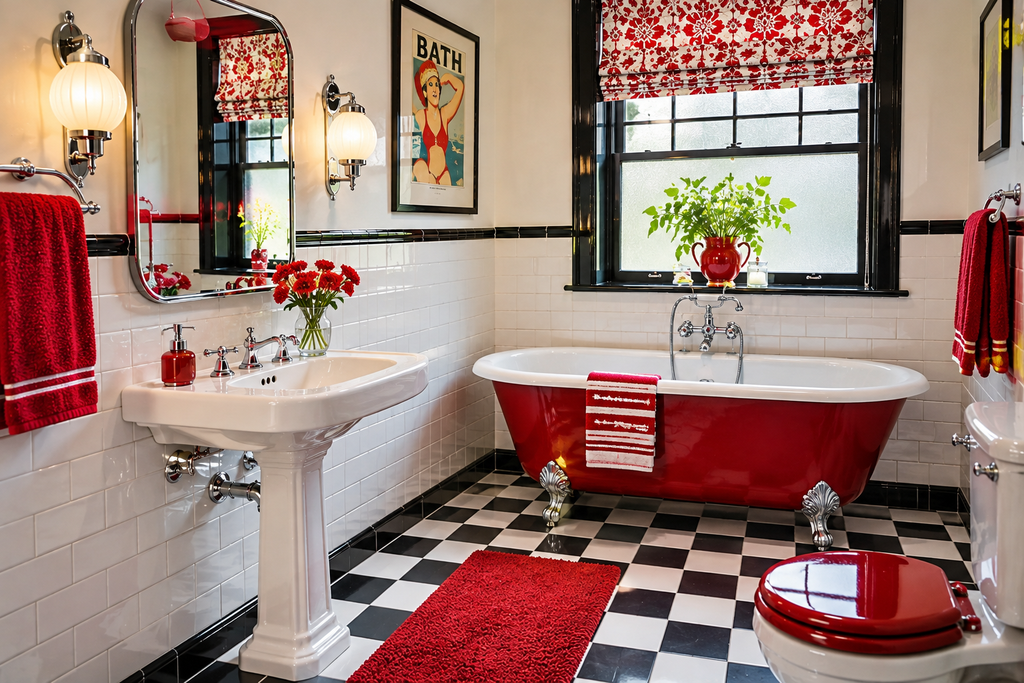
A black-and-white checkerboard floor is one of the easiest retro features to add, and it works in porcelain, vinyl, or sheet flooring. Squares between 4 and 12 inches are common, and the scale should match the room: smaller squares suit a small bathroom, larger squares can look bold in a bigger one.
Red accents, such as a towel, a mirror frame, or a small stool, give it a diner feeling. If the tile is laid on the diagonal, order extra. A common guideline is about 10 percent extra for a straight layout and about 15 percent for a diagonal one, because of the added cuts.
9. Two-tone tile wainscot with a contrasting border band
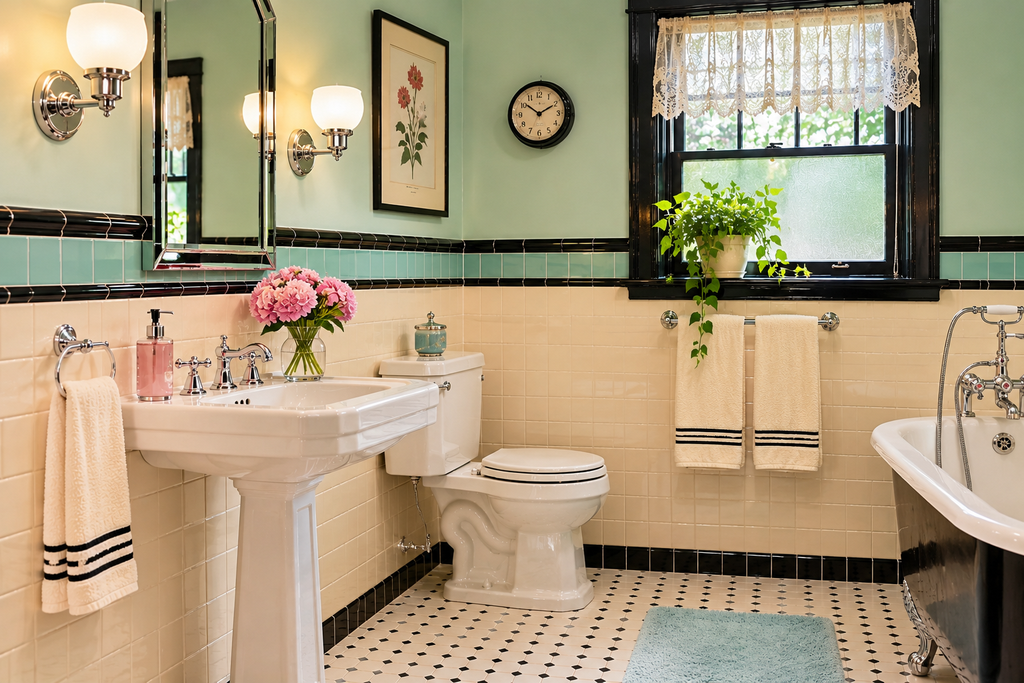
Many postwar bathrooms were tiled only partway up the wall, often to about chest height, with a contrasting border strip at the top and painted plaster above. The partial tile reduces cost and leaves room for a color you can change easily.
In a modern version, choose a border color that picks up one tone from the floor. Skipping the full-height tile also makes this style one of the more budget-friendly ones to reproduce, since you are buying roughly half the tile of a floor-to-ceiling installation.
Mid-Century Modern: Wood, Texture, and Clean Lines
Mid-century bathroom ideas share a restrained look. Where 1950s pastel bathrooms were decorative, mid-century modern rooms were simplified, with flat panels, natural materials, and little ornament.
10. Walnut floating vanity
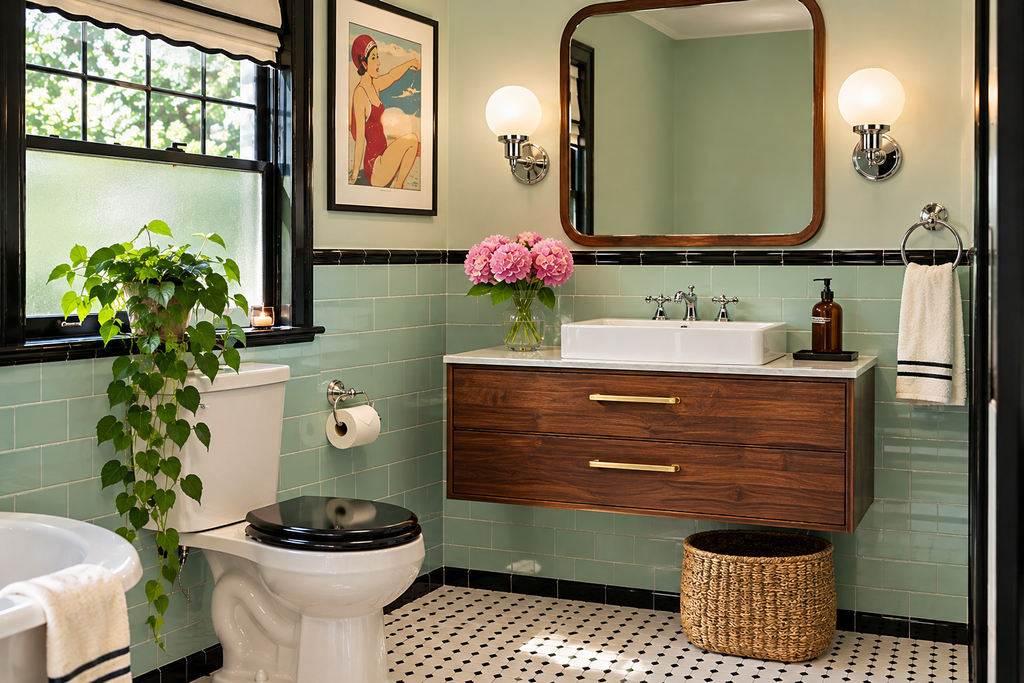
A wall-hung vanity with flat doors, a slim profile, and tapered or no legs is the clearest mid-century signal. Raising it off the floor makes a small room feel larger and makes cleaning easier. Walnut or a walnut-look finish is the classic choice.
Wood in a bathroom needs attention to moisture. Ask about the finish and edge sealing, particularly around the sink cutout and the back panel, where moisture lingers. As with wall-hung sinks, the wall needs solid blocking behind it to carry the load of a countertop and a full drawer.
11. Terrazzo and penny tile
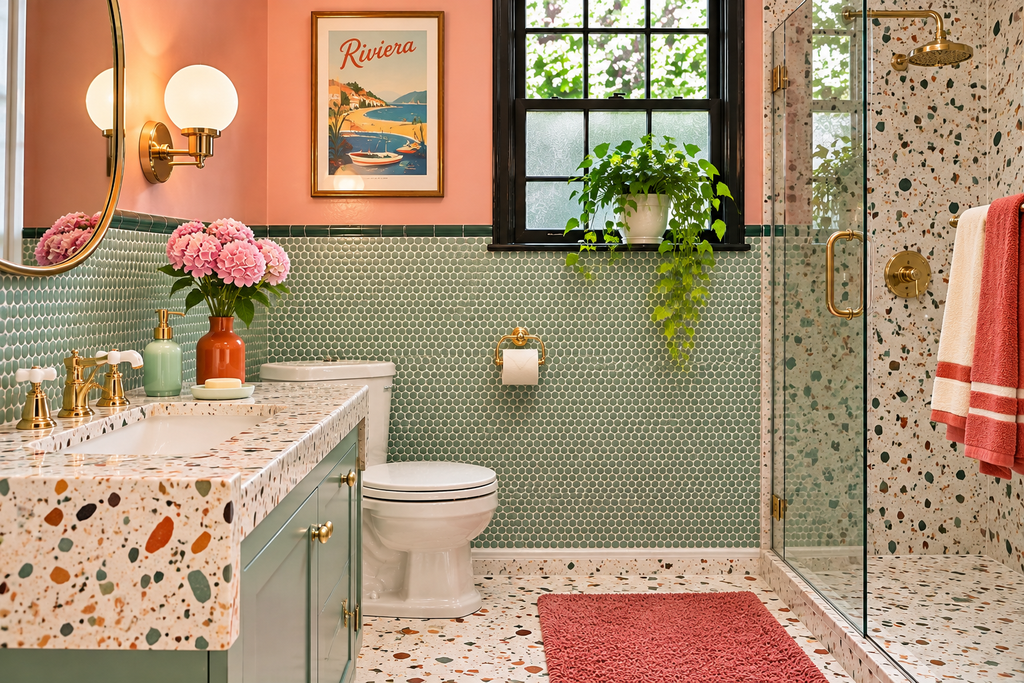
Terrazzo, a mix of stone or glass chips set in a binder, and small round penny tile both show up in mid-century interiors. Traditional cement-based terrazzo needs sealing and can stain. Porcelain terrazzo-look tile gives the appearance with less upkeep and is the simpler choice for most homeowners.
Penny tile has a lot of grout lines. A darker grout hides staining, and epoxy grout resists stains better but is harder to install and is generally best left to an experienced tile setter.
12. Organic geometry: starbursts, boomerangs, and slats
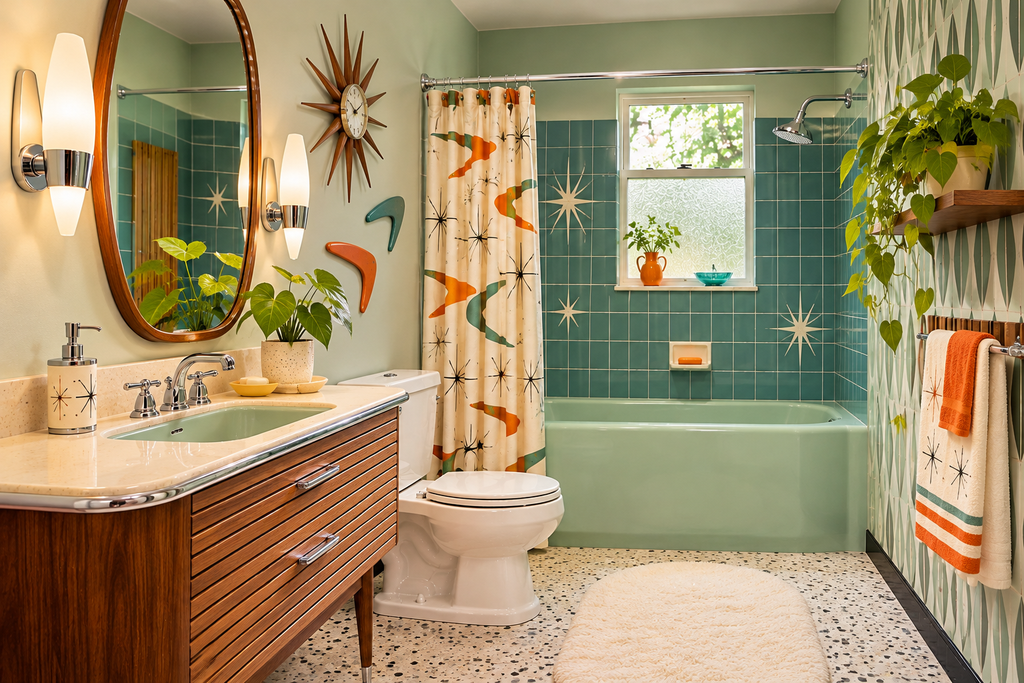
The more playful side of the era used boomerang shapes, starbursts, and wood slat walls. Use them as accents. A starburst mirror, a slatted wood panel behind the vanity, or a patterned tile border is enough. A full atomic-age theme is hard to live with and difficult to remove later.
The 1960s Through the 1980s: Bold, Brown, and Pastel Again
These decades are easy to dismiss as dated, which is partly why they have become interesting to people who want something less expected.
13. 1960s mod with graphic wallpaper
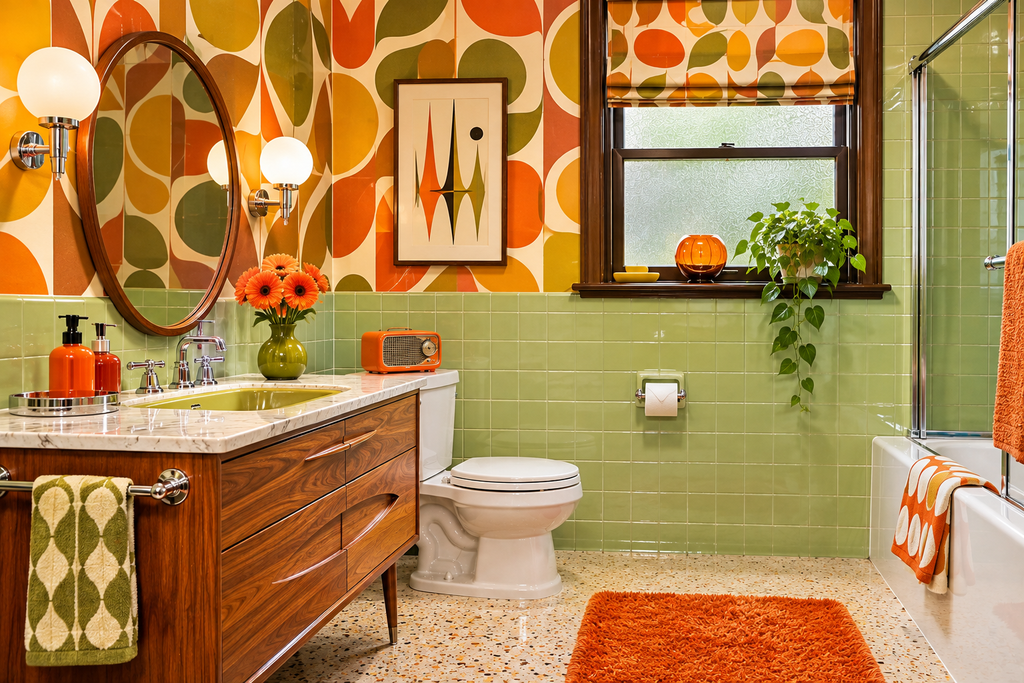
High-contrast black-and-white patterns, bold stripes, and bright orange or pink accents define the mod look. In a bathroom, one wall of graphic wallpaper does more than covering all four. Use vinyl or a product explicitly rated for bathrooms, and keep it away from the direct splash zone of a shower or tub. Powder rooms with no shower are the safest place for wallpaper.
14. Harvest gold and avocado green
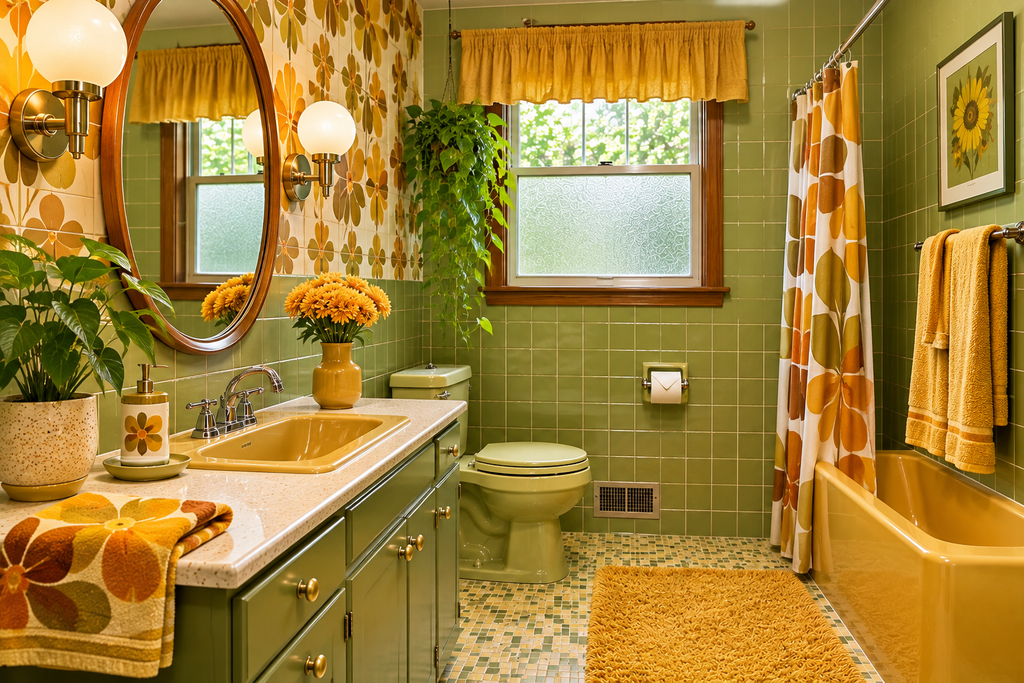
A 1970s bathroom often meant harvest gold, avocado, or both. These colors are muddy when used everywhere, but they work in a controlled way. Painted avocado walls with white fixtures and brass hardware look intentional. Gold fixtures in an otherwise white room look like a leftover.
If you have original gold or green fixtures, white and warm wood help lighten them. Cream tile can bridge the gap between the fixtures and a modern white vanity top.
15. Earth tones, rust, and wood paneling
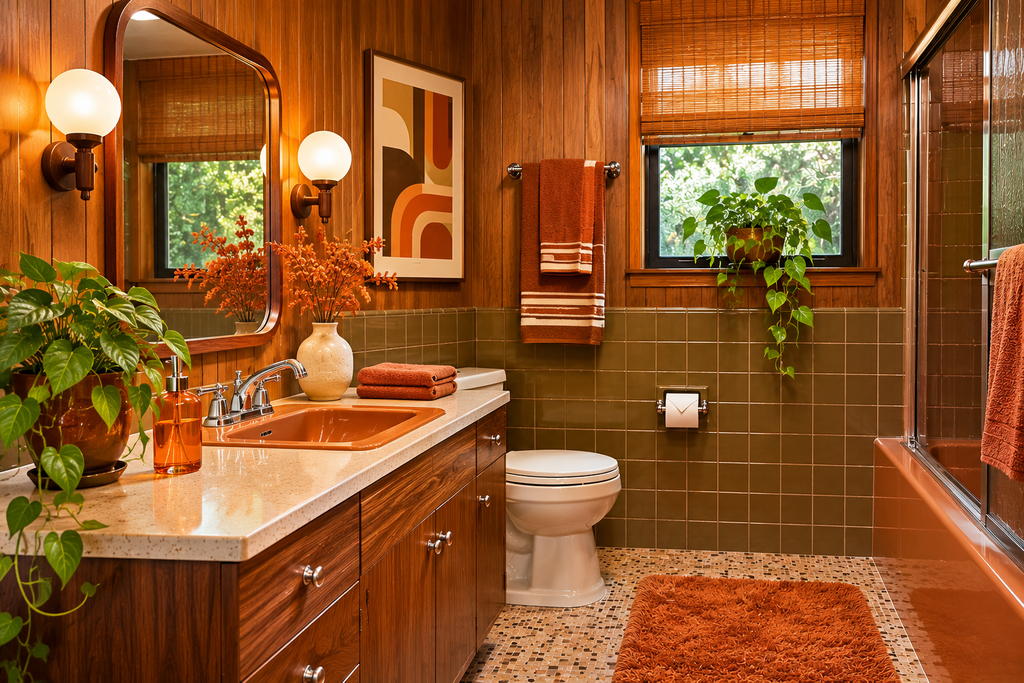
Brown tile, rust orange, and wood paneling were also part of the decade. Wood paneling is the weak spot in a bathroom because of the humidity, so keep it away from the shower and tub or use a sealed, moisture-rated material.
Natural fiber accents such as wicker and macramé are in character but can mildew in damp air, so place them outside the steamy area. The same goes for hanging plants. If you add them, check whether your choices are toxic to pets.
16. 1980s peach, mauve, and glass block
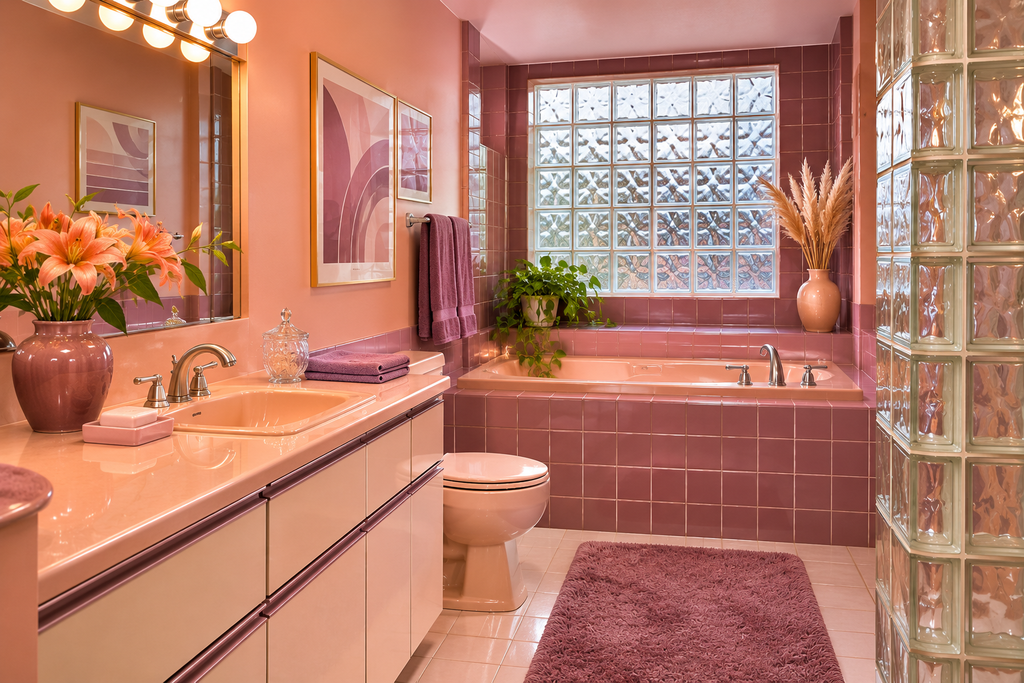
Peach and mauve tile, brass fixtures, and glass block windows are the signature of the 1980s. Glass block is genuinely useful, since it admits light while keeping privacy, and it is still available. If you want a version of this look that does not feel like an unrenovated bathroom, keep one or two of the colors and swap the rest for white and wood.
Moody Vintage: Dark Walls and Old-World Detail
A moody vintage bathroom uses deep color, aged metal, and traditional details to make a room feel enclosed and warm instead of bright. It works best in bathrooms with some natural light, or with enough layered lighting to offset the dark surfaces.
17. Deep green with aged brass
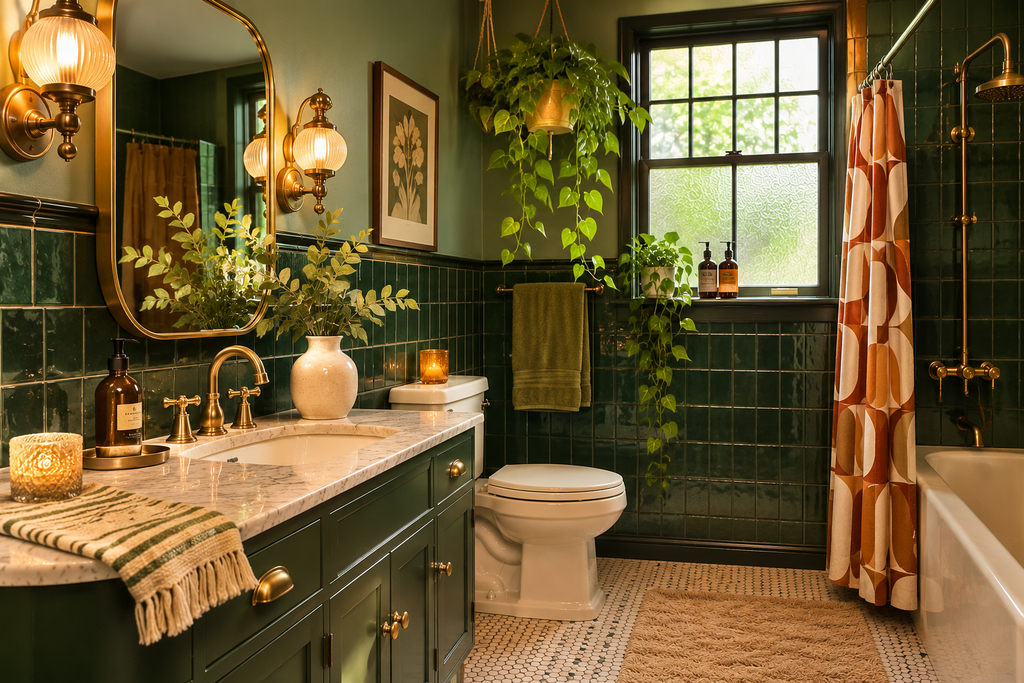
Forest or bottle green walls, brass fixtures with an unlacquered or aged finish, and white or cream marble-look tile make a balanced, classic combination. The brass keeps green from feeling heavy. Unlacquered brass develops a patina over time, which some people want and others do not, so ask for lacquered finishes if you want it to stay as bought.
18. Oxblood, aubergine, and dark wainscoting
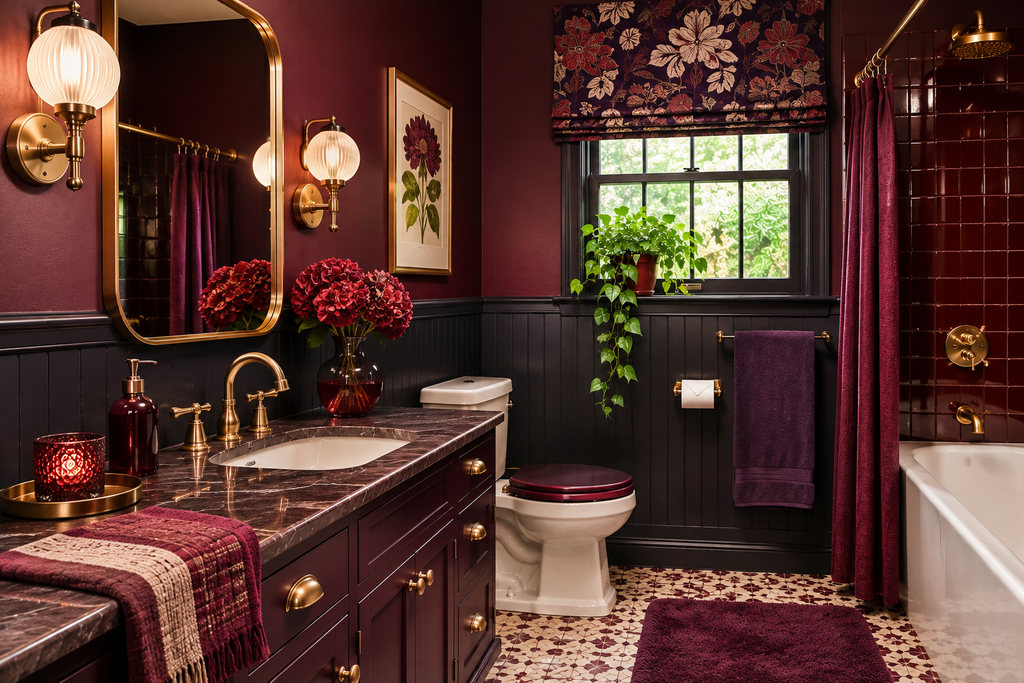
Deep red and purple tones pair with dark wood wainscoting or painted paneling to create a library feeling. A satin or eggshell finish on walls is easier to wipe than flat paint, and semi-gloss on trim handles moisture better.
A dark room absorbs light, so the lighting plan matters more here. Use layered sources: sconces on each side of the mirror at roughly 60 to 66 inches from the floor, plus ceiling lighting. Choose warm bulbs, around 2700K, with a high color rendering index so skin tones look natural.
19. Victorian and Edwardian-leaning vintage
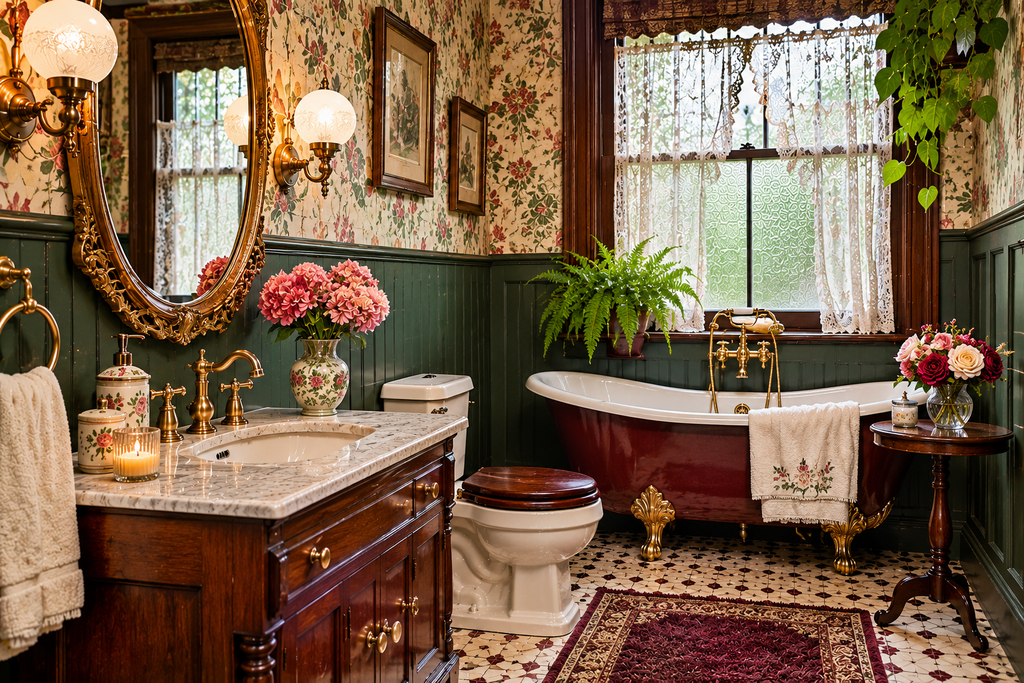
This version is more ornate, with beadboard or paneled wainscoting below, patterned or painted wall above, a ceramic pedestal sink, and a high-tank or chain-pull toilet look. Reproduction high-tank toilets are available, but check that they meet current water use requirements and are installed correctly, since the tank sits well above the bowl.
Ornate does not need to mean cluttered. A single paneled wall and a framed mirror capture the idea.
Grandmillennial: Layered, Traditional, and Deliberately Fussy
Grandmillennial design borrows from the rooms of grandparents: florals, ruffles, skirted sinks, and antique-feeling furniture, but applied with enough editing to look current. It is the easiest of the retro styles to add through softer elements.
20. Floral wallpaper and a skirted vanity
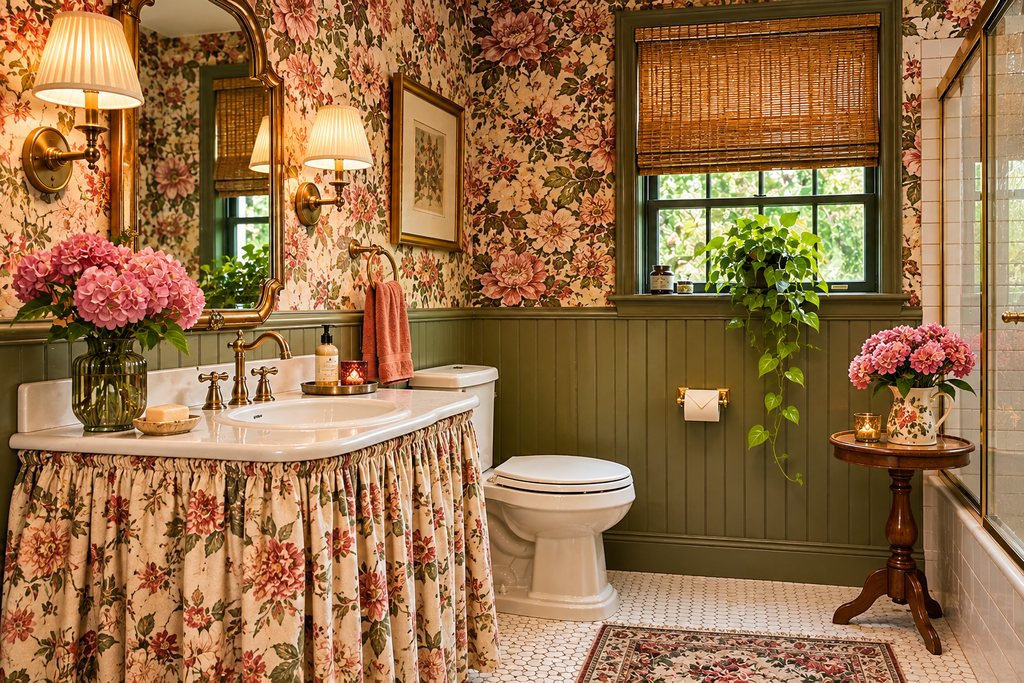
A small floral or botanical wallpaper, a fabric skirt around a pedestal or console sink, and a painted wooden mirror frame create the look. The skirt should be washable and ideally a performance fabric, since it sits close to splashes. Wallpaper in a powder room works well. In a full bath, keep it above a tile wainscot and away from the shower.
21. Blue-and-white chinoiserie with scalloped trim
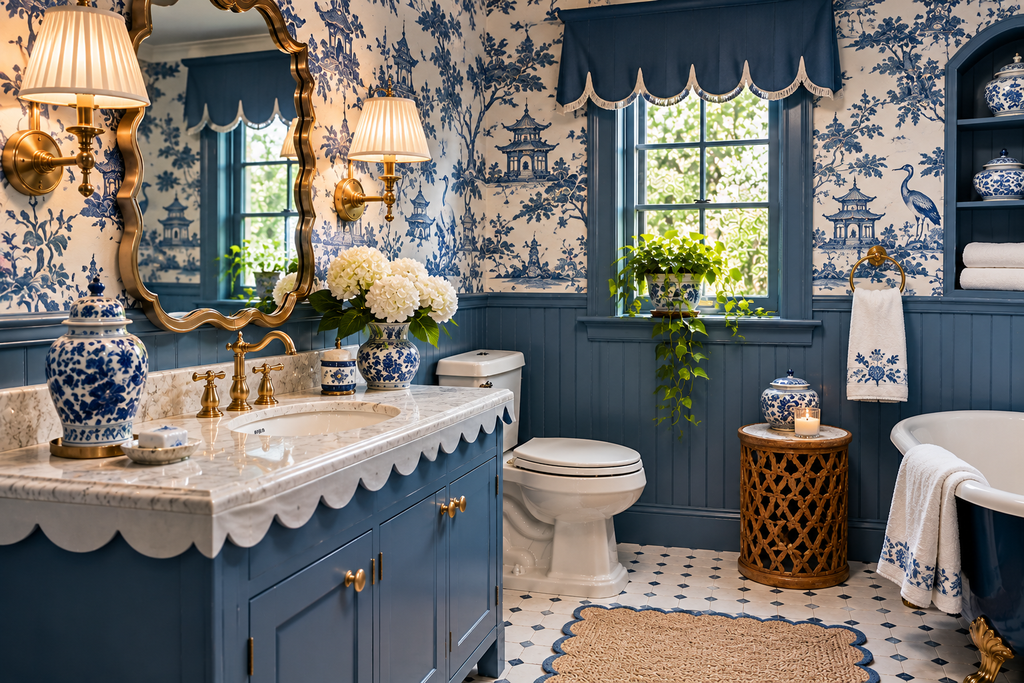
Blue-and-white porcelain patterns, scalloped edges on shelves and mirrors, and gingham or check accents give a more polished version. This is a good fit for guest bathrooms where you can commit to a pattern. Scalloped tile is widely available and creates the effect without any custom work.
Two More Approaches Worth Knowing
22. Cottage vintage with beadboard and a painted floor
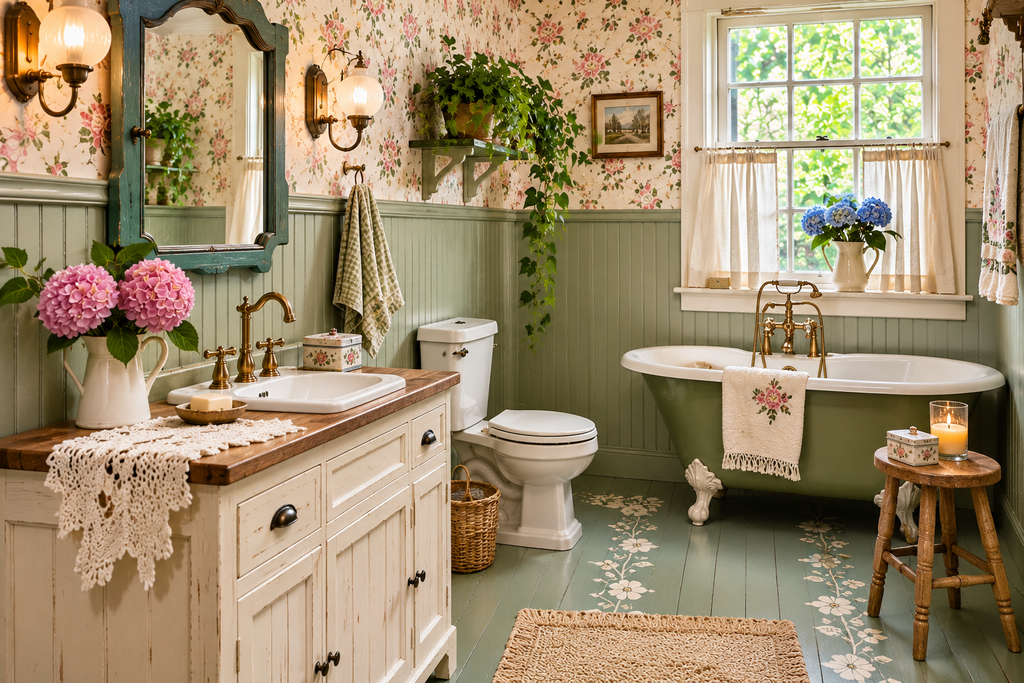
Beadboard walls, a painted wood or vinyl plank floor, an enamel-look sink, and open shelving give a casual, lived-in feel. It is among the least expensive ways to get a vintage bathroom. Use moisture-resistant beadboard panels instead of standard wood in damp areas, and seal the floor properly.
23. A modern bathroom with one vintage anchor
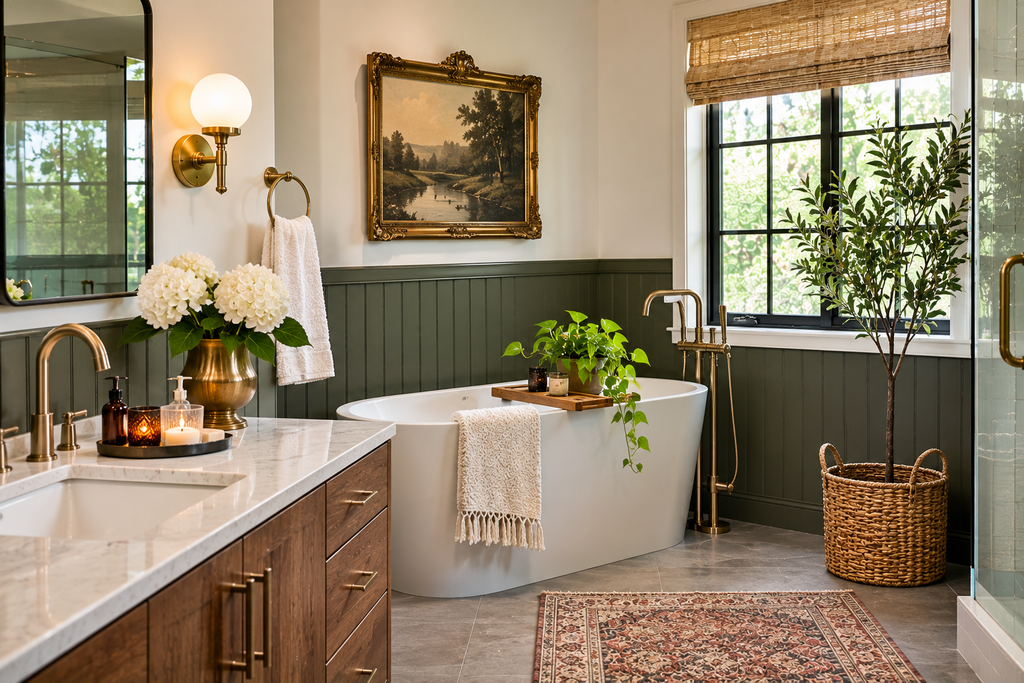
Sometimes the best retro bathroom is not a retro bathroom. A plain, well-built room with a single strong period element, such as a clawfoot tub, a hex tile floor, or a vintage-style vanity mirror, often looks more convincing than a full-period recreation. Pick the anchor first and let everything else stay quiet around it.
What Older Bathrooms Can Hide
Period charm is not worth a health risk, and older bathrooms can contain materials that matter before you begin any demolition or sanding.
- Lead paint. Federal law banned lead-based paint in housing in 1978, so painted surfaces in older homes may contain it. Sanding, scraping, or demolition can release dust. The EPA has rules for contractors who disturb painted surfaces in pre-1978 housing, and testing kits and certified inspectors are available. Verify current requirements with the EPA before starting.
- Asbestos. Some older vinyl flooring, floor tile adhesives, and wall or ceiling materials can contain asbestos. It is generally a hazard when disturbed. Have suspect materials tested by an accredited lab before cutting, sanding, or removing them.
- Electrical. Bathroom outlets need GFCI protection, and lights near a tub or shower must be rated for damp or wet locations. Vintage-looking fixtures should be listed for bathroom use. Local codes differ, and electrical work in a wet room is a reasonable point to hire a licensed electrician.
- Ventilation. Dark paint, wallpaper, and wood all suffer when humidity lingers. A commonly cited guideline is one cubic foot per minute of fan capacity per square foot of floor area, with a 50 CFM minimum for small rooms. Verify the right size for your room with the fan manufacturer or a ventilation professional.
Frequently Asked Questions
Can I keep original tile that has a few cracks? Often yes. Isolated cracks can be repaired or replaced individually. Widespread cracking, hollow-sounding tile, or tile that moves can point to a failing substrate, and that needs to be addressed before any cosmetic fix.
Are salvaged vintage fixtures safe to install? They can be, with caution. Old toilets may exceed current water limits, old faucets may contain more lead than current standards allow, and supply connections may not match modern plumbing. Have a plumber check anything used before installation.
What is the easiest retro style for a renter? Styles built on removable items work best: a checkerboard peel-and-stick floor in a lease-friendly product, a vintage-style mirror and lighting that can be swapped back, a shower curtain and towels in the right color, and a removable wallpaper. Confirm what your lease allows first.
How do I stop a retro bathroom from feeling like a theme? Limit the era-specific items to two or three and let the rest be neutral. Mix old and new materials, and avoid matching every surface.
Key Takeaways
Start by deciding whether you are preserving, reproducing, or borrowing a look, because that choice determines budget and sequence. Pick one era and one or two strong features, such as a hex floor, a color, or a pedestal sink, and keep the rest quiet. Before touching anything in a house built before the late 1970s, test for lead and asbestos, and treat plumbing, electrical, and ventilation as the parts that must be right regardless of style. Verify local code and product details before purchasing fixtures, especially salvaged ones.

About Syprose Kiche
Syprose Kiche is the creator and writer behind My Besuited Home, a practical home and garden website covering DIY projects, gardening, lawn care, landscaping, home improvement, and outdoor living. She focuses on turning everyday homeowner questions into clear, practical guides backed by careful research and useful real-world considerations.