
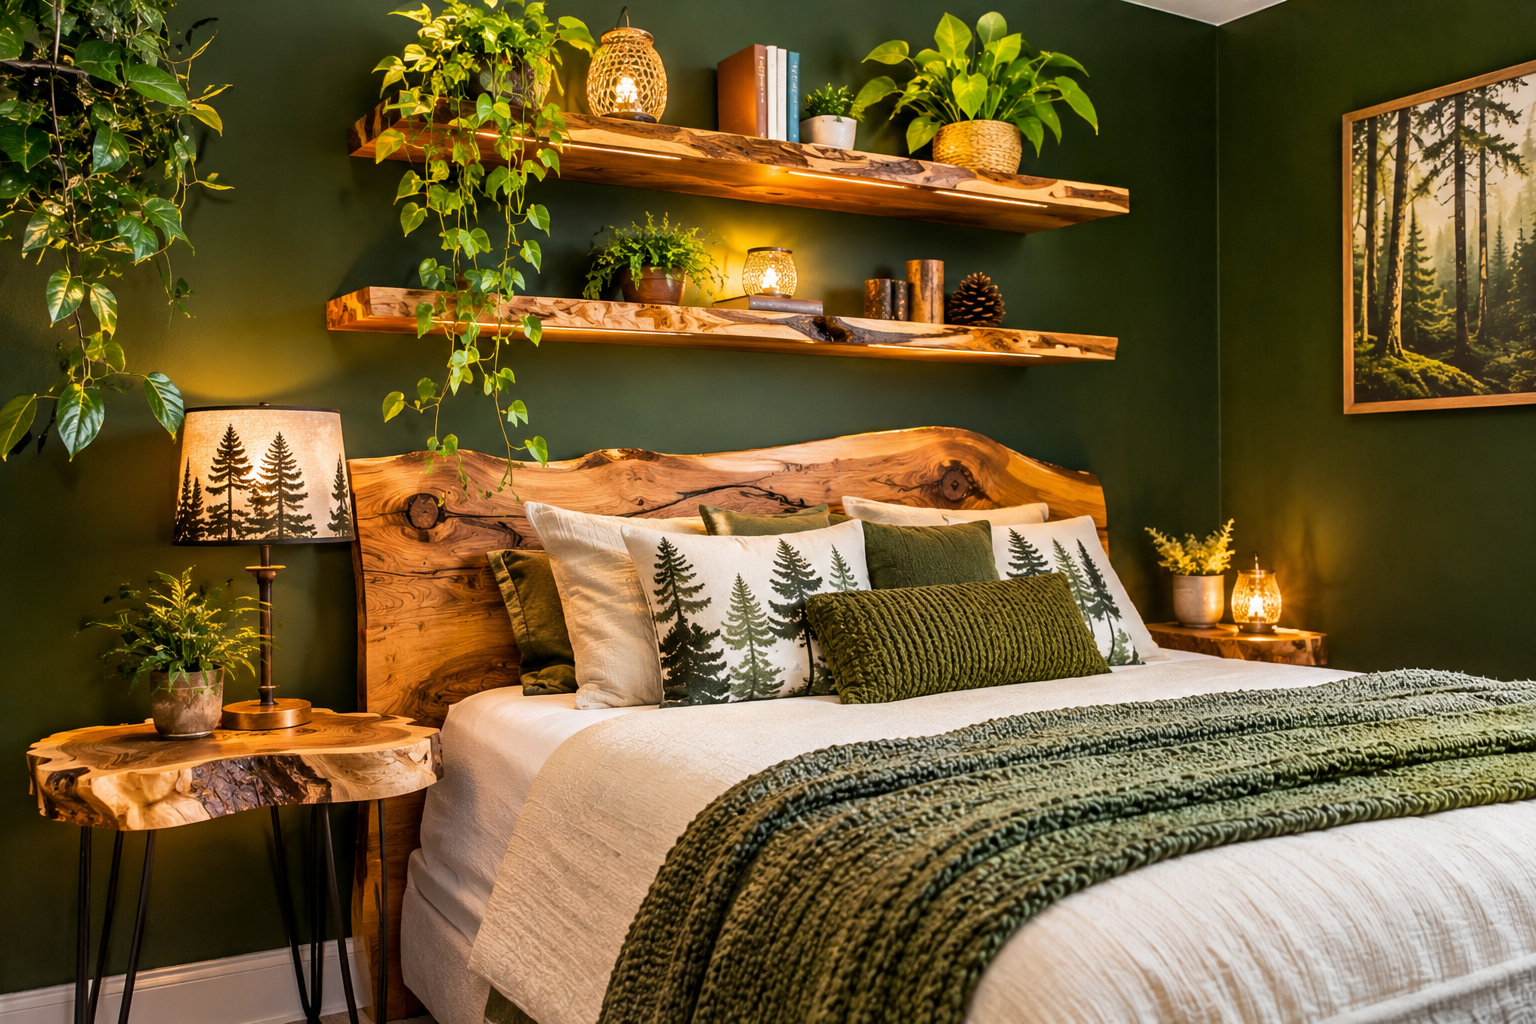
A forest-themed room tends to go wrong in a predictable way. Someone buys a deer print, a plastic fern wreath, a plaid throw and a resin owl, sets them all in a beige room, and ends up with something closer to a souvenir shop than a woodland. The problem is that a real forest is not a collection of objects. It is layers: muted greens and bark browns, light that arrives dim and filtered, and texture on every surface, from the rough trunk to the soft floor. Decor that reproduces those conditions works. Decor that reproduces the souvenirs does not.
The ideas below are built around that difference. Some involve paint and wood, some involve living plants, and a few are simply about light and fabric. You do not need all thirteen. Three or four chosen well will do more than thirteen scattered around a room.
How a Forest Builds a Room (and Why It Matters for Decor)
It helps to borrow the way woodlands are organized, because the same logic holds indoors.
A forest has a canopy, an understory and a floor. In a room, the canopy is everything overhead and at the top of the walls: ceiling color, tall branches, hanging lights, plants on high shelves. The understory is the middle zone, roughly eye level: wall color, art, ferns, shelving, the sides of furniture. The floor layer is rugs, low baskets, stumps, and anything sitting at your feet. Rooms that feel flat usually have decor at only one of these heights, most often a single band at eye level.
Color in a forest is also quieter than most decor catalogs suggest. Greens are rarely bright. They run toward gray-green, olive, and deep blue-green, broken up by bark brown, lichen gray, the pale tan of dead leaves, and the occasional dark red or orange from berries or fungi. Shiny finishes are rare. Most surfaces are matte, rough, or slightly damp-looking. If you keep the palette muted and the finishes dull, almost any individual object looks more convincing.
Light is the last piece, and the one people skip. Sunlight through a canopy is dappled and dim, and it moves. A room with one harsh overhead fixture will never feel like a woods no matter how much moss is on the walls. Several low, warm light sources do more for the atmosphere than any single decorative object.
Walls and Surfaces: Setting the Backdrop
1. Deep Green Paint, Chosen for the Light You Actually Have
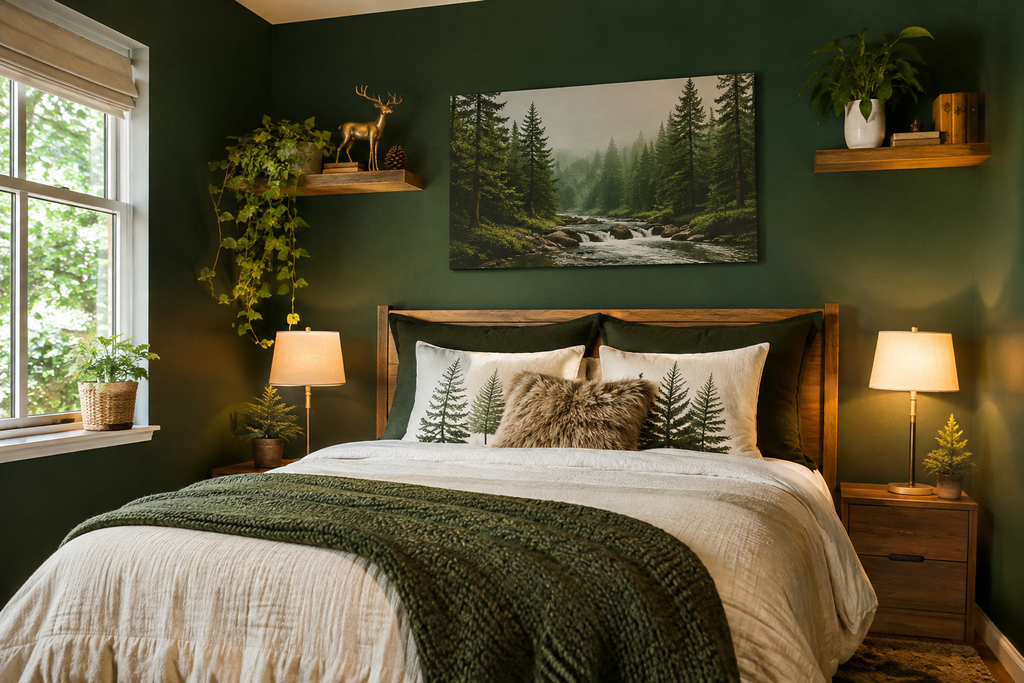
Paint is the cheapest way to change a room’s whole character, and it is also where forest decor most often goes wrong, because the green on the chip is rarely the green on the wall.
Dark, muted greens (think pine needle, spruce, or a gray-leaning olive) read very differently depending on which way the window faces. A north-facing room has cooler, bluer light, which can push a green toward cold and gloomy. A south- or west-facing room warms the same color and can make it look closer to olive. Because of this, buy sample pots rather than relying on a swatch, paint a roughly two-foot square on at least two walls, and look at them in the morning, mid-afternoon and under your evening lamps before committing.
A few decisions are worth making deliberately:
- Finish. Matte or eggshell suits the woodland look and hides small wall flaws. In hallways, kids’ rooms or kitchens where walls get touched, look for a scrubbable matte rather than a flat finish that marks easily.
- Ceiling. Carrying the wall color onto the ceiling creates a canopy effect and can make a room feel enclosed in a cozy rather than a cramped way. In a small, low-ceilinged room with little daylight, a lighter ceiling is the safer call.
- Ventilation. Paint with low or zero VOC content is easier to live with in bedrooms, and any painting job should have open windows and fresh air moving through the room until the smell fades.
Dark walls absorb light. That is the main trade-off. In a room with weak daylight you will need more lamps, not fewer, to keep the space from feeling like a cave.
2. A Woodland Mural or Botanical Wallpaper on One Wall
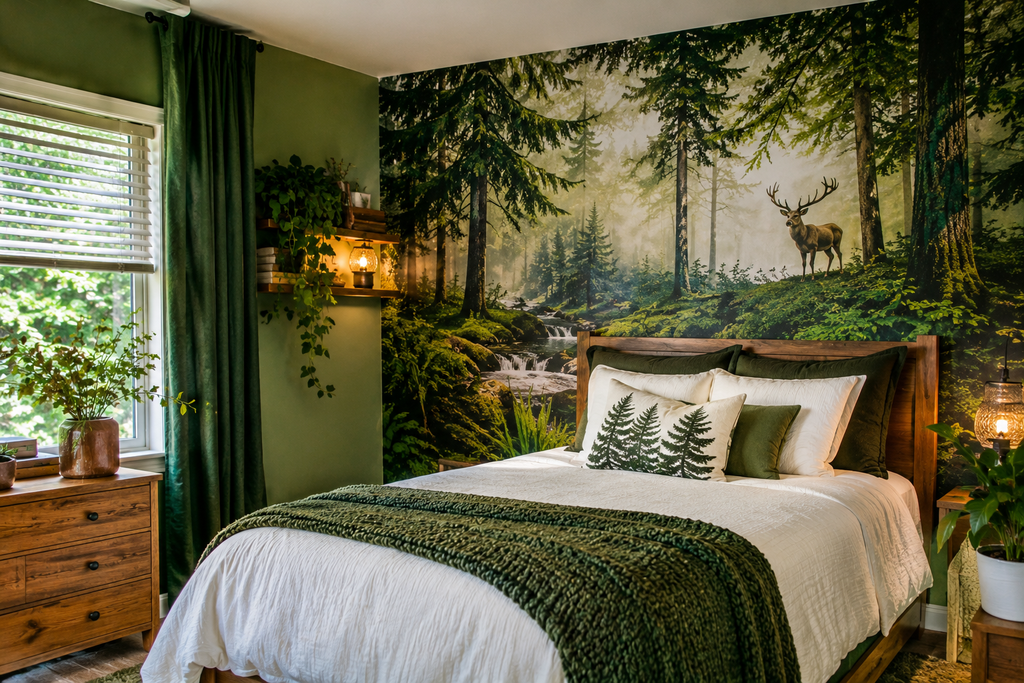
If painting a whole room green feels like too big a swing, a single feature wall with a forest pattern gets you most of the effect. Large-scale prints of tree trunks, misty hillsides, ferns or layered foliage work best behind a bed or a sofa, where the eye settles.
Scale matters more than subject. A big, soft, slightly blurred print tends to look atmospheric. A small repeating pattern of tiny trees can look busy and nursery-like. Pick a print with a muted palette that echoes the rest of the room, because a bright, saturated forest scene will fight with everything else.
For renters, peel-and-stick wallpaper is the usual route, but it has real limits. It adheres best to smooth, fully cured paint. Textured walls, such as orange peel or knockdown finishes, often leave gaps and bubbles. Freshly painted walls generally need to cure for a few weeks before anything adhesive goes on, and manufacturers publish their own timelines, so check the product instructions. Always test a small hidden patch first, since some adhesives can pull paint when removed.
3. A Plank or Board-and-Batten Wall in a Bark-Toned Finish
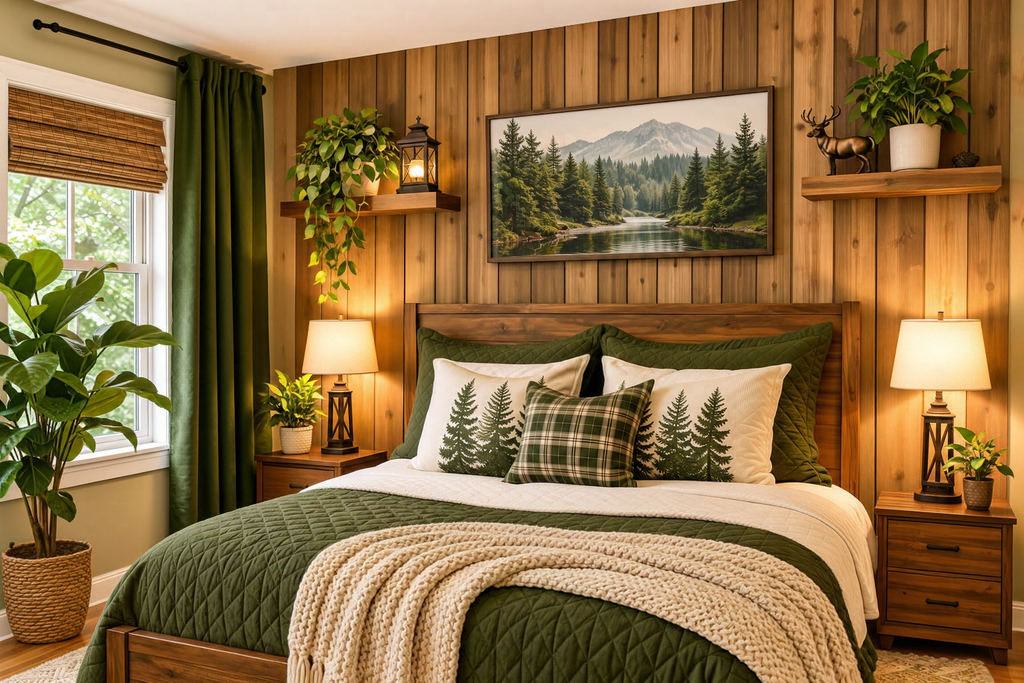
Wood paneling suggests trunks without any literal tree imagery, which keeps the look sophisticated. Vertical planks are especially effective, since they echo the vertical lines of a stand of trees.
There are two sensible routes. Real tongue-and-groove or shiplap boards, stained in a soft walnut, gray-brown or weathered finish, give the most convincing result. Board-and-batten, built from flat sheet material and narrow strips, is cheaper and easier for a first-time DIYer, and painting it in a deep green or charcoal-brown works well.
Some practical points: mark the studs before you start, use a level on the first board because every later one follows it, and leave a small expansion gap where real wood meets floor or ceiling, since wood moves with humidity. If you are cutting or sanding, wear eye protection and a dust mask, and note that anything involving electrical outlets in the wall means switching off the circuit and, if you are unsure, hiring an electrician to extend the boxes.
Natural Materials and Furniture: Bringing the Trunk Indoors
4. Live-Edge Wood Shelves, Tables and Mantels
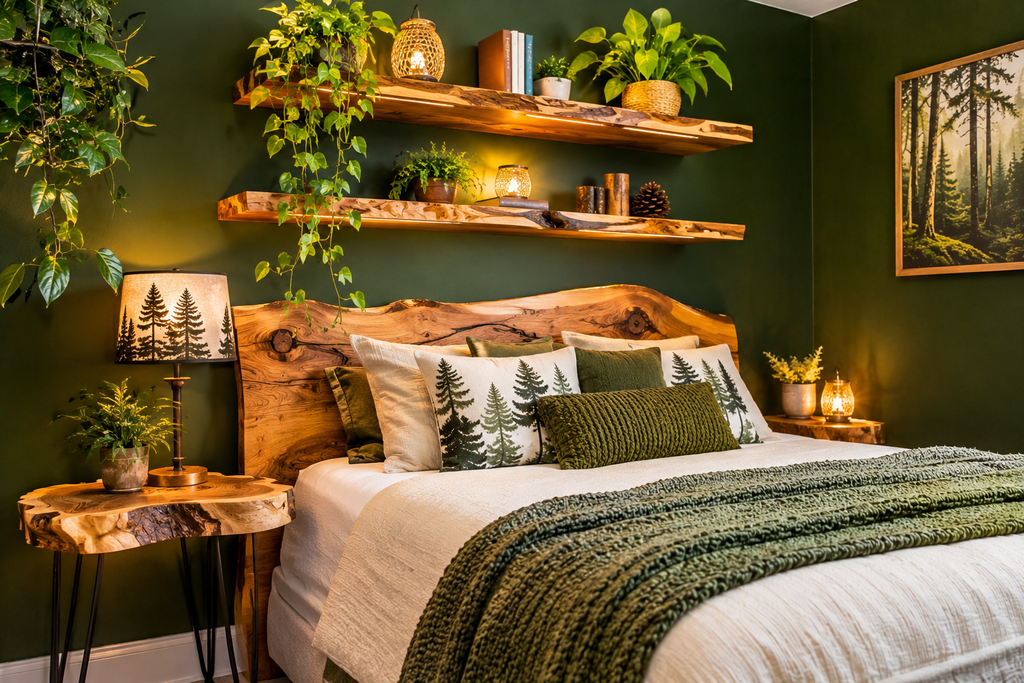
Live-edge pieces keep the natural outer contour of the tree, bark line included, and they are the most direct way to get an organic silhouette into a room. They suit a floating shelf, a console, a mantel or a coffee table.
Price varies enormously depending on species and size, and a full slab table can cost a lot. A live-edge shelf or a small side table delivers much of the same visual effect for far less. Whatever you buy, ask whether the wood is kiln-dried. Wood that was not dried properly can warp, crack or split once it is in a heated home. Also ask what finish was used. Penetrating oil finishes feel more natural but need periodic re-oiling, while a film finish such as polyurethane resists rings and spills better on a surface that will see daily use.
If you want the look on a tighter budget, buying a plain board and a short length of bark-edged material to mount along the front is a possible shortcut, though it is rarely as convincing as a true live edge.
5. Log and Stump Side Tables
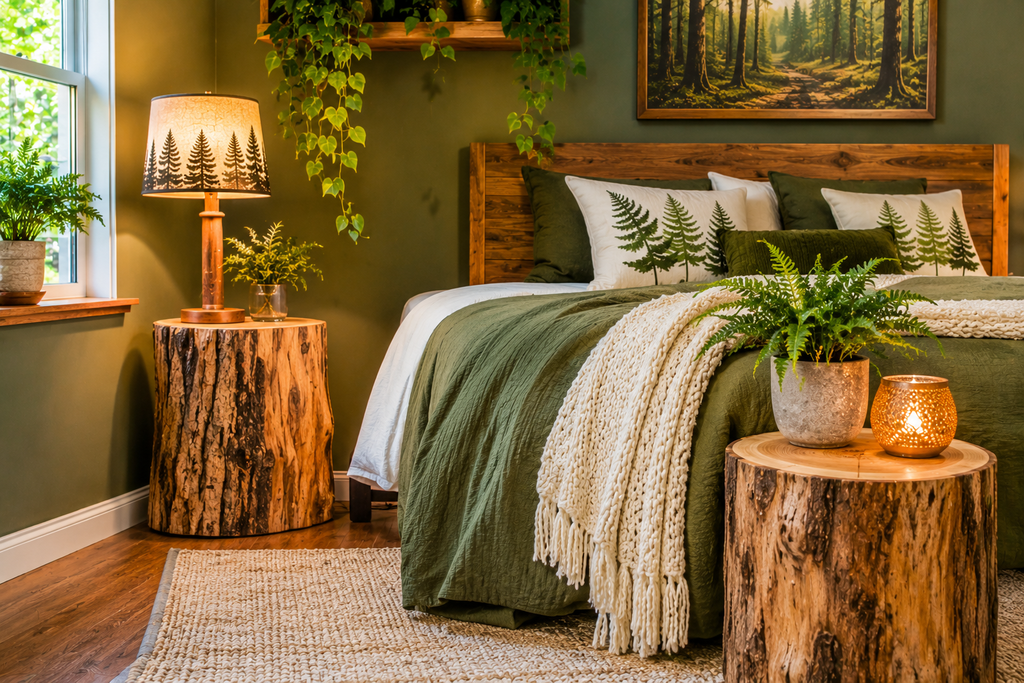
A cross-section of a trunk makes a good side table, plant stand or bedside perch, and it is one of the simplest ways to add a floor-level layer.
The catch is that fresh-cut wood is wet. Bringing a green log indoors can lead to cracking as it dries, mold on the surface, and sometimes insects that were living in the wood. Air-drying takes a long time, and a common rule of thumb is roughly a year per inch of thickness, although climate and species change that considerably. For most people, buying a kiln-dried or already-sealed stump from a furniture maker or a craft supplier is the practical answer.
When you inspect any log piece, look for tiny round holes and fine powdery sawdust, which can indicate wood-boring insects. Check that the bark is firmly attached, since loose bark will flake onto the floor, and seal the surface with a clear finish so it does not shed or stain what you set on top. Add felt pads underneath to protect your flooring, because the underside of a cut log is rarely perfectly flat.
6. Branch Arrangements and Hanging Branch Installations
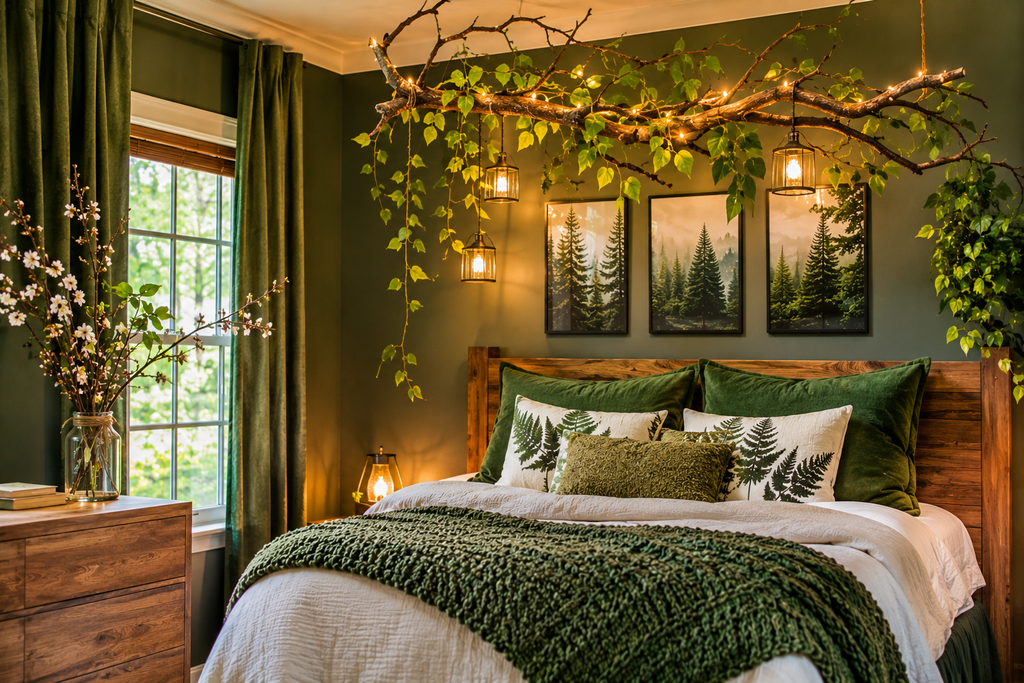
A tall vase of bare branches, a branch hung horizontally as a curtain rod, or a cluster of slim branches suspended from the ceiling gives you canopy-level presence with very little cost.
Branches that look good include birch for its pale bark, curly willow for its movement, and any gnarled branch with an interesting form. To bring them indoors safely, shake off loose debris, inspect for insects or egg cases, and let them dry for a couple of weeks in a garage or outbuilding before moving them inside. Remove any bark that is peeling in large sheets.
Be careful about where the branches come from. Cutting from public parks, preserves and many other protected lands is typically prohibited, and on private property you need the owner’s permission. If you prune your own trees, that is a straightforward source. Otherwise, craft stores sell cleaned, dried branches that avoid the question entirely.
Greenery and Moss: The Living and Preserved Layers
7. Preserved Moss Wall Art and Moss Frames
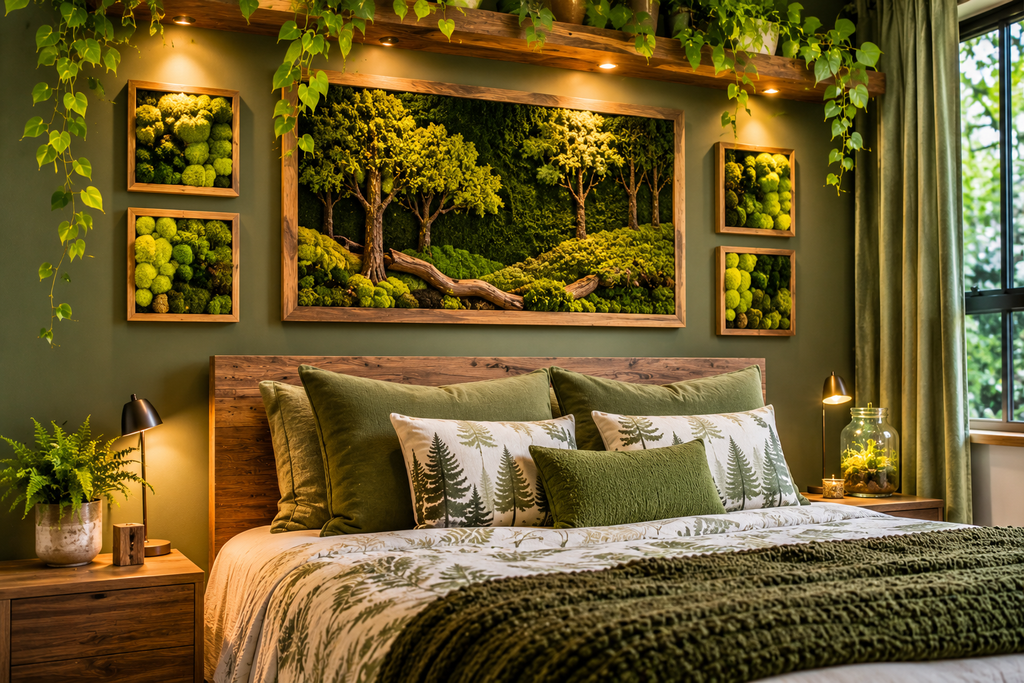
Preserved moss gives you the soft, velvety green of a forest floor without any watering. It is moss that has been treated, usually with a glycerin-based solution and sometimes dyed, so that it stays soft and colored without growing.
That treatment defines the care rules. Preserved moss does not need light or water, and in fact misting it can cause damage. It also does best in stable, moderate humidity. Hang it away from direct sunlight, which fades the color, and away from steamy bathrooms, where it can soften and may develop mold. Keep it clear of heat vents and radiators too.
On fire safety: unless a product is explicitly sold as flame-retardant, assume that dried and preserved plant material will burn. That means keeping a moss frame well away from candles, fireplaces, and anything else that produces a flame or high heat, and not placing it directly over a mantel where embers or sparks are possible.
One naming note. Much of what is sold as “reindeer moss” is actually a lichen. It looks and works the same way as decor, but if a seller labels it as lichen, that is not a mistake.
8. Ferns and Understory Plants in Layered Groupings
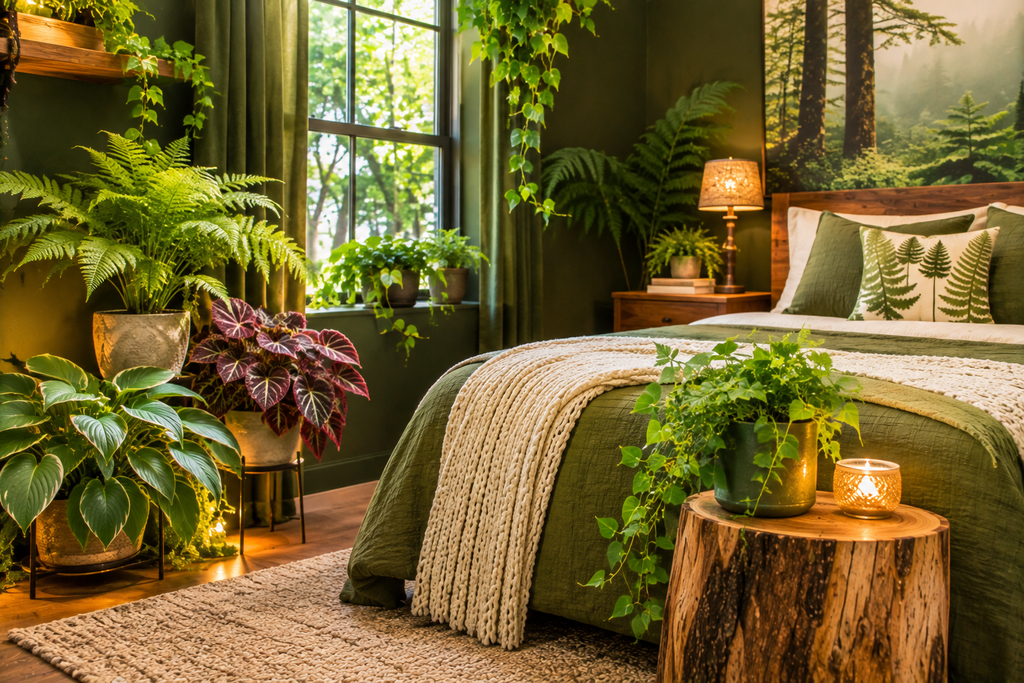
Living ferns are the plant that most convincingly says “forest.” They also bring height variety, which supports the canopy-understory-floor idea. Try a hanging fern near a window, a mid-height fern on a plant stand, and a low plant such as a peperomia on a side table.
Good candidates for indoor conditions include Boston fern, maidenhair fern, button fern and staghorn fern. They generally prefer bright, indirect light and consistent moisture, and most dislike dry heated air. A saucer of pebbles and water beneath the pot (with the pot sitting on the pebbles, not in the water), or grouping plants together, helps raise local humidity a little. Ferns that dry out completely often drop fronds quickly, so they are not the best match for someone who travels often or forgets to water.
If you have cats, dogs or small children, check each plant against the ASPCA’s online toxic and non-toxic plant lists before buying. Boston fern, maidenhair fern and many peperomias are listed as non-toxic to cats and dogs, while pothos, a popular trailing plant for forest-style displays, is listed as toxic. Plant lists are updated, so verify the specific species rather than relying on a memory of the common name.
In a room with very little natural light, a good-quality artificial fern is a better choice than a dying real one. Look for matte leaves with varied shades of green and slight irregularities, and avoid anything shiny, perfectly symmetrical or bright lime in color.
9. A Closed Terrarium as a Miniature Forest Floor
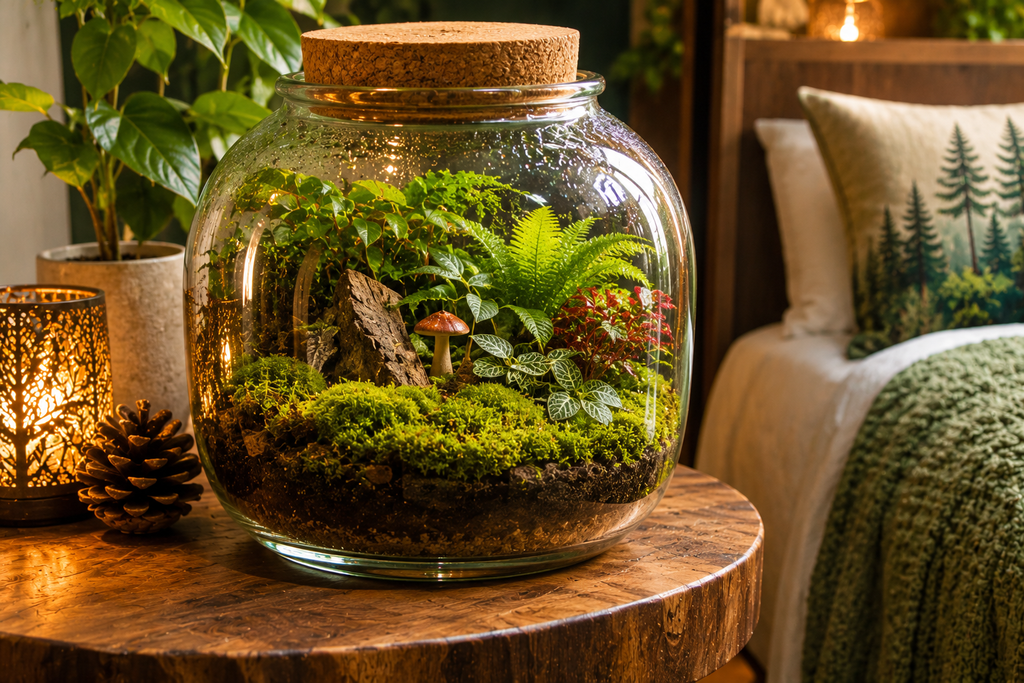
A lidded glass terrarium packed with moss, a small fern and a few stones is a self-contained mini woodland, and it is one of the best options for a desk, bookshelf or coffee table. It also works well in a bathroom or kitchen, where humidity is high.
A typical build goes in layers: a base of drainage material such as small pebbles or LECA, a thin layer of horticultural charcoal to help keep the environment fresh, a potting mix suited to the plants, and then living moss and small plants on top. Compared with an open container, the lid holds in moisture, so you water far less. Add water in small amounts, because a closed container has nowhere for excess to go.
Two problems come up often. First, direct sun can overheat a sealed glass container and cook the plants, so a spot with bright but indirect light is safer. Second, if you see white fuzzy mold or condensation that never clears, the terrarium is too wet or too closed. Open the lid for a few hours or a day, remove affected material, and reduce watering. Choose plants that tolerate humidity and low light, such as small ferns, mosses, and fittonia, and avoid succulents, which will rot in this environment.
10. Pinecones, Acorns and Bark in Bowls, Garlands and Trays
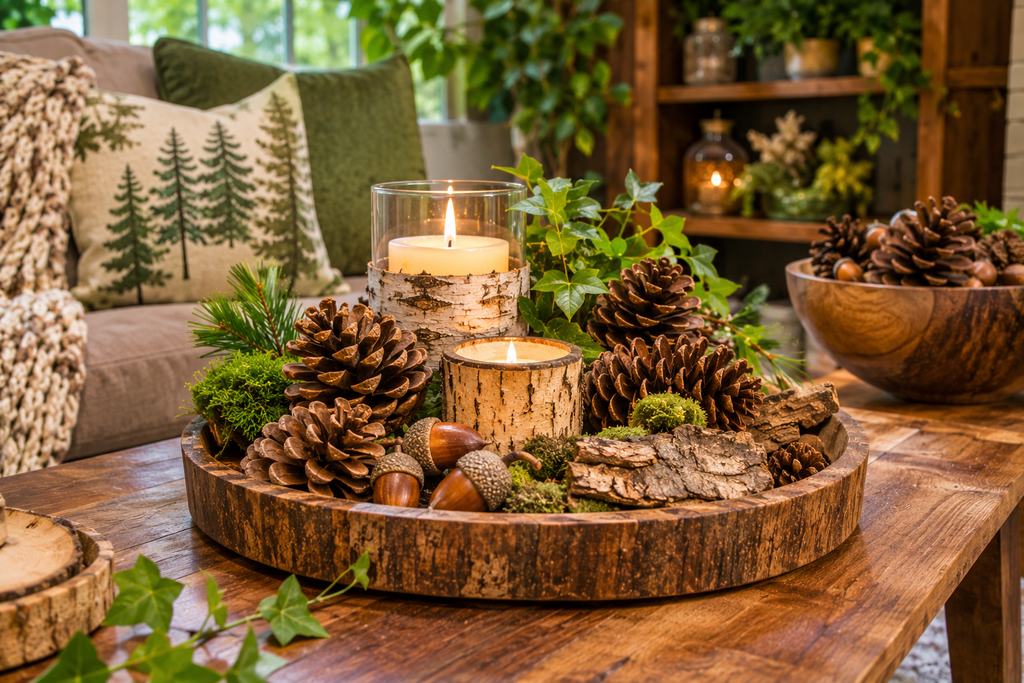
Small natural objects add the floor-level detail that makes a woodland feel real. A wide wooden bowl of pinecones, a runner of bark pieces down a dining table, a tray of acorns and small stones on a coffee table: these are cheap and easy to rearrange as seasons change.
If you gather anything outdoors, clean it first. Brush off dirt, and check for insects and spider egg sacs. Many crafters bake pinecones on a foil-lined sheet at a low temperature, often around 200°F for 30 to 45 minutes, to dry them and eliminate any hitchhikers, but treat that as a starting point and watch the oven closely. Sticky, resin-heavy cones are better left outdoors or air-dried instead, since pine resin is flammable.
As with branches, collecting in parks, preserves and many other public lands is restricted or prohibited, so check local rules. Some national forests allow limited collection with permits, while others do not. A bag of cleaned cones from a craft store is a reasonable alternative if you are unsure.
Lighting and Textiles: Making It Feel Like Woodland Air
11. Warm, Low, Layered Lighting That Mimics Filtered Sun
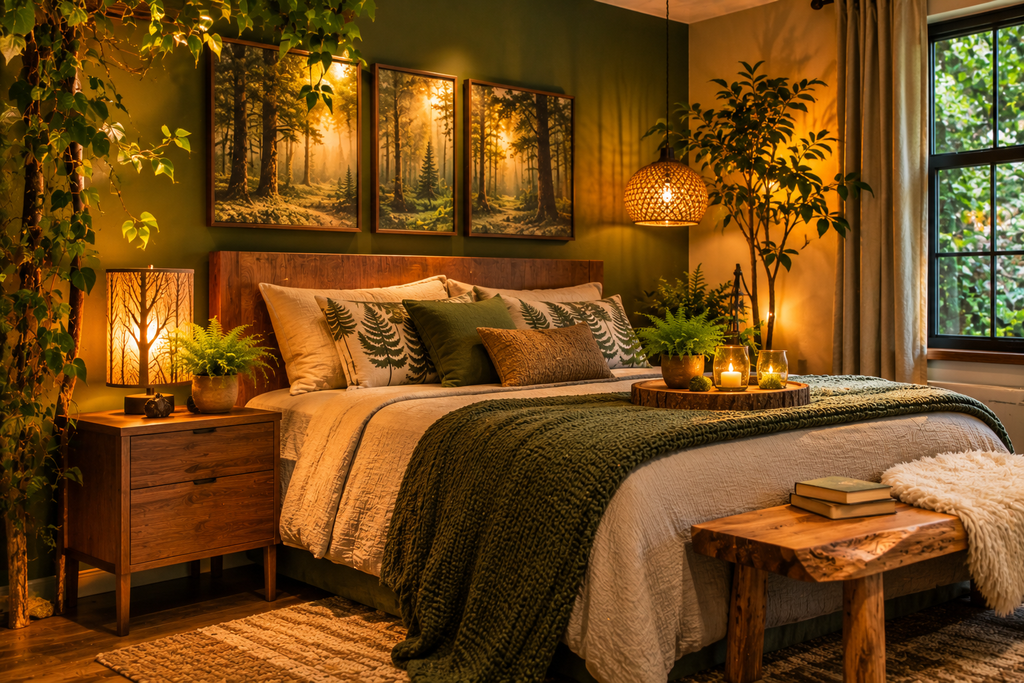
This is the single most overlooked part of the look. A forest at midday is dim compared with an open field, and at dusk it turns amber and dark. Rooms with one bright overhead fixture feel the opposite.
Replace or supplement a harsh ceiling light with two or three lamps at different heights: a floor lamp in a corner, a table lamp on a console, and perhaps a small lantern on a shelf or the floor. Look for bulbs labeled around 2200K to 2700K for a warm, amber glow, and put the main lights on dimmers or use dimmable bulbs. Fabric or woven shades soften the light better than clear glass.
For atmosphere, string lights draped along a branch or tucked behind a shelf give a dappled effect. Check that they are rated for indoor use, and if they will go anywhere damp or outdoors, confirm that they are rated for it. Follow the manufacturer’s limit on how many strands can be connected end to end, and do not run cords under rugs or pinch them in doors.
Candles bring real warmth, but they sit badly beside dried branches, preserved moss, and loose textiles. If you want a flame, keep it on a stable, non-flammable base, well away from any plant material and curtains, and never leave it unattended. Battery-operated flameless candles are a reasonable substitute for shelves with a lot of natural decor.
12. Wool, Linen and Sheepskin for a Forest-Floor Texture
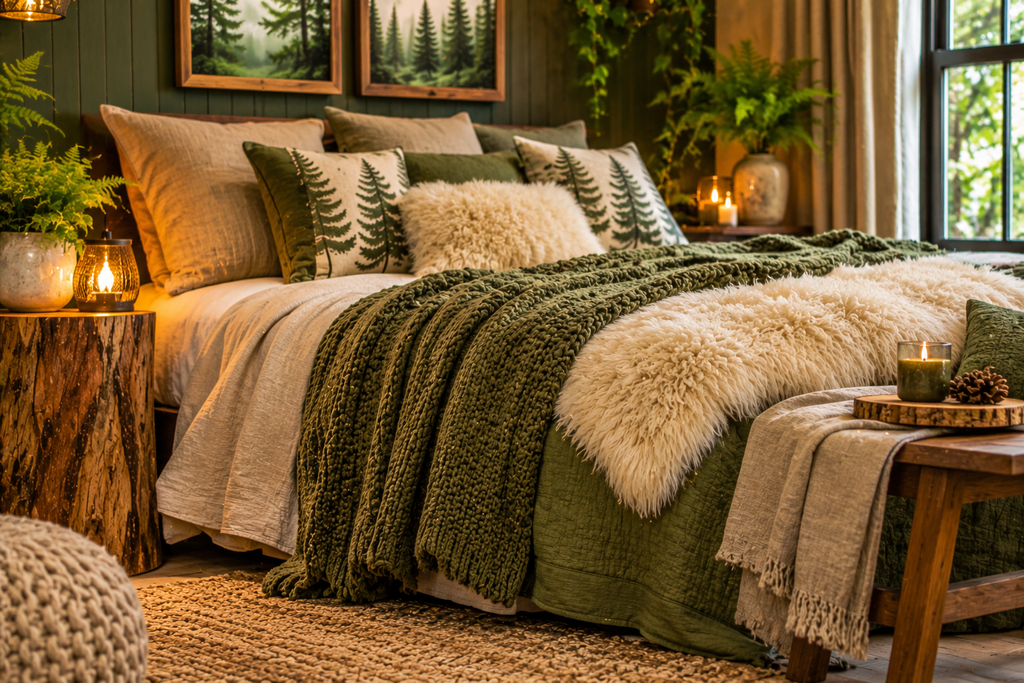
Textiles supply the softness that the harder wood and plant elements lack. Wool throws in moss green, rust or charcoal, a chunky knit blanket, linen curtains in sage or gray-green, and a sheepskin or shaggy rug underfoot create the same layered, tactile feel as a forest floor.
A few guidelines help. Pick fabrics with a natural, matte look, since shiny synthetics break the illusion. Keep the pattern simple, such as a muted plaid, subtle leaf print or textured solid. Layer two or three related shades of green or brown instead of using one heavy color, because that variation is what real foliage looks like.
Rugs on hard floors need a non-slip underlay, and sheepskin and shag rugs can trap dust, which matters if anyone in the household has allergies. Check care labels before buying, since many wool items are spot-clean or dry-clean only. If you choose faux fur, be aware that some synthetic fibers can melt or burn quickly near heat, so keep them away from fireplaces and heaters.
Details and Accents: The Finishing Touches
13. Restrained Wildlife and Folk-Art Accents
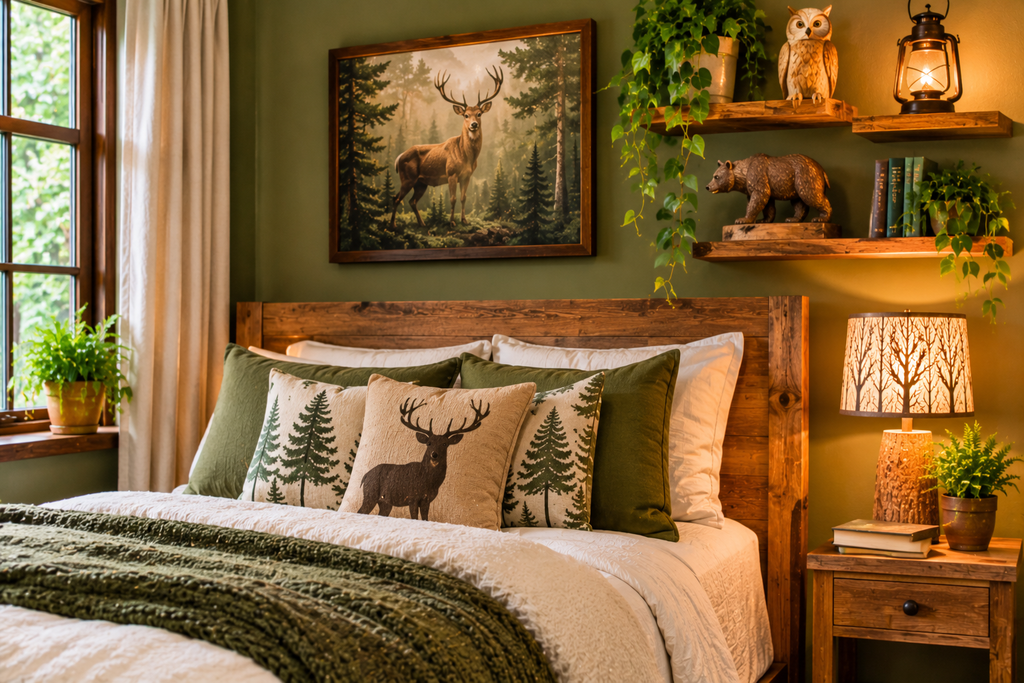
This is where forest decor tends to tip into kitsch, so restraint helps. A carved wooden fox on a shelf, a pair of ceramic mushrooms, a vintage botanical print of ferns or fungi, a single hand-carved bird: any of these can look charming if they are the exception and not the rule.
A useful decision rule is to choose one animal motif per room and then let everything else be plant, wood or texture. If you like owls, let a single well-made owl carry the theme instead of five different ones.
Material is as important as subject. Hand-carved wood, unglazed ceramic, aged brass and matte stone look natural. Bright plastic, glossy resin and cartoonish faces do not. Framed prints in dark wood or black frames add a library-like quality that suits the style, and a group of three or four small prints at different heights adds to the layered effect.
If you like the look of antlers, consider carved wood or ceramic versions. Real shed antlers are sold by some dealers, but rules around collecting and selling vary by location, so buy from a reputable seller if you go that route.
Why Forest Decor Sometimes Looks Wrong, and How to Fix It
Most of the failures fall into a few categories.
Too many motifs. If every object has a tree, leaf, or animal on it, the room reads as a theme. Let some pieces simply be wood, wool or green, with no imagery at all.
All the same height. If everything sits at eye level, the room flattens. Add something overhead, such as a branch or hanging plant, and something underfoot, such as a stump or a rug.
Dark walls without enough light. A deep green room with a single lamp is just dim. Increase the number of light sources before you darken a room, not after.
Shiny artificial greenery. Glossy plastic leaves are the quickest way to cheapen the effect. If you use faux plants, choose matte ones and mix them among real or preserved elements.
Unsealed or damp natural wood. Fresh-cut or poorly dried wood can crack, shed bark, or bring in insects. Buy dried and sealed pieces, or dry your own thoroughly first.
Matching Ideas to Rooms
Because humidity, light and use differ from room to room, some ideas fit certain spaces better.
- Living room: deep green paint or a plank accent wall, a live-edge table, wool textiles, layered lamps.
- Bedroom: a mural behind the bed, linen curtains, warm dimmable lighting, a preserved moss frame well away from any candle.
- Bathroom: ferns and a closed terrarium, which like humidity. Skip preserved moss here.
- Entryway: a stump or bench, a bowl of cones, branches in a tall vase.
- Kitchen or dining area: a bark runner, a branch centerpiece, and a few hanging ferns near a bright window.
Questions Readers Ask About Forest-Themed Decor
Can I do this in a rental without losing my deposit?
Mostly yes. Peel-and-stick wallpaper, plants, branches, lamps, rugs, textiles and framed prints all leave no trace. Painting and mounting heavy wood paneling usually require landlord approval, so ask before you start, and test any adhesive in a hidden area first.
Will forest decor work in a modern or minimalist house?
Yes, and it often looks best that way. Use fewer elements and cleaner lines: one live-edge piece, a single wall of muted green, and a few plants in simple pots. The woodland feeling comes from materials and light, not from piling on objects.
What if my home gets very little natural light?
Lean on lighting and preserved or artificial materials. Warm lamps, preserved moss and good-quality faux plants handle low light far better than live ferns. Keep wall colors from going too dark, and use wood tones and textiles to bring in the forest mood.
Final Thoughts
The forest look comes from three things: a muted palette, layers at different heights, and warm, low light. Everything else is supporting detail. Before buying decor, choose one backdrop (a paint color, a wall pattern, or a plank wall), one living or preserved element (ferns, a terrarium, or moss), and one change to your lighting. Live with those for a few weeks, then add textiles and small accents only where the room still feels bare. If you are working with branches, logs, cones or moss, check the sourcing rules, dry and inspect natural materials before bringing them inside, and keep anything dry and plant-based well away from flames.

About Syprose Kiche
Syprose Kiche is the creator and writer behind My Besuited Home, a practical home and garden website covering DIY projects, gardening, lawn care, landscaping, home improvement, and outdoor living. She focuses on turning everyday homeowner questions into clear, practical guides backed by careful research and useful real-world considerations.