
A tin of cookies can go wrong in three quiet ways. The crisp ones turn soft because they shared a lid with a moist gingerbread cookie. The peppermint flavor drifts into the shortbread. Or the whole thing arrives as a layer of crumbs under a very nice ribbon. None of that is a baking failure. It is a packing failure, and it is mostly avoidable.
The thirteen gifts below are chosen with that in mind. Each one is a cookie or fudge that is simple to make, holds up for at least several days, and looks good with minimal effort. Every entry says what makes it travel well (or not), how long it tends to last, and the packaging that suits it. After the list, there are sections on liners and containers, allergen labels, shipping, and the small food safety points that are easy to overlook with homemade gifts.
How to Choose a Gift That Will Still Be Good When It Gets There
Before picking a recipe, it helps to know the person and the handoff. A cookie handed over in person at a neighborhood party has very different requirements from one that spends three days in a delivery truck.
Three questions narrow things down quickly:
How long between baking and eating? Crisp, dry cookies (shortbread, biscotti, gingerbread) and well-set fudge are forgiving. Soft, chewy cookies and anything with a filling that stays moist are best eaten within a few days.
Will it be mailed? If so, the sturdy options win: shortbread, biscotti, firm gingerbread, and fudge in a rigid container. Thumbprints, frosted soft cookies, and anything with a delicate topping are better delivered by hand.
Does the recipient have allergies or dietary limits? Nuts, peanuts, wheat, milk, eggs, soy and sesame are the usual issues in holiday baking. Several gifts here are nut-free by default, and the allergen section further down covers labeling.
The thirteen ideas are grouped roughly by the kind of gift they make: classic cookie tins, decorated and filled cookies, make-it-yourself mixes, fudge, and then a sampler that combines them.
Cookie Gifts That Pack, Stack, and Travel Well
1. Buttery Shortbread Wedges or Fingers in a Lined Tin
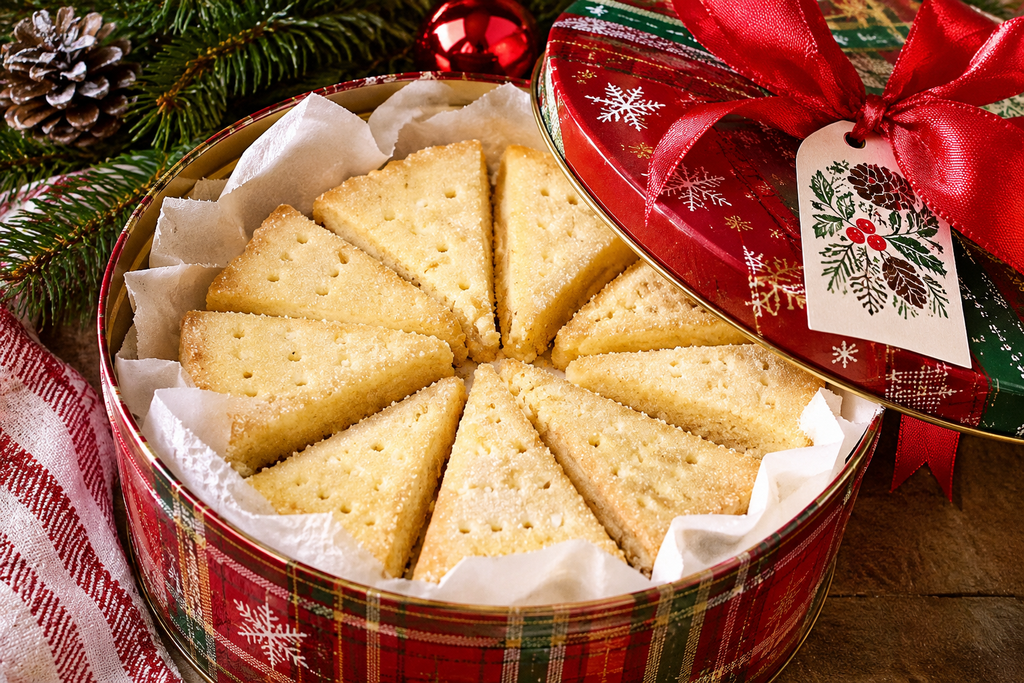
Shortbread is about as good as a baked gift gets, because it is made of very little and holds up well. The classic proportions are one part sugar, two parts butter and three parts flour by weight, and many modern versions swap a small portion of the flour for cornstarch or rice flour to make a more tender crumb. The dough is pressed into a round pan or cut into fingers, pricked with a fork, and baked at a fairly low oven temperature (often in the 300 to 325°F range) until pale gold rather than brown.
Two details separate a good tin of shortbread from a greasy one. Use real butter, and let the dough rest in the refrigerator before baking so it does not spread. If you are baking a round and cutting wedges, score the wedges while the shortbread is still warm from the oven. Cut cold, it shatters.
Packaging: Stack wedges like a pie, or lay fingers in neat rows, in a tin lined with parchment. Shortbread is dry, so it can sit directly against parchment with no liners between pieces. A strip of plaid ribbon around the tin and a tag with the bake date is plenty.
Keeps: Typically around a week to two weeks in an airtight container at room temperature. This varies by recipe, so treat it as a rough guide.
2. Gingerbread Cookies With a Hole for a Ribbon

Gingerbread has a practical advantage over most cookies: it is made to be sturdy. A roll-out dough with molasses and spices, chilled and rolled about a quarter inch thick, bakes into a cookie that survives a handoff, a car ride and a gift bag. Thinner cookies are crisper but break more easily, so decide before rolling whether the cookies are for eating or for hanging.
If they are meant to double as ornaments, poke a hole near the top with a straw or the wide end of a piping tip as soon as the cookies come out of the oven while they are still soft. A hole punched after they cool will crack the cookie. Even if nobody hangs them, a ribbon through that hole gives a simple, plain cookie a finished look without any decorating.
There is one limit to be honest about: gingerbread softens when stored with moisture, and it will soften if it shares a container with a soft cookie. Keep it with other crisp cookies or on its own.
Packaging: Stack three or four cookies in a clear cellophane bag, close it with twine, and slide a cinnamon stick under the knot. For a larger gift, a shallow gift box lined with parchment works, with a few cookies fanned in a row.
Keeps: Roughly one to two weeks when crisp and stored airtight.
3. Sugar Cookies With Hardened Royal Icing

The point of royal icing, for gifting, is that it dries hard. Buttercream-frosted cookies smear and stick to each other and to anything touching them. Royal icing, made from powdered sugar and meringue powder (or egg whites, though meringue powder avoids the raw egg question), sets into a firm shell that can be stacked and boxed.
Patience is the real ingredient. A thin layer of icing needs several hours to harden on the surface and often a full night to be solid enough to pack. Stacking a cookie that feels dry on top but is still soft underneath is the most common reason decorated cookies arrive stuck together. Gel food coloring gives vivid color without thinning the icing the way liquid coloring does.
Keep the designs simple. A flooded white base with a few sprinkled sugar crystals, or a plain tree outline in green, reads as handmade and polished. Elaborate piping is a hobby of its own and not required here.
Packaging: Slide each cookie into its own clear cellophane sleeve, or arrange several in a window box with parchment between layers. Single sleeves are the best choice if you want the icing preserved and the cookies to look like shop-made gifts.
Keeps: Often a week or so, though the cookie underneath determines the quality, not the icing.
4. Chocolate Crinkle Cookies in a Divided Box
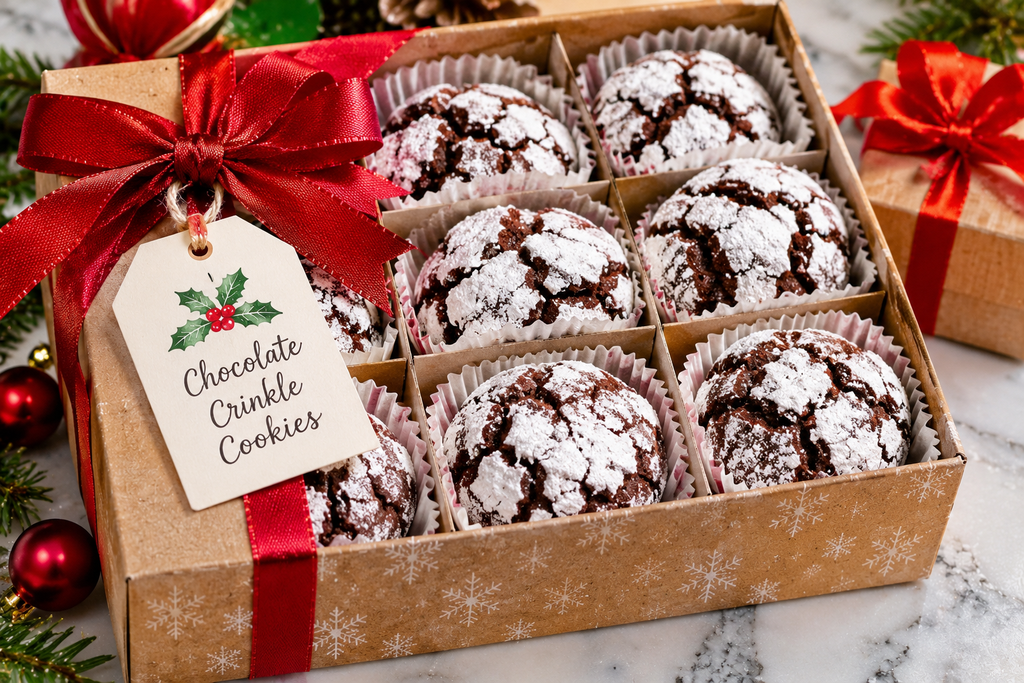
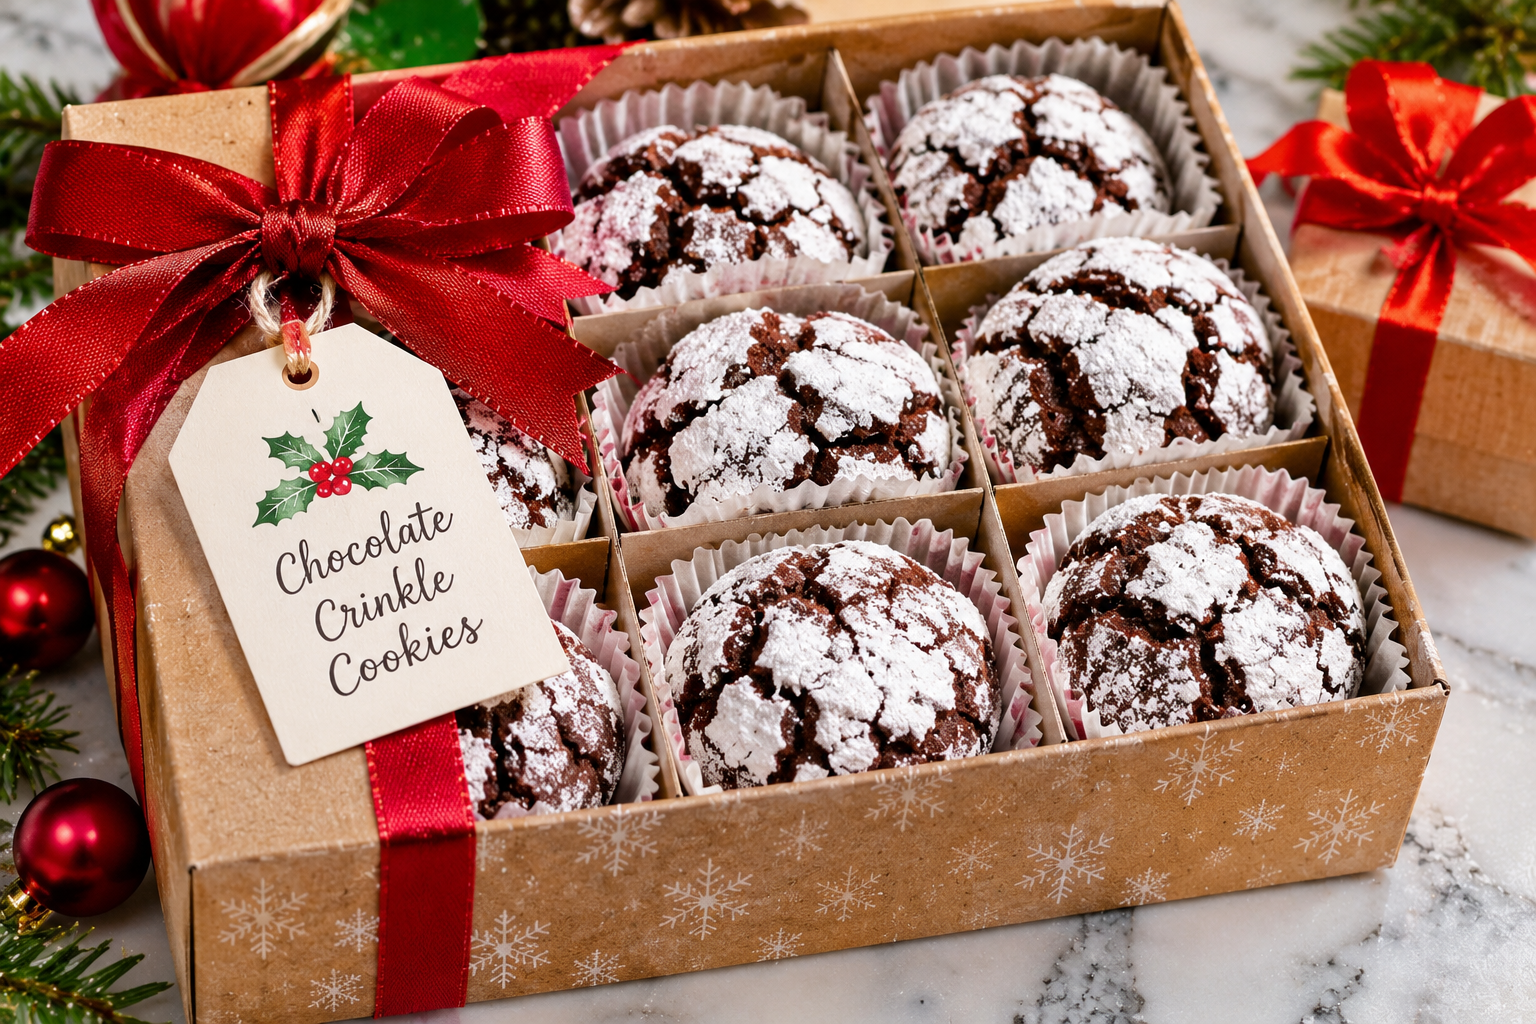
Chocolate crinkles look dramatic for the effort. The dough is chilled until firm, scooped into balls, rolled in granulated sugar and then in powdered sugar, and baked so the surface cracks and the white shows through the dark. Skip the second step, and you lose the crinkle. Skip the chilling, and the balls spread flat and the pattern disappears.
The weak point as a gift is the powdered sugar. It rubs off on whatever is touching it and slowly dissolves into the cookie’s surface over a day or two. Two small fixes help: let the cookies cool completely before packing, and dust a light layer of fresh powdered sugar over them just before they go into the box. Separate layers with parchment.
Packaging: A shallow box with paper liners or a divider keeps the white sugar from smudging. A dark box makes the cookies look even more striking.
Keeps: These are on the softer side, so plan on about three to five days at their best. Not ideal for mailing.
5. Jam Thumbprints in Paper Liners
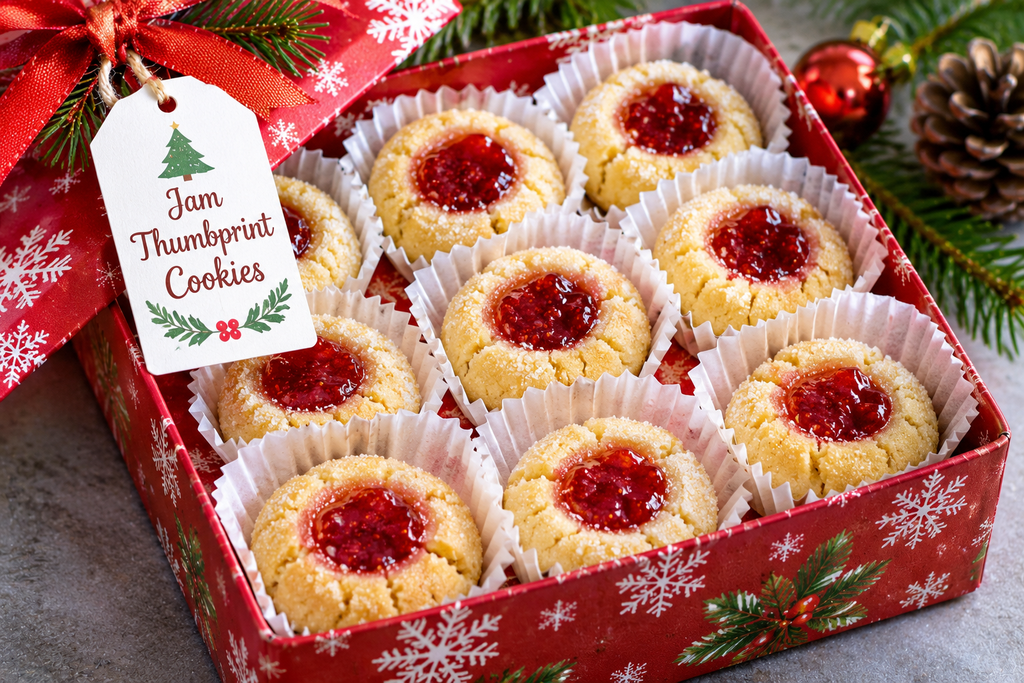
Thumbprint cookies are a gift for hand delivery. The cookie is a small shortbread-style ball pressed with a thumb or the back of a measuring spoon, then filled with jam. They are pretty, and they do not stack. The jam stays tacky, which means anything resting on top of it will pick up a mark or stick.
A thick preserve works better than a loose jelly, which can run and weep. Some bakers fill the cookies after baking so the jam stays bright and does not scorch; others fill before. Either approach works, but cooled cookies should rest in a single layer until the jam firms up.
Packaging: Place each cookie in a mini paper liner, the kind used for cupcakes or candies, and arrange them in a single layer. A flat box with a clear lid is ideal, and a second layer should only go in if parchment sits between the two.
Keeps: Best within about three to five days.
6. Chocolate-Dipped Biscotti Wrapped With a Mug
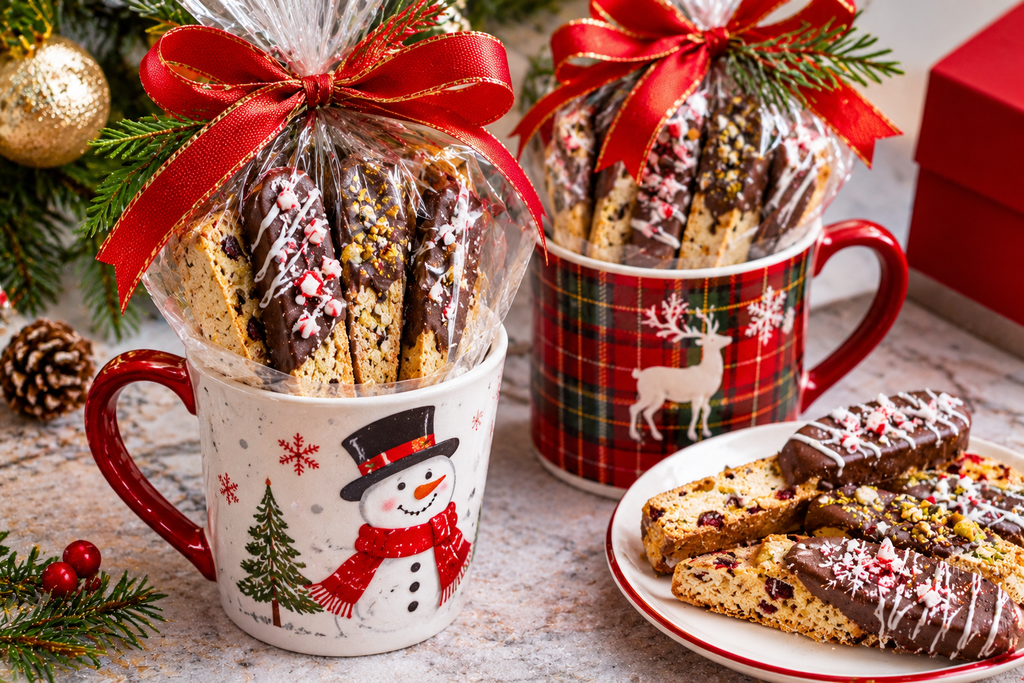
Biscotti is almost designed for gifting. It is baked twice: first as a log, which is cooled briefly and then sliced, and then again as slices to dry them out completely. The result is a long, crisp, shelf-stable cookie that tolerates mailing and sits happily in a pantry for weeks. A typical sequence is a first bake at around 350°F for 25 to 30 minutes, a short rest, slicing with a serrated knife, and a second bake of 10 to 15 minutes until dry and lightly browned. Follow the recipe you use for exact times, since log width changes everything.
Biscotti can be flavored almond, orange-anise, pistachio-cranberry, or chocolate-hazelnut. If you dip one end in melted chocolate, let it set completely at cool room temperature before wrapping. Chocolate that warms and re-hardens can develop a whitish, dusty film called bloom. It is harmless, but it looks less attractive.
Packaging: Stand biscotti upright in a coffee mug and wrap the mug in cellophane with a tied ribbon, or tuck a bundle of six into a tall cellophane bag. A small bag of ground coffee or a tea sampler beside it finishes the gift.
Keeps: Often two weeks or more, since it is baked dry.
7. Cookie Mix in a Jar
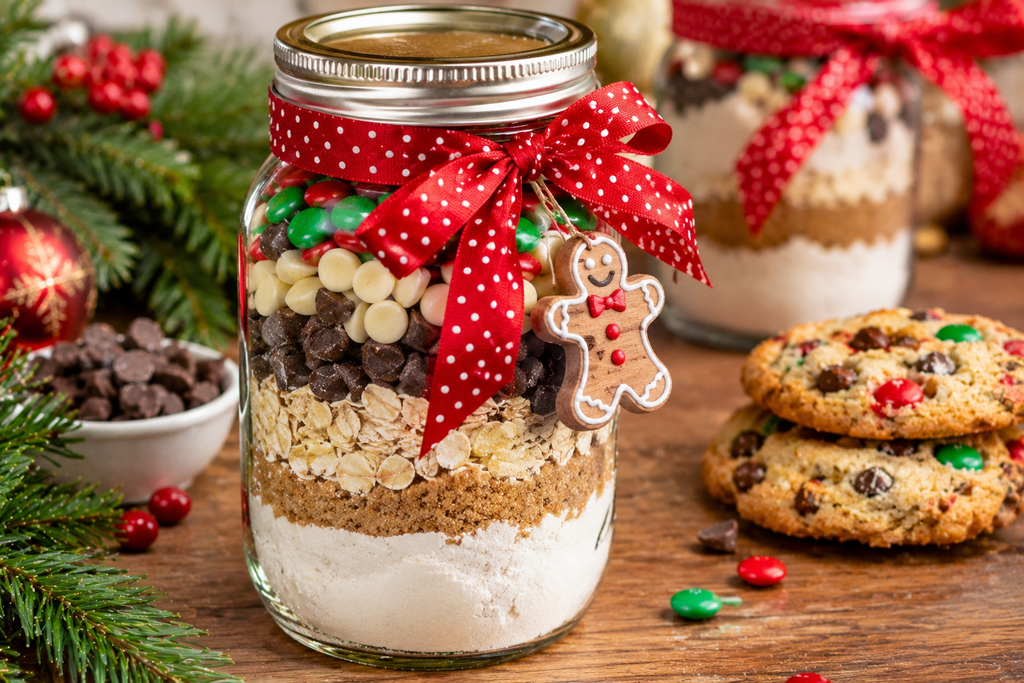
A layered jar of dry ingredients gives the recipient a batch of cookies they bake themselves. It is a good gift for people who enjoy baking, and a surprisingly easy one to assemble in bulk because every jar is identical.
The practical details matter more than the recipe. Use a wide-mouth quart jar, since narrow openings make layering a mess. Measure the dry ingredients into the jar before you commit to a recipe, because some cookie recipes need more volume than a quart holds once everything is packed down. Put the flour mixture, with the baking soda and salt whisked in, in the bottom, then layer sugar, then add the chocolate chips or other mix-ins on top. Pressing each layer down gently stops the layers from mixing in transit.
Include a card with the missing wet ingredients (typically butter, egg and vanilla) and the baking directions. Add one line the recipient should not miss: the jar contains raw flour, so the dough should be baked, not eaten raw. Raw flour is a known food safety concern, so it is better to say so on the card than assume they know.
For shelf life, the freshness of the oldest ingredient is what counts. A conservative window is around three months, but check the dates on the baking soda and chocolate chips and write a use-by date on the tag.
Packaging: A circle of fabric or kraft paper under the screw band, a ribbon, and a hand-lettered tag with the instructions.
Fudge Gifts That Look Like They Came From a Candy Shop
Fudge has a reputation for being tricky, and the old-fashioned kind, cooked on the stove, deserves some respect. The easier versions are quite forgiving, though, and all of them are easier to package than cookies. Fudge is dense, holds its shape, does not crumble, and is the one item on this list that can handle being pressed into a tin without protest.
8. Classic Cooked Chocolate Fudge
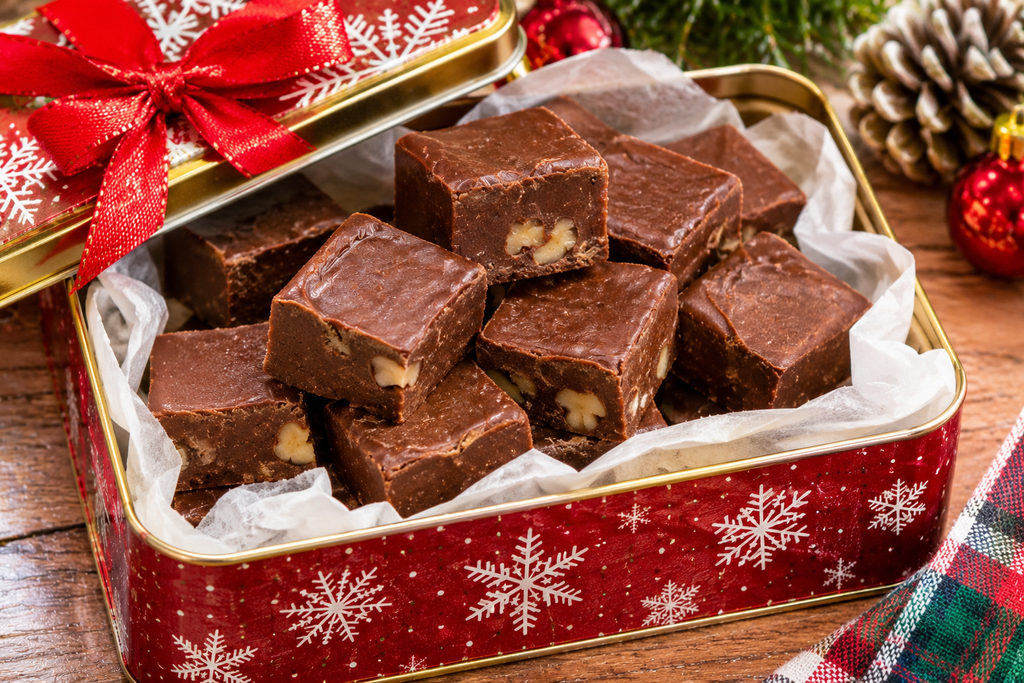
Traditional fudge is a sugar candy. Sugar, milk or cream, butter and chocolate are cooked to the soft-ball stage, roughly 234 to 240°F on a candy thermometer, then cooled before being beaten until it loses its gloss and thickens. The cooling is where people go wrong. If you stir or move the pan while it is hot, large sugar crystals form and the fudge turns grainy. The usual guidance is to let it cool undisturbed to around 110°F before beating.
A few practical notes:
- Check the thermometer in boiling water first. It should read about 212°F at sea level, and if it reads differently, adjust the target by the same amount. At higher elevations, water boils at a lower temperature, so the usual rule of thumb is to lower the target by about 1°F for every 500 feet above sea level.
- Brush down the sides of the pan with a wet pastry brush while the sugar boils so stray crystals do not fall back in.
- Line the pan with foil or parchment with an overhang so the whole block lifts out for cutting.
A marshmallow creme version, which uses sugar, evaporated milk and butter boiled for a few minutes, then chocolate chips and marshmallow creme stirred in, is a more forgiving alternative. It skips the thermometer and the beating, though the texture is a little softer and less crumbly.
Packaging: Cut the block into one-inch squares with a sharp knife wiped clean between cuts. Place each piece in a small candy cup or between sheets of wax paper, then stack in a tin. Fudge sticks to itself if pressed together uncovered.
Keeps: Cooked fudge is typically kept for about two weeks at room temperature in an airtight container, and longer in the refrigerator. Treat that as an estimate.
9. Three-Ingredient Microwave Fudge
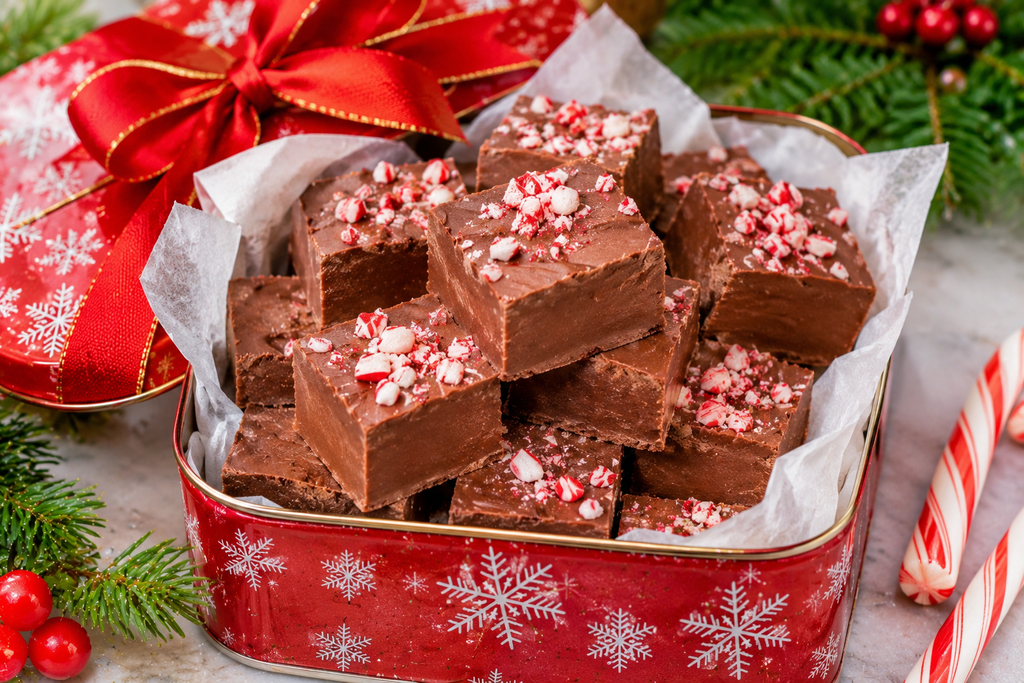
This is the version for people who do not own a candy thermometer and do not want to. It is built from semisweet chocolate chips, one can of sweetened condensed milk, and a little vanilla and salt. A common ratio is about 3 cups of chips (roughly 18 ounces) to one 14-ounce can.
One mistake is worth flagging. The can must be sweetened condensed milk. Evaporated milk looks similar on the shelf but has no sugar and the fudge will not set.
Melt the chips and milk together in the microwave in short bursts of 30 seconds, stirring between each, until smooth. Chocolate scorches easily, and one long burst is how it happens. Stir in the vanilla, spread it into a foil-lined 8-inch square pan, and refrigerate until firm, usually a couple of hours.
The result is softer and smoother than cooked fudge, and it needs to stay cool. A very good option for a batch of small gifts.
Packaging: Cut into small squares and set them in mini baking cups inside a small box. A lid with a clear window shows off the glossy top.
Keeps: Better in a cool place or the refrigerator. About one to two weeks is typical.
10. Peppermint White Chocolate Fudge
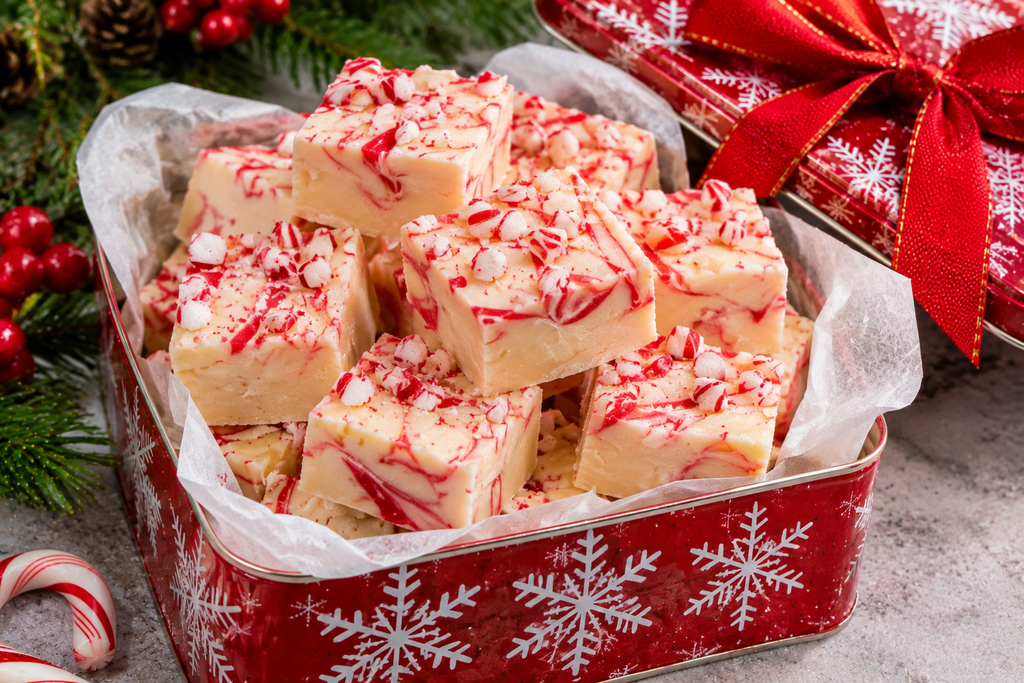
The white and red pattern says Christmas without any decorating skill. The base follows the same shortcut as the microwave fudge, using white chocolate chips in place of semisweet. One thing to check: some products labeled “white baking chips” do not contain cocoa butter and behave differently from real white chocolate, so read the ingredient list if the fudge will not set or tastes waxy.
Peppermint extract is potent. Start with about half a teaspoon in a standard batch and taste before adding more. Crushed candy canes are the finishing touch, but they have a habit of turning sticky in humid air, so sprinkle them on top just before the fudge sets and do not fold them through the whole batch.
Packaging: White fudge shows every smudge, so handle it with clean hands or a bench scraper. Package it separate from other items, because the peppermint will perfume everything near it. A clear box with red-and-white baker’s twine suits it.
Keeps: Best within about a week because of the candy cane topping.
11. Chocolate Walnut Fudge
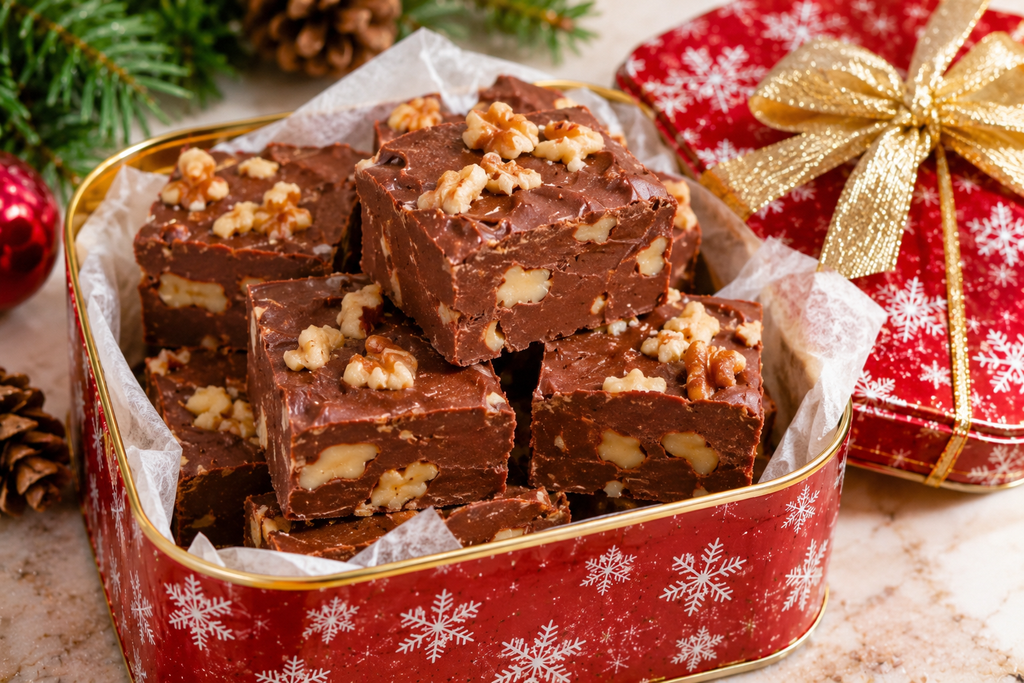
For anyone who prefers a less sweet, more textured piece, stirring toasted walnuts into a chocolate fudge base does the job. Toast them on a baking sheet in a 350°F oven for roughly 8 to 10 minutes until fragrant, cool them, chop them coarsely, and fold them in just before pouring. Toasting is not decoration: it draws out the flavor and keeps the nuts from tasting flat and soft inside the fudge.
Nuts are also the most common reason a gift needs a clear label. Tree nuts are a major allergen, and a gift tag that says “contains walnuts” is a necessary line, not a courtesy. Check the nuts for freshness as well; stale walnuts taste bitter and can ruin a whole batch.
Packaging: Press a few walnut halves on top of each square before cutting, and add a small tag listing the nuts.
Keeps: About two weeks at cool room temperature, and the nuts are usually the first thing to taste tired.
12. Fudge Set Directly in a Small Gift Pan
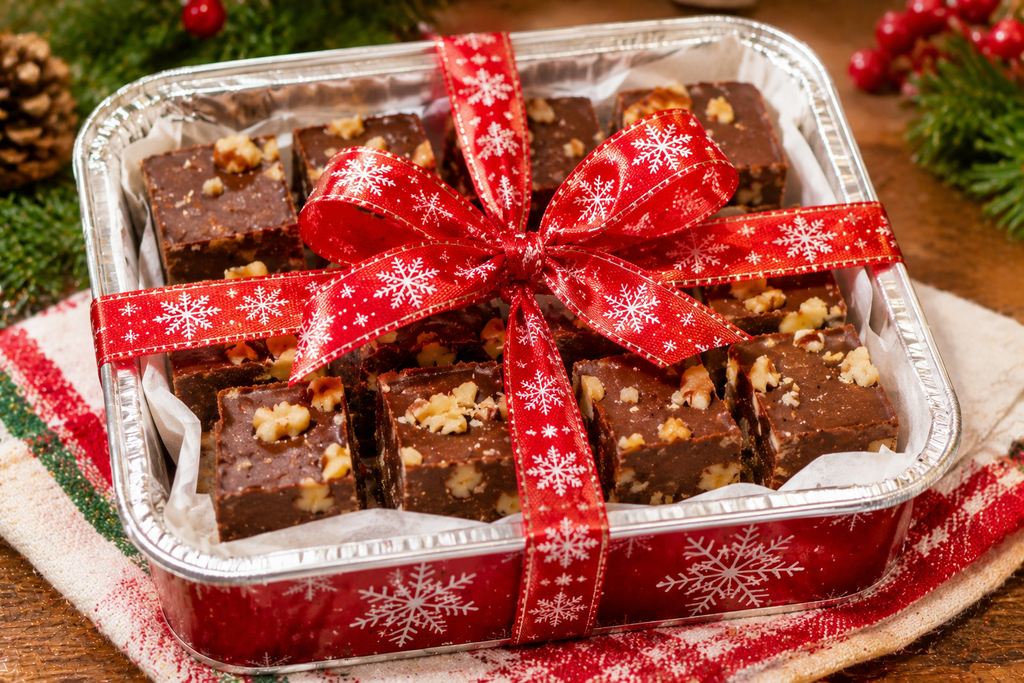
The easiest way to package fudge is to skip packaging altogether and make the container part of the gift. Pour the fudge into a small foil loaf pan or a lined mini loaf pan and give it away in the pan. There is no cutting, no stacking, and no sticking. The recipient gets a whole slab and a small knife tied to the ribbon if you want to add one.
This works best with the microwave and marshmallow creme versions, which set evenly in shallow pans. Line the pan with parchment so the fudge lifts out cleanly and the metal never touches it. Cover the top with a layer of wax paper, then a lid or plastic wrap, then tie a ribbon over the top.
Packaging: A mini loaf pan, a layer of parchment, a lid or wrap, ribbon, and a tag with the flavor and date.
Keeps: Similar to the fudge inside, usually one to two weeks when kept cool.
The Gift That Combines Everything
13. A Cookie and Fudge Sampler Box
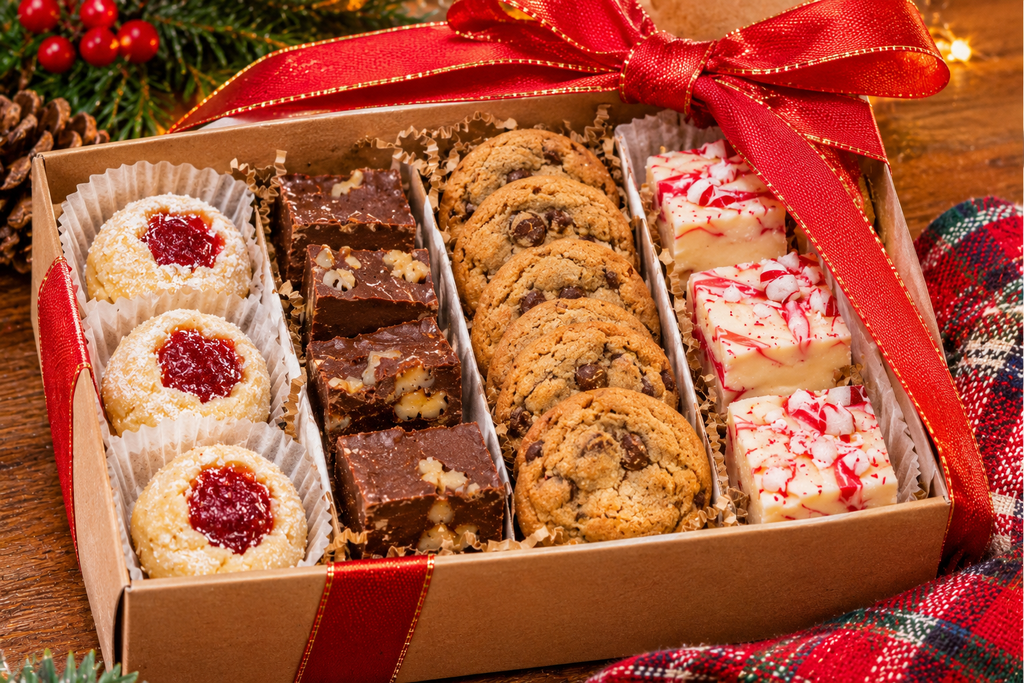
The sampler is the gift most people picture first, and also the one most likely to go wrong, since it puts different textures and flavors in one space. The solution is a few simple rules rather than a complicated plan.
Group by texture. Crisp cookies (shortbread, biscotti, gingerbread) go together. Soft cookies and fudge each get their own compartment. If a soft item must sit near a crisp one, wrap it separately.
Keep strong flavors apart. Peppermint, ginger, and citrus travel through paper and air. Wrap those items in their own bag or liner so the plain shortbread does not taste like candy cane.
Put heavy items on the bottom. Fudge goes in first, cookies on top. A cookie sitting under a block of fudge will break.
Fill every gap. Loose movement is what breaks cookies. Use crumpled parchment, cupcake liners or a few extra pieces of fudge to stop the contents shifting.
A sampler of four items, such as shortbread, gingerbread, a few squares of fudge, and some biscotti, looks generous without being overwhelming. Add a small card listing the items, the ingredients that cause allergies, and the date.
Packaging: A shallow tin or a sturdy gift box, with parchment as the base layer and a ribbon to close.
Keeps: The item with the shortest life sets the limit. If any soft cookies are included, plan for a few days.
Liners, Tins, and What Actually Touches the Food
Good presentation depends on some unglamorous decisions about what sits directly against the food.
Use food-safe liners. Parchment paper, wax paper, and cupcake liners are made for contact with food. Decorative tissue paper is generally not, as the dyes can transfer, so it should go outside the food layer, not against it.
Line every tin. New or reused, a parchment lining keeps the food off the metal and lets you lift the contents out. Skip old tins with rust or worn coatings.
Mind the closure. A tin with a loose lid lets air in, and crisp cookies soften as a result. Plastic bags tied tightly or boxes wrapped in cellophane help when the lid is not snug.
Match the size to the contents. A half-empty tin lets cookies slide around, which is how they crack. A smaller container filled snugly outperforms a large one.
Tag the date. A short tag with the bake date and the main ingredients is one of the more useful touches. It looks thoughtful, and it also answers the question the recipient is likely to ask three days later.
Allergen Labels and the Cottage Food Question
Homemade gifts do not require the formal labeling that packaged foods do, but the reason for labels still applies. In the United States, the major food allergens are milk, eggs, fish, crustacean shellfish, tree nuts, peanuts, wheat, soy and sesame. Most holiday baking involves several of them at once.
A short line on the tag, such as “Contains: wheat, milk, eggs, walnuts,” is enough. Cross-contact matters too. If you baked a batch of peanut cookies in the same kitchen, the tag should say the gift was made in a kitchen that handles peanuts. Someone with a serious allergy will appreciate the honesty, and someone without one will not mind.
One separate point: if you plan to sell any of these rather than give them away, the rules change. Cottage food laws, which cover what can be sold from a home kitchen, differ from state to state, and some states require permits, labels or limits on certain products. Check with your state’s department of agriculture or health before you sell anything.
Mailing Cookies and Fudge Without the Crumbs
For anything leaving your hands and going through the mail, a few steps reduce breakage considerably.
- Pick the right items. Shortbread, biscotti, firm gingerbread and fudge in a rigid container are the best candidates. Thumbprints, crinkles and frosted soft cookies are poor travelers.
- Pack in a box inside a box. Put the gift tin or box in a larger shipping box with 2 inches or so of cushioning on each side, such as crumpled paper or bubble wrap.
- Do not leave empty space. Anything that can shift will break.
- Ship early in the week. Mailing on a Monday or Tuesday lowers the chance a package sits in a warehouse over a weekend.
- Wrap fudge tightly. Warm rooms and delivery trucks soften it. Individually wrapped pieces in a rigid tin handle that better than loose squares.
- Allow for delays. December is the busiest shipping month, so choose the faster service and aim to have the gift arrive well before the holiday.
A “fragile” sticker on the box helps a little, but cushioning does the real work.
Questions People Actually Ask About These Gifts
How far ahead can I bake?
It depends on the item. Dry cookies such as shortbread and biscotti, and fudge, can be made several days to a week or so ahead. Soft cookies are better baked in the final few days. For a longer lead time, freeze undecorated cookies in an airtight container, thaw them in the wrapping so condensation forms on the outside rather than the cookies, and decorate or box them afterward.
Can I freeze fudge?
Yes, and it is one of the better make-ahead options. Wrap it tightly in layers of plastic wrap and foil or place it in an airtight container, and thaw it, still wrapped, in the refrigerator before cutting and packaging. Freezer life is often given as a couple of months, though quality depends on the recipe.
My fudge did not set. Can I fix it?
With cooked fudge, a soft result usually means the mixture did not reach a high enough temperature. The common rescue is to scrape it back into the pot, add a splash of milk or cream, and cook it again to the target temperature. With the microwave and condensed milk versions, extra chilling time is the first thing to try, and if it is still soft, it may have been made with evaporated milk or too little chocolate.
Final Thoughts
The gifts that tend to go over well are the ones where the baking and the packing were planned together. Choose a cookie that suits the trip, line the container with something food-safe, keep crisp and soft items apart, label allergens, and write the date on the tag. If you only want to make one thing, shortbread in a lined tin or a simple three-ingredient fudge in a small gift pan will serve almost anyone. If you want a gift that looks more elaborate, a sampler box built from two crisp cookies and one fudge covers a lot of ground with very little risk.

About Syprose Kiche
Syprose Kiche is the creator and writer behind My Besuited Home, a practical home and garden website covering DIY projects, gardening, lawn care, landscaping, home improvement, and outdoor living. She focuses on turning everyday homeowner questions into clear, practical guides backed by careful research and useful real-world considerations.