
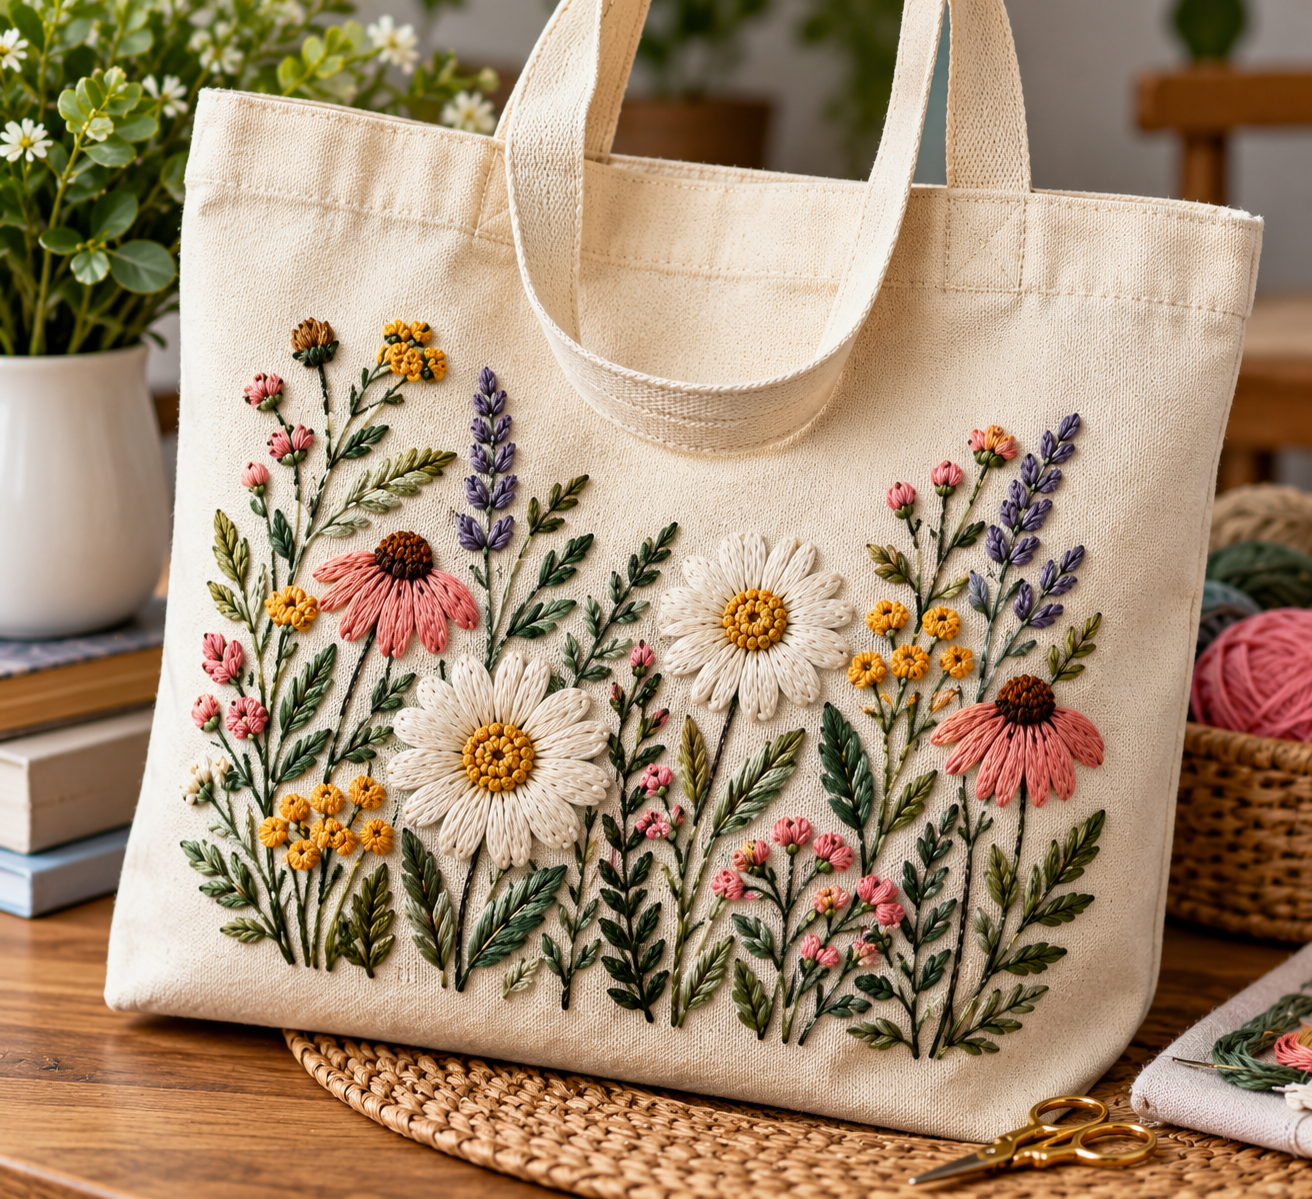
Handmade embroidery gifts go wrong in predictable ways. A hoop that took twenty hours gets tucked in a drawer because the quote didn’t fit the person. A tote bag puckers after its first wash. A monogram is lovely and slightly tilted. Most of these problems are decided before the first stitch, when a project gets chosen for how it looks in a photo instead of for who will receive it, how much time is left, and what the finished piece will go through.
The 20 ideas below are sorted by occasion: everyday gifts for friends, Christmas gifts, gifts for the men in your life, and wedding gifts. Each one lists materials and tools, a short method, and the spot where that particular project tends to go wrong.
Matching the Project to the Friend and the Calendar
The quickest way to narrow 20 options is to answer three questions.
How much time is left? The time bands below are rough planning figures for someone who already knows basic stitches. They shift a lot with design size, thread count, and experience, so treat them as a starting estimate and add a cushion.
- An evening: bookmarks, gift tags, keychain fobs, a single mini hoop ornament.
- A weekend: most hoop art, zipper pouches, a set of tea towels, felt ornaments.
- Two weeks or more: napkin sets, a ring pillow, a pocket square with detailed lettering, any piece with a long name or date.
Will it be washed or only displayed? Anything that goes in a washing machine (towels, napkins, totes, handkerchiefs) needs washed fabric, short secure stitches, and thread that won’t bleed. Anything that hangs on a wall can use looser stitches, beads, and delicate fabric.
What does this person actually own and like? A friend with a minimalist apartment may never hang a floral hoop, but will use a linen pouch every day. Look at what they carry, drink from, and put on their walls before choosing.
One more rule: text multiplies effort. Every letter is a small drawing. A six-word quote can take longer than an entire floral wreath, so keep lettering short when the deadline is tight.
The Basic Kit That Covers Nearly Every Project Below
The same handful of supplies shows up again and again, so it’s worth buying them once and buying them well.
Hoops. Wooden or plastic hoops in 3-, 5-, and 6-inch sizes cover most gifts. The fabric should be taut enough to sound slightly like a drum when tapped, but not stretched so hard that the weave distorts. Distorted fabric snaps back when the hoop comes off and puckers the stitching.
Needles. Embroidery (crewel) needles have a long eye that handles multiple strands. Packages list sizes, and a mid-range size such as 7 is a common match for two or three strands of floss; check the package guidance, since sizing varies slightly by brand. Use a larger, sharper needle for canvas and a fine one for lightweight cotton or handkerchief fabric.
Floss. Six-strand cotton embroidery floss is the standard. The skein can be split, and most projects use two or three strands rather than all six. Separating strands and recombining them before threading gives smoother coverage than pulling them straight from the skein.
Fabric. Tightly woven cotton, linen, and linen-cotton blends are the easiest to stitch and the most forgiving to wash. Felt is excellent for ornaments, coasters, and patches because the edges don’t fray. Avoid stretchy knits for direct embroidery; they distort in the hoop and pull out of shape once released.
Transfer tools. Water-soluble marking pens work well for tracing. Heat-erasable pens are convenient, but the marks can reappear when fabric gets cold, and results vary by pen and fabric, so test on a scrap and follow the manufacturer’s instructions. Stick-on water-soluble stabilizer sheets let you print or draw a design, stick it onto fabric, stitch through it, and rinse it away.
Scissors and extras. Small, sharp embroidery scissors, an iron and pressing cloth, fabric glue, and iron-on interfacing round out the kit.
Stitches Used Throughout
- Backstitch: solid lines, lettering, outlines.
- Stem stitch: curved lines such as vines and flower stems, with a slightly twisted look.
- Satin stitch: smooth fill for small shapes; long stitches in large areas tend to snag, so keep them short.
- Split stitch: a thicker, rope-like line that works for chunky lettering.
- French knot: small raised dots for flower centers, berries, and eyes.
- Lazy daisy: a looped petal or leaf shape.
Safety and Care Basics
Keep needles in a case or pincushion rather than loose on a couch, and cut thread rather than biting it. Pressing needs an iron on the correct setting for the fabric; synthetic felt and some blends melt at high heat, so test on a scrap. Before giving a washable gift, test a short length of dark thread in warm water on a scrap of white cloth. Deep reds and dark blues are the colors most likely to bleed in any dyed thread. Include a small care card with each washable gift.
Everyday Embroidery Gifts for Friends
These six work for birthdays, housewarmings, and “just because” occasions.
1. A Hoop With a Short Quote or a Meaningful Place Name
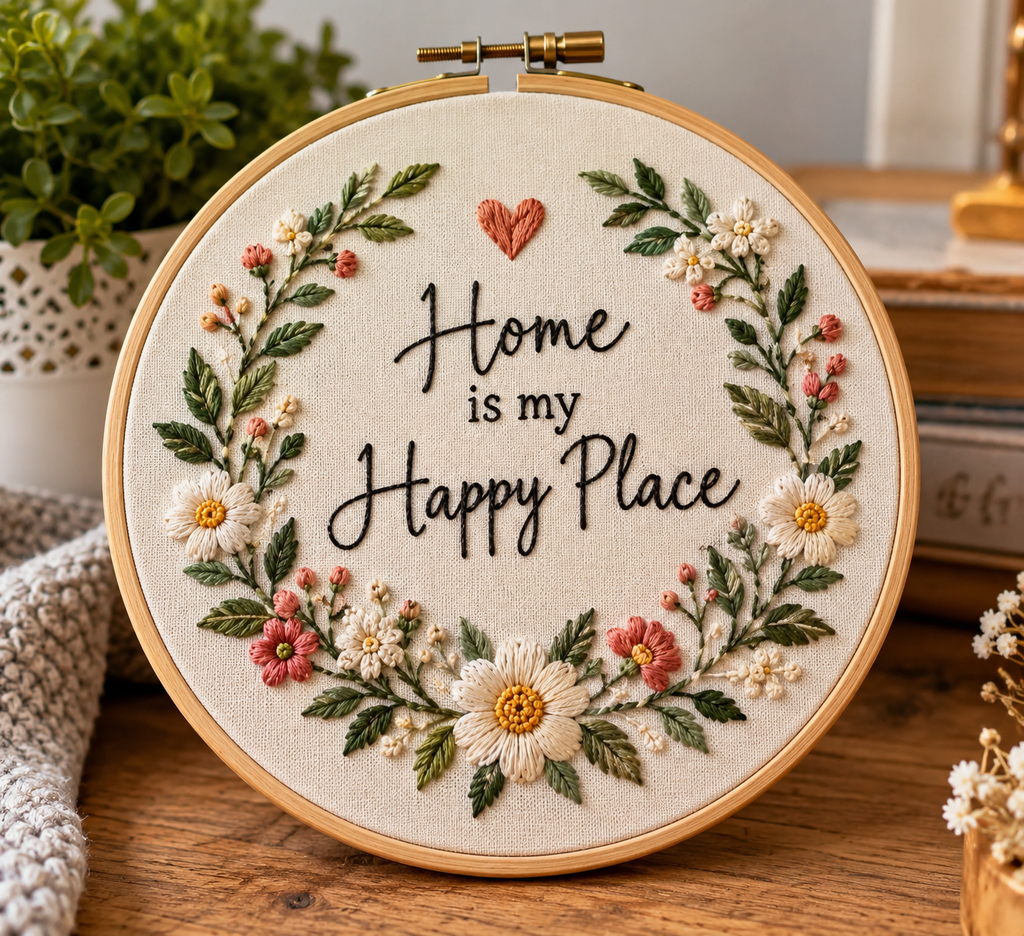
The idea: A small hoop holding a short phrase, a place name, or a saying in the friend’s own handwriting, stitched in simple lettering with a little leaf border. It suits friends who like wall decor, and it needs only a few colors of floss.
Materials and tools: 6-inch wooden hoop; 10-inch square of cotton or linen; two or three colors of floss; size 7 embroidery needle; water-soluble pen; felt circle for the back; fabric glue.
Procedure:
- Print the text in a simple font at the size you want and trace it onto the fabric.
- Hoop the fabric tightly and tighten the screw.
- Backstitch the lettering with two strands; use split stitch if you want thicker letters.
- Add a small border of leaves in stem stitch or lazy daisy.
- Rinse out the marks following the pen directions, press from the back over a towel, and re-hoop.
- Trim the fabric to about one inch beyond the hoop, glue it down to the inside back, and cover with felt.
Watch for: a quote the friend wouldn’t choose themselves. A place name, an inside joke, or a handwritten phrase from them is a safer pick than a generic inspirational line.
2. A Pet Silhouette or Portrait Hoop
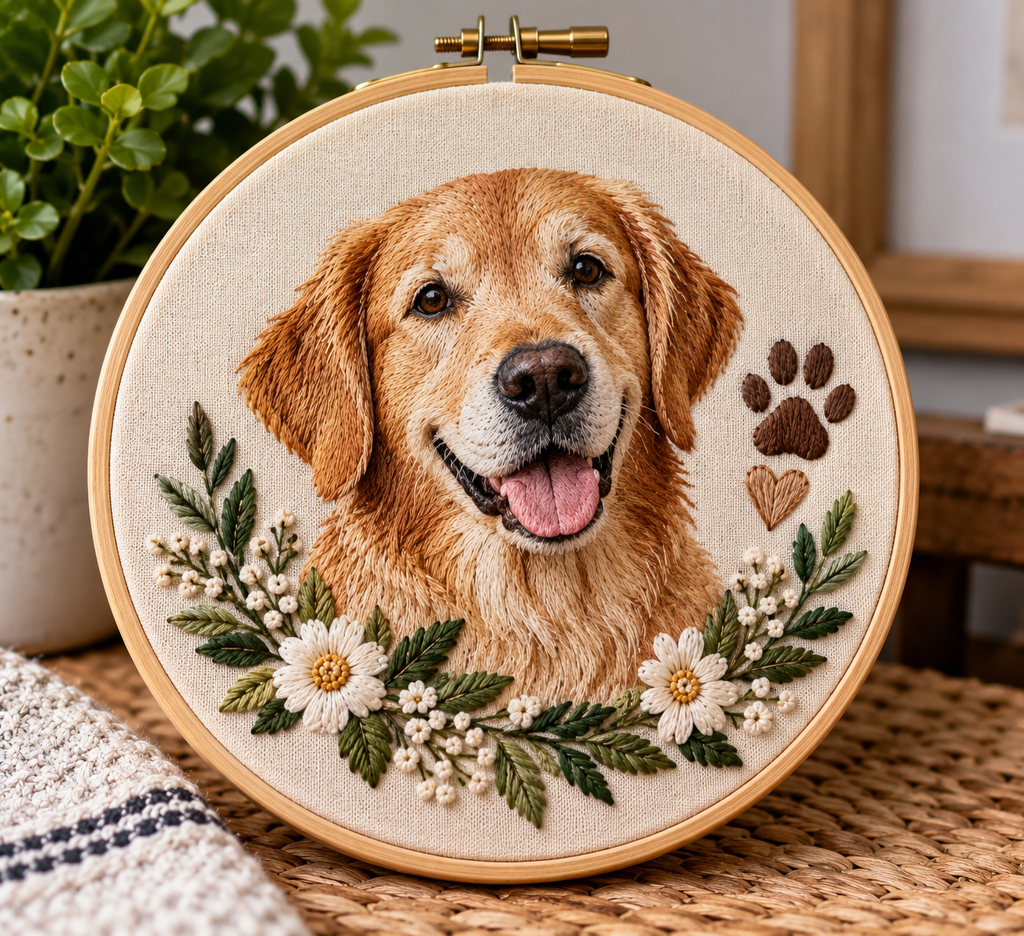
The idea: A one-color silhouette of a friend’s dog or cat, traced from a photo and filled with satin stitch. It works well for pet owners who would rather have a graphic keepsake than a realistic portrait.
Materials and tools: 5-inch hoop; light cotton fabric; black or dark brown floss (plus a contrasting color for eyes); a printed photo of the pet in profile; pen; size 7 needle.
Procedure:
- Pick a photo with a clear outline, print it at hoop size, and trace the shape onto the fabric by holding both against a bright window.
- Hoop the fabric.
- Outline in backstitch, then fill with short, tight satin stitches, or use straight stitches that follow the direction the fur grows for a textured look.
- Add the eye with a French knot.
- Finish the back as in project 1.
Watch for: too much detail. Fine whiskers and subtle markings turn muddy at this scale. Simplify the outline first.
3. An Embroidered Canvas Tote
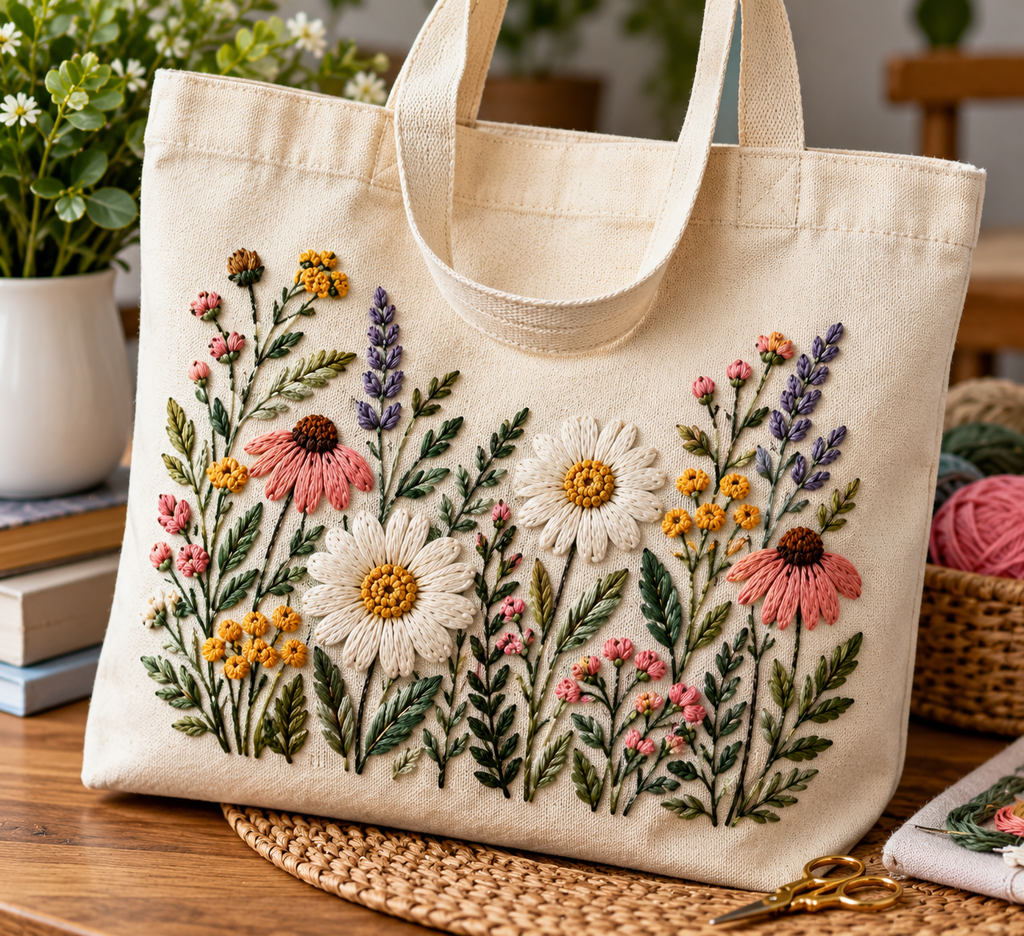
The idea: A plain canvas tote with a small design stitched low on the front. It’s a practical gift for friends who carry groceries, books, or gym clothes, and the stitching adds detail without making the bag look fussy.
Materials and tools: pre-washed cotton canvas tote; tear-away or water-soluble stabilizer; 6-inch hoop; floss; size 5 needle; pen.
Procedure:
- Wash and dry the bag first so it shrinks before you stitch.
- Mark the design on the front, low and slightly off center for a casual look.
- Place stabilizer on the inside of the bag at the design area, then hoop through the front layer only, checking that the back layer isn’t caught.
- Stitch with three or four strands since canvas is thick. Backstitch and satin work best.
- Remove the stabilizer and press.
Watch for: thread tails inside the bag. Knots can snag whatever is carried, so secure ends with small backstitches and trim close, or cover the inside with an iron-on interfacing patch.
4. Felt Bookmarks
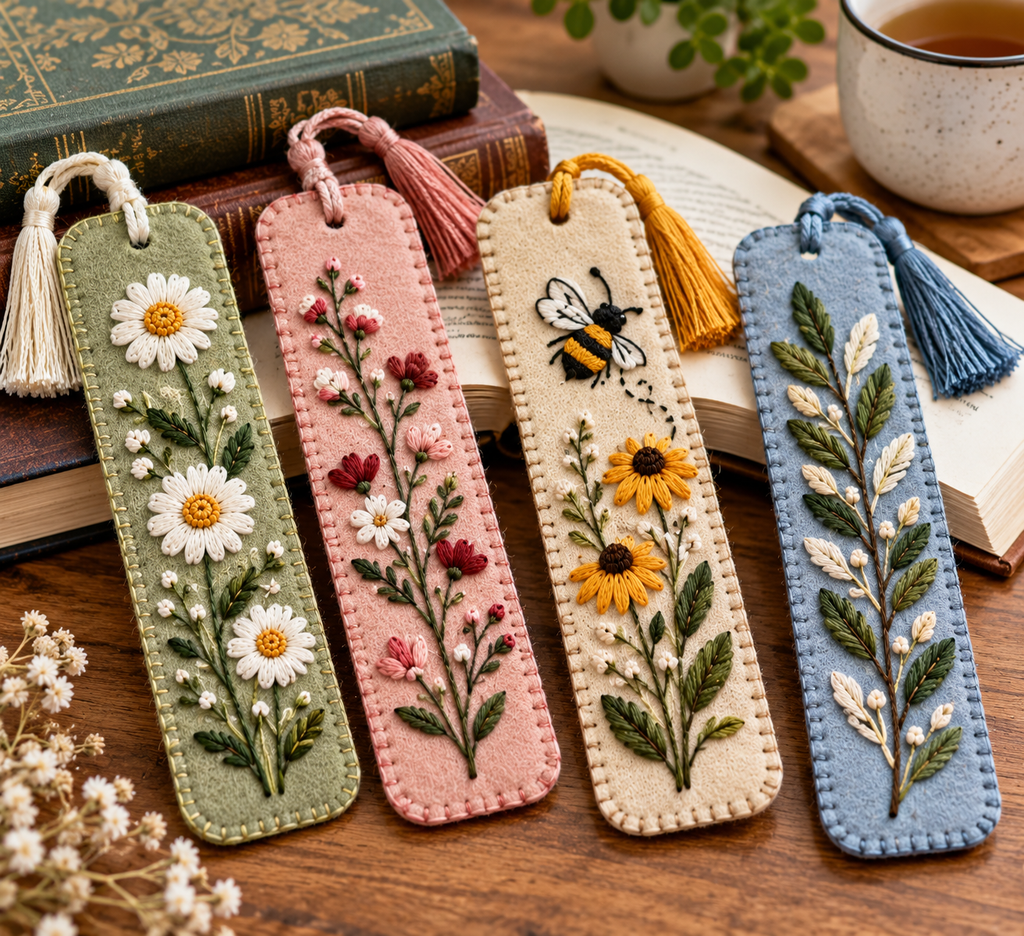
The idea: A slim felt strip with a tiny stitched motif at one end, made to mark a place in a book. It’s one of the fastest projects here, which makes it a good last-minute gift for readers.
Materials and tools: two 2-by-7-inch strips of felt; floss; size 7 needle; small embroidery scissors; optional ribbon or tassel.
Procedure:
- Stitch a small motif (a sprig of leaves, a moon, an initial) near one end of one strip.
- Place the second strip behind it to hide the back of the stitching.
- Blanket stitch around all edges with two strands, catching both layers.
- Add a ribbon loop at the top if you like.
Watch for: crowding. A bookmark has very little space, so one small motif looks better than three.
5. A Zipper Pouch
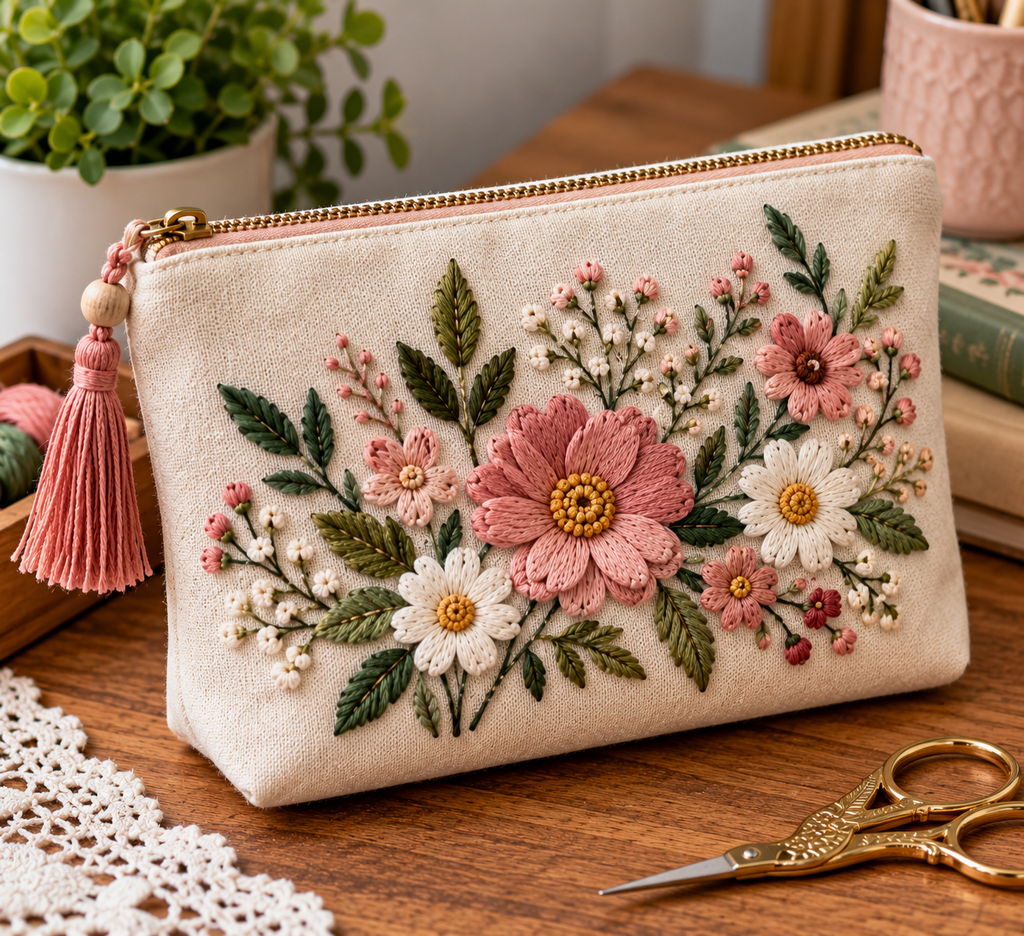
The idea: A small linen or canvas pouch with an embroidered front panel, handy for makeup, cords, pens, or travel odds and ends. It takes more work than a hoop because it adds sewing, but it gets used daily.
Materials and tools: two 8-by-6-inch pieces of linen or cotton canvas; matching lining; 7-inch zipper; iron-on interfacing; floss; sewing machine or needle and thread.
Procedure:
- Fuse interfacing to the back of the front panel, then embroider the design while the fabric is still flat.
- Trim the panels, leaving a half-inch seam allowance.
- Sew the zipper between the top edges of the outer panels and lining.
- Open the zipper partway, sew the outer panels together around the sides and bottom, then do the same with the lining.
- Turn right side out through the zipper opening.
Watch for: embroidering a finished pouch. It’s far harder to hoop a sewn pouch, and the stitching often puckers. Always stitch first and sew second.
6. Flour-Sack Tea Towels
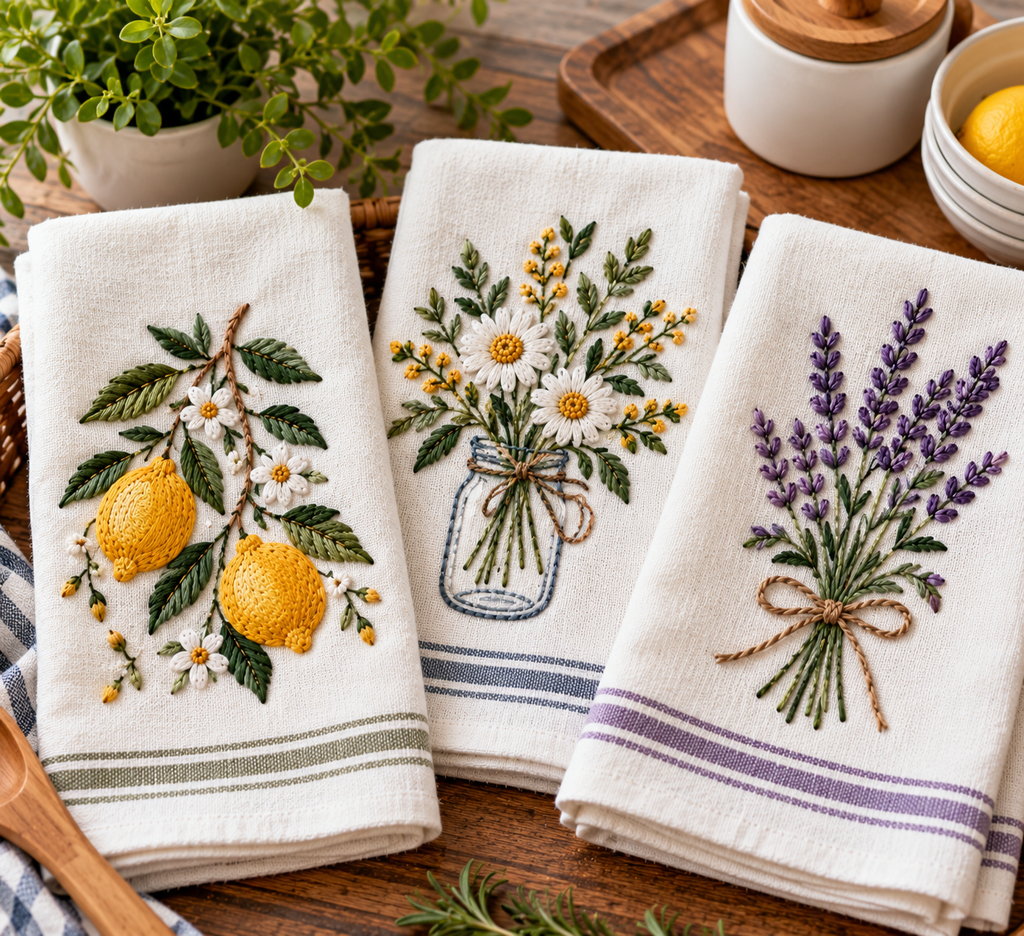
The idea: Plain flour-sack towels with a small kitchen motif above the hem, such as lemons, herbs, or a whisk. They suit friends who cook or have just moved into a new place, and a set of two or three looks like a considered gift.
Materials and tools: two or three flour-sack cotton towels; 6-inch hoop; floss; size 5 needle; pen.
Procedure:
- Wash, dry, and iron the towels so they shrink before you stitch.
- Center a small design three to four inches above the bottom hem: lemons, herbs, a coffee cup, a whisk.
- Outline with three-strand backstitch and fill very small areas with satin stitch.
- Press from the back.
Watch for: large satin-stitch areas. Towels are washed constantly, and long floats snag. Keep shapes small or use outline-only designs.
Christmas Embroidery Gifts That Don’t Need a Big Time Investment
Holiday gifts have a hard deadline, so these four lean toward smaller projects.
7. Mini Hoop Ornaments
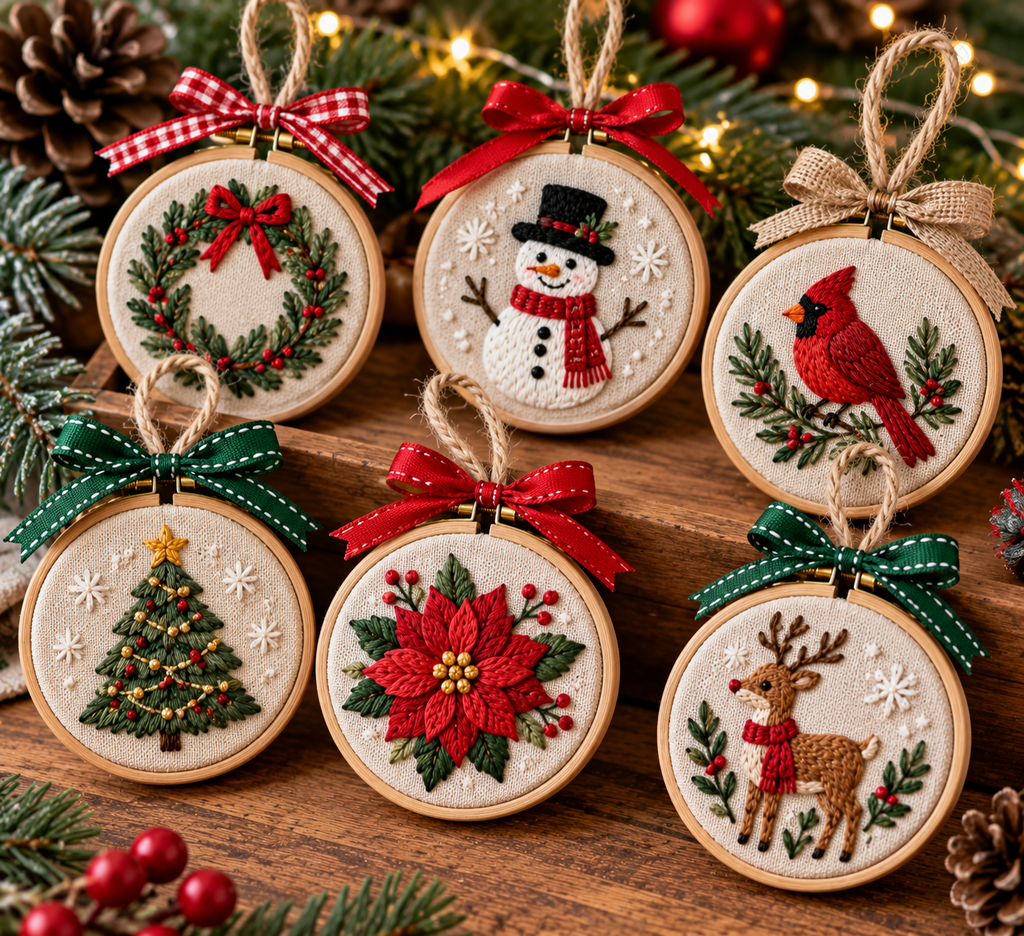
The idea: Tiny hoops holding festive motifs that hang on the tree as ornaments. A set of three or four makes a good small gift for a friend, coworker, or holiday host.
Materials and tools: 3-inch hoops; scraps of cotton or linen; red, green, white, and gold floss; felt scraps; ribbon; fabric glue; size 7 needle.
Procedure:
- Trace a simple motif: holly, a snowflake, a small tree, a star.
- Hoop the fabric and stitch with two strands. Use backstitch for outlines, lazy daisy for leaves, and French knots for berries.
- Trim the fabric, glue it to the inside back, and cover with a felt circle.
- Tie a ribbon loop around the top of the hoop.
Watch for: tiny hoops hold fabric tightly, so there’s little room to fix mistakes. Keep designs under two inches wide.
8. Stitched Felt Ornaments
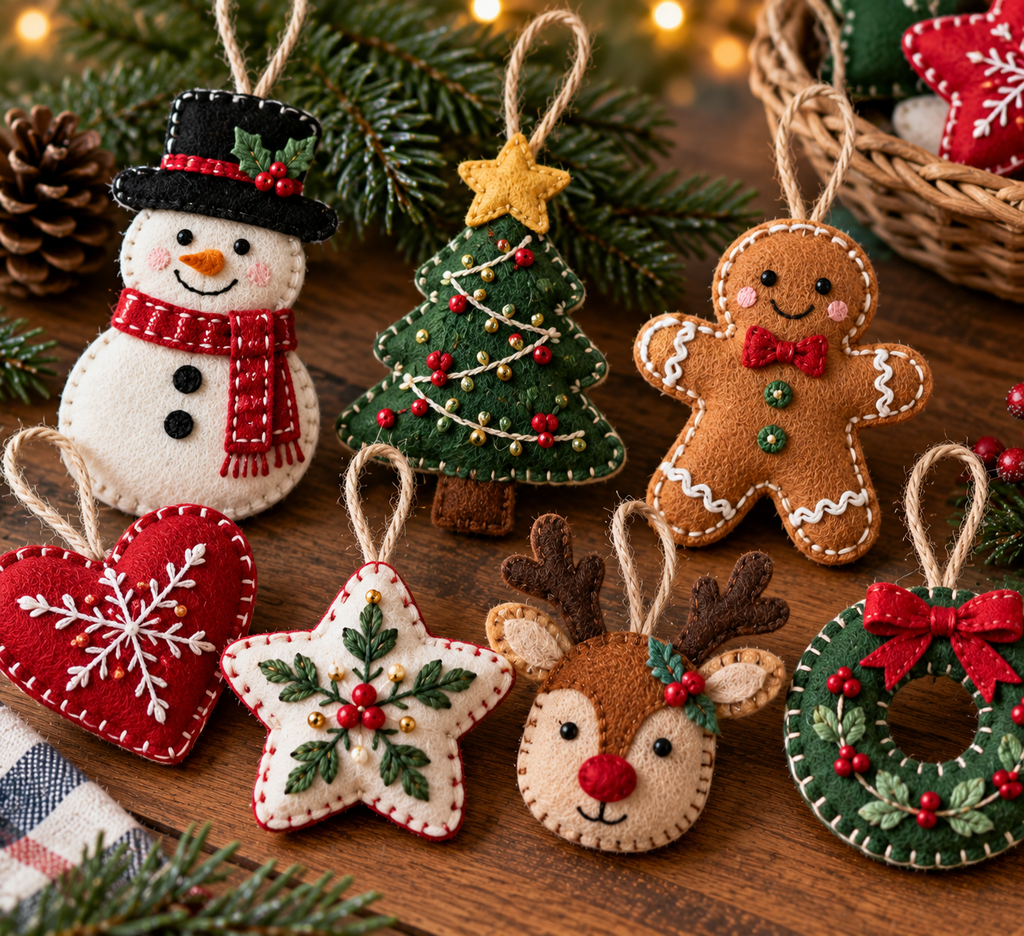
The idea: Soft ornaments cut from felt and decorated with simple stitches: a mitten, a star, a gingerbread person. They are sturdier than hoops and light enough to mail, so they work for friends who live far away.
Materials and tools: wool-blend felt (it tends to hold its shape and accept stitches more cleanly than thin acrylic craft felt); polyfill stuffing; floss; size 5 needle; paper template.
Procedure:
- Cut two matching shapes (mitten, star, gingerbread person).
- Decorate the front piece with running stitch, French knots, or small satin-stitch details before joining.
- Blanket stitch the two pieces together, leaving a small opening.
- Stuff lightly, close the gap, and add a thread loop.
Watch for: open flame. Felt is often synthetic and can melt or burn, so tell the recipient to keep ornaments away from candles.
9. Gift Tags That Double as Ornaments
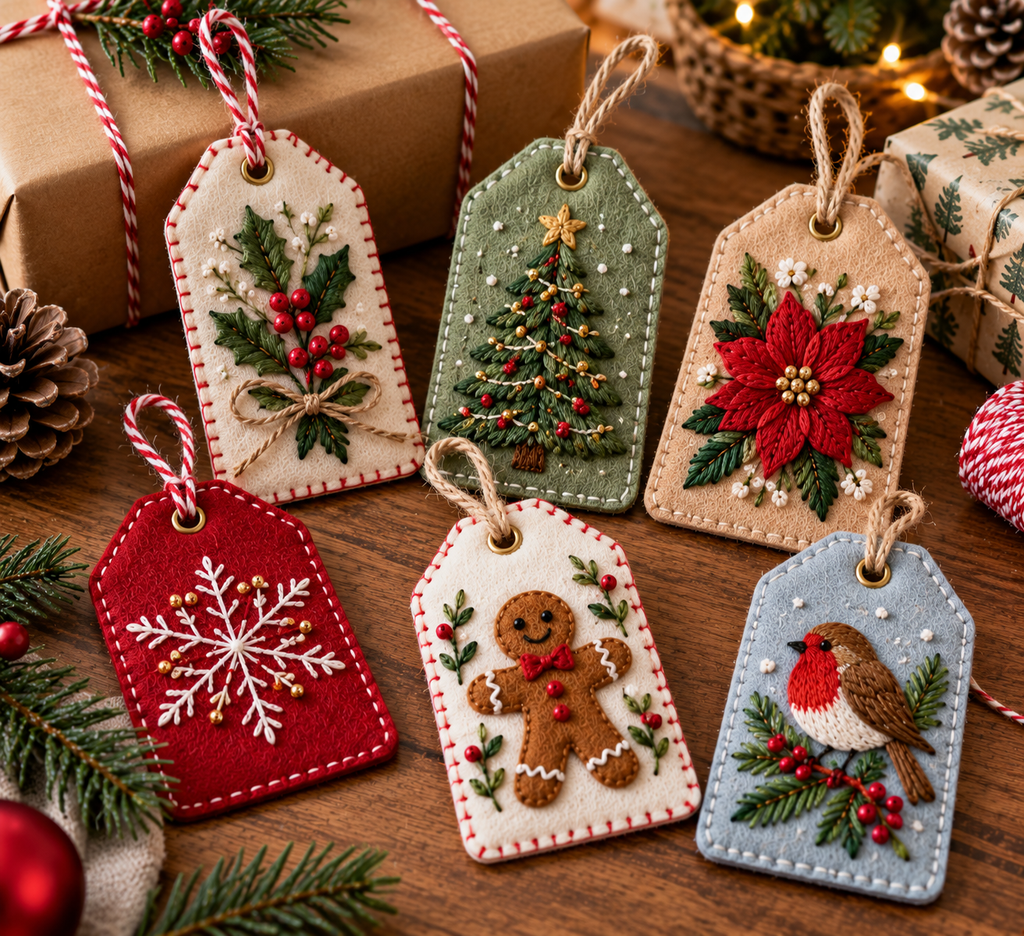
The idea: A small embroidered tag tied to a wrapped present, which the recipient can hang on the tree afterward. It adds a handmade touch to a store-bought gift without a big time commitment.
Materials and tools: felt or heavy cotton with fusible interfacing; cardstock for backing; floss; hole punch; twine; pinking shears.
Procedure:
- Cut a 2-by-3-inch rectangle and stitch a tiny motif or the recipient’s initial.
- Back it with cardstock or a second layer of felt.
- Trim the edges and punch a hole near the top.
- Thread twine through the hole.
Watch for: weight. A heavy tag can pull thin wrapping paper out of shape, so attach it to a ribbon rather than directly to the paper.
10. A Name Stitched on a Ready-Made Stocking
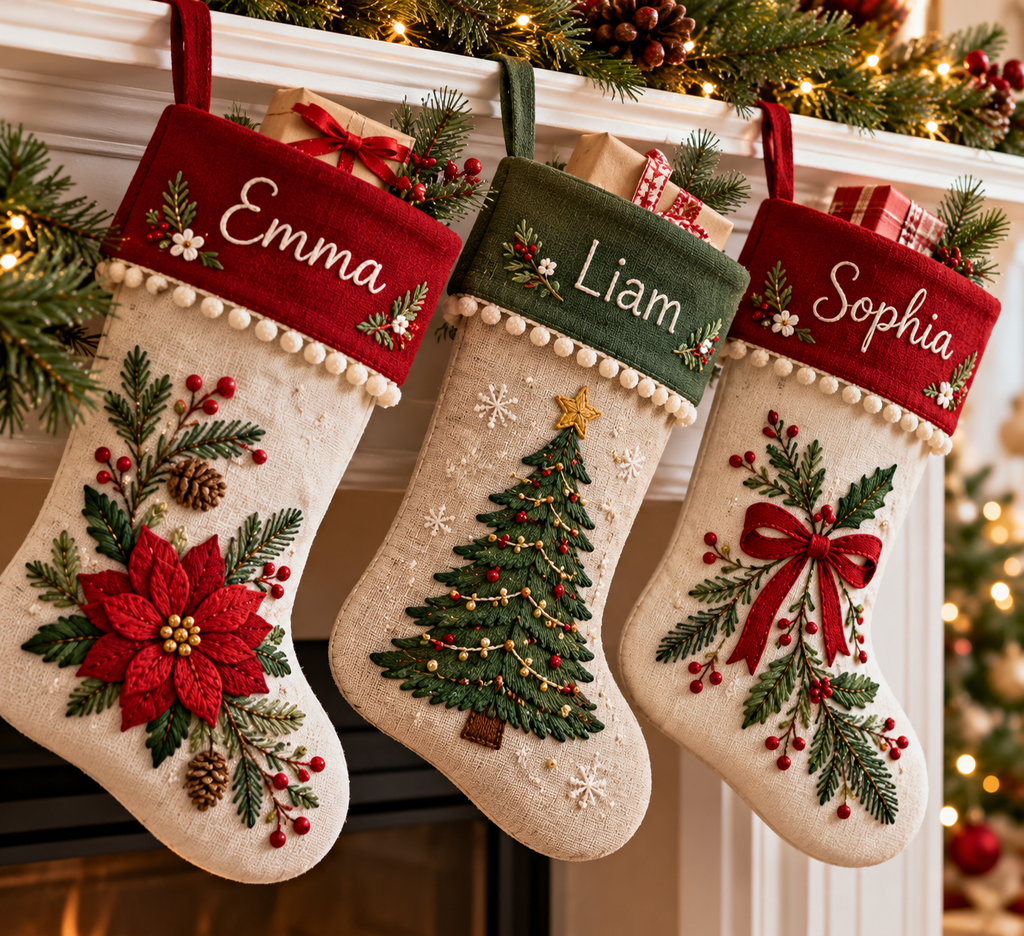
The idea: A name stitched on the cuff of a plain stocking, so each friend or family member gets a personalized one. It looks custom, but starting from a ready-made stocking saves most of the sewing.
Materials and tools: plain stocking with a smooth cuff; stick-on water-soluble stabilizer; floss; size 5 needle; paper for planning.
Procedure:
- Test the layout on paper first, counting letters so the name stays centered.
- Stick the stabilizer to the cuff, draw the name on it, and stitch through both layers.
- Use backstitch or stem stitch with three strands.
- Rinse the stabilizer away and let the cuff dry flat.
Watch for: textured or faux-fur cuffs. Stitching won’t show up on them. Embroider the name onto a small patch of smooth fabric or felt, then sew the patch to the stocking.
Embroidery Gifts for Him
Men’s gifts sometimes get overcomplicated. Subtle colors, clean lettering, and useful objects tend to land better than florals.
11. A Coordinates Hoop
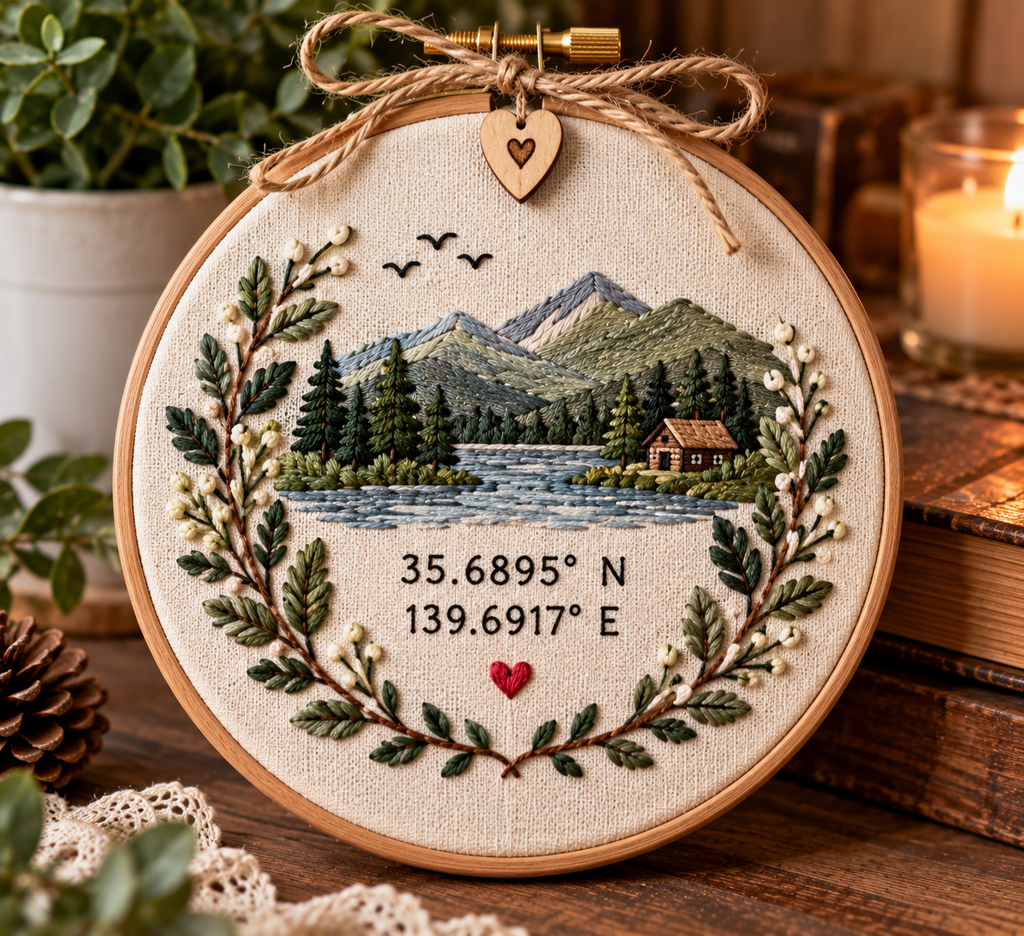
The idea: A hoop showing the latitude and longitude of a place that matters to him: a hometown, the spot where you met, a favorite lake. Numbers in a quiet color give it a restrained look that suits a desk wall or a shelf.
Materials and tools: 6-inch hoop; gray or navy linen; white or cream floss; size 7 needle; pen.
Procedure:
- Pick a place that matters: a hometown, where the friends met, a favorite trail.
- Write the latitude and longitude in numerals and trace them onto fabric.
- Backstitch the numbers with two strands.
- Add a small line detail underneath, such as a mountain ridge or a compass.
- Finish the hoop as in project 1.
Watch for: wrong digits. Confirm the coordinates in a map service and check the order of numbers before you stitch. A single transposed digit changes the location and can’t be unseen.
12. A Monogrammed Pocket Square
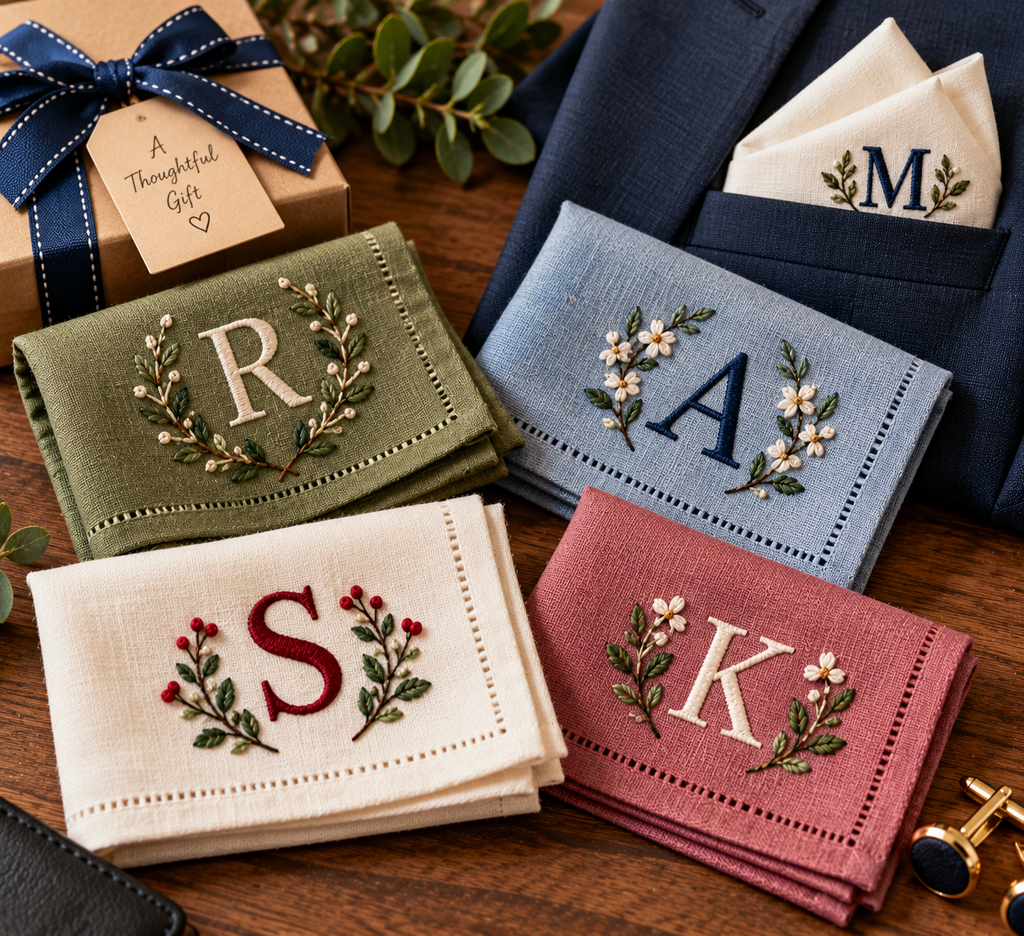
The idea: A hemmed square of cotton or linen with two or three initials stitched in one corner, made to fold into a jacket pocket. It suits a friend who wears a suit to weddings or work.
Materials and tools: 12-inch hemmed square of cotton or linen; 4-inch hoop; one or two strands of floss; size 9 or 10 needle; pen; lightweight stabilizer.
Procedure:
- Mark the initials about one inch in from each edge of one corner.
- Place stabilizer behind the area and hoop the corner.
- Satin stitch with two strands, keeping stitches short and parallel.
- Remove the stabilizer according to its instructions and press face down over a towel.
Watch for: puckering on thin fabric. Use light stabilizer and avoid pulling stitches tight.
13. A Beanie Patch
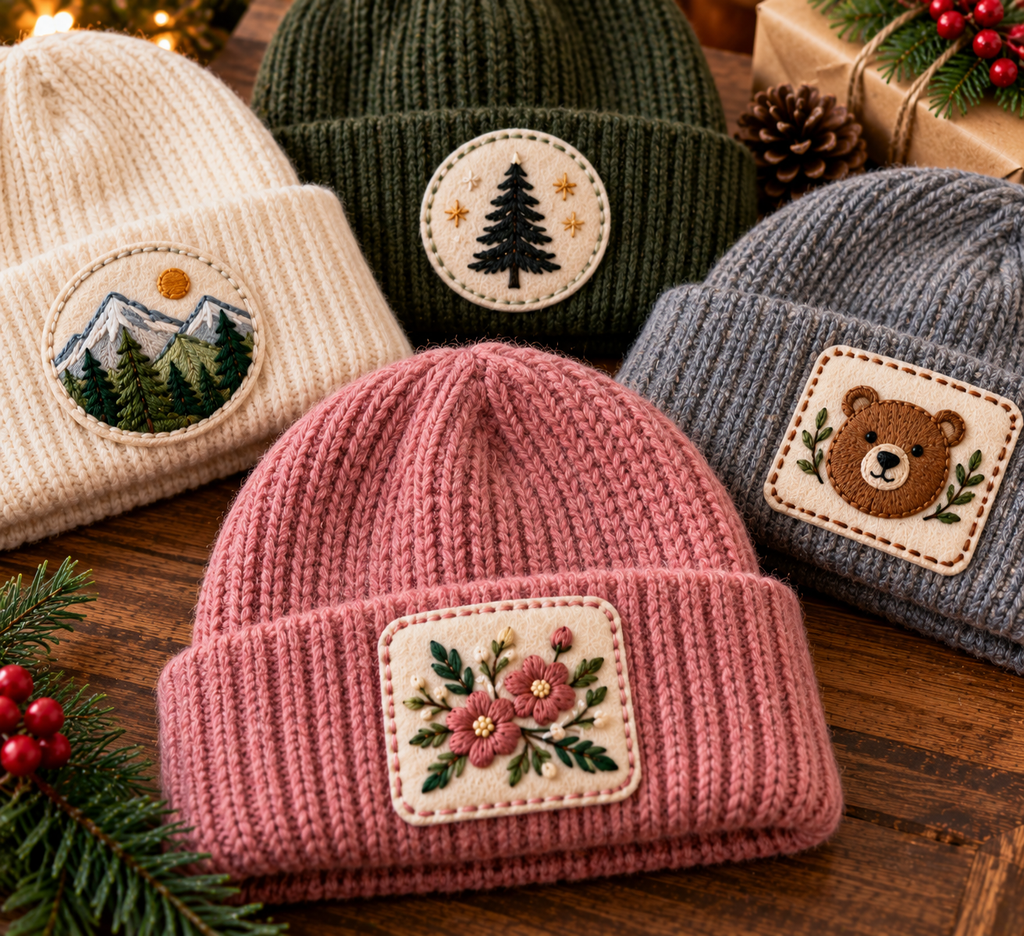
The idea: A small embroidered patch, such as a pine tree, a mountain line, or initials, sewn onto the cuff of a knit cap. Stitching the motif on felt first avoids the stretching problems of embroidering knit directly.
Materials and tools: 3-inch square of felt or twill; floss; size 7 needle; matching sewing thread; a knit beanie.
Procedure:
- Embroider a simple design such as a pine tree, mountain line, or initials.
- Cut around the motif, leaving a quarter-inch border.
- Pin the patch to the beanie’s folded cuff.
- Whipstitch or blanket stitch it on through the outer layer only.
Watch for: stitching straight onto knit. It stretches and distorts, which is why a patch is the better route.
14. A Felt Keychain Fob
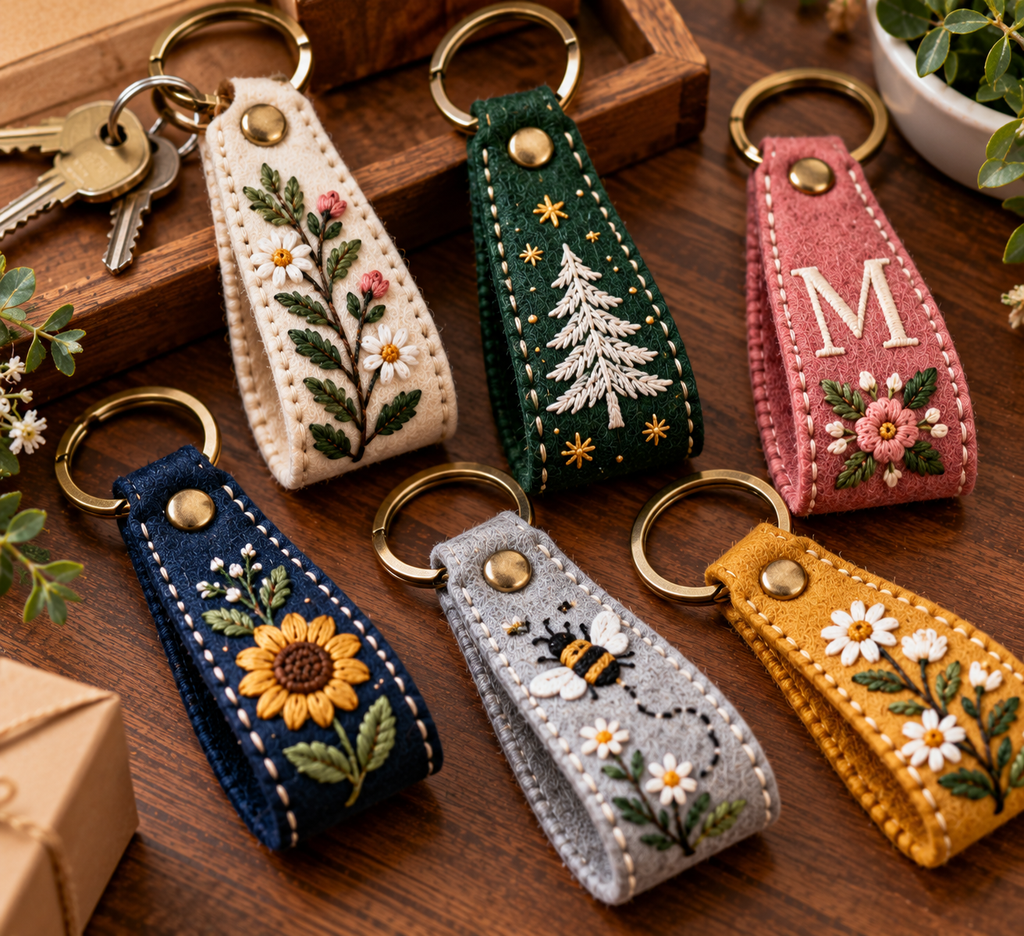
The idea: A small felt tag on a key ring carrying an initial or a simple icon. It’s quick, inexpensive, and used every day, which makes it a good add-on to a bigger gift.
Materials and tools: two 1.5-by-3.5-inch pieces of felt; metal key ring and clasp hardware; floss; size 7 needle.
Procedure:
- Stitch an initial, small icon, or short word on one piece.
- Pair it with the second piece and blanket stitch the edges.
- Fold a small tab at one end, thread it through the ring, and sew it shut.
Watch for: hardware that rubs. Felt wears fastest near the ring, so double the layer there.
15. Geometric Felt Coasters
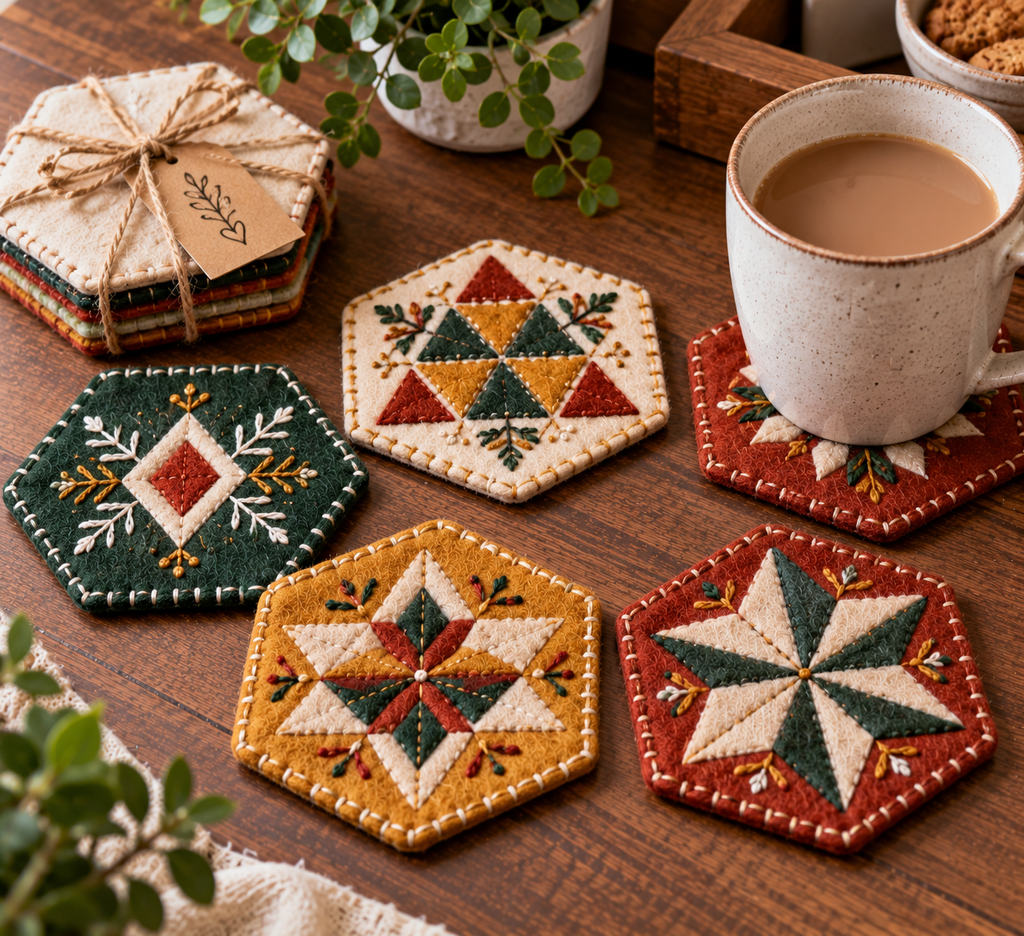
The idea: A set of four felt coasters with geometric stitching in neutral colors. They suit a desk, bar cart, or coffee table, and the repeated pattern makes them forgiving for newer stitchers.
Materials and tools: four 4-inch squares or circles of wool felt (plus four for backing); floss; size 5 needle.
Procedure:
- Stitch a geometric pattern with running stitch or small crosses.
- Place a backing piece behind each coaster.
- Blanket stitch around the edges.
Watch for: heat. Felt coasters absorb condensation but don’t reliably protect furniture from hot mugs or pans, so pair them with cold drinks or warn the recipient.
Embroidery Wedding Gifts
Wedding gifts usually mean a deadline set by the calendar and a recipient who will keep the piece for years. Fabric quality and spelling matter here.
16. A Wedding Date Hoop
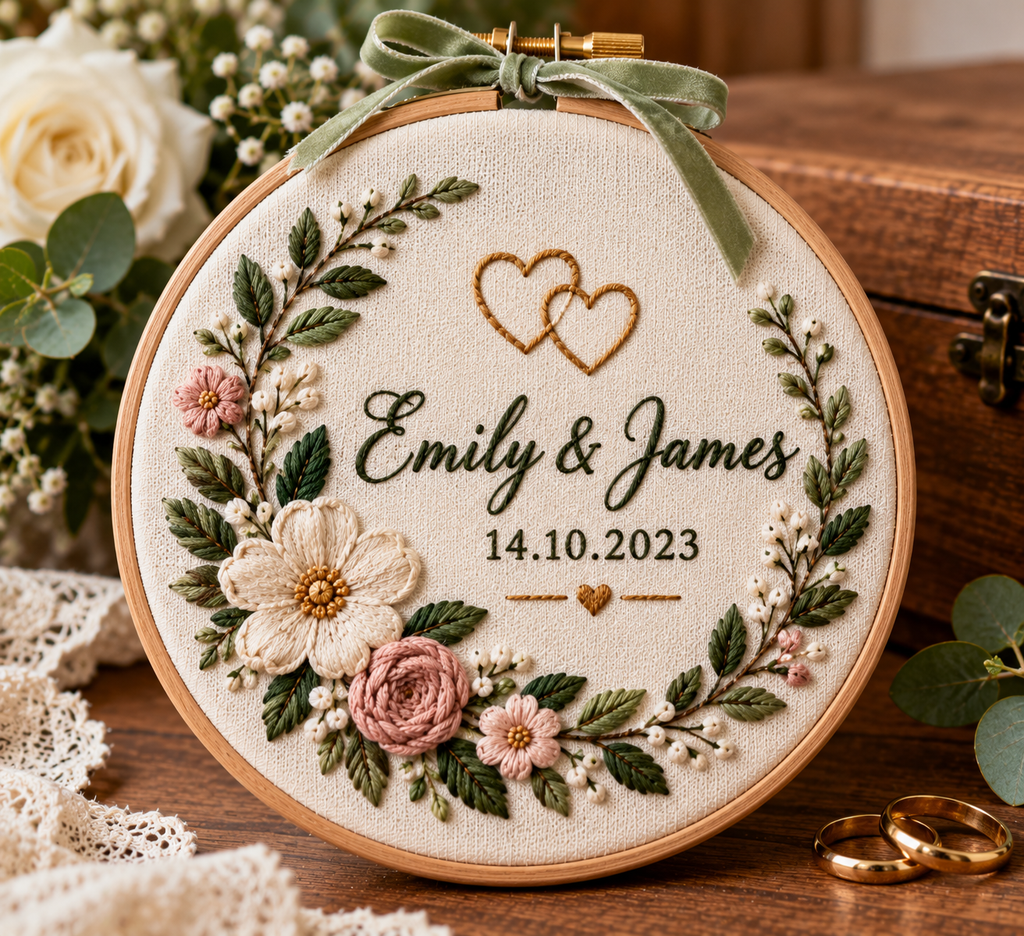
The idea: A keepsake hoop with the couple’s names, the wedding date, and a small floral wreath. It can hang on a wall or sit on a shelf, and it’s one of the most personal gifts on this list.
Materials and tools: 8-inch hoop; ivory linen; floss in two or three colors; size 7 needle; pen.
Procedure:
- Lay out the names and date on paper.
- Trace the layout and add a small wreath around it.
- Backstitch lettering with two strands, stem stitch the wreath stems, and add lazy daisy petals and French knots.
- Rinse, press, and finish the back.
Watch for: facts. Confirm spelling and the order of the date. U.S. numeric dates put the month first, which can confuse guests from elsewhere. Writing the month out avoids it.
17. An Embroidered Handkerchief for the Bride
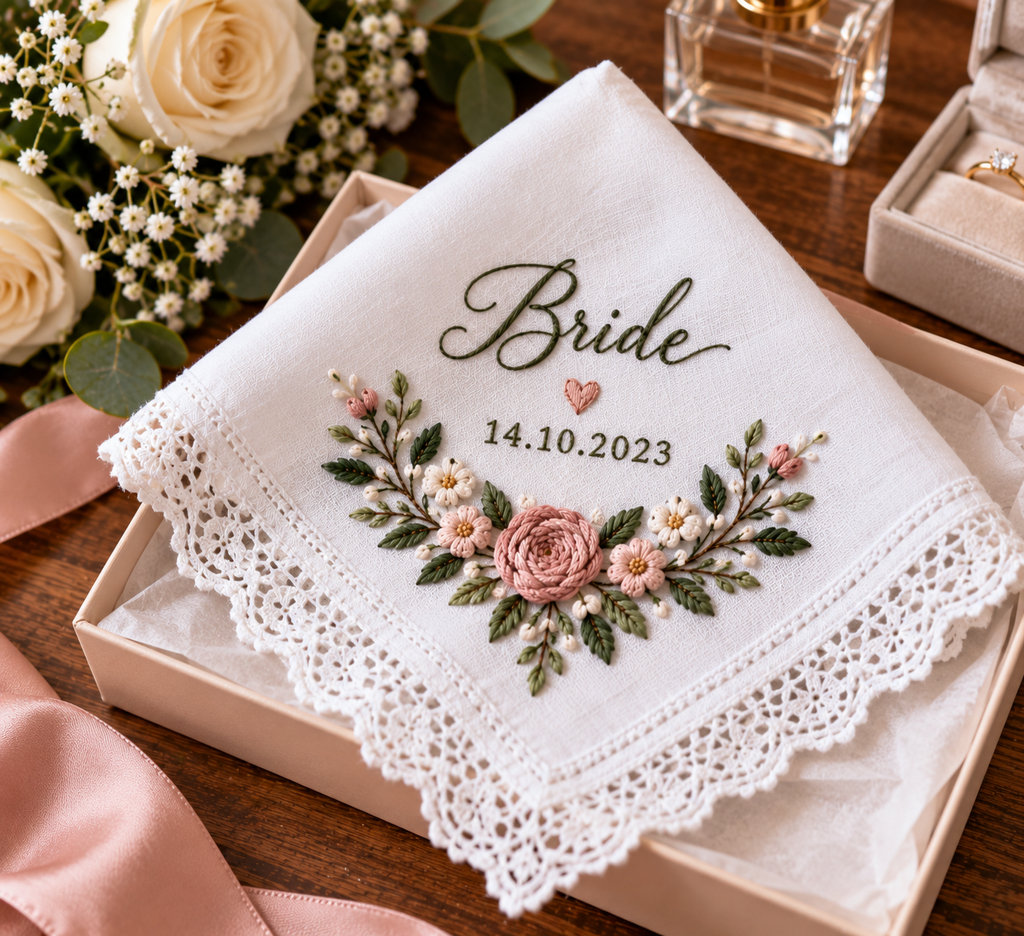
The idea: A small handkerchief with a tiny initial, date, or flower in one corner for the bride to carry on the day. Stitching it in blue is a simple way to cover “something blue.”
Materials and tools: white or ivory cotton or linen handkerchief; 4-inch hoop; fine floss (one or two strands); small needle; optional blue thread.
Procedure:
- Mark a small initial, date, or tiny flower in one corner.
- Hoop gently so the fine fabric isn’t stretched.
- Stitch with a flat satin stitch or neat backstitch.
- Press from the back.
Watch for: scratchy stitches. A handkerchief touches skin, so keep stitching small and flat, and trim thread ends closely.
18. A Ring Pillow
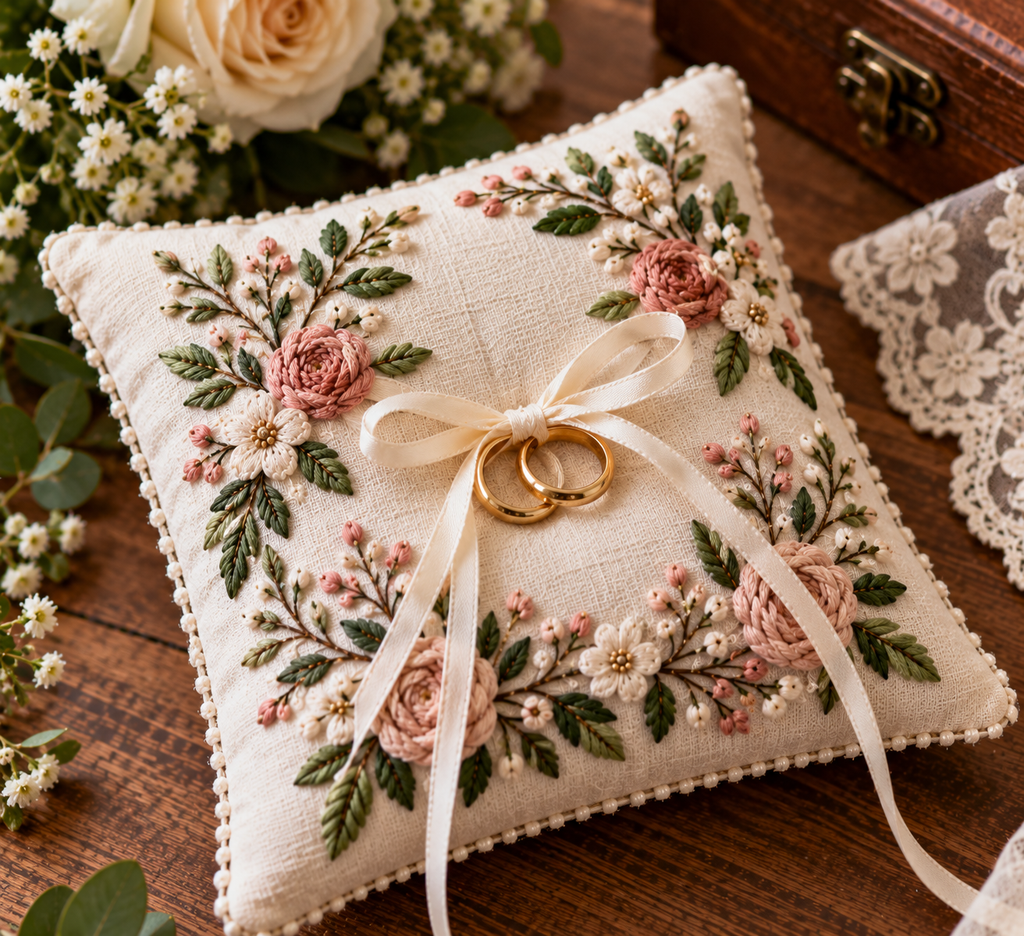
The idea: A small cushion that carries the rings down the aisle, with the couple’s initials or a floral motif stitched on top. After the ceremony it stays on as a keepsake.
Materials and tools: two 6-inch squares of linen; polyfill; 3/8-inch ribbon; floss; sewing thread; needle.
Procedure:
- Embroider the couple’s initials or a small floral at the center of one square.
- Sew the squares right sides together on three sides, turn, and stuff.
- Close the opening by hand.
- Sew a ribbon to the middle of the pillow for tying the rings.
Watch for: tight ties. The rings are valuable and need to come off quickly at the ceremony, so use a simple bow and let the ring bearer know.
19. Embroidered Linen Napkins
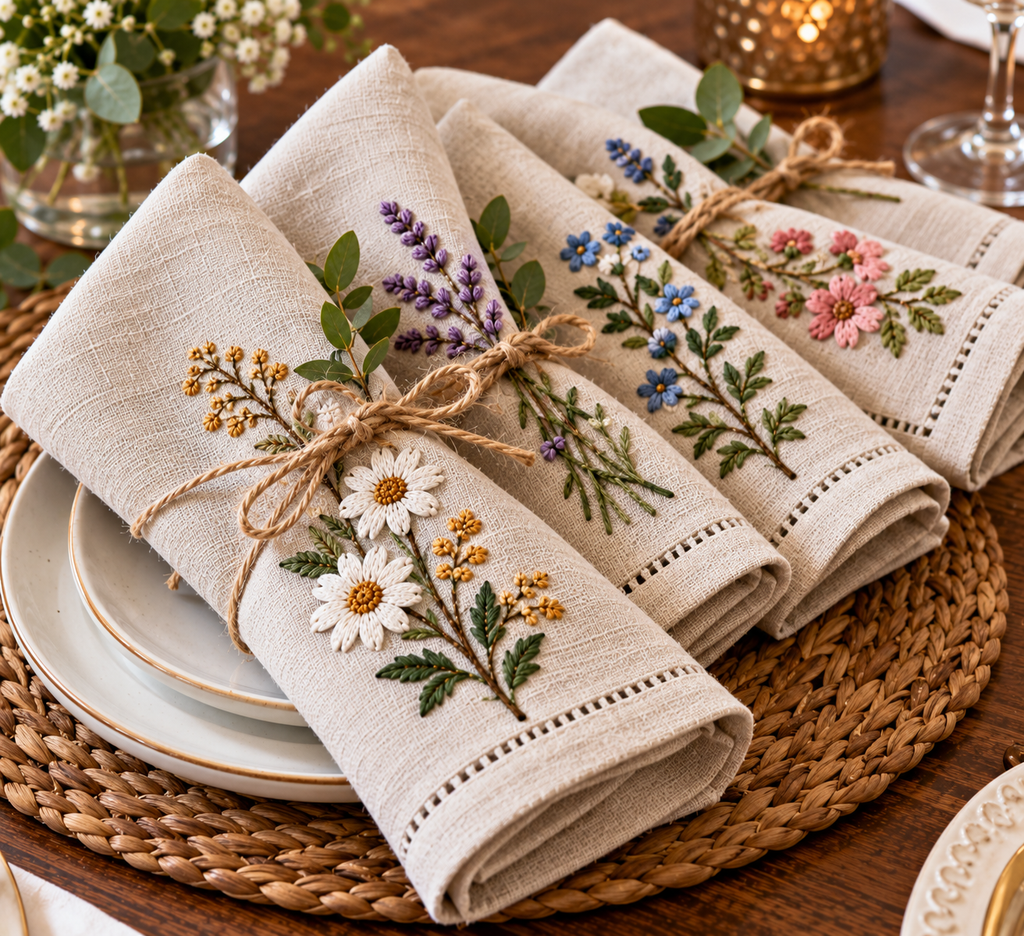
The idea: A set of cloth napkins, each with the same small motif in one corner, for the couple’s own dinner table. It’s a useful gift rather than a decorative one, and the set gets used long after the wedding.
Materials and tools: four or six cotton or linen napkins; 4-inch hoop; floss; size 7 needle; ruler; pen.
Procedure:
- Wash and press the napkins first.
- Mark every napkin the same distance from the corner, such as two inches in from each edge.
- Stitch the same small motif in each: a sprig, a monogram, a tiny heart.
- Press from the back.
Watch for: inconsistency across a set. Make a paper template of the motif and use it for each napkin.
20. A Linen Cover for a Guest Book or Vow Booklet
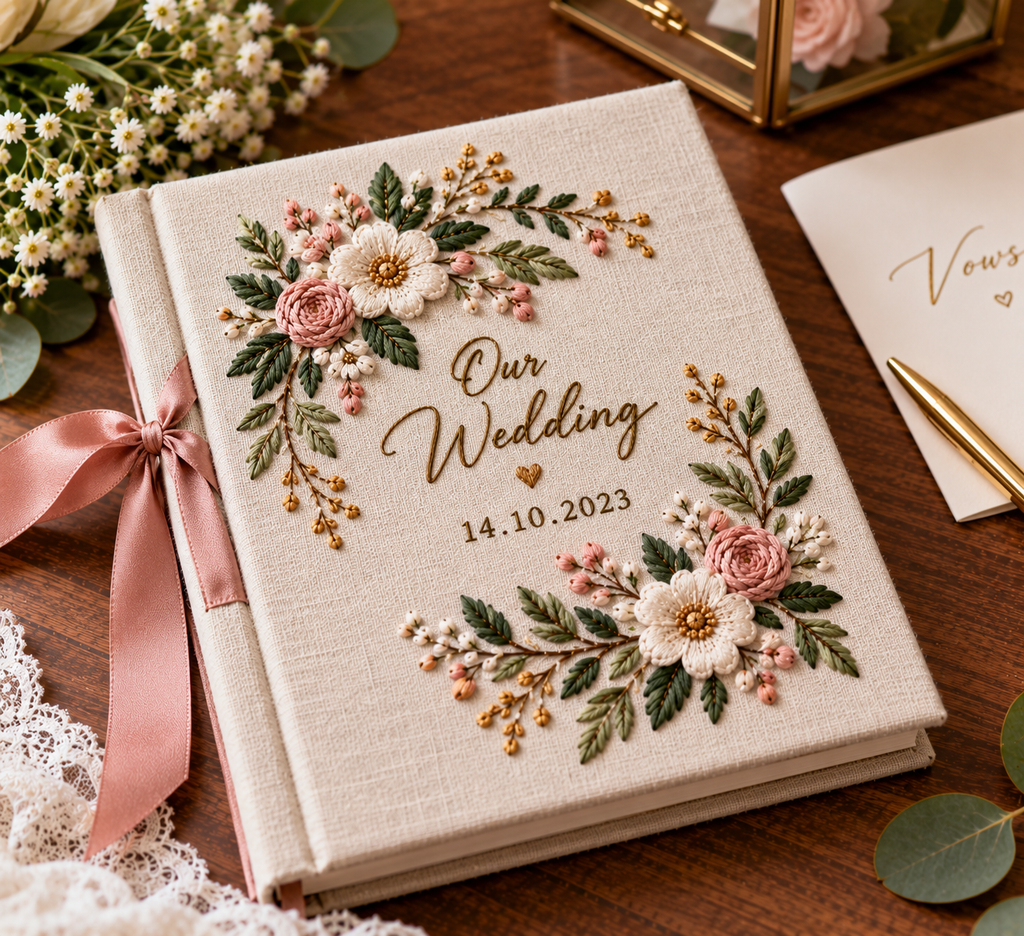
The idea: A guest book or vow booklet wrapped in embroidered linen, so the book that holds the day’s messages becomes a keepsake in its own right.
Materials and tools: linen or cotton book cloth; plain notebook or guest book; stabilizer; floss; fabric glue; scissors.
Procedure:
- Cut the cloth two inches larger than the open cover on every side.
- Embroider the front-cover area while the cloth is flat.
- Wrap the cloth around the cover and glue the edges to the inside, mitering the corners.
- Cover the inside with a sheet of paper or the endpaper.
Watch for: stiff glue. Test the adhesive on a scrap, because some fabric glues darken light linen.
Mistakes That Make Handmade Embroidery Look Unfinished
A few errors account for most of the disappointing results.
Puckered fabric. This comes from stitching too tightly, hooping too loosely, or skipping stabilizer on thin fabric. Pulling thread only until it lies flat and no further helps.
Shadowing. Dark thread carried across the back of light fabric shows through the front. Weave thread through the back of existing stitches instead of jumping across open space.
Mismatched weights. Heavy floss on thin cotton looks clumsy, and one strand on canvas disappears. Match the thread to the fabric.
Skipping the test stitch. A small scrap of the actual fabric tells you how the thread covers, how the pen marks come out, and whether the design reads at that size.
Questions Worth Asking Before You Start
Can I embroider on a stretchy T-shirt or sweater? Yes, but it requires cut-away stabilizer on the inside and a very light touch on tension. For a first gift, patches or woven fabric are safer.
How far ahead should I begin? For anything with a name or date, start at least two weeks ahead of the deadline, since lettering is the slowest part.
Should a hoop gift be framed? It doesn’t have to be. The hoop itself works as a frame, but a hanging loop or small nail hook on the back is helpful.
Key Takeaways
Pick the project by recipient and deadline before picking it by appearance. Wash fabric and test thread for anything that will go in a washer, keep lettering short when time is tight, and stitch pieces flat before assembling them into pouches, pillows, or covers. Double-check every name, date, and set of coordinates before the first stitch, since spelling errors are the hardest mistakes to hide.

About Syprose Kiche
Syprose Kiche is the creator and writer behind My Besuited Home, a practical home and garden website covering DIY projects, gardening, lawn care, landscaping, home improvement, and outdoor living. She focuses on turning everyday homeowner questions into clear, practical guides backed by careful research and useful real-world considerations.