
For years, I believed that a peaceful, rushing stream or a cascading waterfall was a luxury reserved only for people with sprawling estates. My own small backyard felt perpetually dry and quiet, a constant reminder that I couldn’t host a grand aquatic environment. Yet, what I truly craved wasn’t the visual magnitude of a lake, but the simple, beautiful sound of moving water—that consistent, calming auditory backdrop that melts away the stress of the day.
The good news is that you don’t need acres to achieve this sensory satisfaction. I discovered the pondless water feature, which I can tell you is one of the most effective backyard transformations for minimal space. It delivers all the auditory pleasure of a waterfall—the shimmer and the rush—without requiring a large, exposed body of water. It’s a system designed to maximize the sound of nature while minimizing the space and maintenance required.
In this guide, I’m going to walk you through exactly how I built my own pondless feature. We’ll cover everything, starting with smart planning to ensure success in a tight spot, reviewing the materials list, and then breaking down the installation into five manageable steps. By the time we’re finished, you’ll have the knowledge to turn that quiet, unused corner of your yard into your new favorite retreat.
Why Pondless is Perfect for Small Spaces
A. Safety and Maintenance Benefits
One of the biggest concerns with any traditional pond is safety. If you have young children, curious pets, or simply don’t want the liability of standing water in your yard, a standard pond is often a non-starter. This is where the pondless design shines: because the reservoir is completely hidden beneath heavy-duty rocks and a layer of gravel, there is no exposed standing water, effectively eliminating the risk of accidental drowning. That peace of mind alone makes the investment worthwhile for any family.
Beyond safety, the maintenance advantage is significant. A typical pond is a complex ecosystem requiring careful balancing of chemicals, aeration, filtration, and constant battle against aggressive algae growth. When you remove the need for fish, complex plants, and large surfaces of still water, you simplify everything. Your main job becomes periodically adding water to compensate for evaporation and splash, rather than acting as a full-time aquatic chemist.
Furthermore, a still body of water is a five-star hotel for mosquitoes. Since a pondless feature is constantly circulating its water—the pump moves it from the underground reservoir, up to the spillway, and back down through the rocks—it prevents the stagnation that mosquitoes require for breeding. It’s an elegant solution that keeps your yard sounding beautiful and feeling comfortable on warm summer evenings.
B. Space Efficiency
The single most efficient aspect of this design is the fact that the reservoir is hidden. In a small yard, every square foot is precious. If you built a standard pond, that space would be dedicated solely to aquatic function. With a pondless system, the actual water storage is completely concealed underground, meaning the surface area can be covered in attractive decorative stones that you can walk on or place planters near.
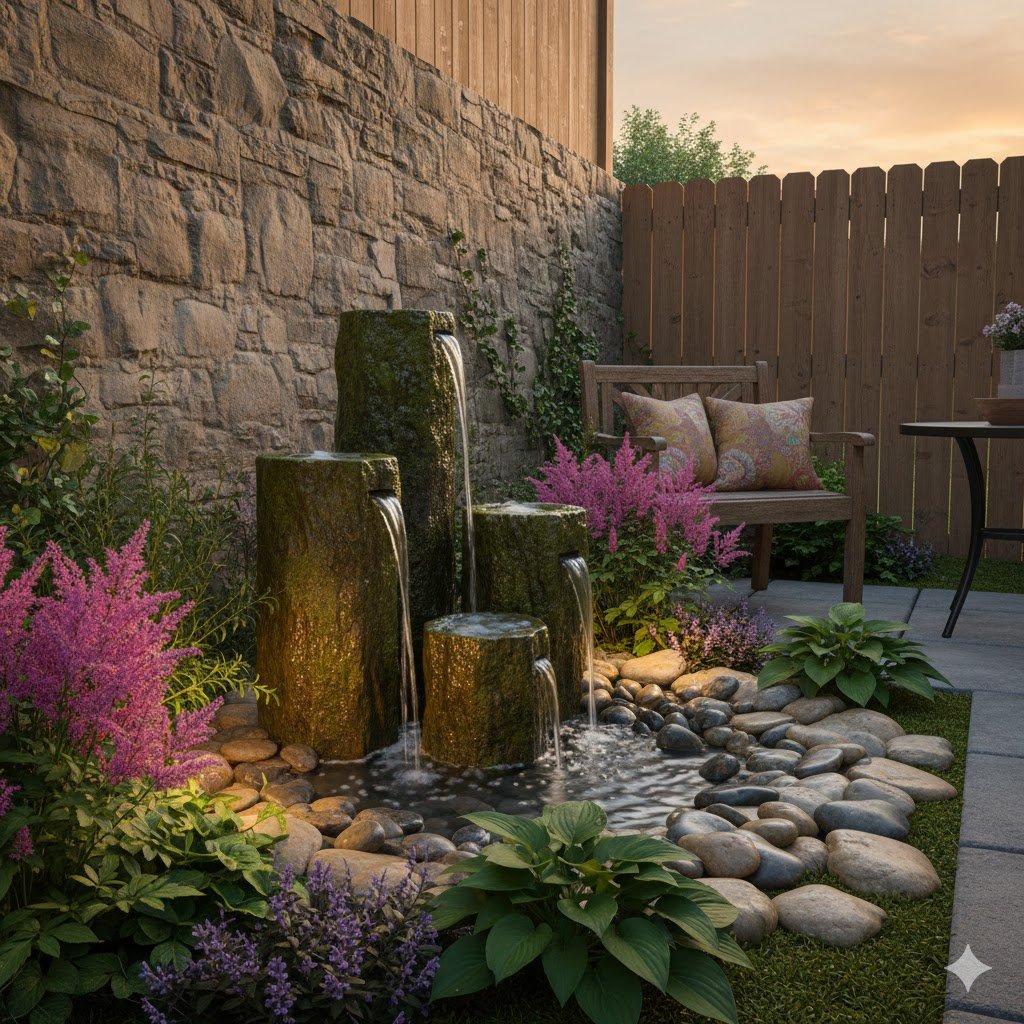
This hidden reservoir also allows for incredible flexibility in design. You aren’t constrained to a large, flat, pond shape. Instead, you can have a simple bubbler fountain where water gently wells up from a single boulder, or you can create a miniature, multi-tiered cascade that hugs a retaining wall. The structure adapts to the vertical and horizontal constraints of your small yard, making it feel organic rather than forced.
My own tiny patio taught me that the perceived size of a water feature is far more important than its actual footprint. By hiding the mechanics beneath the ground, the space consumed by the feature is almost entirely decorative. You can essentially build a fully functional, relaxing waterfall system in an area that’s just four feet by four feet, maximizing your patio or garden space for actual furniture and entertaining.
Planning & Gathering Materials (The Prep Work)
A. Design and Placement
Before the shovel touches the dirt, you need to commit to the location. I strongly recommend placing your feature near where you spend the most time relaxing—a patio chair, a deck railing, or even right outside a frequently opened window. The goal is to maximize the enjoyment of the sound. Crucially, you must also plan for power. Trying to hide a long, unsightly, and potentially hazardous extension cord is a headache; aim to place the feature as close as possible to an outdoor-rated GFCI electrical outlet.
Next, decide on the style. Are you leaning toward a simple, sophisticated bubbler that gently trickles? Or do you want a more dynamic, noisy cascade that requires a slightly higher vertical drop? Since our space is limited, keep the flow proportional to the size of the yard; a roaring river sound in a tiny space can feel overwhelming. Your style choice dictates the types of rocks you’ll purchase—smooth river stones for a tranquil look, or rugged slate for a dramatic cascade.
The final planning piece is sizing your reservoir and pump. This is critical for the long-term health of your system. If your pump is too powerful for your water storage capacity, it will quickly run dry and burn out. You need to calculate the head height (the vertical distance from the pump to the spillway) and the desired flow rate (GPH, or gallons per hour). Match these numbers to the pump manufacturer’s chart, and ensure your reservoir (especially if you opt for the more efficient Water Matrix blocks) can handle the volume of water the pump will push.
B. Essential Material Checklist
The core of a good pondless feature is a reliable, subterranean reservoir. While some people try to use simple plastic tubs, I highly recommend using Water Matrix blocks. They are more costly upfront, but they create internal voids that hold over 90% water by volume, compared to only 40% for a basin filled with just rock and gravel. You’ll also need a high-quality EPDM or PVC pond liner; always buy a piece that’s large enough to cover the pit with at least 2 to 3 feet of excess overlap on all sides.
You can’t install the liner without its critical partner: the geotextile underlayment. This fabric goes between the soil and the liner and is the crucial protector against sharp roots, stones, or settling debris that could puncture the liner over time. Once the basin is protected, focus on the plumbing: a submersible pump correctly rated for GPH and head height, and flexible tubing to connect the pump to your desired water outlet.
Finally, we arrive at the aesthetics—the rocks and gravel. You need two distinct types. First, decorative, larger river stones, flat slate, or granite for creating the actual waterfall structure and covering the edges. Second, a substantial amount of smaller, smooth gravel or pea stones to fill the reservoir void around the water blocks. A critical pre-installation step for the gravel is to thoroughly rinse it! Rock dust is a pump killer and will instantly cloud your water.
Step-by-Step Installation Guide (The Core DIY)
Step 1: Digging the Reservoir Pit
Start by marking your proposed feature’s outline. You can use a garden hose to define the shape and perimeter on the ground before committing. The reservoir pit should be the deepest point of your entire feature, typically dug to a uniform depth of 18 to 24 inches. This depth maximizes the underground storage capacity and helps keep the water cool, even in summer.
Once the hole is roughly excavated, use a long board and a level to ensure the floor of the pit is perfectly flat. This might seem tedious, but if the reservoir is uneven, the water blocks or basin won’t sit correctly, and the whole system could settle poorly, potentially affecting the waterfall’s stability later on. Take your time to get this foundation right.
This is the point where I almost gave up on my first build because of the sheer number of rocks I had to clear out. But I learned a critical lesson: you must meticulously remove every root, sharp stone, and piece of debris. Even a tiny, sharp object, when placed under the weight of hundreds of pounds of water and decorative stone, will eventually compromise your liner. Vacuum the bottom of the pit if you have to—cleanliness is crucial here.
Step 2: Underlayment and Liner Installation
First, lay the geotextile underlayment fabric smoothly over the bottom and sides of your prepared pit. If your excavation is large, you might need to overlap multiple pieces; ensure these overlaps are generous. This protective layer is truly your insurance policy against punctures and is a non-negotiable step in the process.
Next, carefully unfold and lay the primary pond liner on top of the underlayment. The key instruction here is to press the liner gently into the contours of the pit, avoiding stretching it tightly. Try to minimize large wrinkles, especially at the bottom, but don’t obsess over perfection; the weight of the water and rocks will eventually smooth out most of them.
The most important rule in this step is to resist the urge to trim the excess liner. You need a significant amount draped over the edges, at least two to three feet of slack around the perimeter. We leave this excess in place because the weight of the rock fill might shift the liner slightly, and you only want to trim it after the entire feature is filled with water and stone, guaranteeing that the soil remains fully covered.
Step 3: Installing the Reservoir Components
If you are using Water Matrix blocks, assemble them according to the manufacturer’s directions and place them inside the lined pit. These blocks are what hold the bulk of your water underground. Next, install your submersible pump. If you’re using a dedicated pump vault, place the pump inside it; if not, you’ll place the pump directly among the matrix blocks. The goal is to protect the pump from large debris while keeping it accessible.
Once the pump is secured, connect the discharge hose and run it upward, out of the basin, and toward the pre-planned location of your waterfall or spillway. Ensure this hose is routed smoothly along the side of the pit, ready to be concealed by the upper layers of rock.
This step is primarily about setting up the internal functionality before we hide everything. Double-check that all hose connections are tightly clamped and that the pump’s electrical cord is routed safely out of the basin, ready to be run to the power source.
Step 4: Connecting the Spillway/Waterfall
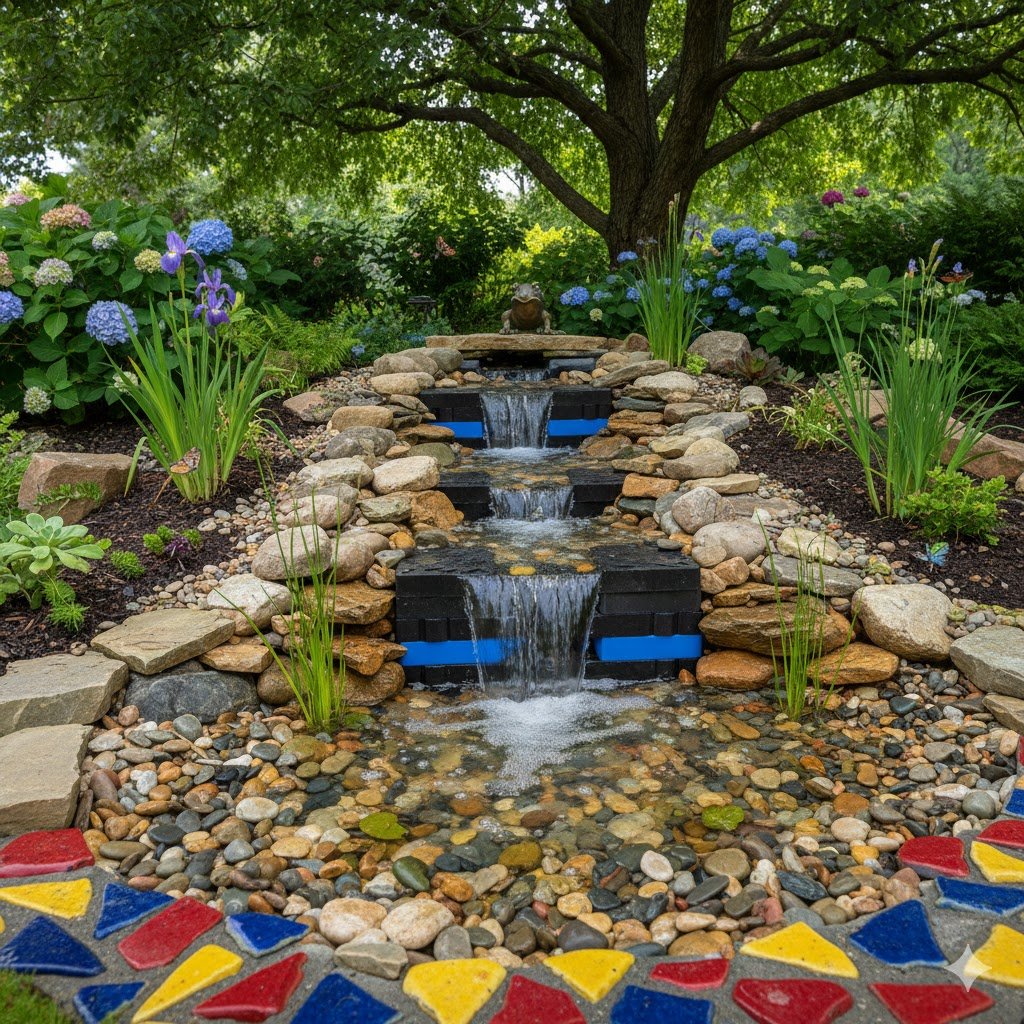
Now, the fun part: building the structure. Begin stacking your main decorative rocks to create the waterfall mound. Always build up the sides higher than the center of the stream bed. Water will always find the easiest path, so creating raised “banks” is essential to prevent the flow from escaping the liner laterally.
Secure the end of your discharge hose at the top of this structure. It needs to feed directly onto your designated spillway rock—the flat rock from which the water will cascade. Use a level to ensure this spillway rock is angled slightly forward, guaranteeing a clean, controlled sheet of water rather than a messy, directional spray.
I learned the hard way that without sealing the gaps, water will sneak behind your beautifully placed rocks. The secret weapon here is black waterfall foam, sometimes called pond foam. Use it sparingly but strategically to seal the crevices between the major structural stones. This foam cures quickly and forces the water to follow the path you designed, maximizing the visual and auditory effect of your falls.
Step 5: Rock Placement and Basin Filling
With the waterfall structure complete, it’s time to fill the reservoir itself. Start layering in the washed gravel and smaller river stones, working from the outside in. This layer acts as a natural mechanical filter, preventing leaves, dirt, and larger debris from ever reaching the pump’s intake.
Once the entire basin is filled up to the desired ground level, begin placing your larger, decorative river stones on top. The goal is complete concealment: you shouldn’t be able to see any of the liner, the water blocks, or the smaller gravel beneath. However, make sure you know exactly where your pump vault or pump access is, as you will need to get to it eventually for cleaning.
Finally, you can safely trim that excess liner. With the weight of the rocks holding everything securely, trim the liner and carefully tuck the edges under your outermost decorative border stones. Camouflage the perimeter with surrounding soil, mulch, or low-lying plants to fully integrate the new water feature into your existing landscape.

Finishing Touches and Aesthetics
A. Water Fill and Pump Test
The first step in the final phase is filling the reservoir with water. If you used water blocks, this might take a surprising amount of time, as they hold a tremendous volume. Continue filling until the water level is well above the pump’s intake, completely submerging the gravel layer and allowing the water matrix blocks to start functioning.
The moment you plug in the pump is incredibly satisfying. Watch the water flow immediately. If your pump has an adjustable flow rate, dial it in until the sound is exactly what you want—sometimes a slight adjustment can make all the difference, turning a dull trickle into a vibrant splash.
Watch the feature for about an hour to identify any splash issues. Excessive splash outside the reservoir’s perimeter means you’re losing water constantly. To fix this, you need to strategically place small, slightly recessed catch rocks around the drop zone. These rocks gently interrupt the falling water, guiding it back down into the covered basin rather than letting it land on the surrounding soil.
B. Lighting
A water feature enjoyed only during the day is a feature only half-enjoyed. Installing low-voltage LED lighting can extend the tranquility into the evening, transforming the feature into a stunning nocturnal focal point. LED lights are incredibly energy-efficient and rated for continuous outdoor use, making them an easy addition.
When it comes to placement, think drama. My favorite trick is to place one small, warm white light directly under the spillway rock. As the water passes over it, it creates a magnificent shimmering, glowing effect that looks ethereal. You can also use a spotlight aimed from a distance to highlight the textures of the structural rocks, giving the water feature depth and dimension.
Always use outdoor-rated, waterproof lighting. The wires should be hidden meticulously—tuck them underneath the decorative rocks or along the edge of the liner before you bury the perimeter with mulch. You want the light to appear magically without any visible source or clumsy wiring.
C. Integrating Plants
While the hardscape creates the structure and sound of your feature, integrating plants around the edges is key to making it look natural. Too much exposed rock can look harsh and sterile; plants soften the edges and visually blend the feature seamlessly into your existing garden beds.
Choose moisture-loving plants that thrive near damp soil, such as Hostas, ferns, or various sedges. These plants add beautiful texture and color that contrasts nicely with the gray or brown stone. Be sure to place them far enough away so that their leaves and petals don’t constantly drop into the water basin, which would increase the organic debris the pump has to filter.
One absolute rule to follow: do not plant anything inside the reservoir area or on the liner itself. While it might look pretty initially, roots are incredibly strong and will eventually find a way to compromise the liner, causing slow leaks. Stick to container gardening or planting just outside the waterproof boundary.
Quick Maintenance Tips
A. Routine Care
The number one maintenance task for any pondless feature is simple: check the water level weekly. Even without leaks, you will lose water constantly to evaporation and the aeration caused by the running waterfall. On a hot, windy day, this can be significant. Simply use a garden hose to top it off, ensuring the water level never drops below the pump’s intake.
To maintain water clarity and prevent the inevitable build-up of fine organic matter, I recommend adding beneficial bacteria every month or so. This natural treatment helps to break down dust, pollen, and small leaf particles before they can foul the water, keeping the system naturally clean without harsh chemicals.
If you notice the waterfall flow begins to weaken, it’s almost certainly a clog at the pump intake. You’ll need to access the pump vault, disconnect the pump, and clean the pre-filter sponge or intake screen. This usually takes just a couple of minutes but is critical. Running a pump with a blocked intake makes it work harder, significantly shortening its lifespan.
B. Winterization
If you live in a region that experiences harsh or sustained freezing temperatures, you need to prepare the feature for winter. Leaving the pump submerged in water that freezes solid is a recipe for a cracked pump housing or a seized motor, leading to expensive replacement in the spring.
The safest method for winterizing is a full system shutdown. Unplug the pump, disconnect the tubing, and remove the pump from the basin. Once removed, clean the pump and store it indoors—a garage or basement is fine. A pro tip: store the pump submerged in a bucket of water. This prevents the rubber seals from drying out and cracking over the winter months.
You do not need to drain the entire reservoir. Once the pump is removed, simply cover the waterfall area with a tarp or boards to prevent debris and heavy snow from collecting on the rocks. The gravel-filled basin allows any residual moisture to expand naturally as it freezes, causing no damage to the liner or the structure itself.
Wrapping Up
You took on a challenging but rewarding project, transforming a previously quiet, underutilized space into a source of sensory delight. It wasn’t about building a massive, complex structure; it was about strategic digging, careful rock placement, and smart plumbing choices to create an accessible and sustainable water feature.
The real triumph of the pondless system is its elegant simplicity. You now have a low-maintenance, safe, and space-efficient waterfall that sounds exactly like something you’d hike miles into the wilderness to find, yet it’s right there on your patio. The gentle white noise of running water does more for relaxation than any playlist I’ve ever downloaded.
Don’t let the thought of a “small yard” be a limiting factor in your gardening dreams. You’ve installed a simple luxury that will bring you peace for years to come. Now, go grab a cup of coffee, sit by your new waterfall, and truly enjoy the quiet reward of a successful DIY project.