
To make DIY beeswax wraps, cut your cotton fabric into your desired sizes. Place the fabric on a parchment-lined baking tray or between two sheets of parchment if using an iron. Sprinkle beeswax (and resin or oil, if using) evenly over the fabric. If you’re using the oven, bake at around 185°F (85°C) for 5-7 minutes. For the iron method, use medium heat and slowly press until the wax melts.
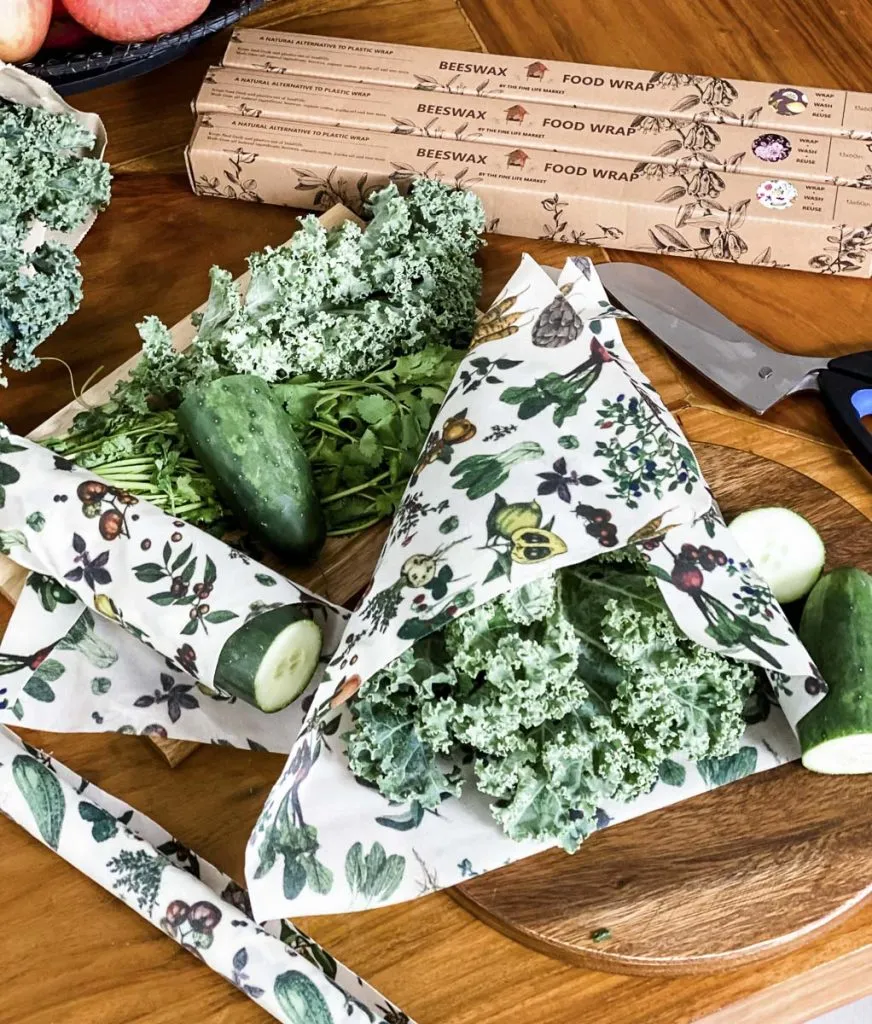
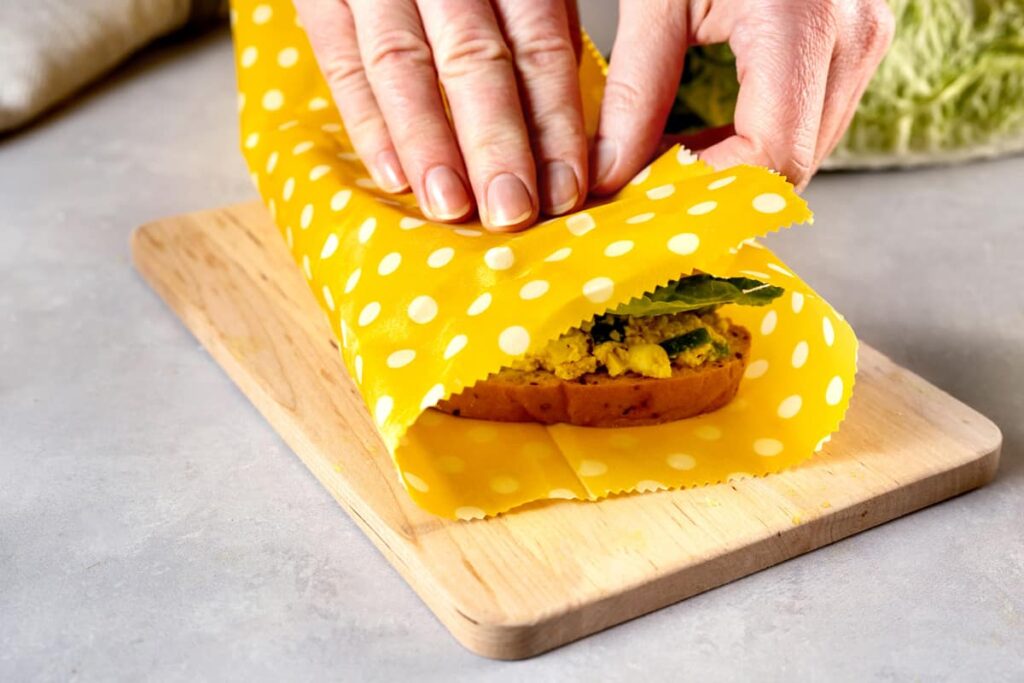
Once the wax has melted and is evenly distributed, carefully lift the fabric (use tongs or gloves) and wave it gently in the air to cool and harden. It usually takes just a few minutes to dry and become usable. The wrap should be tacky and flexible, able to fold over food and containers.
You can refresh older wraps by repeating the melting process and adding a bit more wax. Properly made and stored wraps can last up to a year, making this DIY project well worth your time and energy.
1. Classic Lemon Print Wraps
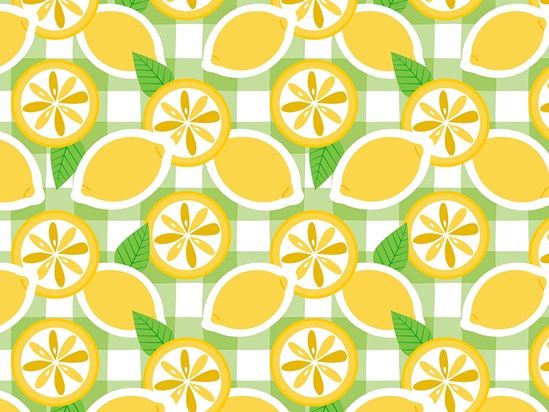
Bright and cheerful lemon-printed fabrics are perfect for food wraps. Their visual association with freshness makes them ideal for wrapping sliced fruits, cheese, and leftovers. Choose fabrics in shades of yellow, green, or white with citrus patterns for an uplifting kitchen vibe.
These wraps make excellent gifts, especially in spring or summer baskets. Pair one with a loaf of banana bread or homemade jam, and you’ve got a thoughtful, reusable touch that friends will appreciate. The classic lemon print is also timeless and works beautifully in modern or farmhouse-style kitchens.
Making lemon print wraps is no different from the basic method—just select your favorite lemon-themed fabric and cut to size. If you’re using beeswax alone, the wrap may feel a bit stiff at first, but it will become more flexible with use.
2. Upcycled Shirt Fabric Wraps
Have an old cotton shirt you no longer wear? Turn it into something useful! Upcycling old shirts into beeswax wraps gives your favorite patterns a second life while reducing textile waste. It’s a win-win for sustainable living.
Choose tightly woven cotton shirts, preferably without stretch. Patterns like stripes, plaids, or florals can add a charming, rustic aesthetic to your wraps. Wash the fabric thoroughly to remove any detergent or residue before applying the wax.
This is a fantastic project for those who love sentimental DIYs—turning a loved one’s old shirt into something new, functional, and sustainable. It adds a layer of emotional value to an otherwise everyday item.
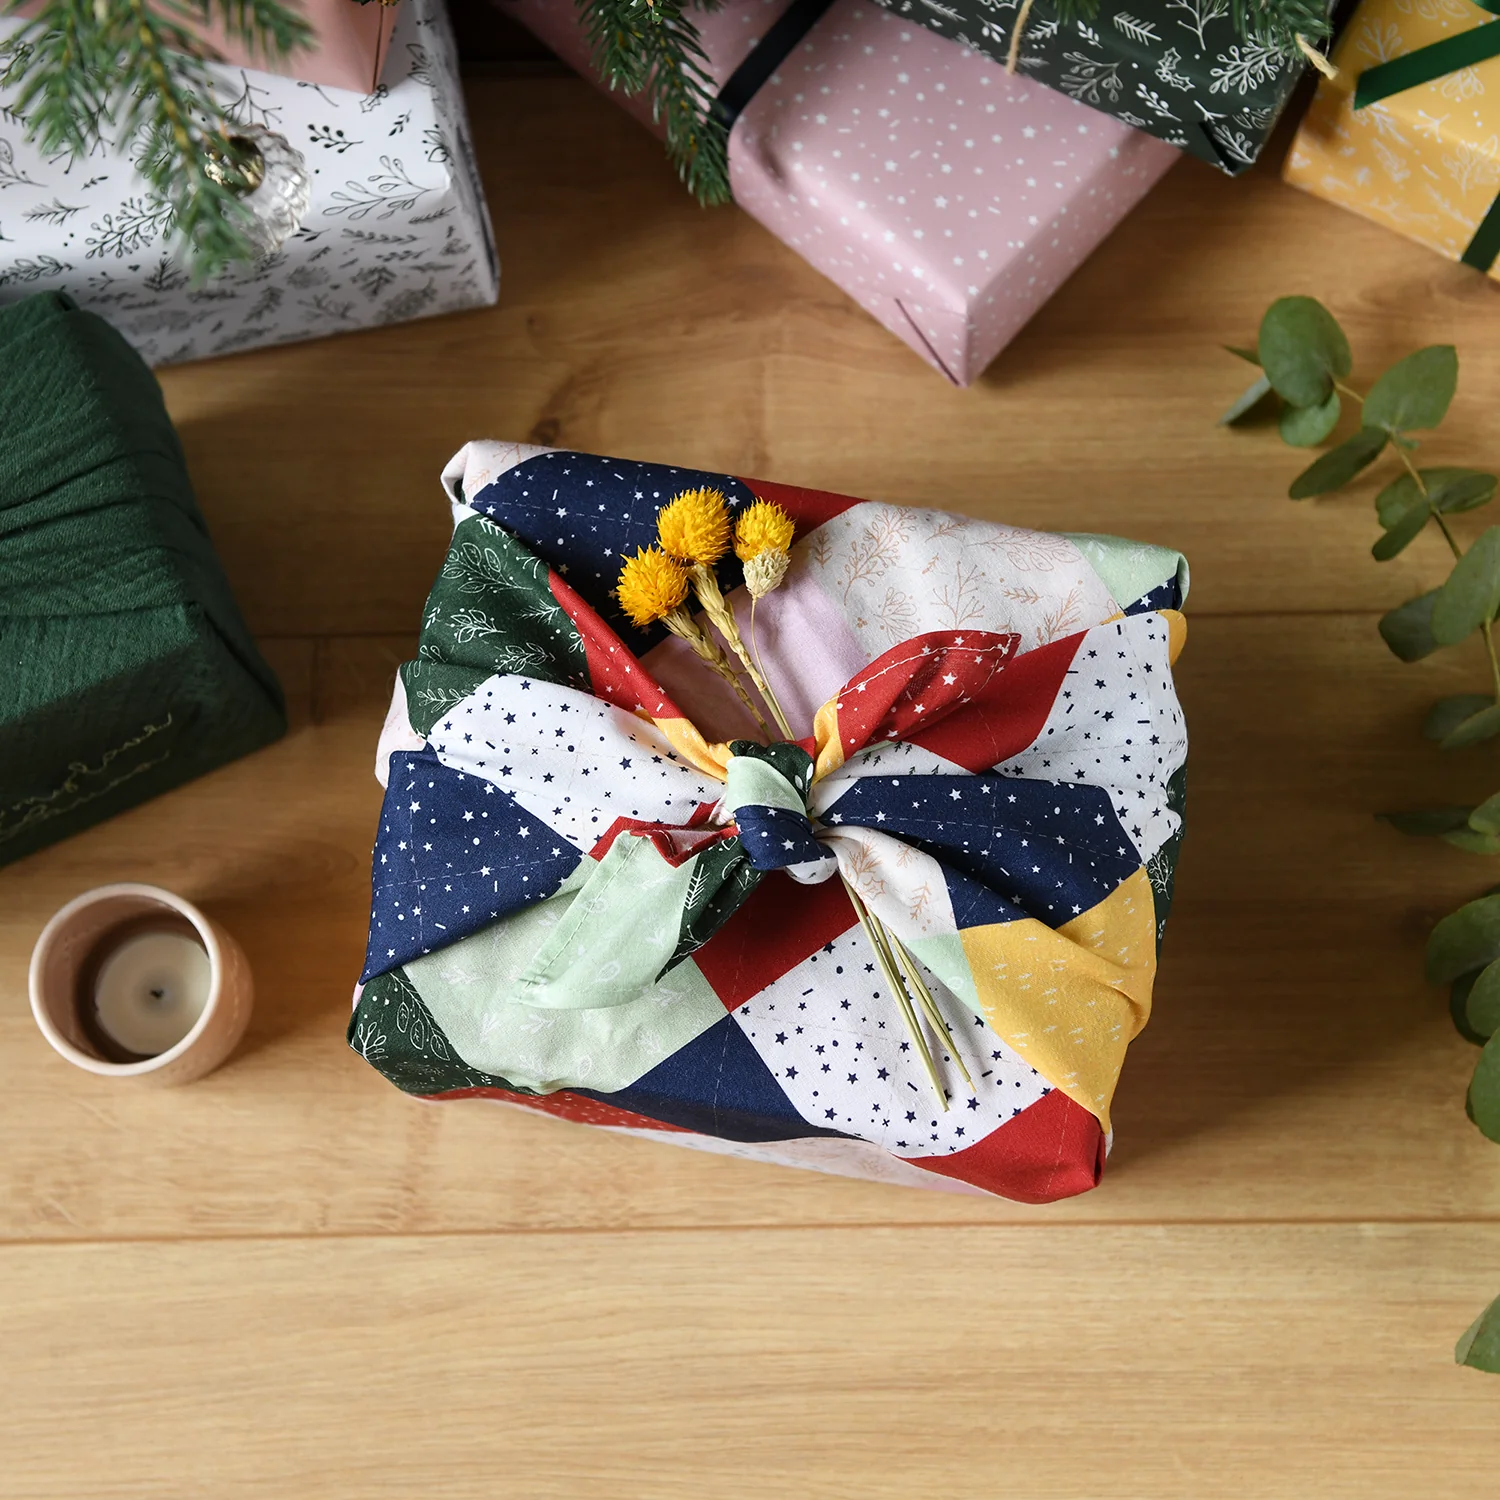
3. Holiday-Themed Wraps

Beeswax wraps aren’t just practical—they can be festive too. Choose fabrics with seasonal prints such as snowflakes, pumpkins, holly, or hearts for holidays like Christmas, Halloween, or Valentine’s Day. These make wonderful eco-friendly gifts or party favors.
Holiday wraps are particularly great for packaging cookies or baked goods. Wrap your treats in a festive beeswax wrap, tie with twine, and add a handwritten note—it’s a thoughtful and reusable gift wrap that keeps on giving.
Since these wraps are likely to be shared or gifted, adding jojoba oil and pine resin helps ensure they’re flexible and user-friendly. Don’t forget to include a little card with cleaning instructions when giving them as gifts!
4. Kids’ Lunchbox Wraps
Encourage eco-conscious habits early by making fun beeswax wraps for kids. Use fabrics with dinosaurs, unicorns, stars, or cartoon animals to make lunch and snack time exciting. These wraps are perfect for sandwiches, fruit slices, and even dry snacks like crackers.
Let kids pick their own fabric and help with the process (under supervision). It becomes an educational and bonding experience that teaches sustainability and creativity at the same time. The bright, playful designs also make it easier for kids to identify their snacks.
These wraps work best in medium or small sizes, and you can even create matching snack bags by sewing edges and leaving one side open. Add Velcro or a button for closure if you want a pouch-style wrap.
5. Wraps with Added Pine Resin
Pine resin is the secret to ultra-sticky, longer-lasting beeswax wraps. While beeswax alone works, adding resin gives the wrap more grip—making it easier to seal bowls or cling tightly around food items.
To make this version, melt equal parts beeswax and pine resin, and add a few drops of jojoba oil. Stir well and apply the mixture to the fabric before heating. The result is a wrap with enhanced tackiness that performs more like commercial versions.
Keep in mind, pine resin has a distinct scent that some people love, but others may not prefer. Do a small test batch before committing to a whole set. Once you find the right balance, you’ll be hooked on the added performance.
6. Edible Herbs-Infused Beeswax Wraps
For an elevated touch, add dried herbs like rosemary, mint, or lavender into your beeswax mixture. As the wax melts, the herbs gently infuse the wraps with natural scent and subtle antibacterial properties.
Choose finely crushed herbs to avoid uneven texture. You can either mix them into the melted wax or sprinkle them on the fabric before melting. These wraps not only smell divine but also offer a unique visual texture that feels artisanal.
They’re perfect for wrapping cheese, bread, or herbs and can even be used as wrapping for homemade soaps or gifts. Just ensure the herbs are fully dry to prevent mold or moisture issues.
7. Monogrammed or Stamped Fabric Wraps
Personalize your wraps with fabric stamps or stenciled monograms before waxing. Use non-toxic, washable fabric paint to add initials, quotes, or even cute food-related illustrations like carrots or bees.
This idea makes your wraps one-of-a-kind, ideal for gifts, party favors, or farmer’s market packaging. You can also theme them—like stamping a baguette image for your bread wrap or a cheese wedge for a dairy wrap.
Make sure your designs are fully dry before adding wax. The heat can set the paint, sealing your art into the fabric wrap permanently for a professional and customized finish.
8. Different Sizes for All Needs
One size doesn’t fit all in the kitchen. That’s why making wraps in a variety of sizes—from small 6-inch squares to large 14×18-inch rectangles—makes your DIY collection more versatile and functional.
Small wraps are perfect for wrapping half lemons or avocado halves. Medium wraps work well for sandwiches, while large wraps are ideal for covering casserole dishes or bulky produce like melons.
Create a wrap set in complementary fabrics to make them easier to identify by size and use. It also makes for a beautiful and functional display when stored in a kitchen drawer or basket.
9. Patchwork Fabric Wraps

Don’t toss your fabric scraps—sew them into a quilt-like patchwork wrap! This idea is great for using up leftovers from previous projects and creates a beautiful, mosaic-style food wrap.
You’ll need to sew the pieces together with a tight seam to prevent wax leakage. Once joined, treat the fabric like a single piece and proceed with the waxing process. Use contrasting colors or stay within one palette for a more cohesive look.
Patchwork wraps are stunning and make wonderful, heartfelt gifts. They also serve as conversation starters when used at potlucks or family gatherings.
10. Wraps with Handles or Buttons
Elevate your wraps with functional add-ons like small handles, sewn-on loops, or button closures. These additions transform your wraps into reusable snack pouches or compact carriers for on-the-go food.
You can create a pouch by folding fabric in half and sewing the sides, then adding a wax coating. Once it’s dry, attach a button and string loop for a reusable, foldable snack bag. These are great for hiking, school lunches, or picnics.
The added functionality makes these wraps more user-friendly and encourages reuse even more often. Just be sure to use hand-sewn attachments rather than glue, which won’t hold up well during washing.
11. Beeswax Wrap Envelopes for Cheese
Cheese is one of the best foods to store in beeswax wraps, thanks to their breathable yet moisture-locking properties. Take it up a notch by creating envelope-style wraps tailored for cheese storage. These are shaped with a flap closure—like an envelope—that gently seals around a block of cheese.
To create an envelope wrap, cut your fabric into a slightly rectangular shape, fold it like an envelope, and lightly press the folds before waxing. After waxing, the wrap will naturally hold its shape, allowing you to fold it closed without needing tape or ties. The pine resin-enhanced version is particularly useful here, ensuring a snug seal.
These wraps keep cheese fresher for longer without trapping excess moisture like plastic does. You can label them with a fabric marker to identify different cheeses, making them perfect for cheeseboards or entertaining.
12. Transparent Wraps Using Organic Muslin
For those who love knowing exactly what’s inside their wrap at a glance, transparent or semi-transparent wraps made from organic muslin are a clever solution. Muslin’s lightweight weave allows more light to pass through compared to standard cotton, giving a peek at the contents.
These wraps work best for dry foods like nuts, fruit slices, or herbs. Since muslin is thinner, it absorbs wax quickly—use a bit less wax to avoid stiffening the fabric too much. The result is a light, flexible wrap that’s especially useful in busy households or shared fridges.
Muslin wraps also double as pretty gift packaging. Tie one around a mason jar of homemade trail mix or loose tea, and you’ve got a reusable, elegant, and practical gift presentation.
13. Printed Recipe or Notes Wraps
Take your wraps to the next level by printing a favorite recipe or handwritten note directly onto the fabric before waxing. This is a great option for gifting baked goods, as it turns the wrap into both a container and a keepsake.
Use fabric-safe ink or a laser printer transfer method to imprint your text. Recipes like cookie mixes, bread instructions, or salad dressings work well. You can even include a care guide on the wrap itself for first-time users.
This idea adds a highly personal touch and transforms the wrap into a cherished item. Whether you’re gifting to a friend or preserving a family recipe, the wrap becomes more than just functional—it tells a story.
14. Tie-Dye or Naturally Dyed Fabric Wraps
Colorful wraps are always a joy to use, and natural dyes like beetroot, turmeric, and avocado skins can help you create beautiful tones without synthetic chemicals. You can also try tie-dye techniques for a more vibrant, artistic effect.
Before waxing, dye your fabric using your chosen natural ingredients. Turmeric gives a golden yellow, while red cabbage yields soft purples. After dyeing, let the fabric dry completely and heat-set the color with an iron before applying wax.
These wraps are perfect for eco-conscious users who want every part of their wrap to reflect sustainability. Plus, their unique coloring makes them stand out in a gift basket or on a pantry shelf.
15. Wraps for Bread Loaves
Few things feel more wholesome than storing fresh bread in a handmade wrap. Create extra-large beeswax wraps—around 16×24 inches—for enveloping loaves, baguettes, or artisanal rolls. These wraps keep bread crusty on the outside and soft inside longer than plastic.
Choose thicker cotton fabric for this purpose so that it holds up to daily use. You can fold the wrap around the bread like a gift and secure it with a string or twine. If desired, stitch a label or tag on the edge to indicate “bread” or your family name.
Bread wraps are perfect for picnics, homemade gift baskets, or simply storing your sourdough loaf on the counter in style. They’re also washable and reusable, making them a smart, stylish alternative to bakery bags.
Tips for Success
When making beeswax wraps, always use natural, 100% cotton fabric for the best results. Synthetic fibers won’t absorb wax properly and could release chemicals when heated. Pinking shears help keep the edges from fraying, which extends the life of your wraps.
Apply the wax mixture in a thin, even layer—too much wax can make the wrap stiff and prone to cracking. If your wrap feels too dry or loses stickiness over time, refresh it by reheating it with a little extra wax and oil.
Store your wraps flat or rolled in a drawer. Avoid wrapping hot food, and never use them in the microwave. With care, your wraps can last up to a year or more, making them a true sustainable staple in your home.
How to Clean and Store Beeswax Wraps
Cleaning beeswax wraps is simple. Wash them in cool water with a mild soap (like Castile soap), and gently wipe with your hands or a soft sponge. Avoid hot water, which can melt the wax and ruin the wrap.
After washing, air dry the wrap on a dish rack or hang it on a clothesline. Once dry, store it flat in a drawer or roll it and place it in a basket. Avoid folding the same creases over and over to extend their lifespan.
If a wrap becomes cracked or loses its tackiness, you can refresh it by melting a small amount of wax and reapplying it. This maintenance routine can add months to the life of your wraps and keep them looking vibrant and working effectively.
Final Thoughts
DIY beeswax wraps are more than a sustainable alternative—they’re a fun, creative expression of your values. With just a few supplies and some imagination, you can create beautiful, personalized wraps that reflect your personality and commitment to eco-friendly living.
Whether you’re making wraps for yourself, your kids, or as thoughtful gifts, each project is a small yet impactful step toward reducing single-use plastic. The versatility of these 15 ideas means there’s a wrap design for every occasion, from daily lunch prep to holiday baking and zero-waste gifting.
So grab your favorite fabric, melt some wax, and start wrapping! And don’t forget to share your creations in the comments—we’d love to see how you bring your beeswax wrap ideas to life.