
I spent years wrestling with a small patch of grass, locked in a Sisyphean struggle against crabgrass, drought, and the dreaded weekend mow. It wasn’t until I truly looked at that tiny, green rectangle that I realized how much time, water, and frustration I was pouring into something that gave me nothing back—and certainly did nothing for the local ecosystem. I used to think creating a wildflower meadow required acres, or at least a quarter-acre. It simply doesn’t.
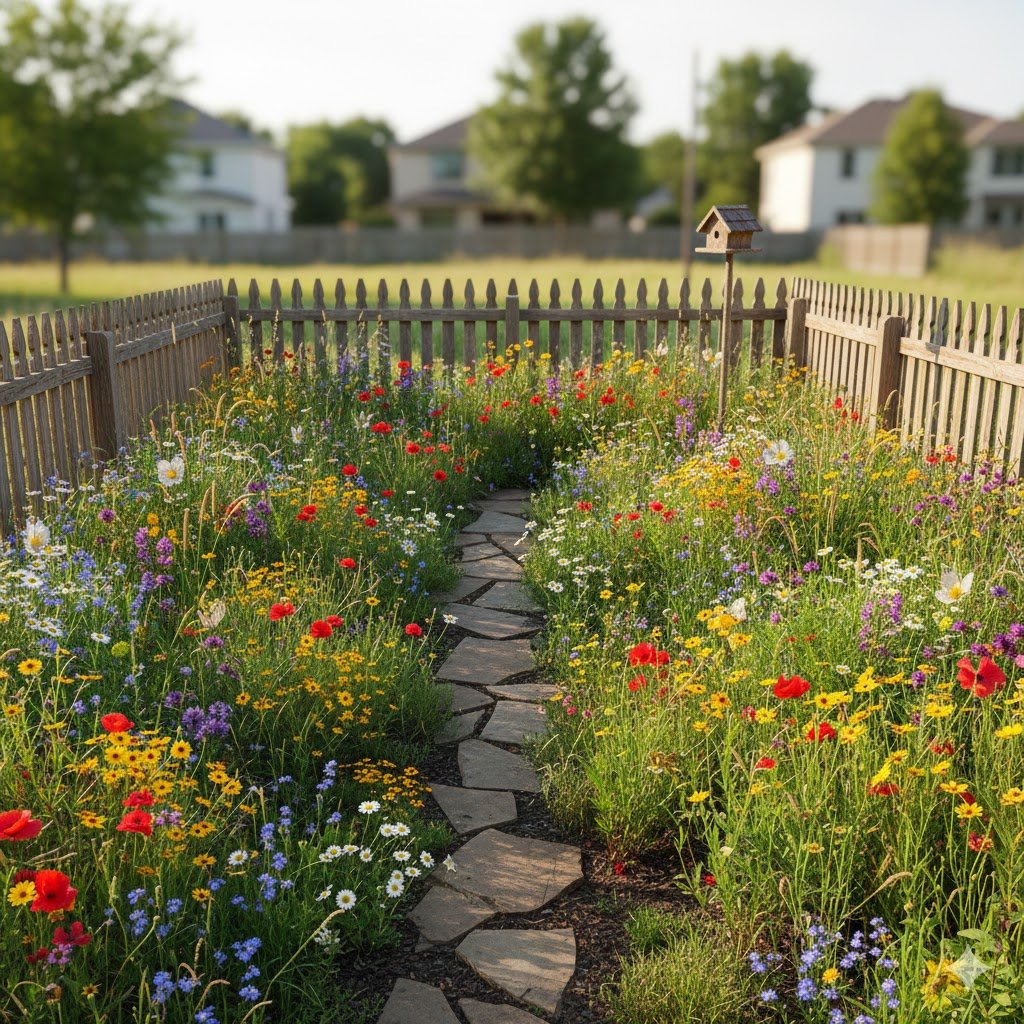
If you have a corner of your yard, a narrow border, or even just a 5×5-foot section of turf that you’re ready to reclaim, this guide is for you. Converting that small space into a native wildflower meadow is one of the most rewarding, low-cost projects you can undertake. It’s time to stop mowing and start marveling.
Why Go Wild? The Benefits of a Micro-Meadow
Let’s be honest: the primary motivation for me was reducing weekly chores. But the environmental payoff of my micro-meadow project quickly became the most satisfying part.
Ecological Powerhouse
A meadow, even a miniature one, is a biodiversity accelerator. When I put in my first patch, I was astonished at the variety of bees and butterflies that appeared within the first season—it was like throwing a welcome party for the local wildlife.
- Support Pollinators: You’re providing essential food and habitat for native bees, butterflies, moths, and hummingbirds that struggle to find resources in manicured neighborhoods.
- Increased Biodiversity: A meadow attracts beneficial insects that help control pests naturally, and you’ll start seeing more diverse birds coming for the seeds and bugs.
- Water Conservation: Native wildflowers, unlike shallow-rooted turfgrass, develop deep, complex root systems that stabilize soil and access moisture far better. This means you can virtually turn off the sprinkler in that area once the meadow is established.

Practical and Aesthetic Gains
The shift in aesthetics is immediate and dramatic. Instead of a flat, green carpet, you get a dynamic, ever-changing tapestry of color.
- Low Maintenance: After the initial effort, you can retire the lawnmower from this area. No fertilizer, no constant cutting—just a simple annual chop (more on that later).
- Year-Round Interest: Different native plants bloom at different times, guaranteeing successive color from early spring through late fall.
- Curb Appeal: A vibrant meadow is a unique and beautiful feature. It makes your yard stand out in a wonderful, eco-friendly way.
Planning & Preparation (The Crucial First Steps)
This phase is where success is determined. Don’t rush this, especially turf removal. It’s the one part that requires the most elbow grease.
A. Site Assessment and Selection
First, choose wisely. The vast majority of meadow flowers need sunshine.
- Choose Your Patch: Select an area that gets at least six hours of direct sun per day.
- Soil Testing (Recommended): I didn’t do this the first time, but I wish I had! Meadow plants thrive in poor soil. If your current lawn is lush, your soil is likely too rich, which will give aggressive lawn grasses and competitive weeds an advantage over your delicate wildflowers.
- Scale Down: Start small! A 5×10 foot rectangle or a curvy border along a walkway is a perfectly manageable size. It’s better to succeed small than fail big.
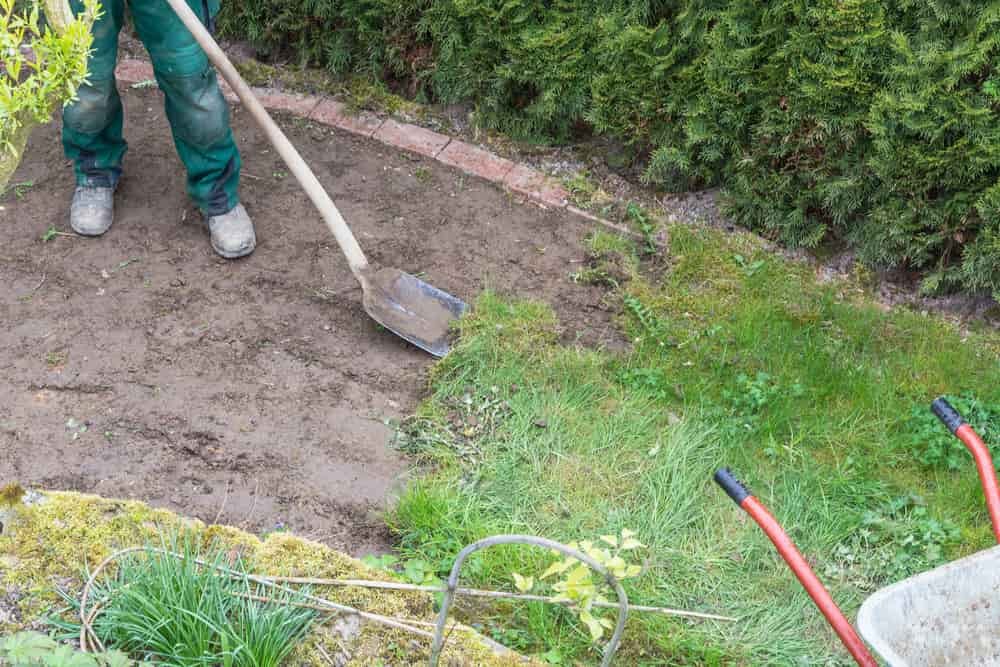
B. Eliminating Existing Turfgrass (The Hardest Step)
You cannot just throw seeds onto the existing lawn. The turf will outcompete everything. You must kill the grass, roots and all.
- Method 1: Solarization (My Preferred Method for Small Spots): Cover the chosen area with clear plastic sheeting (not black) and secure the edges tightly. The sun heats the soil beneath, essentially cooking the grass and weed seeds. Leave it in place for 6–8 weeks during the hottest summer months. It’s clean and chemical-free.
- Method 2: Sheet Mulching (Good for Slow Conversion): Lay down thick layers of wet cardboard (removing all tape and labels) directly over the grass, then cover with a few inches of compost, mulch, or wood chips. This slowly smothers the lawn over the course of a growing season.
- Method 3: Hand Removal/Scraping: Physically dig up and scrape away the top 2–4 inches of sod. This is instant but by far the most labor-intensive method, and you’ll still need to monitor for roots you missed.
C. Seed Mix Selection (The Right Ingredients)
This is vital for true ecological benefit.
- Native is Best: I cannot stress this enough. Only use regionally native seed mixes. Native plants are what local pollinators evolved with and depend on.
- Annual vs. Perennial: Look for a mix that includes both. Annuals (like Blanketflower or Cosmos) give you that wonderful burst of color in the first year while the perennials are establishing deep root systems for long-term survival.
- Avoid “Wildflower Bombs”: Steer clear of cheap, generic mixes labeled as “wildflower bombs.” These often contain non-native or aggressive species (like Bachelor Buttons or Shasta Daisies) that can become invasive or out-compete the true natives you want to establish.
Execution (Sowing Your Seeds)
Once the ground is bare, the fun part begins!
A. Timing the Planting
You have two great options, and one is significantly better than the other.
- Late Fall (Ideal): Sowing seeds just before the first hard freeze is best. This mimics nature: the seeds sit on the cold ground, going through a necessary process called cold stratification over winter. They will naturally germinate perfectly in the spring.
- Early Spring (Second Best): If you miss the fall window, sow as soon as the ground is workable in the spring. If you choose this, you may need to cold-treat your seeds artificially in the refrigerator before planting.
B. Soil Scarification
You need to create tiny bare pockets for the seeds to settle into.
- Rake, Don’t Till: Gently rake the surface of the soil to loosen the top layer and expose some bare dirt. Do not till deep! Tilling brings up thousands of dormant weed seeds, giving you a massive headache later.
C. Seeding Technique
It’s surprisingly easy to over-seed, especially in a small area.
- Mixing: Mix your expensive, tiny seeds with a bulk filler like sand or sawdust (about 1 part seed to 4 parts filler). This ensures even distribution and helps you see where you’ve already sown.
- Sowing: Broadcast the mixture evenly over the prepared patch.
- Seed-to-Soil Contact: Once the seeds are down, lightly walk over the entire area or gently press them in with a board. The seeds need firm contact with the soil but should not be buried under any depth of dirt.
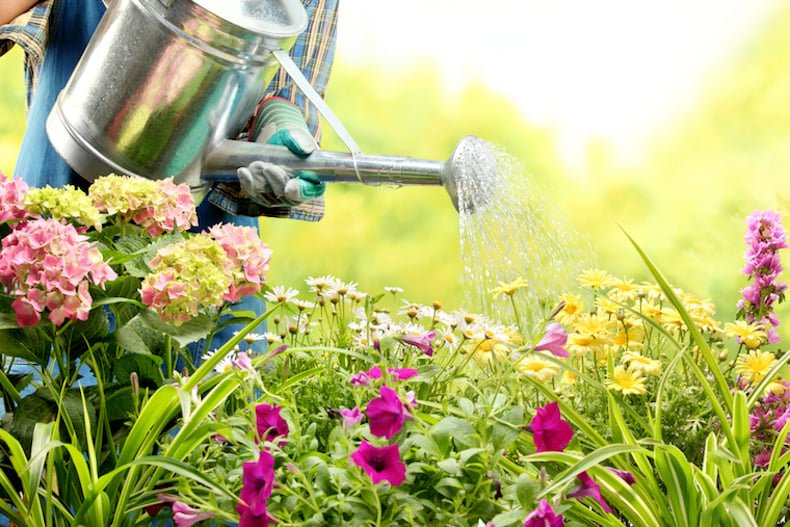
D. Initial Watering
For the first 4–6 weeks, you need to be diligent. Keep the area lightly moist until you see the tiny seedlings established. Once they have a few true leaves, you can usually back off on watering dramatically.
Maintenance and Patience (The Long Game)
This is the hardest part: learning to leave well enough alone and managing expectations.
A. The First Year: The “Ugly” Stage
I won’t lie, your meadow will look messy and possibly “weedy” in year one.
- Weed Control: Aggressively pull weeds (especially aggressive perennial grasses) before they have a chance to set seed. If you let the weeds win now, you’ll regret it in year two.
- Patience is Key: The beautiful perennial flowers are quietly putting all their energy into deep root development during the first year. Most of the color you see will come from the annuals you included. Manage your expectations—the real magic happens in year two and beyond.
B. Mowing (The Annual Chop)
This is the only regular maintenance task your meadow will require.
- Why and When: Cut the meadow down once a year, typically in late fall after the plants have gone dormant, or early spring before new growth starts.
- Height: Cut the growth down to about 4–6 inches. This suppresses woody plants and aggressive grasses while allowing the seeds from the current season to drop back into the soil, refreshing your meadow. Tip: Leave the cut material in place for an hour or so, allowing any sheltering insects time to crawl away, then rake up and compost the thatch.
C. Long-Term Care
After year three, your micro-meadow should be a powerhouse. You will only need to perform the annual cut and occasional spot-weeding for any particularly stubborn intruders. Remember: Avoid Fertilizers. Fertilizing will only give the undesirable grass and weeds the boost they need to overpower your wildflowers.
Final Thoughts
If I can trade my gas-guzzling mower for a pair of binoculars to watch the Goldfinches feeding on Black-eyed Susans, so can you. The small yard conversion requires a bit of planning and one intense phase of grass removal, but once established, the payoff in time saved, water conserved, and natural beauty is immense. You’re not just replacing grass; you’re restoring a functional ecosystem on your own property.
Don’t wait for the perfect moment. Start your site assessment this weekend—even if it’s just staking out that 5×5-foot section you’ve had your eye on. What native flowers are you going to research first? I’d love to hear which ones you are most excited to plant!