17 Stunning Christmas Tree Decorating Ideas to Elevate Your Holiday Style

Christmas Tree Decorating Ideas

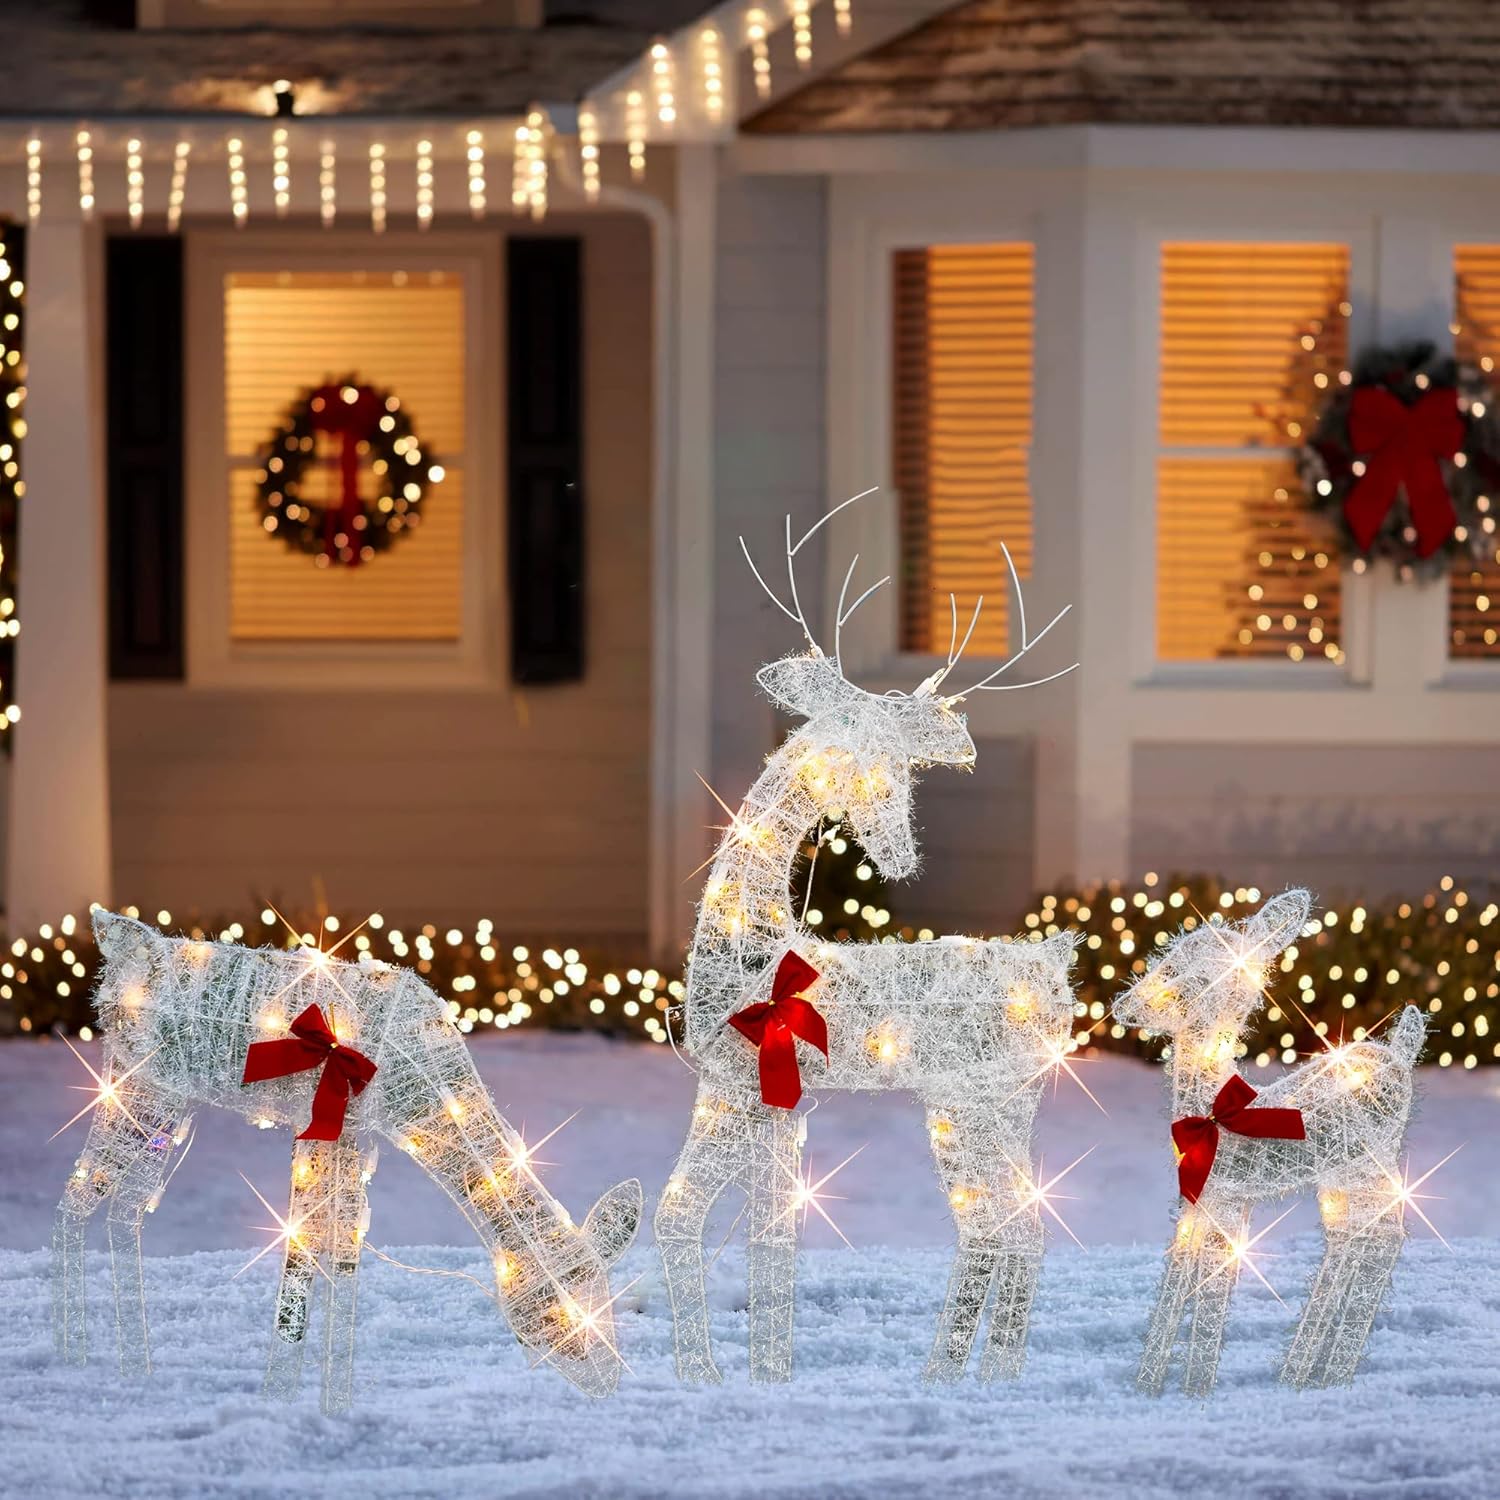
Decorating the Christmas tree is one of the most cherished traditions of the holiday season, bringing families together to create a beautiful centerpiece for their celebrations. The process is filled with joy, nostalgia, and creativity, allowing everyone to express their unique style and spirit. In this blog, we will explore 17 diverse Christmas tree decorating ideas, ranging from classic themes to whimsical, DIY creations. Whether you prefer traditional elegance or modern flair, you’ll find inspiration to make your Christmas tree a stunning focal point in your home. Section 1: Classic Christmas Tree Themes 1. Traditional Red and Green The classic red and green color scheme evokes the spirit of Christmas like no other. This timeless palette can be beautifully executed with a mix of shiny baubles, matte ornaments, and festive ribbons. Start by selecting a variety of ornaments in deep reds and vibrant greens, ensuring they vary in size and texture to create visual interest. Consider using a mix of glass, wood, and fabric ornaments to add depth to the tree. To enhance the traditional feel, incorporate garlands made of popcorn or cranberries, which can be strung carefully around the tree. Additionally, twinkling white lights will provide a warm glow, accentuating the rich colors and creating a cozy ambiance. Finish the look with a classic tree topper, such as a bright star or angel, to complete this festive ensemble. 2. Gold and Silver Elegance For those seeking a more sophisticated Christmas tree, the gold and silver theme offers an elegant and luxurious touch. Start by selecting a base of metallic ornaments, using shades of gold and silver to create a dazzling effect. Shiny glass ornaments, glittering ribbon, and reflective garlands will catch the light beautifully, enhancing the opulent feel of the tree. To achieve balance, consider incorporating white or cream elements, such as floral accents or delicate lace ribbons. This contrast will soften the metallic tones and create a cohesive look. String warm white lights throughout the branches, ensuring they illuminate the gold and silver hues effectively. For the finishing touch, select an elegant tree topper, such as a golden bow or a silver star, to crown your sophisticated tree. 3. Rustic and Natural Embracing a rustic and natural theme invites the warmth of nature into your holiday decor. Start by choosing a tree that reflects this style, such as one with a more organic shape or one adorned with real pinecones and branches. To decorate, utilize earthy tones and materials, including burlap ribbon, wooden ornaments, and twine. Incorporating natural elements like dried oranges, cinnamon sticks, or sprigs of holly will enhance the rustic charm. These items can be easily hung on the tree or placed in small clusters for visual interest. Opt for soft, warm white lights to create an inviting atmosphere that highlights the natural beauty of your decorations. Finally, consider using a tree skirt made of burlap or a cozy plaid blanket to ground the rustic theme and complete the look. Section 2: Unique and Creative Ideas 4. Whimsical and Playful For a fun and lively twist on traditional decor, consider a whimsical and playful Christmas tree. This theme is all about embracing bright colors, quirky ornaments, and a sense of joy. Start by selecting a variety of vibrant ornaments in hues like hot pink, electric blue, and sunny yellow. Incorporate whimsical shapes, such as candy canes, toys, and cartoon characters, to evoke a sense of nostalgia and playfulness. To add extra flair, consider using fun garlands, such as oversized pom-poms or multi-colored beads, draped throughout the tree. Twinkling colored lights will enhance the festive vibe, creating a cheerful glow. For the tree topper, think outside the box—try a large, colorful bow or even a playful stuffed animal that fits your theme. This tree will surely bring smiles to everyone who sees it, making it perfect for families with young children or those who embrace their inner child. 5. Farmhouse Chic The farmhouse chic theme combines rustic charm with contemporary style, making it a popular choice for modern holiday decor. Start by selecting a tree that complements this aesthetic—think fuller shapes or those with a bit of a wild look. To decorate, incorporate elements like plaid ribbons, wooden ornaments, and whitewashed accents. The key is to blend natural textures with a cozy, inviting color palette. Consider adding small farmhouse-inspired touches, such as mason jar ornaments or vintage-looking signs. These elements will enhance the tree’s charm and create a sense of homey warmth. Use soft white lights to illuminate the tree, ensuring that the overall effect is warm and inviting. A burlap tree skirt or a knitted blanket at the base will further enhance the farmhouse feel, making it a delightful addition to any home. 6. Beachy Christmas If you live in a coastal area or simply love the beach, why not bring a little seaside magic to your Christmas tree? A beachy Christmas tree can be adorned with seashells, starfish, and shades of blue and sandy beige. Start by choosing a tree that reflects your coastal vibe, perhaps one with a light color or a faux tree that mimics driftwood. For decorations, incorporate items like glass ornaments in aqua and turquoise, along with white lights that evoke a beachy atmosphere. Hang natural elements like dried coral or sea glass to enhance the coastal feel. To finish the look, consider a tree topper that reflects the theme, such as a starfish or a shell. This unique tree will bring the warmth of the beach into your holiday celebrations. Section 3: DIY and Handmade Ideas 7. Personalized Ornaments Personalized ornaments add a special touch to your Christmas tree, making it a meaningful focal point of your holiday decor. Consider creating custom ornaments that reflect your family’s personality and memories. Start by selecting clear glass or wooden ornaments and decorate them with family photos, handprints, or heartfelt messages. For a simple DIY project, gather supplies such as paint, markers, or photo prints. You can also use materials like glitter … Read more

11 Stunning Neutral Holiday Décor Ideas for a Calm and Inviting Christmas

Neutral Holiday Décor Ideas

The holiday season is a time of celebration, warmth, and joy. However, many people find themselves overwhelmed by the traditional red and green holiday decor. If you’re looking for a refreshing twist that combines elegance with versatility, neutral holiday décor is the perfect solution. You can incorporate shades of beige, white, gray, and taupe to create a serene and sophisticated ambiance that complements any home style. In this article, we’ll explore 11 neutral holiday décor ideas that will help you embrace the beauty of simplicity this season. Neutral Color Palettes for the Holidays Choosing the Right Neutrals When it comes to selecting a neutral color palette for the holidays, the options are virtually limitless. Neutrals encompass a wide range of shades, from soft creams to deep taupes and cool grays. Choosing a cohesive palette is essential for creating a harmonious look throughout your space. Consider starting with a base color, such as soft white or beige, and then incorporating various shades for depth and contrast. Mixing different neutral tones adds richness to your decor without overpowering the space. For instance, pairing warm beige with cooler gray can create a sophisticated contrast that adds visual interest. Additionally, don’t be afraid to incorporate subtle patterns or textures to further enhance the overall aesthetic. Striped or textured pillows can elevate a neutral palette and keep it from feeling flat. Combining Textures Texture plays a significant role in achieving a layered and inviting look in neutral holiday décor. Combining various materials like linen, wool, cotton, and even natural elements can create a warm, cozy atmosphere. For example, a soft wool throw blanket draped over a neutral-colored sofa can instantly add warmth and comfort to the room. Incorporating natural elements like wood and stone can also enhance your neutral decor. Consider using wooden ornaments, natural wreaths, or even stone centerpieces to ground the design. These elements not only add texture but also bring an organic feel that is both welcoming and serene, perfect for the holiday season. 11 Neutral Holiday Décor Ideas 1. Neutral Christmas Tree Decor Your Christmas tree can be a stunning focal point, even when decorated in neutral tones. Begin by selecting a tree that suits your style, whether it’s a traditional green or a white artificial tree. For ornaments, opt for a mix of matte and shiny finishes in shades of white, beige, and gold. This combination will create a beautiful visual contrast and allow your tree to shine. Consider adding natural elements like pinecones, twigs, or dried flowers to your tree for an organic touch. A simple string of white lights can illuminate the tree beautifully, enhancing the neutral palette. Don’t forget about the tree skirt! A soft, neutral fabric like burlap or a knit blanket can provide the perfect base, adding texture and warmth to your holiday display. Lastly, consider topping your tree with a neutral star or a natural element, like a sprig of evergreen. This simple addition can tie the entire look together while maintaining the elegance of your neutral theme. 2. Festive Centerpieces Creating a neutral holiday centerpiece can set the tone for your festive gatherings. Start by selecting a neutral table runner or cloth as your base. From there, layer your centerpiece with natural elements like pine branches, eucalyptus, or seasonal flowers. Mixing in metallic accents like gold or silver can add a touch of glam while keeping the overall look understated. Candles are another excellent way to incorporate neutral colors into your centerpieces. Use various heights and sizes of candles in shades of ivory or beige. Group them together in clusters, perhaps on a mirrored tray or a wooden platter, to create an inviting glow. This arrangement not only looks beautiful but also adds warmth to your holiday table. For added texture, consider using elements like burlap or linen to wrap around the base of your centerpiece or include in your arrangement. This simple touch can make a significant impact, making your table feel effortlessly elegant and cozy for your holiday meals. 3. Wreaths and Garlands Wreaths and garlands are classic holiday decorations that can beautifully enhance a neutral theme. Start by crafting a neutral wreath using natural materials such as dried flowers, pine branches, or eucalyptus. Consider incorporating accents like burlap ribbons or pinecones for added texture and interest. A neutral wreath can be hung on your front door or above the fireplace, serving as a warm welcome for guests. Garlands are another fantastic way to extend your neutral décor beyond just the front door. Drape garlands made of natural greenery or dried flowers over mantels, stair railings, or even along dining tables. You can intersperse twinkling fairy lights to add a magical touch without overpowering the neutral aesthetic. Consider using neutral-colored ornaments or ribbons in your garland for added flair. A few strategically placed elements can elevate the entire look, creating a beautiful balance of elegance and simplicity. 4. Cozy Textiles Textiles are a powerful tool in holiday decorating, and using neutral options can create a cozy, inviting atmosphere. Start with neutral throw blankets and pillows to add warmth to your living spaces. Layering different fabrics—like a chunky knit blanket with a soft velvet pillow—adds depth and makes your decor feel intentional. Rugs are another essential element in creating a cozy ambiance. Consider adding a neutral area rug beneath your coffee table or in your dining area. This not only anchors the space but also adds an extra layer of comfort underfoot, perfect for the holiday season. Don’t forget to use neutral table linens as well. A simple tablecloth or placemats in soft hues can set the stage for holiday meals while maintaining the elegant, understated theme you’re aiming for. These textiles bring warmth and comfort to your décor, making it perfect for gatherings with family and friends. 5. Candles and Holders Candles are synonymous with the holiday season, and incorporating them into your neutral décor can create a warm, inviting atmosphere. Choose candles in shades of ivory, cream, or light … Read more

15 Senior Night Table Display Ideas

Senior Night Table Display Ideas

Senior Night is a special time for celebrating the accomplishments and memories of high school seniors. Whether it’s for athletes, band members, or academic achievers, the table display plays a huge role in honoring the senior and their journey. These 15 creative Senior Night table display ideas will help you design a display that captures the personality, achievements, and future aspirations of your senior, making their night truly unforgettable. 1. Personalized Photo Collage Table A personalized photo collage table is a heartwarming way to showcase a senior’s journey through the years. Begin by gathering pictures that tell their story, from baby photos to their senior year. Use a variety of frames to create visual interest, with larger ones for milestones like their first day of school or a championship win, and smaller ones for candid moments. Arrange the photos chronologically or mix them up for a more dynamic look. To add depth to the display, you can include mementos like ticket stubs, report cards, or art projects from their childhood. Consider adding labels or captions to each picture, sharing fun facts or special memories. You can even provide a scrapbook or photo album where guests can flip through additional memories. The goal is to create a nostalgic and personalized table that highlights the senior’s unique experiences. Add final touches with flowers or LED candles to create a warm, inviting atmosphere. This display not only honors the senior but also provides a trip down memory lane for family and friends. 2. Memory Jar Table A memory jar table is an interactive and sentimental idea that allows friends, family, and classmates to contribute to the celebration. Set up jars labeled with different themes, such as “Favorite Memories,” “Advice for the Future,” or “Encouraging Words.” Provide small slips of paper and pens in a variety of colors so guests can write their thoughts and drop them into the jars throughout the evening. For decoration, use jars of different sizes and embellish them with ribbons, stickers, or tags that align with the senior’s school colors or personal interests. You can even incorporate fairy lights inside or around the jars to add a magical glow. Include a framed sign with instructions, encouraging everyone to participate in the memory-making process. This display not only creates a beautiful and personalized table but also gives the senior something special to read and cherish after the event. The memories and advice shared can serve as a source of encouragement and reflection as they move on to the next chapter of their life. 3. Sports-Themed Display If your senior is an athlete, a sports-themed table is a fantastic way to highlight their athletic achievements. Start by incorporating key items like their team jersey, helmet, or gear specific to their sport. These personal artifacts make the display more meaningful and offer a sense of pride in the senior’s dedication and hard work. Use team colors as the backdrop, either through a tablecloth, banner, or balloons. Medals, trophies, and awards can be prominently placed to show off their accomplishments. Framed action shots from games or team photos can add visual interest, and you can create a small timeline of their sports career to document their growth and milestones. To complete the look, consider adding themed props, like a basketball, football, or track shoes, depending on their sport. You can even include a small chalkboard with their stats, highlights, or a favorite quote from their coach. This kind of display is a great way to showcase not just their skills but also the camaraderie and teamwork that defined their athletic journey. 4. Trophy & Awards Showcase For seniors who have accumulated numerous accolades over the years, a trophy and awards showcase table is an excellent way to highlight their hard-earned accomplishments. Arrange their trophies, plaques, and certificates in a way that draws attention to the variety and scope of their achievements. You can use tiered stands or stack boxes underneath a tablecloth to create different levels, giving each award its own moment in the spotlight. Be sure to label each award with a small plaque or tag that includes details like the event, date, and the title of the award. This adds a professional touch and helps tell the story of the senior’s success over time. To complement the trophies, consider adding photographs from the events or activities where the awards were earned, giving context to the achievements. For an added personal touch, include a framed note from a coach, teacher, or mentor who played a significant role in helping the senior succeed. This not only honors the senior’s hard work but also pays tribute to the support system that helped them reach their goals. 5. “Then & Now” Table The “Then & Now” table is a creative way to visually show the growth of your senior over time. Start by selecting photos from their early childhood and pairing them with recent photos from their senior year. You can place these side by side or create a linear timeline that tracks their development over the years. Use matching frames to keep the display cohesive and elegant. To add more context, you can also display objects that signify different milestones. For example, a small childhood trophy can be paired with a larger senior year award, or a kindergarten drawing might sit next to their senior yearbook. These items tell a story of growth and evolution, showing how far the senior has come. Adding a few fun captions under each photo can highlight key moments, such as “First Day of Kindergarten” or “Senior Year Soccer Captain.” This display is perfect for highlighting not only achievements but also the personal growth and memories that have shaped the senior’s character. 6. Lighted Display with Fairy Lights For a magical and eye-catching table display, consider using fairy lights or LED strips to illuminate your design. Drape fairy lights along the edges of the table or around key items to make them stand out. You can even place … Read more

17 Pink Winter Wonderland Baby Shower Ideas

Pink Winter Wonderland Baby Shower Ideas

Welcoming a little one into the world is a special occasion, and what better way to celebrate than with a pink winter wonderland baby shower? This theme brings together the elegance of a winter landscape with soft, rosy hues that create a cozy yet chic atmosphere. Whether you’re planning an intimate gathering or a lavish affair, these 17 ideas will help you turn your baby shower into a magical event that guests will remember forever. 1. Pink and White Balloon Arch with Snowflake Accents A balloon arch sets the tone for any event, and for a pink winter wonderland baby shower, a mix of pink and white balloons makes for a stunning entrance or backdrop. You can further elevate this by incorporating metallic silver balloons or confetti-filled balloons to add a touch of sparkle. Snowflake-shaped balloons can be interspersed to capture the wintery vibe, bringing both dimension and whimsy to the decor. This balloon arch could serve as a perfect backdrop for the gift or dessert table, framing the mother-to-be in a photo-worthy moment. Another option is to place it at the entrance to welcome guests into the magical scene. If you want to make the arch even more special, consider using various shades of pink to create an ombre effect, which will add depth and visual interest. For a DIY twist, there are plenty of balloon arch kits available that are easy to assemble, or you can hire a professional to create a customized design that fits the winter wonderland theme perfectly. Pair this with soft draping or fairy lights, and your space will instantly transform into a dreamy, pink paradise. 2. Frosted Pink Christmas Trees Few things capture the essence of winter like a Christmas tree, and for a baby shower, pink frosted trees bring in both seasonal flair and thematic color. Mini pink Christmas trees can be used as centerpieces or set up in the corners of your event space to add height and texture to the decor. You can frost these trees with white spray paint or use glitter to simulate the effect of snow. Decorate these trees with small pink and white ornaments, adding in some silver or gold accents to tie in with the winter wonderland aesthetic. Fairy lights or twinkle lights can be woven into the trees to give them a soft, glowing effect, perfect for creating a magical ambiance. If you prefer, you can even opt for one large pink frosted tree as the focal point of the room, standing proudly as a symbol of joy and celebration. The trees can also be used for interactive purposes. For example, hang small, handwritten notes or baby shower games on the branches, giving guests a fun and engaging activity to enjoy throughout the event. These frosted trees are both decorative and functional, embodying the festive spirit while enhancing your pink winter wonderland theme. 3. Faux Fur Throws and Rugs for Cozy Ambiance Creating a cozy, comfortable environment is key to making your guests feel welcome, and incorporating faux fur throws and rugs can instantly elevate the comfort level of your baby shower. Drape plush, soft throws over seating areas, such as sofas, chairs, or benches, to add a layer of warmth and luxury to your event. White or blush-colored fur mimics the look of freshly fallen snow, fitting seamlessly into your winter wonderland theme. Faux fur rugs can be placed under tables or in lounge areas to create a sense of coziness, inviting guests to relax and enjoy the festivities. This textural element enhances the overall decor, making the space feel more intimate and inviting. Not only does it add visual appeal, but it also ensures that your guests will be comfortable during the party. Another way to integrate faux fur into your decor is by using it as table runners or placing it under the dessert display. The soft fur contrasts beautifully with glass, metal, or snowflake-themed accents, giving the decor a multi-dimensional look. Plus, the tactile element will make the baby shower feel that much more luxurious and special. 4. Hanging Snowflake Decorations with Pink Tones Snowflakes are a winter classic, and incorporating them into your decor is a must for a pink winter wonderland baby shower. Hanging snowflake decorations can be used to add an ethereal touch to your event space. Use a combination of white, silver, and pink snowflakes in various sizes to create a beautiful cascade from the ceiling or along the walls. You can hang these from clear fishing line or delicate ribbons, giving the illusion that the snowflakes are floating in the air. To make the snowflakes stand out even more, opt for glittery or metallic versions that catch the light and add a sparkle to the room. You can even DIY your own snowflakes from pink and silver cardstock or purchase pre-made decorations from a party store. Arrange the snowflakes around key areas of the party, like above the dining table or the dessert station, to draw guests’ attention and enhance the magical atmosphere. For a bolder statement, create a large snowflake wall where guests can take photos. Layer different colors and textures of snowflakes to form a backdrop, using lighting to make the snowflakes shimmer. This adds a memorable visual element that guests will love and gives them a perfect photo opportunity during the shower. 5. Pink Icicle Lights for an Enchanting Glow Lighting plays a crucial role in setting the mood for any event, and for a winter wonderland baby shower, pink icicle lights are a stunning choice. These lights can be hung from the ceiling, draped around tables, or used to frame doorways and windows. The soft, pink hue creates a warm, inviting glow that perfectly complements the winter theme, while still keeping everything feminine and festive. Icicle lights mimic the natural beauty of winter, giving the illusion of glistening snow or frozen icicles. When paired with other pink and white elements, they tie the whole decor together, creating an enchanting winter … Read more

14 DIY Snowman Crafts: Creative Ideas to Brighten Up Your Winter Décor

DIY Snowman Crafts

Nothing says winter like a cheerful snowman! Whether you’re decorating for the holidays or simply want to add a touch of winter magic to your home, DIY snowman crafts are the perfect way to get into the seasonal spirit. From easy and adorable creations that you can make with your kids to more advanced projects that bring a rustic charm to your decor, these 14 DIY snowman ideas will inspire you to get crafting. 1. Sock Snowman Sock snowmen are a classic DIY craft that’s perfect for all ages. With just a few materials like white socks, rice or stuffing, and some buttons, you can create a charming little snowman to sit on your mantle or window ledge. Start by filling a white sock with rice or polyfill, securing sections with rubber bands to create the snowman’s body and head. Then, use buttons for eyes and a small scrap of fabric for a scarf to give your snowman some personality. The beauty of sock snowmen is that they’re fully customizable. You can use different materials for the hat and scarf—like patterned socks or colorful ribbons—making each snowman unique. Consider using different-sized socks to create a whole snowman family to display together. This project is also great for using up fabric scraps, buttons, and other small craft materials you already have at home. For an added touch, you can place your sock snowman inside a small holiday-themed bowl or nestle it into a wreath for a festive look. These snowmen also make wonderful gifts for friends and family, adding a personal handmade touch to your holiday presents. 2. Mason Jar Lid Snowman Ornaments If you’re looking for a fun and simple Christmas tree decoration, Mason jar lid snowmen are an excellent option. All you need are a few Mason jar lids, some white paint, and a few embellishments like buttons and ribbon. Start by painting the jar lids white to serve as the snowman’s face. Once dry, you can use buttons, felt, and markers to create the snowman’s eyes, nose, and mouth. For the finishing touch, add a small strip of fabric or ribbon as a scarf and glue on some miniature buttons down the front. You can also add glitter or fake snow to the edges of the lids to give the ornaments a frosted look. Tie a ribbon through the top of the lid to hang your new snowman ornaments on the tree or around the house. These ornaments are not only fun to make, but they’re also perfect for holiday gifting. You can create sets of these adorable snowmen and give them to loved ones as a handmade addition to their tree decor. Plus, they’re a great way to repurpose old jar lids and avoid waste! 3. Paper Plate Snowman For an easy and budget-friendly craft that’s perfect for kids, try making a paper plate snowman. All you need are two paper plates (one large for the body and one smaller for the head), glue, and some basic craft supplies like markers, googly eyes, and felt. Glue the two plates together, then let the kids go wild decorating their snowman’s face and body with whatever materials they have on hand. One fun idea is to use cotton balls for the snowman’s body to give it a fluffy, 3D texture. You can also cut out small pieces of felt to create a hat and scarf, and use construction paper for a carrot nose. This is a wonderful craft for kids to express their creativity while practicing fine motor skills. To take this project a step further, you can string multiple paper plate snowmen together to create a snowman garland. Hang the garland on a wall or above a fireplace for a cute winter-themed decoration. Best of all, this craft is simple enough to involve the whole family and makes for a fun afternoon activity. 4. Tin Can Snowmen If you enjoy upcycling, these tin can snowmen are the perfect way to repurpose old cans into charming winter decor. Clean and dry a few tin cans of different sizes, then spray paint them white to create the snowman’s body. Stack the cans on top of each other, securing them with glue or tape, and you have a standing snowman that can be displayed indoors or outside on your porch. To add personality, glue on buttons for eyes and use fabric or felt for the snowman’s scarf and hat. You can also stick twigs into the sides of the snowman for arms, giving it a rustic, natural look. This craft is a great way to reduce waste and create a unique decoration from everyday items. For an outdoor display, consider spraying the cans with a waterproof sealant to protect them from the elements. Arrange a few tin can snowmen of different sizes together on your porch or in the garden for a whimsical winter scene that’s both charming and eco-friendly. 5. Wine Cork Snowmen Wine cork snowmen are another wonderful way to upcycle materials while adding a touch of winter charm to your home. Start by painting the wine corks white and letting them dry. Then, use small scraps of felt or fabric to create a scarf, and add tiny buttons down the front for decoration. Use a black marker to draw on the snowman’s eyes, and an orange marker for the carrot nose. For a whimsical twist, you can use twigs or wire to create little arms for your wine cork snowman. These tiny figurines are perfect for decorating tables, shelves, or even as place card holders for your holiday dinner. Because wine corks are small and lightweight, they’re also ideal for creating snowman ornaments to hang on your tree. This is a fun project that also doubles as a conversation starter, especially for wine lovers. The small size of the corks makes these snowmen easy to gift or use as stocking stuffers. Gather a few together in a small basket or display them alongside your other holiday decor … Read more

11 Clever Disguise a Gingerbread Man Project Ideas

Disguise a Gingerbread Man Project Ideas

The holiday season is a time for baking, decorating, and indulging in sweet treats that bring joy to our homes. Among these delightful confections, gingerbread men stand out as a festive favorite. Traditionally, these spiced cookies are decorated with icing and candies, but why not take it a step further this year? With a touch of creativity, you can transform your gingerbread men into a variety of fun characters and themes that will delight both children and adults alike. In this blog, we’ll explore 11 easy ideas to disguise your gingerbread men, making them perfect for holiday gatherings, themed parties, or simply for a fun family activity. From superheroes to seasonal characters, each idea is designed to inspire you to get creative in the kitchen. So, gather your ingredients and let’s explore some creative gingerbread disguises! The Importance of Creativity in Holiday Baking A. Enhancing Festivities Baking is an integral part of holiday traditions, often bringing family and friends together in a spirit of joy and creativity. Disguising gingerbread men adds an exciting twist to the conventional baking routine, turning a simple cookie into a centerpiece that sparks conversation and laughter. Creative designs can set the tone for festive gatherings, making them memorable for everyone involved. Moreover, these whimsical creations can serve as decorations for your holiday table or as fun treats for guests. The more imaginative and colorful the gingerbread men, the more they can enhance the overall atmosphere of your celebrations, creating a lively and inviting environment that reflects the joy of the season. B. Engaging Children and Families Baking and decorating gingerbread men is a wonderful way to engage children in the holiday spirit. Kids love getting their hands messy with icing and candy, and disguising gingerbread men can transform a simple activity into a fun family project. This hands-on experience fosters creativity and teamwork, as family members can collaborate on designs, share ideas, and help each other with the decorating process. Furthermore, creating unique gingerbread disguises can lead to cherished memories. Each decorated cookie can tell a story, whether it’s a superhero saving the day or a princess attending a royal ball. These moments spent together not only bring families closer but also encourage children to explore their creativity in the kitchen. C. Personalization Every holiday celebration is unique, and personalized gingerbread men can reflect the tastes and interests of your loved ones. By customizing the designs to suit specific themes or favorite characters, you can create a special treat that resonates with your guests. This personalization adds a thoughtful touch to your holiday baking, making the gingerbread men not just cookies but meaningful gifts. In addition, personalized gingerbread men can serve as memorable party favors. Guests will appreciate the effort you put into creating these whimsical treats, and they can take a piece of the celebration home with them. Whether it’s a quirky disguise or a character that reflects your guests’ personalities, these personalized treats are sure to be a hit. 11 Clever Disguise a Gingerbread Man Project Ideas A. Classic Costumes 1. Superhero Gingerbread Man Transform your gingerbread man into a superhero with just a few simple ingredients! Start by baking your gingerbread men as usual, ensuring they are well-shaped and sturdy enough to hold decorations. Once cooled, gather colored icing, candies, and small edible decorations to create your superhero’s look. To design the superhero outfit, use bright colored icing for the costume. Think bold colors like red, blue, or green to represent classic superheroes. Create a cape by adding a flowing design in the back using icing, and don’t forget the emblem on the chest! You can use candies like M&M’s or chocolate chips to form the symbol of your choice. Let your imagination run wild, and feel free to invent a backstory for your superhero gingerbread man! As you decorate, encourage children to come up with their superhero names. This interactive element adds an extra layer of fun to the project, making the superhero gingerbread men a hit for both kids and adults alike. 2. Pirate Gingerbread Man Set sail on a sweet adventure by creating a pirate gingerbread man! Start by baking the gingerbread men and letting them cool completely. For the decorations, you’ll need black and red icing, candy eyes, and small chocolate pieces to create the pirate look. To make the iconic pirate hat, use black icing to draw a tricorn hat shape on the top of your gingerbread man. Add a red icing band around the base of the hat for an extra pop of color. For the eye patch, use a small piece of black fondant or a chocolate candy and position it over one eye, giving your gingerbread man a daring pirate flair. Use candy eyes to bring your pirate to life! Complete the look by creating a simple mustache with black icing and adding a treasure chest made of brown icing with colorful candy “gold” spilling out. This pirate gingerbread man is sure to be a treasure at your holiday gatherings! 3. Princess Gingerbread Man For a touch of royal elegance, consider creating a princess gingerbread man. Begin with the standard gingerbread cookie base and allow it to cool. You’ll want to gather pink, purple, and gold icing, edible glitter, and a selection of candies to design the princess outfit. Start by using pink icing to create a lovely dress, adding details like ruffles or lace using contrasting colors. For the crown, roll out small pieces of yellow fondant or use yellow icing to form a tiara shape on top of your gingerbread man’s head. Add edible glitter to the crown for a sparkling finish that will make your princess shine! Finally, embellish the dress with small candies or edible pearls, making sure every detail reflects the charm of a true princess. This whimsical creation is perfect for a holiday gathering or as a delightful treat for little princesses at your party. B. Seasonal Themes 4. Snowman Gingerbread Man Bring winter cheer to your … Read more

18 Creative Modern Coffee Bar Ideas for Coffee Lovers at Home

Modern Coffee Bar Ideas

Creating a dedicated coffee bar in your home is a growing trend among coffee lovers and interior design enthusiasts. A home coffee bar not only brings the convenience of enjoying your favorite brew right at home, but it also adds a stylish, functional element to your space. Whether you’re a casual coffee drinker or a seasoned barista, having a dedicated area for brewing coffee can elevate your home and create a welcoming atmosphere. In this article, we’ll explore 18 modern coffee bar ideas that combine design, functionality, and personal style. Whether you’re working with a small corner of your kitchen or have space for a larger setup, these ideas will help you craft the perfect coffee bar to suit your needs. I. Choosing the Right Location for Your Coffee Bar 1. Kitchen Corner Coffee Bar One of the most popular locations for a coffee bar is in a corner of the kitchen. It’s an ideal space because it allows easy access to the essentials—water, countertops, and storage. You can turn an unused kitchen corner into a chic coffee station with floating shelves, a small countertop, and cabinetry. Add a compact espresso machine or a single-serve coffee maker for a sleek setup that doesn’t take up much space. For those with limited kitchen space, consider creating a coffee nook with a built-in shelf under your cabinets. This approach keeps everything organized and within reach without cluttering the countertops. A few stylish coffee canisters, mugs, and a small plant can tie the space together. 2. Living Room Coffee Bar A living room coffee bar offers convenience, especially if you entertain guests often. Designating a corner or an unused wall in your living room for your coffee setup allows you to enjoy a cup of coffee while relaxing or hosting friends. This is also a great opportunity to experiment with different design styles, such as industrial or Scandinavian, to complement your living room’s decor. Use a console table or sideboard as your coffee station and add decorative trays to organize mugs, coffee beans, and accessories. Incorporating a stylish coffee cart with wheels can also add flexibility, allowing you to move your coffee bar around as needed. 3. Dedicated Coffee Room If you have the luxury of extra space, why not create a dedicated coffee room? This is a fantastic option for serious coffee enthusiasts who want an immersive experience. You can design a space that reflects your love for coffee, with customized shelving for your coffee gear, a sitting area, and even a small fridge to store milk and cold brew. In this space, you can also experiment with bolder decor elements, such as a feature wall or unique artwork that celebrates your love for coffee. A dedicated coffee room allows you to take your home cafe experience to the next level and fully embrace the art of coffee-making. II. Design Styles for a Modern Coffee Bar 4. Minimalist Coffee Bar Minimalism is perfect for creating a sleek, clutter-free coffee bar. Focus on clean lines, neutral tones, and simple yet functional design elements. A minimalist coffee bar can be as straightforward as a floating shelf with a few essential items like a coffee maker, mugs, and a canister for coffee beans. The key is to keep the space visually open and uncluttered. Choose a neutral color palette, such as white, black, or soft grays, and keep decorative elements to a minimum. For example, a small succulent or a single piece of wall art can add just enough personality without overwhelming the space. 5. Industrial Coffee Bar For those who prefer a more rugged, urban look, an industrial coffee bar might be the perfect fit. This style incorporates raw materials like wood, metal, and concrete to create a bold yet functional space. Consider using reclaimed wood shelving, metal pipes for support, and concrete countertops to give your coffee bar a unique, edgy feel. Pair this with metal stools or a distressed wooden table to complete the industrial vibe. Lighting is crucial in this design—opt for exposed bulbs or pendant lights with metal fixtures to enhance the industrial look. 6. Scandinavian Coffee Bar The Scandinavian style is known for its simplicity, light colors, and functionality—making it an ideal choice for a modern coffee bar. Incorporate natural wood elements, white walls, and sleek, functional storage solutions. Scandinavian design emphasizes clean lines, so look for furniture and storage pieces that are both aesthetically pleasing and practical. To add warmth and coziness, include textured accents like woven baskets, soft linens, or a small rug. Plants also play a significant role in Scandinavian decor, so consider adding a few potted plants to breathe life into your coffee bar. III. Essential Equipment for Your Coffee Bar 7. Espresso Machines No coffee bar is complete without the right equipment, and an espresso machine is a must-have for those who love specialty coffee. Whether you opt for a manual or automatic machine, having an espresso maker allows you to create café-quality drinks right at home. Consider compact models if you’re working with a smaller space, and choose a sleek, modern design that complements your overall decor. Make sure to display your espresso machine prominently on your coffee bar for easy access and a professional look. Add a few stylish cups or mugs nearby to complete the setup. 8. Coffee Grinders A coffee grinder is another essential piece of equipment for any modern coffee bar. Freshly ground coffee beans can elevate your brew, offering richer flavors and aromas. Consider investing in a high-quality burr grinder that provides consistent grounds. Display your grinder on a shelf or counter, and organize your coffee beans in decorative containers nearby. If space is limited, you can use wall-mounted storage solutions for your beans and grinder. This keeps everything within reach while maintaining a clutter-free coffee station. 9. Milk Frothers and Accessories To complete your coffee bar, don’t forget the accessories. Milk frothers are essential for creating lattes, cappuccinos, and other milk-based drinks. Electric frothers, handheld steamers, … Read more

17 Creative Laundry Room Ideas

Laundry Room Ideas

Laundry rooms often occupy a unique space in our homes. They serve a crucial function, yet many people overlook them when it comes to design and organization. Instead of being just a place for chores, laundry rooms can be transformed into stylish and efficient spaces that reflect personal style while enhancing functionality. In this article, we’ll explore 17 creative laundry room ideas that can help you make the most of this essential area. 1. Maximize Vertical Space Utilizing vertical space is a smart way to enhance both functionality and aesthetics in your laundry room. Often, we focus only on the floor space when planning our layouts. However, wall-mounted shelves, cabinets, and pegboards can dramatically increase your storage capacity without encroaching on valuable floor area. For example, adding shelves above your washer and dryer can provide a dedicated space for laundry essentials like detergent, fabric softeners, and dryer sheets. This keeps your items organized and easily accessible, making laundry day more efficient. Pegboards are another excellent option for maximizing vertical space. They can be customized to hold various tools and accessories, such as measuring cups, stain removers, and other laundry necessities. With hooks and bins, you can easily rearrange the layout as your needs change. This flexible storage solution not only frees up counter and floor space but also adds an element of organization and creativity to your laundry room. In addition to shelves and pegboards, consider adding a drying rack that can be mounted on the wall. These racks can be folded down when not in use, allowing you to air-dry delicate items without taking up valuable space. By thinking vertically, you can create a laundry room that is not only practical but also visually appealing, making the most of every square foot. 2. Hidden Hampers or Laundry Bins Keeping dirty laundry organized and out of sight can be a game-changer in maintaining a tidy home. Hidden hampers or laundry bins are an effective solution to this common problem. Consider installing pull-out hampers that slide out from beneath your countertop or cabinetry. This design keeps the hamper out of sight while providing easy access for tossing in dirty clothes. You can customize the size and style of the hampers to fit your laundry room’s aesthetic, ensuring they blend seamlessly with the decor. Another great option is to use cabinet space to conceal laundry bins. This not only keeps your laundry area looking clean but also protects your clothes from dust and pet hair. You can design a cabinetry system that features built-in compartments specifically for laundry, making it easier to sort clothes as they come in. For example, one bin could be designated for whites, another for colors, and a third for delicates, streamlining your laundry process. For a more innovative approach, consider installing a laundry chute that leads directly to your laundry room. This makes it incredibly convenient to drop dirty clothes from upstairs or other areas of the house, ensuring they don’t pile up in other rooms. With hidden hampers, you can keep your space organized while making laundry chores more manageable. 3. Install a Folding Station A designated folding station can significantly improve the efficiency of your laundry routine. Many laundry rooms lack adequate space for folding clothes, which often leads to clutter and frustration. By creating a dedicated folding area, you can streamline the process and keep your laundry room tidy. Consider adding a fold-down table that can be tucked away when not in use. This provides a convenient workspace without taking up too much room, making it perfect for small laundry areas. Alternatively, you can build a countertop over your washer and dryer. This solution maximizes the space you already have while providing a sturdy surface for folding clothes. Choose materials that are durable and easy to clean, as this area will likely encounter spills and stains. A well-designed countertop not only serves as a folding station but can also double as a spot for sorting and organizing laundry. To make your folding station even more efficient, consider integrating storage solutions nearby. Add baskets or bins for organizing folded items, ensuring everything has a designated place. This way, once you finish folding, you can easily put everything away without creating additional clutter in your laundry room. 4. Add Decorative Touches Decorative elements can transform your laundry room from a utilitarian space into a stylish area that you enjoy being in. Start by incorporating a fun wallpaper or a bold paint color that reflects your personality. Choosing a pattern or color scheme that aligns with the rest of your home can create a cohesive flow throughout your living space. Adding decor that resonates with your style, such as framed artwork or decorative baskets, enhances the ambiance and makes laundry day feel less like a chore. Incorporating vintage or themed decor is another way to add character to your laundry room. Consider displaying antique washboards, old-fashioned clothespins, or even retro appliances. This not only creates visual interest but also pays homage to the history of laundry practices. You can mix modern elements with vintage finds for an eclectic look that is uniquely yours. Additionally, don’t forget to accessorize with functional yet decorative items, such as stylish storage containers and charming laundry signs. These small touches can enhance the overall aesthetic while providing practical solutions for organization. With the right decorative touches, your laundry room can become a space that feels inviting and enjoyable to use. 5. Incorporate Hidden Storage Storage is essential in any laundry room, and incorporating hidden storage solutions can help you maintain a clutter-free environment. One effective way to achieve this is by using sliding cabinets or drawers that conceal cleaning supplies and laundry necessities. This approach keeps items organized and out of sight while maximizing available space. You can customize the size and layout of your cabinets to fit your specific needs, creating a seamless look that complements your decor. Another clever idea is to install a pull-out ironing board that can … Read more

18 Gifts in a Jar that Will Make Your Friends Feel Loved

Gifts in a Jar

Gift-giving is a special way to show your friends how much they mean to you, and what better way to do that than with a thoughtful, handmade gift in a jar? Not only are these gifts budget-friendly and easy to customize, but they also offer a personal touch that can’t be replicated with store-bought presents. Whether your friend loves sweets, spa days, or DIY projects, this list has something for everyone. Read on for 18 creative gifts in a jar that are sure to make your friends feel loved and appreciated. 1. Cookie Mix in a Jar A cookie mix in a jar is a timeless gift that brings warmth and joy to any home. By layering the dry ingredients needed for a delicious batch of homemade cookies, you create a visually appealing gift that’s also practical. Start by adding flour, sugar, baking soda, and chocolate chips in layers inside a mason jar. Each layer should be neat and compact to create a beautiful visual presentation. To personalize this gift, you can choose your friend’s favorite type of cookie, whether it’s classic chocolate chip, oatmeal raisin, or festive holiday cookies. Attach a recipe card that includes the necessary wet ingredients (such as butter, eggs, and vanilla extract) and baking instructions. You can also add extra touches like a small wooden spoon or cookie cutter tied to the jar with ribbon. This gift is perfect for the friend who loves to bake or enjoys a cozy treat on a lazy afternoon. 2. Hot Cocoa Jar There’s nothing more comforting on a chilly day than a cup of hot cocoa, and gifting a hot cocoa jar is like giving a warm hug in a jar. This gift is simple to assemble and can be customized with different toppings to suit your friend’s tastes. Begin by layering cocoa powder, sugar, and a pinch of salt for the base mix. Then, add mini marshmallows, chocolate chips, or crushed candy canes to make the jar look festive. You can also include a small whisk or a spoon, attached to the side of the jar with a ribbon, to help your friend mix their cocoa to perfection. Personalize the jar further by adding a handwritten note with serving instructions and a suggestion to pair the cocoa with a favorite holiday movie. This thoughtful and cozy gift is perfect for the winter season or as a holiday surprise for your friends. 3. Relaxation Spa in a Jar For the friend who could use some relaxation and self-care, a spa in a jar is a wonderful way to help them unwind. Fill the jar with calming bath products like bath salts, essential oils, and face masks. You can choose scents like lavender or eucalyptus to promote relaxation and stress relief. Include small, luxurious touches like a hand-poured candle or a soothing herbal tea blend. The beauty of this gift lies in its versatility—whether your friend prefers a quiet bath, a refreshing face mask, or a cozy candle-lit evening, this jar has it all. You can personalize the gift by choosing products that suit their specific needs or adding a small note with “spa instructions” on how to create the perfect relaxing environment. This is the perfect gift for someone who deserves a little pampering. 4. S’mores Kit in a Jar Who says you need a campfire to enjoy s’mores? With a s’mores kit in a jar, you can bring the joy of this classic treat right into your friend’s home. Layer graham crackers, chocolate bars, and marshmallows inside a mason jar for a sweet, nostalgic gift that will remind them of cozy campfires and outdoor adventures. To make this gift extra special, you can include roasting sticks or skewers so your friend can roast marshmallows over a candle or stovetop. For an added personal touch, consider including a mini candle and matches to simulate the campfire experience indoors. This s’mores kit in a jar is perfect for those who love sweet treats and outdoor fun but want the convenience of enjoying it at home. 5. Pancake Mix in a Jar For the breakfast lover in your life, a pancake mix in a jar is both thoughtful and delicious. To create this gift, layer the dry ingredients for pancakes—flour, sugar, baking powder, and a pinch of salt—in a mason jar. Add a recipe card that instructs your friend to mix in wet ingredients like eggs, milk, and melted butter when they’re ready to whip up a batch of fluffy pancakes. To personalize the jar, you can attach a small bottle of maple syrup, a spoonful of vanilla extract, or even a mini whisk. This gift is perfect for a cozy weekend breakfast, and it’s sure to make your friend smile as they enjoy a homemade meal that you’ve made easy for them. The simplicity of the ingredients combined with the heartwarming gesture makes this an excellent gift for food lovers. 6. Friendship Notes in a Jar Sometimes, the best gifts are the ones that speak from the heart. A friendship notes jar is a deeply personal and thoughtful gift that allows you to express how much your friend means to you. Simply fill a jar with handwritten notes—each one containing a special message, affirmation, or cherished memory that you share. Use colorful or decorative paper to make the notes visually appealing. This gift is perfect for birthdays, holidays, or just as a surprise “thinking of you” gesture. To make it even more personal, you can fold the notes into origami shapes or add small charms or trinkets that hold meaning for your friendship. Every time your friend pulls out a note, they’ll be reminded of your love and appreciation, making this gift one that keeps on giving. 7. DIY Body Scrub Jar For the friend who loves skincare, a DIY body scrub jar is a luxurious and easy-to-make gift. Combine natural ingredients like sugar, coconut oil, and essential oils in a jar to create an exfoliating and moisturizing … Read more

17 Turkey Disguise Projects for Kids

Turkey Disguise Projects

Thanksgiving is right around the corner, and that means it’s time for a fun tradition—turkey disguises! This beloved craft activity gives kids the chance to get creative and help their turkey avoid the dinner table by dressing it up in a clever disguise. Whether you’re a teacher looking for a fun class project or a parent searching for a holiday craft, these turkey disguises will inspire hours of creative fun. Below are 18 unique and easy-to-make turkey disguises that kids of all ages will enjoy creating. What Is a Turkey Disguise Project? A turkey disguise project is a popular Thanksgiving activity where kids are given a turkey template and tasked with disguising it so it no longer looks like a turkey. The idea is to “save” the turkey from being eaten by transforming it into something unrecognizable. This activity allows kids to unleash their creativity by using a variety of materials, from simple paper and glue to more elaborate costumes made from fabric, glitter, and craft embellishments. This project is often used in schools or at home as a fun craft that aligns with the Thanksgiving season. It’s not only a creative exercise but also helps improve fine motor skills and encourages imaginative thinking. Kids love the idea of turning their turkey into something entirely different, whether it’s a superhero, princess, or even a ninja! Plus, it’s a great way for families to spend time together making something fun. To get started on your own turkey disguise project, all you need is a turkey template (you can find plenty of printable ones online), a collection of craft supplies, and a lot of imagination. This guide will take you through 18 fun disguise ideas, but the sky’s the limit with what your child can dream up. Encourage them to think outside the box and come up with a unique disguise of their own. How to Get Started with Your Turkey Disguise Before diving into the various turkey disguise ideas, it’s important to set up your workspace and gather all the necessary materials. First, print a basic turkey template, which will serve as the base for your child’s disguise. You can easily find printable templates online or draw your own. Once you have the turkey outline ready, you’ll want to gather crafting supplies such as colored paper, markers, glue, scissors, glitter, and any other materials you think your child might want to use. Next, encourage your child to brainstorm ideas for their turkey disguise. They can choose a theme based on their favorite characters, professions, or animals. It’s helpful to offer a few suggestions but let them take the lead on picking their disguise. This not only boosts creativity but also helps them feel more ownership of the project. Finally, once the idea is chosen, it’s time to start crafting! Encourage your child to sketch their design first if they’re up for it, then proceed with cutting, gluing, and assembling the disguise on the turkey template. It’s helpful to have an adult on standby to assist with any cutting or hot-glueing for more intricate designs. Now, let’s dive into 18 specific turkey disguise ideas your kids will love. 17 Turkey Disguise Projects for Kids 1. Superhero Turkey What better way to save your turkey than to transform it into a superhero? Kids can have fun picking their favorite superhero—whether it’s Spider-Man, Batman, or Wonder Woman—and dress their turkey up in a mask, cape, and emblem. Start by using construction paper to cut out a cape and mask for the turkey. You can also use glitter or markers to add an emblem, like a lightning bolt or a bat symbol, to the turkey’s chest. For the cape, use red or blue paper, and let the turkey’s wings stick out to look like it’s flying. If you want to get really creative, make some superhero boots out of colored paper and attach them to the turkey’s feet. The superhero theme allows for a lot of variation depending on which character your child wants to use. For instance, if they choose Wonder Woman, you can create a tiara and lasso out of gold craft paper. To finish the look, let your child color the turkey in bright superhero colors, like red, yellow, or blue. You can even add a foam board behind the turkey to make it look like it’s standing on a city skyline or bursting through a wall. This project is not only fun but also encourages kids to think about what powers their turkey might have! 2. Princess Turkey For those who love all things royal, turning your turkey into a princess is a magical disguise idea. Start with a fancy gown made out of colored fabric or paper. You can even use tulle to give the dress a realistic princess feel. Add glitter, jewels, and stickers to the gown to make it look extra glamorous. Don’t forget a tiara—use metallic paper or craft foam to make a sparkling crown to sit atop your turkey’s head. To really make the disguise come to life, give your princess turkey long flowing hair made out of yarn or ribbon. You can braid it, add a bow, or even sprinkle it with glitter for that extra royal touch. If your child loves Disney princesses, they can base the design on their favorite character, like Cinderella or Elsa. A wand made from a toothpick or pipe cleaner can also add to the magic. Finish the look by adding some makeup details to the turkey’s face—draw on rosy cheeks, lipstick, and even some fluttering eyelashes. You can use googly eyes for an extra dose of fun. The princess turkey is a perfect disguise for any little one who loves fairy tales and wants to give their turkey a royal makeover. 3. Pirate Turkey Arr matey! Disguising your turkey as a pirate is a swashbuckling idea that’s sure to get some laughs. Start by making a pirate hat using black construction paper. Add a skull and crossbones … Read more