

There’s something magical about digging your hands into the soil and uncovering golden, homegrown potatoes. It’s even more exciting when you realize you don’t need a sprawling garden to do it! Growing potatoes in containers is one of those gardening tricks that makes you feel like you’ve outsmarted nature. It’s simple, tidy, and perfect for small spaces — from balconies to patios and even doorsteps. Over the years, I’ve learned that container gardening is not only space-efficient but also surprisingly productive. Here’s a step-by-step guide to help you grow your own fresh potatoes right at home.
Why Grow Potatoes in Containers?
Container gardening offers freedom that traditional garden beds can’t. For starters, it’s ideal if you’re short on outdoor space. You can grow a good yield of potatoes on a balcony or beside your kitchen door. The best part? You can move the containers around to chase sunlight or protect them from bad weather.
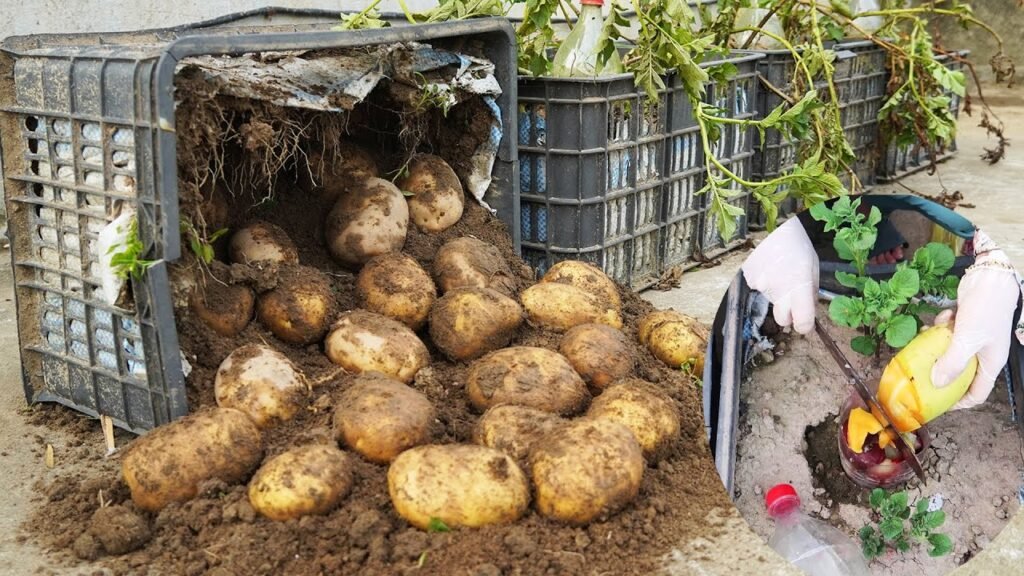
Another major perk is pest and disease control. By growing in fresh potting mix, you avoid many soil-borne diseases and pests that often plague potatoes planted directly in the ground. Plus, harvesting becomes a breeze — no need for digging and risking damaged tubers. You simply tip over the container, and out come your perfect, dirt-dusted spuds.
Finally, container growing lets you start the season early. If spring nights are still chilly, you can move your containers indoors or into a greenhouse until temperatures warm up. This flexibility makes it possible to grow potatoes almost anywhere.
Choosing the Right Potato Variety
Not all potatoes are created equal when it comes to container growing. I’ve found that early and mid-season varieties perform best because they mature quickly and don’t need as much room to spread. Some reliable choices include Yukon Gold, Red Pontiac, Charlotte, and Fingerlings.
It’s best to buy certified seed potatoes instead of using ones from the grocery store. Store-bought potatoes are often treated with sprout inhibitors, which slow down or prevent growth. Certified seed potatoes are disease-free and produce more consistent yields.
Avoid late-season or maincrop potatoes for containers — they take longer to mature and need deeper soil. Stick with compact, fast-growing varieties, and you’ll have a satisfying harvest without the wait.
Selecting the Right Container
The container you choose plays a big role in how your potatoes perform. Aim for something that’s at least 10–15 gallons in size and 16 inches deep. Potatoes grow downward, so depth is more important than width.
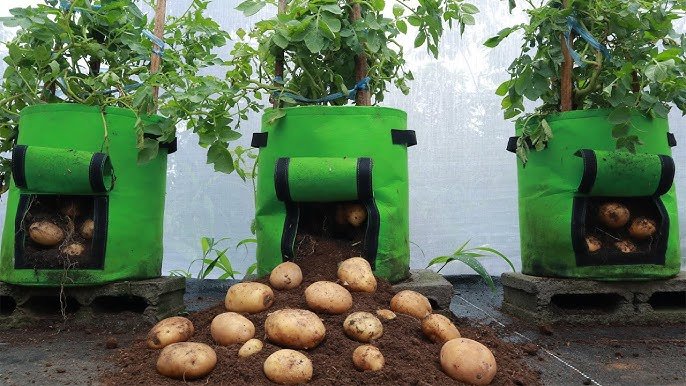
You can use almost anything — grow bags, large buckets, trash bins, or even old barrels — as long as it has good drainage holes. Without proper drainage, excess water can lead to rot. I like using dark-colored containers because they help keep the soil warm, speeding up early growth.
If you’re repurposing a container, drill several holes in the bottom and a few along the sides for airflow. Potatoes thrive in breathable containers, which prevent soggy soil and promote healthy root development.
Preparing the Soil Mix
Potatoes love loose, nutrient-rich, and well-draining soil. Garden soil alone can be too heavy, so it’s best to create a custom mix. Combine one part compost, one part garden soil, and one part perlite or coconut coir to improve drainage and aeration.
Before planting, mix in a slow-release organic fertilizer or extra compost for nutrients. Potatoes are hungry plants, and feeding them early helps build strong tubers. The ideal soil pH is slightly acidic — between 5.5 and 6.5 — which keeps nutrients available for growth.
If the soil feels dense, add more organic matter until it’s crumbly and light. Think of it like baking — the right “texture” makes all the difference.
How to Plant Potatoes in Containers
Step 1: Sprout your seed potatoes (chitting)
Place your seed potatoes in a bright, cool area for about 2–3 weeks. They’ll start developing small sprouts, which help them grow faster once planted.
Step 2: Fill your container
Add about 4–6 inches of your soil mix to the bottom of the container.
Step 3: Plant your seed potatoes
Lay 2–3 seed potatoes on the soil with the sprouts facing upward. Cover them with 3–4 inches of soil and water thoroughly.
Step 4: Label your container
If you’re experimenting with different varieties, label each container to keep track of what’s growing.
At this stage, your job is to keep the soil moist and the container in a sunny spot. Soon, you’ll see little green shoots breaking through the surface.
Caring for Potato Plants
Potatoes need consistent moisture but dislike soggy conditions. Water when the top inch of soil feels dry, ensuring even coverage. Containers can dry out faster than ground soil, especially in hot weather, so check them regularly.
Your plants will thrive in 6–8 hours of direct sunlight each day. If they’re on a balcony or patio, move them around as needed to capture the most light. Every 2–3 weeks, feed with a potassium-rich fertilizer or compost tea to support tuber growth.
As the plants grow, you’ll need to hill up the soil — that means adding more mix around the stems to cover the lower leaves. Repeat this every time the plants grow 6–8 inches tall until the container is nearly full. This step encourages the plant to produce more potatoes along the buried stems.
Common Problems & How to Avoid Them
Overwatering is the most common mistake. Too much moisture suffocates roots and causes rot. Always check that your container drains freely.
Pests like aphids, slugs, and potato beetles can sometimes find their way to your plants. I usually spray neem oil or remove them by hand. Healthy soil and proper spacing make your plants less inviting to pests.
Another common issue is sunburned or green potatoes, which happens when tubers are exposed to sunlight. Keep them covered with soil at all times. And remember to avoid reusing old soil for potatoes year after year — it can harbor diseases.
Harvesting Your Potatoes
Harvest time is the most satisfying part. Early potatoes are usually ready 10–12 weeks after planting, while later types take up to 20 weeks. When the foliage starts yellowing and drying out, your potatoes are ready.
To harvest, simply dump out the container onto a tarp or gently dig through the soil with your hands. Be careful not to puncture the tubers. Shake off the excess soil and let the potatoes dry in a shaded, airy spot for a few hours before storing them.
Store your harvest in a cool, dark, well-ventilated place. Avoid refrigerating them — too much cold can alter their flavor and texture.
Reusing the Soil and Container
After harvesting, you can reuse the soil with a bit of care. Remove any leftover roots or debris, and mix in fresh compost before replanting. However, don’t grow potatoes in the same soil for consecutive seasons — rotate crops to keep diseases at bay.
Clean your containers with a mild bleach solution (1 part bleach to 9 parts water) to sanitize them before the next planting. Once dry, they’re ready for your next garden experiment.
Bonus Tips for Bigger Yields
- Companion planting: Place containers near herbs like basil or beans to naturally deter pests.
- Mulching: Add a light mulch layer to retain moisture and regulate temperature.
- Second crop: Start another round of potatoes mid-season for a continuous harvest.
Small adjustments like these can lead to healthier plants and larger, tastier potatoes.
Wrapping Up
There’s a special kind of joy in growing something as humble yet hearty as potatoes — especially when all you need is a container, some soil, and a sunny spot. Once you try it, you’ll realize just how simple and satisfying container potato gardening can be. Each harvest feels like digging up buried treasure, and those golden tubers taste even better knowing you grew them yourself. So grab a pot, roll up your sleeves, and start your own mini potato patch — your kitchen table will thank you later.