
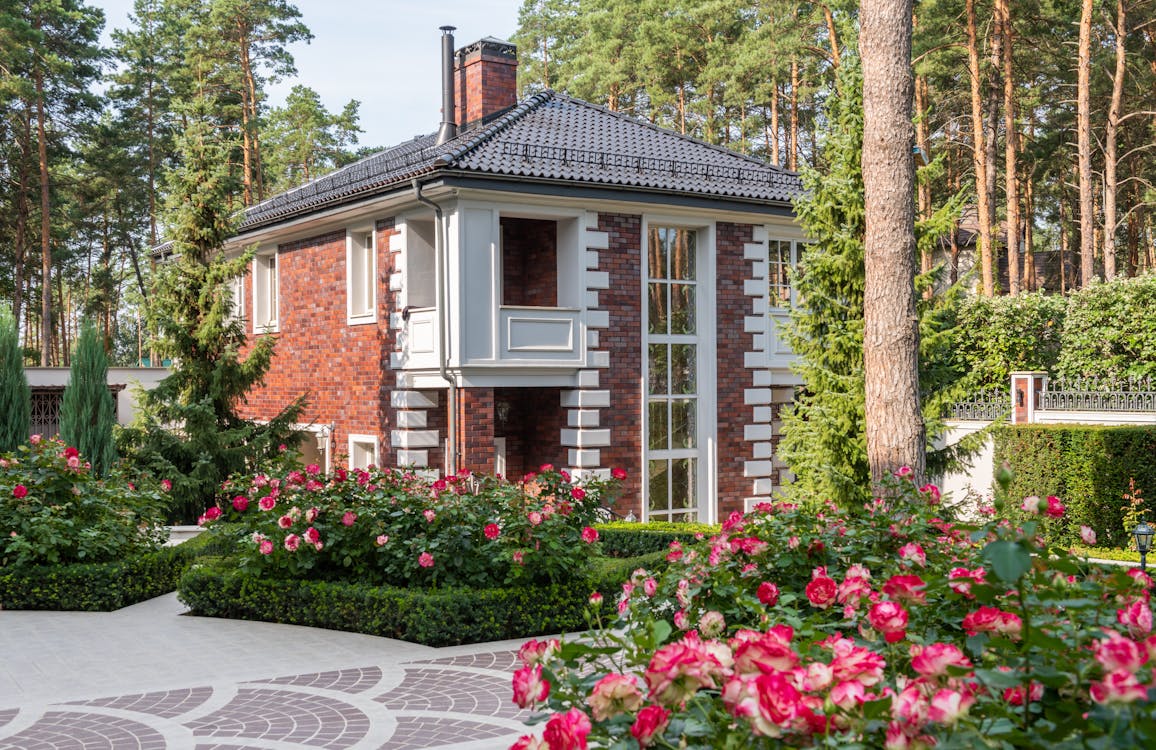
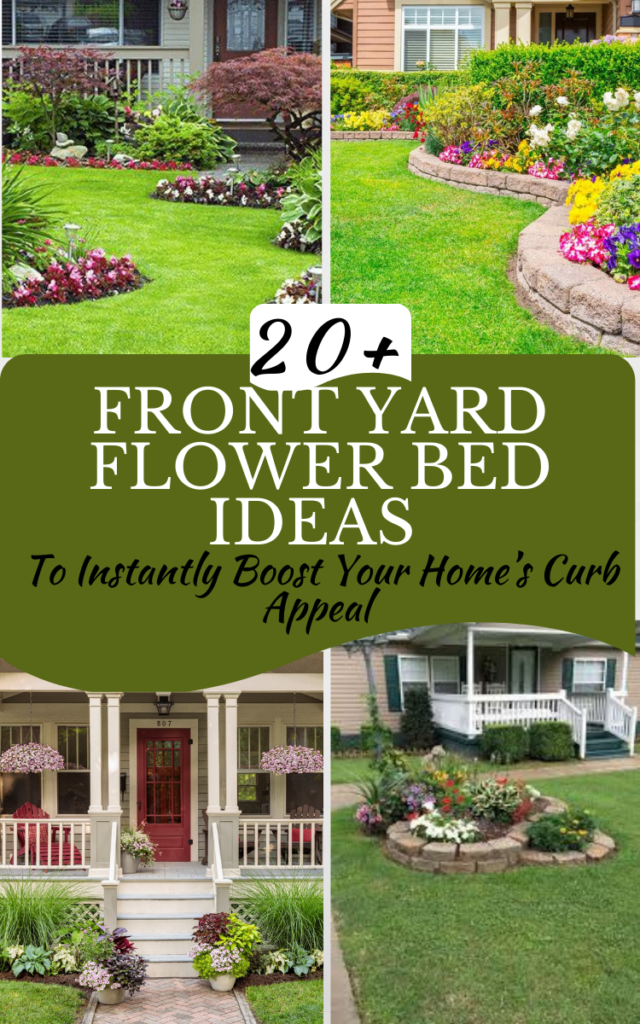
Your front yard is the first thing people see, yet for most of us, it’s a source of low-grade anxiety. You pull into the driveway after a long day and instead of feeling “home,” you’re greeted by a patch of sad, leggy shrubs and that one mystery weed that grows three inches every time you blink. We’ve all been there, staring at the neighbor’s perfect hydrangeas and wondering what kind of sacrificial ritual they perform to keep them so fluffy.
I’ve had my fair share of gardening “facepalms” over the last twelve years. There was the summer my zucchini took over the entire ZIP code because I thought I’d be “efficient” and plant them in the front flower bed. By August, you couldn’t see my front door, and I’m pretty sure the mailman was afraid to leave the truck. I’ve learned that the secret to a great front-of-house bed isn’t spending a fortune at the nursery; it’s about picking the right “workhorse” plants that do the heavy lifting so you don’t have to.
1. Low Maintenance Foundation Plantings with Boxwoods
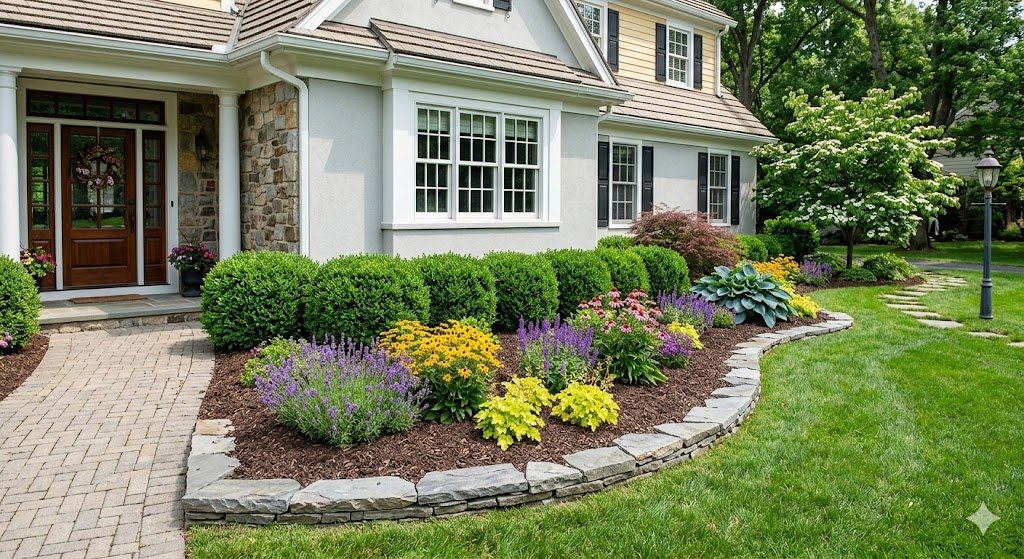
If you want your house to look like an adult lives there, you need boxwoods. These are the “little black dress” of the gardening world. They provide a structured, evergreen backdrop that keeps your house from looking naked in the middle of January. I’m a huge fan of ‘Green Velvet’ boxwoods because they hold that deep green color even when the wind is howling and the ground is frozen solid.
I’ve found that the “meatballs in a row” look is a total waste of potential. Instead of planting a straight line of identical globes, try staggering them or grouping them in odd numbers. This creates a more natural, layered look that hides any gaps if one happens to have a bad year. I once tried to prune mine into perfect squares like a fancy English estate, but I ended up with something that looked like a row of lumpy green dice. Stick to soft, rounded shapes; they’re much more forgiving.
Space them out more than you think you should. Those cute little pots at the garden center are deceptive. Give them at least three feet of breathing room. If you jam them together for “instant” coverage, you’ll end up with root rot and a fungal mess by year three. I’ve spent more time ripping out overcrowded shrubs than I care to admit, and it’s a back-breaking job you can avoid with a tape measure.
Mulching is the final touch for boxwoods. Use a dark, shredded hardwood mulch. It keeps the roots cool and makes the green pop. Avoid that bright red dyed mulch—it looks like a crime scene and stains your concrete when it rains. Keep the mulch a few inches away from the actual stems of the plant to prevent rot. It’s a small detail that saves you from replacing a $40 shrub next spring.
2. Layering Perennials for Multi-Season Color
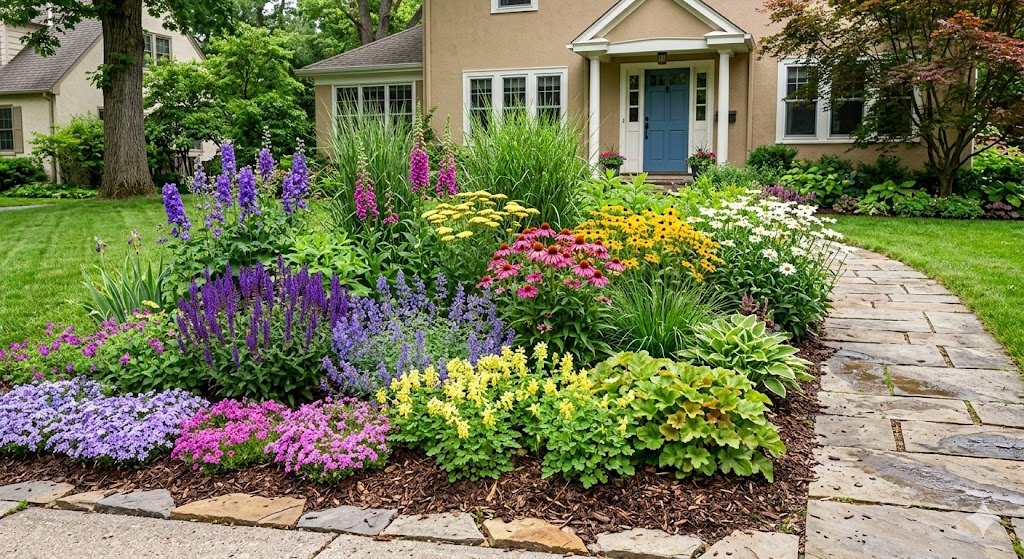
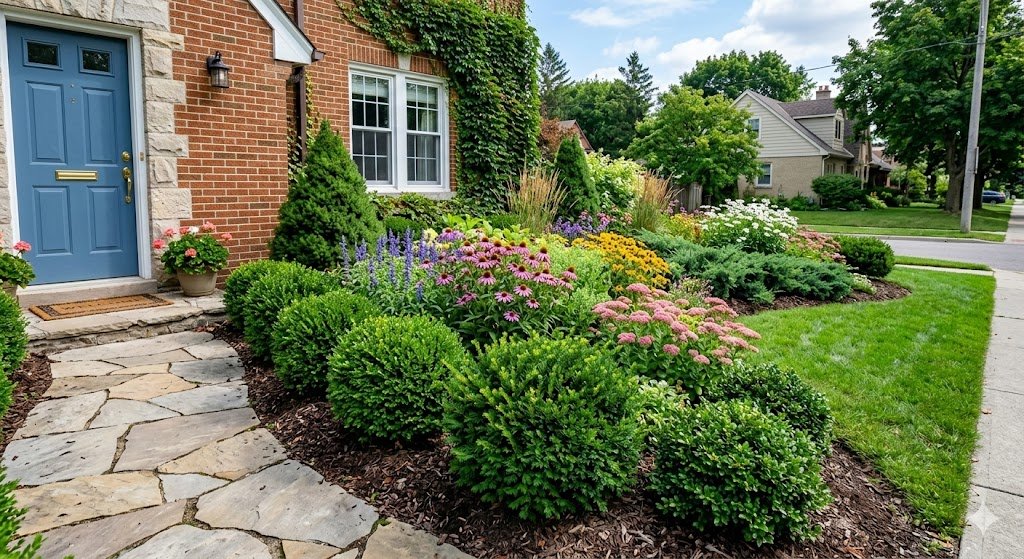
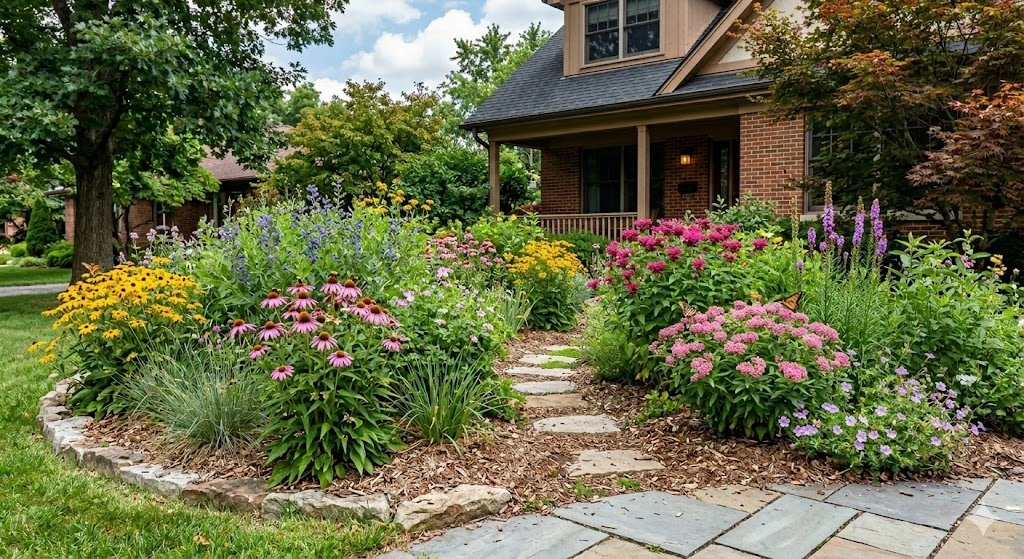
A flat flower bed is a boring flower bed. You want “height hierarchy.” This means putting your tall guys in the back, medium guys in the middle, and the short, “spiller” plants in the front. For the back of the bed, I swear by Coneflowers (Echinacea). They’re tough as nails, they don’t mind the heat radiating off your siding, and the bees will treat your front yard like a five-star buffet.
In the middle row, I’m obsessed with Salvia. The deep purple spikes provide a great contrast to the rounded shapes of your foundation shrubs. Plus, if you “deadhead” them (which is just a fancy way of saying snip off the dead flowers), they’ll keep blooming until the first frost. I once forgot to prune mine and they turned into a floppy mess that looked like a bunch of purple hair after a rainstorm. Ten minutes with some shears makes all the difference.
For the very front, go with Creeping Phlox or Sedum. These act as a “living mulch” that chokes out weeds. I’ve found that planting a thick border of Creeping Phlox saves me about four hours of weeding every month. In the spring, it looks like a carpet of pink or white flowers, and for the rest of the year, it’s just a nice green mat. It’s the ultimate lazy gardener’s hack for a clean edge.
Mix in some ornamental grasses like Little Bluestem for texture. They add movement, which is something people often forget. When the wind blows, you want your garden to dance, not just sit there. Grasses also look amazing in the winter when they turn a golden-tan color and catch the frost. Just make sure you cut them back to the ground in early March before the new growth starts.
3. Creating Curb Appeal with Statement Hydrangeas
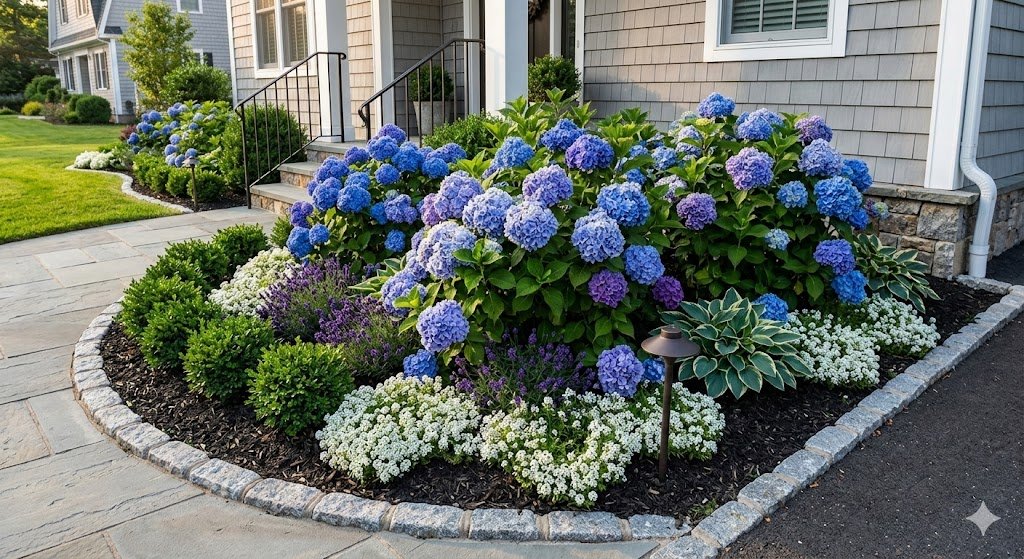
Hydrangeas are the “divas” of the front yard, but man, are they worth it. If you have a spot that gets morning sun and afternoon shade, you need a ‘Limelight’ or an ‘Endless Summer.’ They fill up massive amounts of space and produce flowers the size of your head. It’s the fastest way to make your neighbors jealous without actually saying a word.
I’ve found that the “mophead” varieties are a total waste of money if you live in a cold climate and don’t want to baby them. They often die back to the ground and then refuse to bloom. Instead, look for Panicle Hydrangeas. They are much hardier and they bloom on “new wood,” which means even if you hack them back in the winter, they’ll still give you flowers in the summer. I’ve tried to grow the fussy ones for years, but the Panicles are the only ones that don’t make me want to cry.
Watering is the big catch. The word “hydra” is right there in the name—they are thirsty. If you see them drooping at 2:00 PM, they aren’t dying; they’re just “fainting.” Give them a deep soak at the base of the plant, not on the leaves. I once spent a whole summer overhead-watering my hydrangeas and ended up with a fungus problem that looked like white flour was dumped on the leaves. Keep the hose at ground level.
Don’t be afraid to cut the flowers and bring them inside. It actually encourages the plant to grow more. A big vase of hydrangeas on your kitchen table makes you feel like you’ve mastered life. If you leave them on the bush, they’ll eventually turn a dusty pink or antique green, which looks pretty cool in the fall. Just don’t prune them too late in the season, or you’ll cut off next year’s “show.”
4. Hostas for Shaded Front Porch Beds
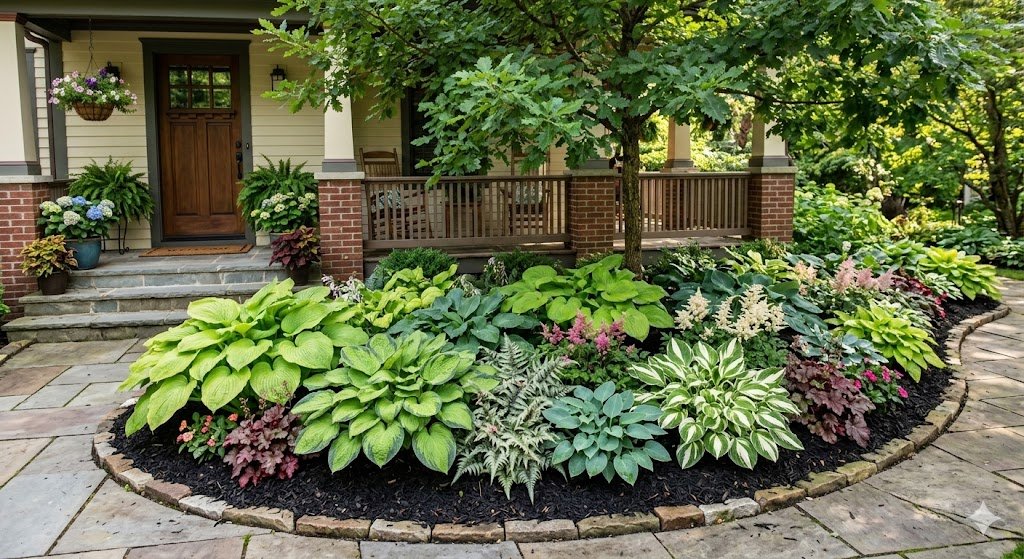
If your front yard is tucked under a giant oak tree or faces north, stop trying to grow grass. It’s a losing battle. Embrace the shade with Hostas. They are basically indestructible. I’ve seen hostas survive being dug up by dogs, trampled by kids, and even partially eaten by deer, only to come back stronger the next year.
There are so many varieties now that you can create a whole garden using nothing but hostas. I like to mix the giant ‘Sum and Substance’ (which can get four feet wide!) with the blue-tinted ‘Halcyon’ and the variegated ‘Patriot.’ The different leaf colors and textures make the shade feel bright and intentional rather than dark and dingy. I once tried to plant “sun-loving” petunias in my shade bed and they ended up looking like sad, spindly neon sticks. Use what works for the light you have.
The “Real Talk” with hostas is slugs. Slugs love hostas like I love a good donut. You’ll know you have them if your leaves start looking like Swiss cheese. I’ve found that a shallow dish of cheap beer tucked under the leaves is the best way to handle them. They crawl in for a drink and… well, they don’t crawl out. It’s gross, but it works better than any chemical I’ve tried.
Hostas are also the easiest plants to “divide.” If your hosta gets too big, you just jam a shovel through the middle of it in the spring, dig up half, and plant it somewhere else. I’ve populated my entire backyard for free just by splitting the hostas in my front yard every three years. It’s the “buy one, get ten” deal that actually works.
5. Adding Vertical Interest with Climbing Roses

Most front-of-house beds stay low to the ground, which is a missed opportunity. You want to draw the eye up toward your architecture. A climbing rose on a trellis or an arbor is a classic move that adds instant romance to a house. I’m a big fan of ‘New Dawn’ because it’s a vigorous grower and the pale pink flowers smell like heaven.
I’ve found that the “Knock Out” roses are great for beginners because they don’t get diseases, but they don’t climb. If you want height, you have to look specifically for “climbers.” They don’t actually “climb” like vines, though; they have long canes that you have to tie to a support. I once planted a climber and just left it, expecting it to know what to do. It ended up crawling across the mulch and tripping the pizza delivery guy. You have to train them.
Pruning roses scares people, but it shouldn’t. Just remember the three Ds: dead, damaged, and diseased. Cut those parts off whenever you see them. For everything else, wait until late winter. I’ve found that a pair of high-quality leather gloves is the best investment you can make. Rose thorns are no joke, and I’ve got the scars on my forearms from a particularly grumpy ‘Joseph’s Coat’ rose to prove it.
Feed them. Roses are hungry. I use a slow-release granular fertilizer in the spring and then again in mid-summer. If you don’t feed them, they’ll still grow, but the flowers will be sparse. It’s like trying to run a marathon on a salad—it’s just not going to happen. A little food goes a long way in getting those “wow” blooms that people stop their cars to look at.
6. Using Evergreen Shrubs for Year-Round Structure
While flowers are great, you need “bones.” Evergreens provide the structure that holds the garden together when the flowers take a nap. Beyond boxwoods, I really like Yews and Dwarf Spruces. A ‘Bird’s Nest’ Spruce is a low-growing, flat-topped evergreen that looks great tucked under a window. It stays small, so you don’t have to worry about it blocking your view of the street.+1
I’ve found that ‘Sky Pencil’ Hollies are a total game-changer for narrow spaces. They grow straight up like green pillars. If you have a small space between your front door and a window, one of these adds height without taking up much floor space. I put two of them on either side of my garage door, and it instantly made the whole house look more “designed.”
Be careful with Junipers. A lot of people love them because they’re “bulletproof,” but some varieties can get really “scratchy” and overgrown. If you plant the wrong kind of juniper under a window, you’ll spend the rest of your life fighting to keep it from eating your house. Stick to the “dwarf” or “creeping” varieties if you want to keep your sanity.
One side note: Evergreens need water in the winter, too. If you have a dry, windy winter with no snow, your evergreens can actually “dry out.” I give mine a good soak in December and February if the ground isn’t frozen. It prevents that “winter burn” where the needles turn brown and crispy. It only takes five minutes, but it saves you from having to buy new shrubs in April.
7. Incorporating Ornamental Grasses for Texture
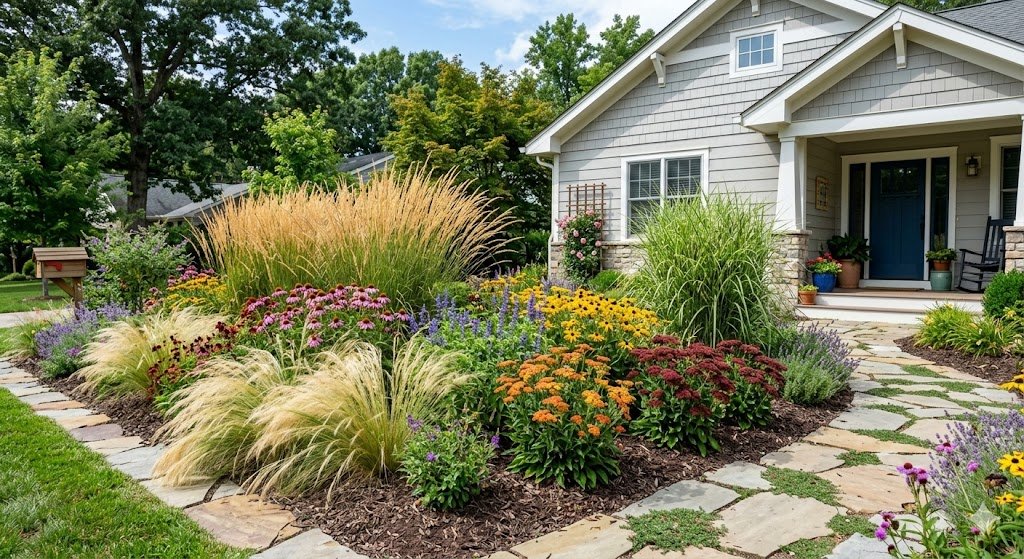
Grasses are the “secret sauce” of modern curb appeal. They add a soft, fuzzy texture that balances out the hard lines of your house. ‘Karl Foerster’ Feather Reed Grass is the industry standard for a reason. It stays in a neat, upright clump and looks like golden wheat by mid-summer. It doesn’t flop over, even in a thunderstorm.
I’ve found that “Pampas Grass” is a total nightmare for most residential front yards. It grows ten feet tall, the leaves are sharp enough to cut skin, and it’s a magnet for trash and dead leaves. Unless you live on a five-acre estate, skip the Pampas and go for something smaller like ‘Blue Fescue’ or ‘Japanese Forest Grass.’ They give you that same “swish” without the maintenance headache.
Maintenance for grasses is basically one day a year. In late winter, you take a pair of hedge shears and cut the whole thing down to about four inches from the ground. That’s it. I once forgot to do this and the new green grass grew up through the old brown stalks, making the whole thing look like a “bad hair day.” Set a reminder on your phone for St. Patrick’s Day—that’s usually the right time to chop them.
Grasses also look fantastic in large pots. If your front-of-house bed is mostly concrete or a porch, a big container with a tall grass in the middle is a simple, high-impact look. It’s a great way to hide ugly utility meters or downspouts. Just make sure the pot is heavy enough that the wind doesn’t knock it over once the grass gets tall and acts like a sail.
8. Planting Bulbs for Early Spring Surprises
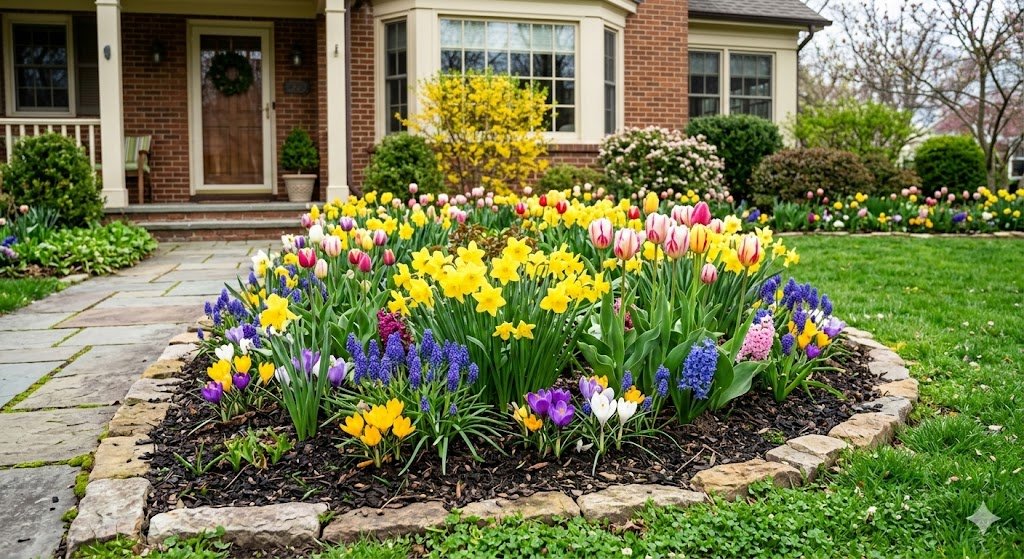
If you want to be the first house on the block with color, you have to think ahead. Planting tulips and daffodils in the fall is a gift you give to your “future self.” When everyone else’s yard is still a muddy gray mess in March, yours will be popping with yellow and red. It’s the ultimate mood booster after a long winter.
I’ve found that “fancy” tulips are often a waste of money because they only bloom for one year and then they’re done. If you want flowers that come back every year, go with Daffodils or Alliums. Critters like squirrels and deer won’t touch them because they taste like onions. I once planted 50 expensive “Parrot Tulips” only to have a family of squirrels dig them all up like they were having a buffet. I stick to daffodils now; they’re “squirrel-proof.”
Planting depth is the only “technical” part. A good rule of thumb is to plant the bulb three times as deep as the bulb is tall. Pointy side up! If you plant them upside down, they’ll still find their way up eventually, but they’ll be exhausted. I use a cordless drill with an auger bit to make the holes. I can plant 100 bulbs in about 20 minutes without breaking my back.
Layer your bulbs. Plant the big ones like Alliums deep, and then put smaller ones like Crocus on top of them in the same hole. It’s called a “bulb lasagna.” You get waves of color coming up in the same spot for about six weeks. Once the flowers are done, let the green leaves turn yellow and die back on their own. Don’t cut them off! That green leaf is the “battery” that charges the bulb for next year.
9. Creating a Clean Edge with Stone or Brick
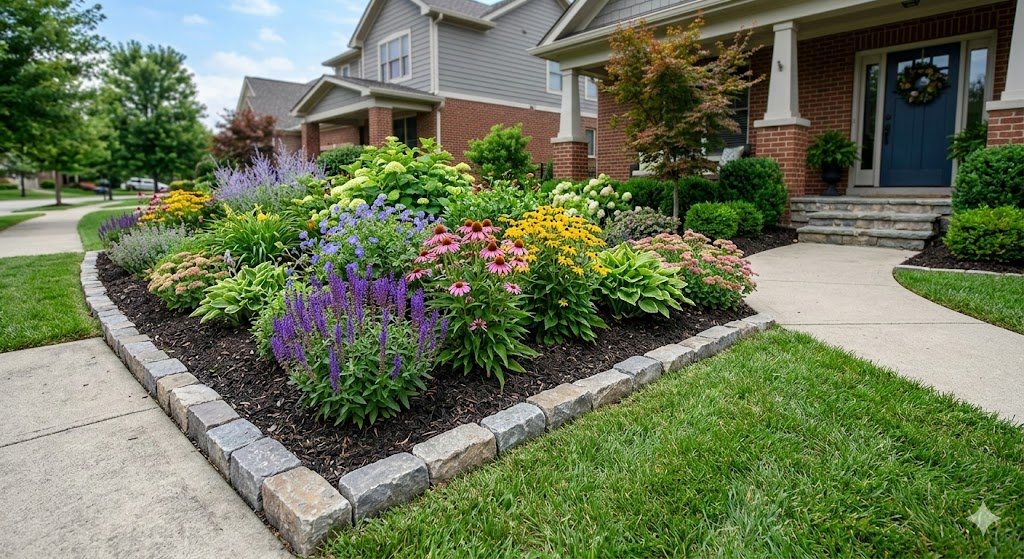
The difference between a “professional” bed and a “messy” one is the edge. A crisp, clean line makes even a simple bed look like a million bucks. I’m a big fan of using a “natural” edge—just a deep V-cut in the dirt—but if you want something permanent, go with tumbled stone or brick. It keeps the grass from crawling into your flowers.
I’ve found that those cheap plastic “picket fence” edgings are a total waste of money. They look tacky, they crack in the sun, and they’re a nightmare to mow around. I once spent a whole Saturday installing them, only to have my weed-whacker shatter three of them on the first pass. Go for something heavy and low-profile. A flat “mowing strip” of bricks set into the ground is my favorite because you can run your mower wheels right over them.
If you’re using stone, make sure you put down a solid base of sand or gravel first. If you just toss stones on the dirt, they’ll sink and get crooked within a year. I’ve made that mistake more than once, and re-leveling a hundred heavy stones is not my idea of a fun weekend. Do it right the first time and you’ll never have to touch it again.
Think about the “shape” of your bed. Curved lines are generally more pleasing to the eye than sharp corners. A nice, wide curve makes your front yard feel larger and more welcoming. Use a garden hose to “layout” the curve on the grass before you start digging. It lets you step back and see the “flow” from the street.
10. Using Annuals for “Instant” Summer Color
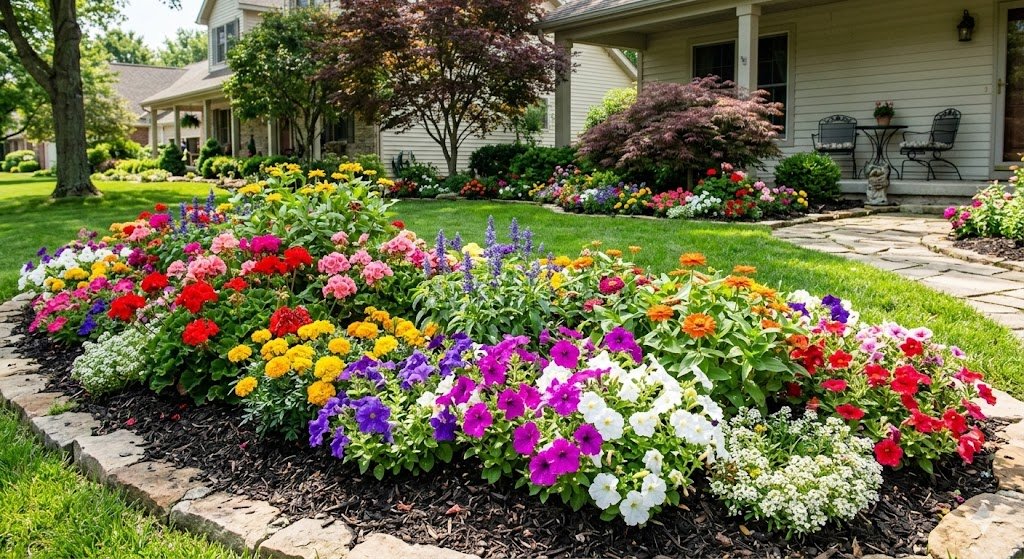
While perennials are the “bones,” annuals are the “jewelry.” These are the plants you buy every year—like Petunias, Marigolds, and Zinnias—to provide non-stop color all summer long. They fill in the gaps while your perennials are growing. I like to use “Wave” Petunias as a ground cover because they spread like crazy and produce thousands of flowers.
I’ve found that buying the “jumbo” flats of annuals is a total waste of money. Buy the small “six-pack” sizes. Annuals grow so fast that within two weeks, you won’t be able to tell the difference, and you’ll save a ton of cash. I once spent $200 on “instant” color for a graduation party, and by the end of the month, the $20 worth of small plants I’d tucked in elsewhere had already caught up to them.
Deadheading is the key to non-stop blooms. If you let the plant “go to seed,” it thinks its job is done and it’ll stop making flowers. Pinch off the old, wilted blooms once a week. It’s a mindless task that you can do while you’re out with your morning coffee. If you’re too busy for that, look for “self-cleaning” varieties like ‘Superbells’ or ‘Angelonia’ that don’t need to be pinched.
Annuals are “heavy feeders.” Because they are blooming their hearts out all season, they need a lot of energy. I use a water-soluble fertilizer every two weeks. If you see the leaves turning light green or yellow, the plant is hungry. Feed it, and it’ll reward you with a second wave of color that lasts until the frost hits.
11. Incorporating a Focal Point Like a Birdbath or Statue
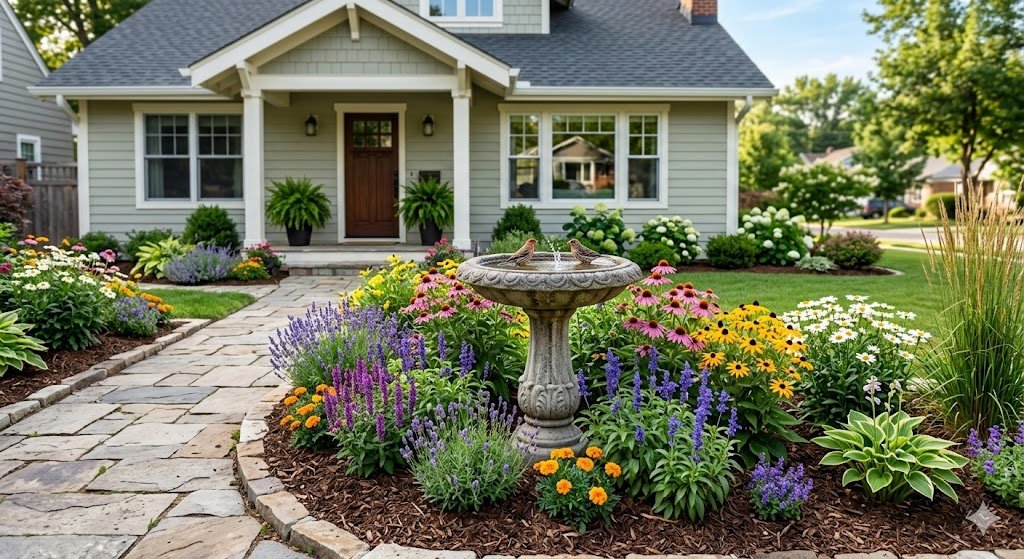
Every good flower bed needs a “place for the eye to rest.” Without a focal point, a garden can just look like a big pile of plants. A stone birdbath, a large glazed pot, or a tasteful piece of art can anchor the whole design. I have a simple, weathered stone birdbath in the center of my front bed, and it’s the most “photographed” part of my yard.
I’ve found that “cutesy” garden gnomes and plastic flamingos are a total waste of curb appeal. They can look a bit cluttered and cheap. If you want to keep it classy, go for natural materials like stone, copper, or heavy ceramic. A single, large blue glazed pot tucked among green shrubs is a sophisticated look that never goes out of style.
Scale is everything. If you have a massive two-story house, a tiny 12-inch birdbath is going to look like a toy. You need something with a little “heft.” Conversely, don’t overwhelm a small bungalow with a giant, multi-tiered fountain. I once tried to put a “life-size” deer statue in my front yard (don’t ask why), and it looked like the deer was about to jump through my living room window. Scale it to your space.
Focal points are also great for filling “dead zones.” If you have a spot where nothing seems to grow—maybe because of a tree root or a weird soil patch—don’t keep fighting it. Put a decorative urn or a bench there. It solves the problem and looks like you planned it that way all along.
12. Using Native Plants for an Eco-Friendly Yard
If you’re tired of watering and spraying for bugs, go native. Native plants are the ones that have lived in your area since before the houses were built. They are adapted to your specific soil and weather, which means they don’t need much help from you. Plus, they support local butterflies and birds better than any “exotic” plant from a catalog.
I’m a big fan of ‘Milkweed’ (Asclepias). It’s the only thing Monarch butterfly caterpillars eat. People used to think of it as a “weed,” but modern varieties like ‘Cinderella’ have beautiful pink flowers and stay in a neat clump. I have a patch of it in my front yard, and every August, it’s covered in Monarchs. It’s a great conversation starter with the neighbors.
I’ve found that “Wildflower Mixes” in a can are a total waste of time. They usually contain a bunch of filler seeds that don’t even grow in your climate. Instead, go to a local nursery and ask for plants native to your specific state. You’ll get much better results. I once tried a “meadow in a bag” on a sunny slope and ended up with a patch of ugly crabgrass and three lonely daisies. Buy actual plants, not “mystery seeds.”
Native plants can look “wild,” so if you want to keep them front-yard-appropriate, use “cues to care.” This is a design term that means putting a neat edge around them or adding a small sign. It tells people, “This isn’t a patch of weeds; it’s a deliberate habitat.” It’s the difference between a messy yard and a “managed” ecosystem.
13. Adding Mulch to Tie Everything Together
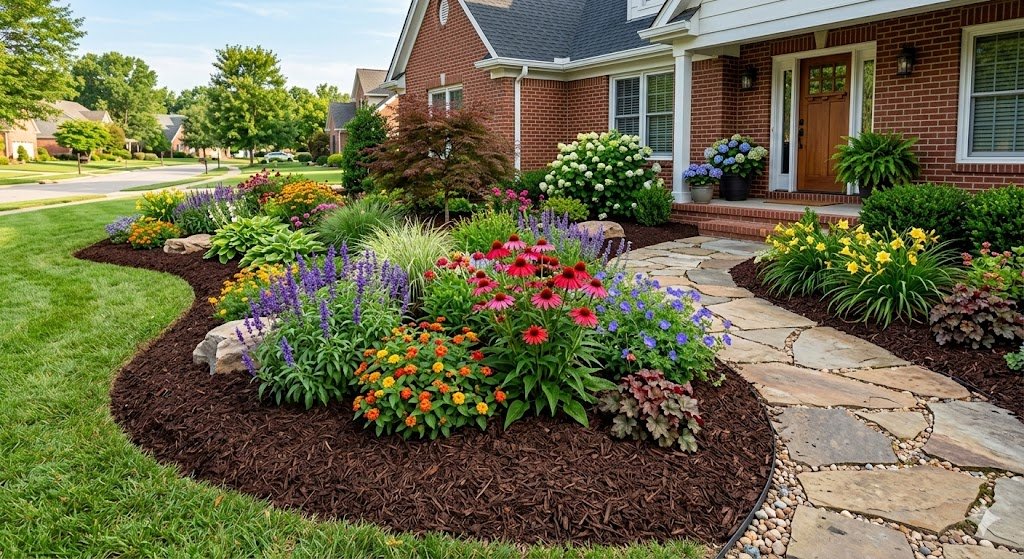
Mulch is the “finishing touch” that makes a garden look complete. It’s like the rug in a living room—it pulls all the different elements together into one cohesive look. Beyond looks, it’s a lifesaver for your plants. It holds in moisture, suppresses weeds, and as it breaks down, it feeds the soil.
I’ve found that “cocoa hull” mulch is a total waste of money if you have a dog. It smells amazing (like a chocolate factory!), but it’s toxic to dogs and they will try to eat it. Stick to pine bark or shredded hardwood. I prefer “triple-shredded” mulch because it’s fine enough that it stays in place and doesn’t float away in a heavy rainstorm. I once used large “bark nuggets” on a slope and after a thunderstorm, I found half of them in the street.
The “Real Talk” on mulch is that you can have too much of a good thing. Don’t pile it up in “mulch volcanoes” around your trees. This traps moisture against the bark and invites rot and insects. You want a flat 2-3 inch layer across the whole bed, like a blanket. I’ve seen 50-year-old trees killed by “over-mulching,” and it’s a tragedy that takes five minutes to fix.
Refresh your mulch every spring. You don’t always need to add a full three inches—sometimes just a “dusting” of an inch is enough to bring back that rich, dark color. I like to do mine in late March before the perennials start popping up. It’s a lot easier to mulch a flat bed than it is to weave your way around a hundred delicate flower stalks.
14. Planning for “Winter Interest”

Your front yard shouldn’t disappear for four months of the year. While the flowers are the “stars” of the summer, you need something to look at in the winter. This is where plants with interesting bark or structure come in. Red Twig Dogwoods are my favorite for this. After their leaves fall, the stems turn a bright, flaming red that looks incredible against the snow.
I’ve found that “Winterberry” holly is a total showstopper. It drops its leaves in the fall, but the branches stay covered in bright red berries all winter long. It’s like a natural Christmas decoration. Just remember that, like most hollies, you need a male and a female plant to get the berries. I’ve seen people buy five females and zero males, and they wonder why they have zero berries. One “Jim Dandy” male can pollinate about six females.
Evergreens are obviously a big part of winter interest, but don’t forget about “hardscape.” A stone wall, a wooden fence, or even a decorative gate provides a visual “anchor” when the plants are dormant. I have a small cedar trellis that I keep clear of vines in the winter just so I can see the “grid” pattern against the siding. It adds a bit of architectural detail when everything else is brown.
Also, don’t be in a rush to “clean up” everything in the fall. I leave my dried flower heads (like Coneflowers and Sedums) and my ornamental grasses until the spring. They catch the snow and provide seeds for the birds. A “dead” garden can actually be quite beautiful if you leave the structural parts standing. Plus, it’s one less chore you have to do in the freezing cold of November.
15. Integrating a Lighting Scheme for Evening Appeal
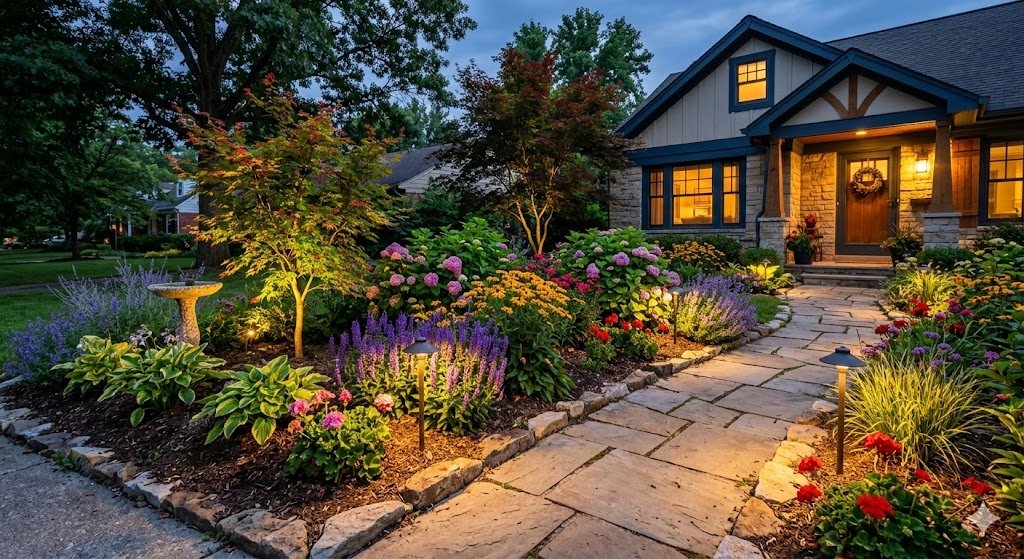
You spend all that time and money on your flower beds; you should be able to see them after 8:00 PM! Landscape lighting is the easiest way to make your house look like a high-end estate. You don’t need a professional electrician—modern LED “low voltage” systems are safe and easy to install yourself.
I’ve found that those cheap “solar stakes” from the dollar store are a total waste of time. They’re dim, they break within a season, and they usually look like “runway lights” if you line them up along a path. Instead, go for a wired system with a transformer. It provides a much warmer, consistent light. I once tried to light my whole front walkway with solar lights and by 10:00 PM, my yard was pitch black. Spend the extra $50 on a wired set.
Focus on “uplighting” your trees and “path lighting” for the walkways. You want the light to be subtle. Don’t point a spotlight directly at your house—it’ll wash out all the detail and look like a security yard. Aim the lights at your favorite plants or the texture of a stone wall. It creates shadows and depth that you don’t even see during the day.
Put your lights on a timer or a “dusk-to-dawn” sensor. There’s nothing better than pulling into your driveway at night and seeing your garden softly glowing. It makes the house feel safe and welcoming. I’ve found that lighting also acts as a great deterrent for intruders—they’d much rather mess with the dark house next door than the one that’s beautifully illuminated.
16. Using Window Boxes for Vertical Color
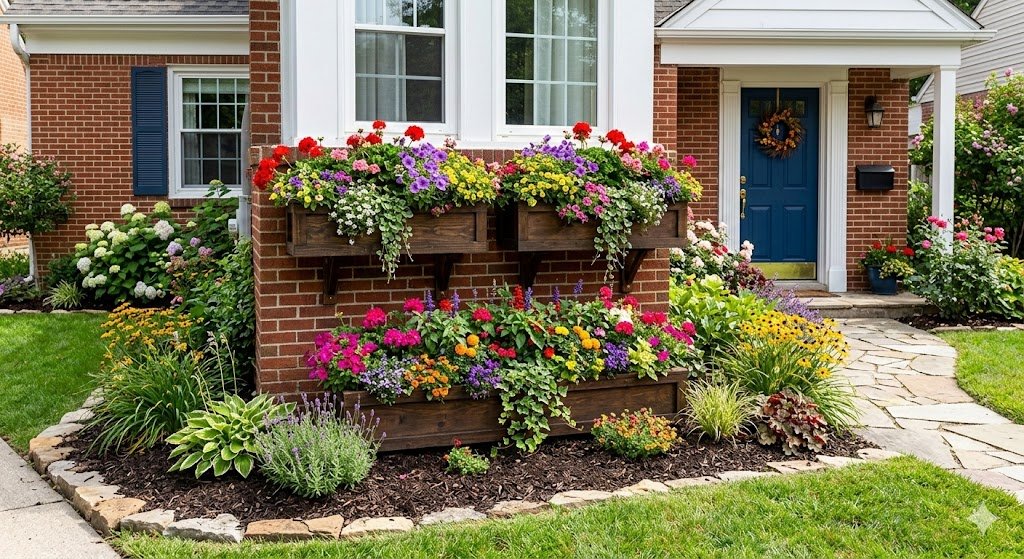
If your flower beds feel a bit detached from the house, window boxes are the “bridge” you need. They bring the garden up to eye level and soften the transition between the siding and the soil. I’m a huge fan of the self-watering versions. I once spent a summer trying to remember to water my cedar window boxes every morning, but I missed three days during a heatwave and ended up with a row of crispy, brown sticks. Self-watering reservoirs are a life-saver for your curb appeal.
The “Real Talk” with window boxes is that they can be heavy. Don’t just screw them into your siding and hope for the best. I once saw a window box full of wet soil rip right off a house, taking a chunk of trim with it. Use heavy-duty brackets and make sure you’re hitting studs. It’s a ten-minute job that saves you a massive repair bill down the line.
For the plants, use the “Thriller, Filler, Spiller” method. A tall Dracaena or Grass in the center, some mounding Petunias or Geraniums around it, and some Sweet Potato Vine or Creeping Jenny to hang over the edge. It creates a lush, overflowing look that makes your windows look twice as big. I’ve found that using the same color palette as your ground beds makes the whole house look more cohesive.
One quick side note: if you have a second-story window box, think about how you’re going to water it. If you have to drag a ladder out every Tuesday, you’re going to hate that window box by July. Stick to drought-tolerant plants like succulents or lantana for those hard-to-reach spots.
17. Creating a Rock Garden for Slope Success
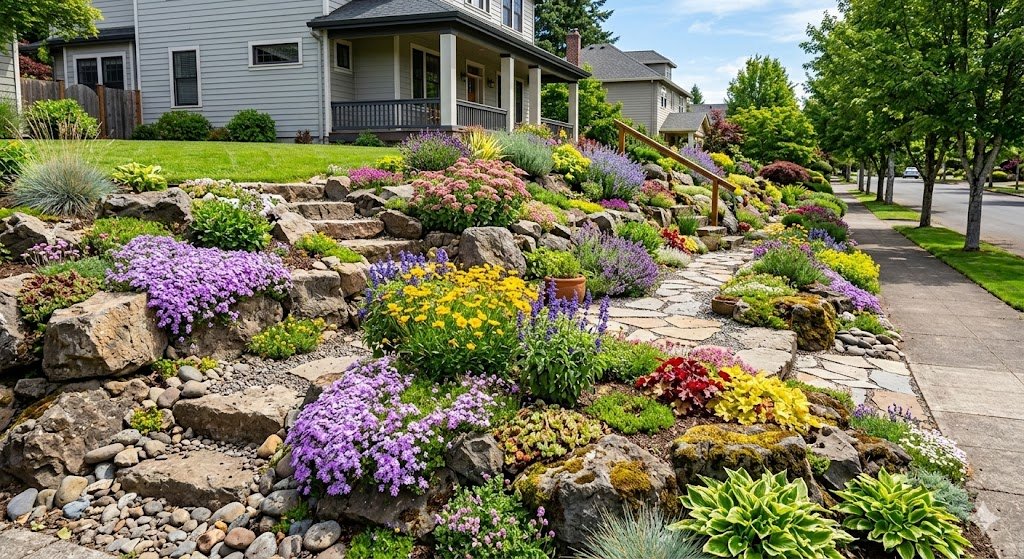
If you have a steep slope in your front yard, stop trying to mow it. It’s dangerous, it’s annoying, and it usually results in patchy grass and erosion. A rock garden is the ultimate solution. By tucking large boulders into the hillside and planting around them, you create a stable, beautiful feature that requires zero gasoline to maintain.
I’ve found that “river rock” is a total waste of time for slopes. It’s round, so it just rolls downhill the moment you step on it. You want “angular” rock—stuff that locks together. I used weathered limestone for a slope in my last house, and it looked like a natural mountain outcropping. It’s much easier to plant between the cracks of jagged rocks than it is to keep mulch on a 45-degree angle.
For plants, go with “alpines” or ground-hugging evergreens. Blue Star Juniper or Creeping Thyme are perfect here. They love the fast drainage that a slope provides. I once tried to plant thirsty Cannas on a rocky hill, and I spent the whole summer watching the water run right past their roots and down into the gutter. Use plants that like it dry.
Rock gardens also give you a great excuse to buy a few “specimen” plants. A single, twisted Japanese Maple or a Dwarf Conifer looks like a piece of sculpture when it’s framed by large stones. It adds a “high-end” feel that a flat bed of mulch just can’t match. Just make sure the rocks are buried at least one-third into the ground so they look like they’ve been there for a century.
18. Decorative Edging with Edible Herbs
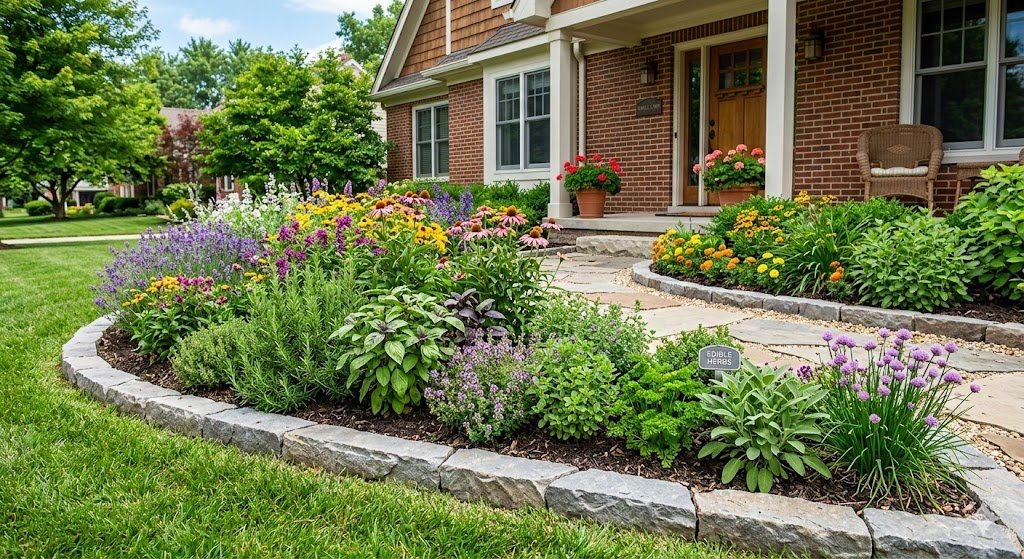
Who says your front yard can’t be tasty? I’ve found that mixing herbs into your front-of-house beds is a genius way to save space and add incredible scent. Rosemary, Lavender, and Sage are all beautiful, hardy plants that look just as good as any ornamental shrub. Plus, brushing against them as you walk to the front door releases an amazing aroma.
Lavender is my absolute favorite for a sunny walkway. It has that silvery foliage that looks great even when it’s not blooming. I’ve found that ‘Munstead’ or ‘Hidcote’ varieties are the hardiest for most climates. Don’t plant them in a spot that stays soggy, though. Lavender hates “wet feet” more than anything. I once planted a row of it near a leaky downspout and they turned into gray mush within a month.
Rosemary can actually be used as a structural shrub. In warmer climates, it can grow into a three-foot hedge. It’s evergreen, it’s drought-tolerant, and it’s basically “pest-proof.” Even the deer in my neighborhood, who treat my hostas like a salad bar, won’t touch the rosemary. It’s a win-win for everyone except the deer.
One “neighborly” tip: if you’re planting herbs in the front yard, make sure they aren’t right where dogs might… well, mark their territory. I keep my “edible” herbs in slightly raised planters or closer to the porch. It’s a bit of “Real Talk” that will make your evening dinner much more appetizing.
19. Incorporating Garden Arbors for Entry Impact
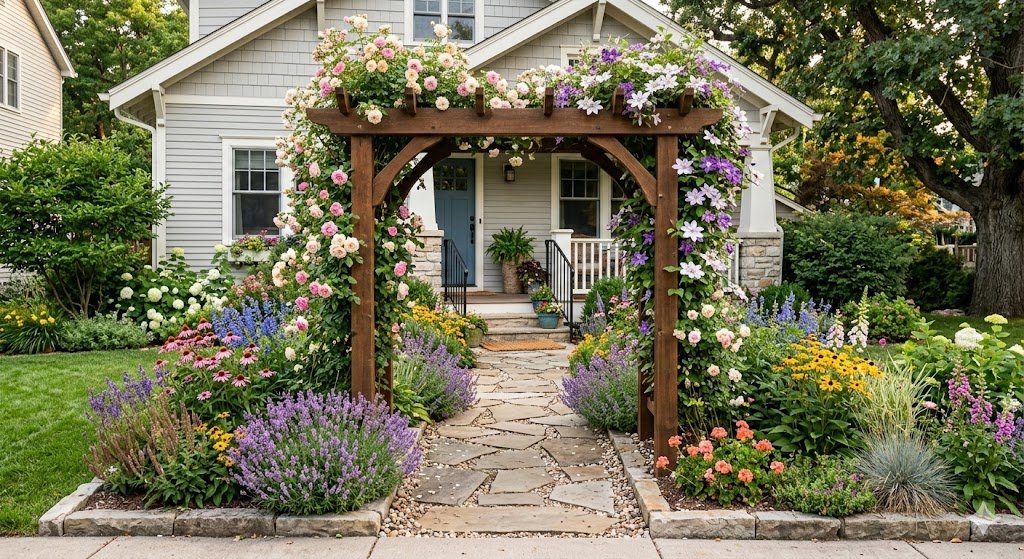
A garden arbor is the ultimate “Welcome Home” sign. It creates a doorway into your private world. If you place one over your front walkway, it instantly elevates the entire property. It’s an architectural element that provides year-round interest, even when the plants are dormant.
I’ve found that those cheap, $50 metal arbors from the big-box stores are a total waste of money. They’re made of thin tubing that will rust out and collapse under the weight of a mature vine in two years. I’ve had to cut a beautiful Clematis off a collapsed arbor, and it’s a heartbreak I don’t want you to experience. Spend the money on a solid cedar or heavy-duty vinyl version.
You can grow almost anything on an arbor, but I love the “double-threat” of Jasmine. It’s evergreen in many areas and the scent is powerful enough to make you stop in your tracks. If you have a lot of sun, a climbing rose is the classic choice. Just make sure you stay on top of the pruning so it doesn’t turn into a thorny tunnel of doom that snags your guests’ hair.
Arbors also give you a place to hang things. A small hanging basket or a set of wind chimes adds another layer of sensory appeal to your front yard. It makes the space feel lived-in and cared for. I’ve found that a well-placed arbor can actually make a small front yard feel much larger because it creates a “destination” rather than just a patch of grass.
20. Designing with Color Blocking for Modern Appeal
If you want your house to look “curated” rather than “cluttered,” try color blocking. This is a design trick where you plant large drifts of the same color together. Instead of one red flower here and one yellow flower there, you plant a massive sweep of ten red flowers. It’s much more high-impact and looks much more professional.
I’ve found that sticking to a “triad” of colors is the easiest way to make this work. Maybe you go with Purple, Yellow, and Green. Or White, Blue, and Silver. I once tried to do a “rainbow” garden with every color in the catalog, and it just looked like a circus exploded in my front yard. It was visually exhausting. Limiting your palette makes the whole design feel more intentional and calm.
Use your house color as the starting point. If you have a blue house, orange and yellow flowers will pop beautifully. If you have a red brick house, white and silver foliage will make it look crisp and clean. I’m very opinionated about “white gardens”—they look incredible at dusk and make a small space feel much brighter.
The “Real Talk” on color blocking is that you have to be disciplined. When you’re at the garden center and you see that one “cool” plant that doesn’t fit your color scheme, you have to walk away. It’s hard, I know. But the result is a garden that looks like it belongs in a magazine rather than a clearance rack.
21. Integrating a Small Water Feature for Sound
The one thing most front yards are missing is sound. A small, recirculating fountain or a “bubbling rock” adds a layer of tranquility that masks the sound of traffic and nosy neighbors. You don’t need a full-blown pond with koi fish—those are a massive maintenance headache. A simple “plug-and-play” fountain is all you need.
I’ve found that those “solar powered” fountains are a total waste of energy. They only work when the sun is directly hitting them, and the second a cloud passes over, they stop. It’s an inconsistent, sputtering mess. Get a small, low-voltage electric pump. It’s quiet, reliable, and costs about two cents a month to run. I have a small stone urn that bubbles over into a bed of river rock, and it’s the most relaxing part of my entire property.
Water features also attract birds in a way that feeders can’t. Birds need to bathe and drink, and the sound of moving water is like a siren song to them. I’ve seen more cool birds in my front yard since I added the fountain than I ever did with just a birdhouse. It’s a great way to bring some nature right to your doorstep.
One final “neighborly” warning: check your fountain every few days in the summer. Water evaporates faster than you think, and if the pump runs dry, it’ll burn out. I once lost a $50 pump because I went on a long weekend and the sun drank all the water before I got back. Keep it topped off, and it’ll keep your front yard feeling like a five-star spa.
Real Talk: What’s Not Worth the Effort
I’m a big believer in “lazy gardening”—not because I’m lazy, but because I want to enjoy my yard, not be a slave to it. First on my “Don’t Bother” list: English Ivy. I know it looks “classic” and “cottage-core,” but it is an invasive nightmare. It will climb your trees and kill them, it will find its way into your siding, and once you have it, you can never, ever get rid of it. I’ve spent years digging out ivy from a previous owner, and I’m still not done.
Second: “Fancy” high-maintenance lawns. If you want a front yard that looks like a golf course, you’re going to spend every Saturday mowing, fertilizing, and spraying chemicals. I’ve found that shrinking the lawn and expanding the flower beds is a much better use of time. A smaller lawn is easier to keep green, and the flower beds add much more “value” and beauty to the property.
Third: “Drop-in” annual planters. I see people buy those massive pre-planted pots and just plop them in the middle of a bed. They usually dry out too fast because they’re root-bound, and they never look “integrated” into the garden. It’s much better to plant things directly into the ground. If you want a pot, use it as a focal point, not a replacement for a real flower bed.
Lastly: Trying to change your soil pH to grow “fussy” plants. If you have alkaline soil, don’t try to grow blue hydrangeas or blueberries. You’ll be dumpng sulfur and chemicals into the ground forever, and the plant will still struggle. Pick plants that love your soil. Gardening with nature is a joy; gardening against it is a full-time job that you aren’t getting paid for.
Wrap Up
At the end of the day, your front flower bed should reflect you. Don’t get too caught up in the “rules.” If you love a certain color or a weird-looking plant, put it in! Gardening is a journey of trial and error, and every “mistake” is just a lesson in what not to do next time.
What’s the one plant in your front yard that currently makes you want to pull your hair out? Let’s talk about a replacement for it in the comments below!