
Building your own raised garden bed is one of the most empowering things you can do for your backyard. I remember the first time I ditched the traditional “in-ground” rows for a structured bed. Suddenly, my back didn’t ache after weeding, the drainage was perfect, and my neighbors actually stopped to compliment my yard.
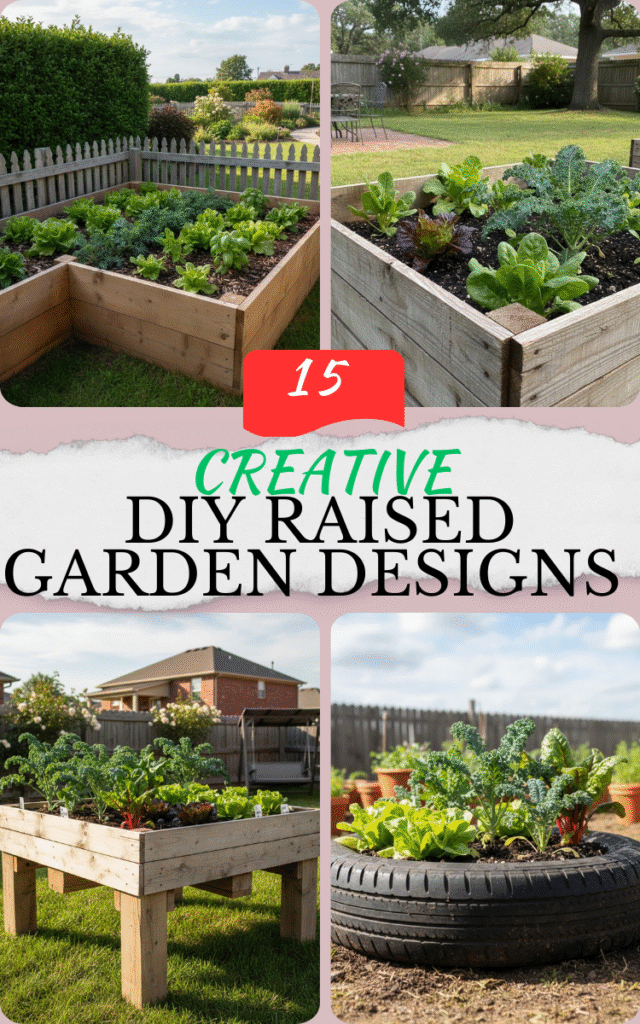
Raised beds give you total control over your soil quality and keep those pesky weeds from creeping into your veggie patch. Whether you have a sprawling suburban lot or a tiny urban balcony, there is a design here for you.
In this guide, I’m walking you through 15 of my favorite DIY raised garden bed ideas. We’ll cover everything from budget-friendly pallet builds to elegant cedar-and-metal designs. Let’s get growing!
Things to Consider Before You Build
Before you grab your drill, you need a plan. The biggest mistake I see beginners make is putting a beautiful bed in a spot where plants can’t survive. First, look at the sun. Most vegetables need 6 to 8 hours of direct sunlight. If your chosen spot is under a giant oak tree, your tomatoes will struggle.
Second, think about water. You don’t want to be dragging a heavy hose 50 yards across the yard every morning. Build your beds within reach of a spigot or an existing irrigation line. It makes the “chore” of gardening feel a lot more like a hobby.
Finally, let’s talk dimensions. I always recommend keeping your beds no wider than 4 feet. Why? Because you want to be able to reach the center from either side without ever stepping on the soil. Stepping on the soil compacts it, which makes it harder for roots to breathe. For height, 6 to 12 inches is standard, but if you have back issues, 18 to 24 inches is the “sweet spot” for comfort.
15 Raised Garden Designs You Can Build This Weekend
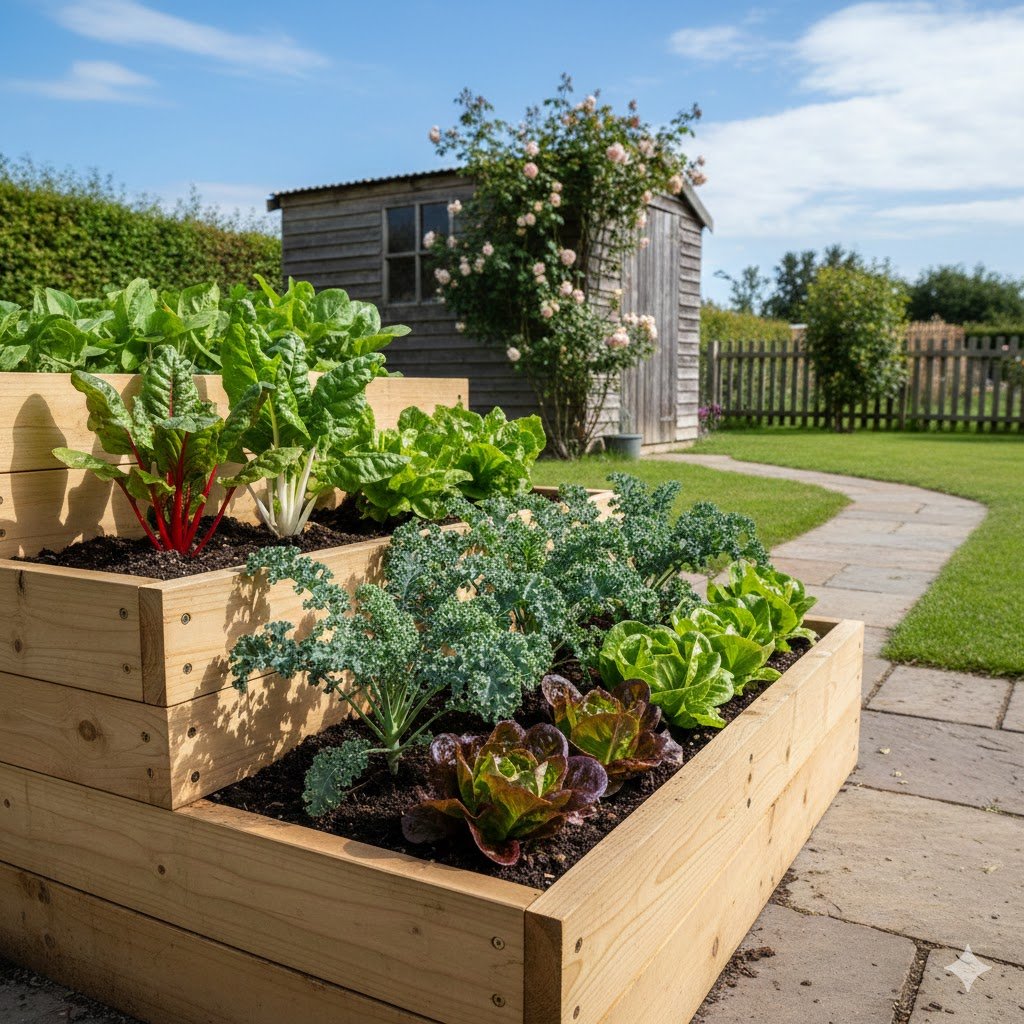
1. The Classic Pallet Bed
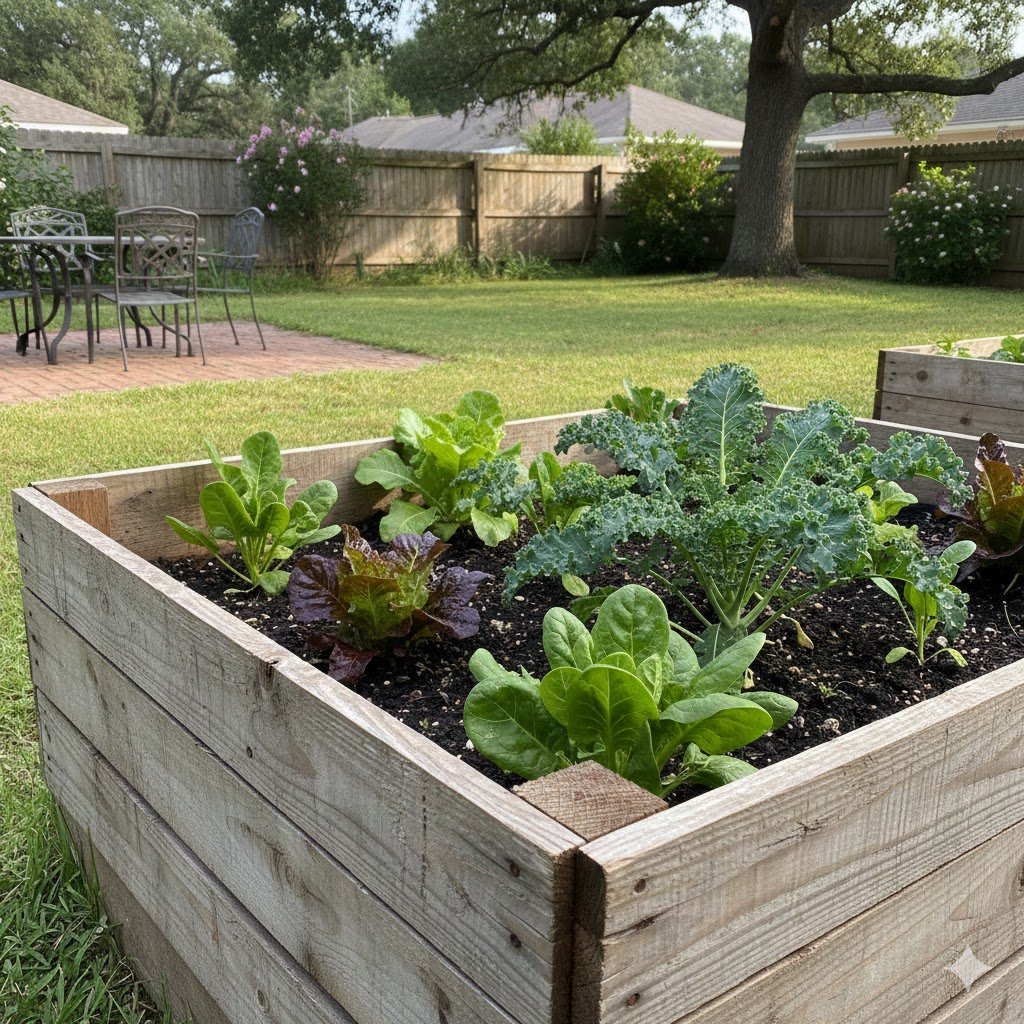
If you are looking for the absolute cheapest way to get started, the pallet bed is your best friend. You can often find heat-treated pallets for free behind local hardware or grocery stores. They offer a rustic, “shabby-chic” look that fits perfectly in any backyard. Just make sure the pallet is stamped with “HT,” which means it was heat-treated rather than chemically treated.
To start, you’ll want to dismantle the pallets carefully using a crowbar. This is probably the hardest part of the project because those nails are stubborn! Once you have your individual slats, you can cut them to equal lengths. I like to use four sturdy 4×4 posts in the corners to give the bed structure.
Next, screw the slats into the corner posts. You can leave small gaps between the boards for extra drainage, or butt them up tight for a cleaner look. Because pallet wood is usually thin, I recommend lining the inside with landscape fabric to keep the soil from washing out through the cracks.
Once the frame is built, give it a quick sanding. You don’t need it to be smooth as a dining table, but removing the big splinters will save your hands later. If you want it to last more than two seasons, apply a coat of food-safe linseed oil to protect the wood from rot.
Finally, set your bed in its permanent home and fill it up. This project usually takes me about two hours from start to finish. It’s a fantastic way to recycle material that would otherwise end up in a landfill, and the cost is essentially zero if you already have some screws lying around.
2. Modern Corrugated Metal and Wood
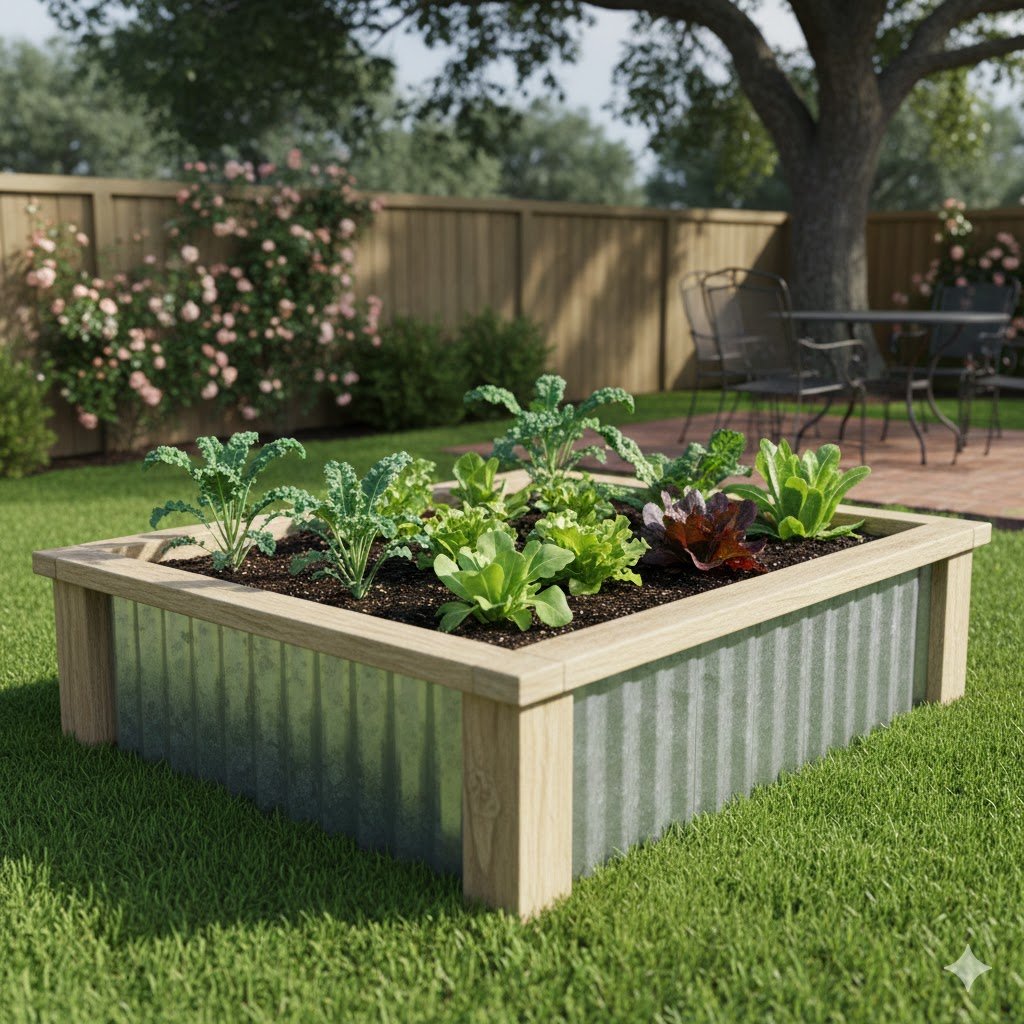
This is my personal favorite because it looks like something straight out of a high-end landscaping magazine. The contrast between the warm wood tones and the cool, industrial metal is stunning. It’s also incredibly durable. While wood eventually rots, corrugated metal can last for decades.
To build this, you’ll create a wooden “picture frame” for each of the four sides. Use rot-resistant wood like cedar or redwood for the best results. You’ll want to cut a groove into the wood or use small cleats to hold the metal panels securely in place. The metal itself should be galvanized to prevent rust.
When cutting the metal, please wear heavy-duty gloves and eye protection. The edges are razor-sharp! I use a circular saw with a metal-cutting blade, but tin snips work too if you have strong wrists. Slide the metal into your wooden frames and secure them with roofing screws that have rubber washers to prevent leaks.
Assembly is straightforward: join your four framed panels at the corners using 4×4 posts. I recommend building these on a flat surface like a garage floor before moving them to the garden. Since the metal reflects heat, these beds are excellent for heat-loving crops like peppers and eggplants.
The final result is a bed that won’t bow or warp over time. It adds a sophisticated architectural element to your garden. While the materials cost more than a pallet bed, the longevity and “wow factor” make it a solid investment for any serious gardener.
3. The Waist-High Elevated Bed
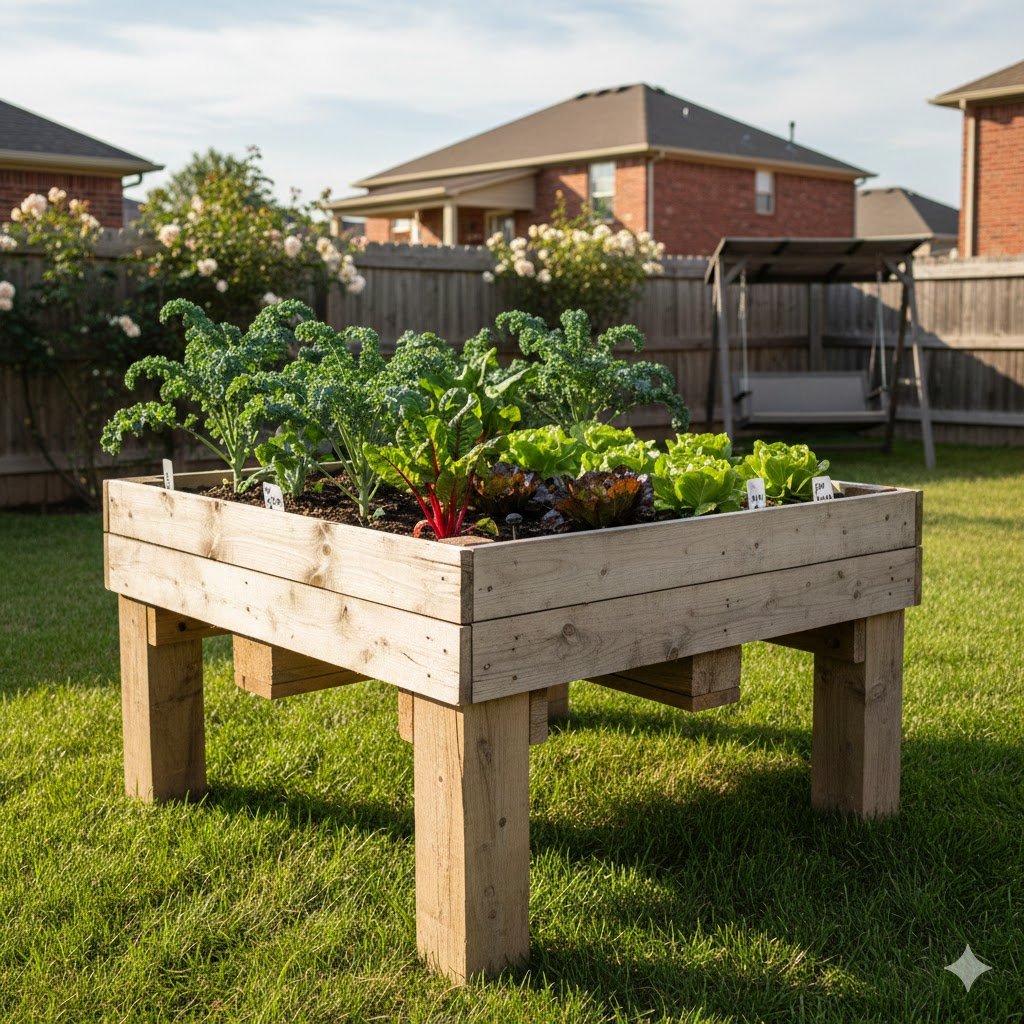
If you’re tired of your knees cracking every time you go to pick a radish, this is the design for you. An elevated bed is essentially a large planter box on legs. It’s perfect for patios, decks, or for anyone with mobility issues. It brings the garden up to you, rather than making you go down to it.
Start by building a deep box, usually about 10 to 12 inches deep. You’ll need heavy-duty lumber for this because wet soil is incredibly heavy. I recommend using 2×6 or 2×8 boards for the sides. For the floor of the box, use sturdy slats with about 1/4-inch gaps for drainage, and cover them with a layer of landscape fabric.
The legs are the most important part of this build. Use 4×4 posts and bolt them to the outside of the box using carriage bolts. Don’t just use screws; they can shear off under the weight of the soil. I like to add a “stretcher” bar between the legs near the bottom to keep the whole unit from wobbling.
One tip for elevated beds: they dry out faster than beds on the ground. To manage this, I often install a simple drip line or use a self-watering insert. You can also add a small shelf on the bottom “stretcher” bars to hold your watering can, trowel, and gardening gloves.
This design is a game-changer for accessibility. It also keeps your plants completely out of reach of rabbits and most ground-dwelling pests. It’s like having a kitchen counter outside that happens to grow delicious salad greens.
4. The Cinder Block Garden
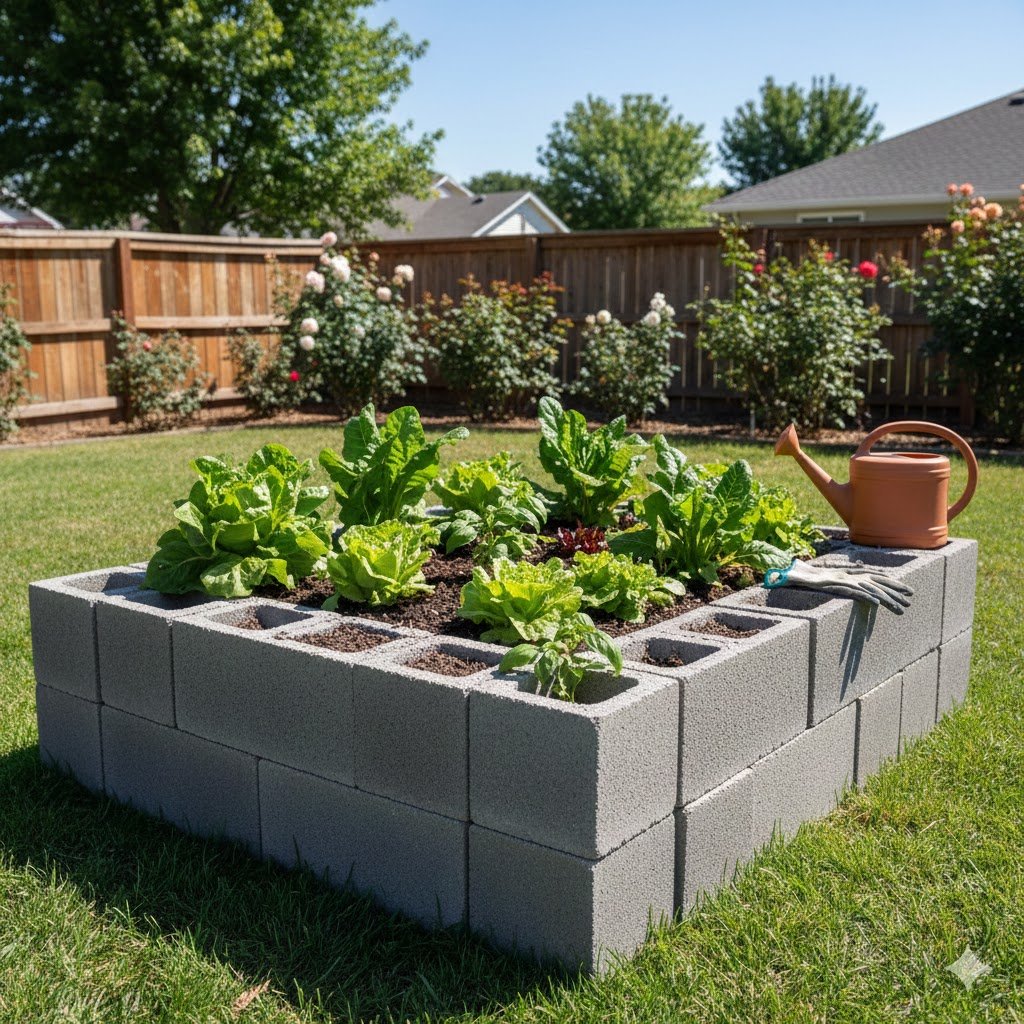
Don’t underestimate the humble cinder block. If you want a garden bed that you can build in 15 minutes without a single power tool, this is it. It’s basically “Legos for adults.” Cinder blocks are inexpensive, fireproof, and won’t rot, making them a permanent fixture in your landscape.
First, clear the area and level the ground as much as possible. Lay your blocks in a rectangle, ensuring the corners are square. The best part? You can use the “holes” in the cinder blocks as mini-planters. I love planting marigolds or herbs like thyme in the blocks while the main veggies grow in the center.
If you want a taller bed, you can stack a second layer of blocks. I recommend staggering the seams (like a brick wall) to make it more stable. If you live in an area with shifting soil, you can drive lengths of rebar through the holes and into the ground to lock the blocks in place.
One aesthetic tip: cinder blocks aren’t the prettiest things in the world. However, you can easily paint them with masonry paint to match your house, or even apply a thin layer of stucco for a Mediterranean look. Over time, moss might grow on the north-facing side, giving it a lovely aged appearance.
Filling a cinder block bed is easy, but remember that the blocks can soak up heat during the day. This is a huge benefit in the spring when you want to warm up the soil early, but keep an eye on watering during the peak of summer. It’s a rugged, functional, and nearly indestructible gardening solution.
5. U-Shaped “Walk-In” Garden
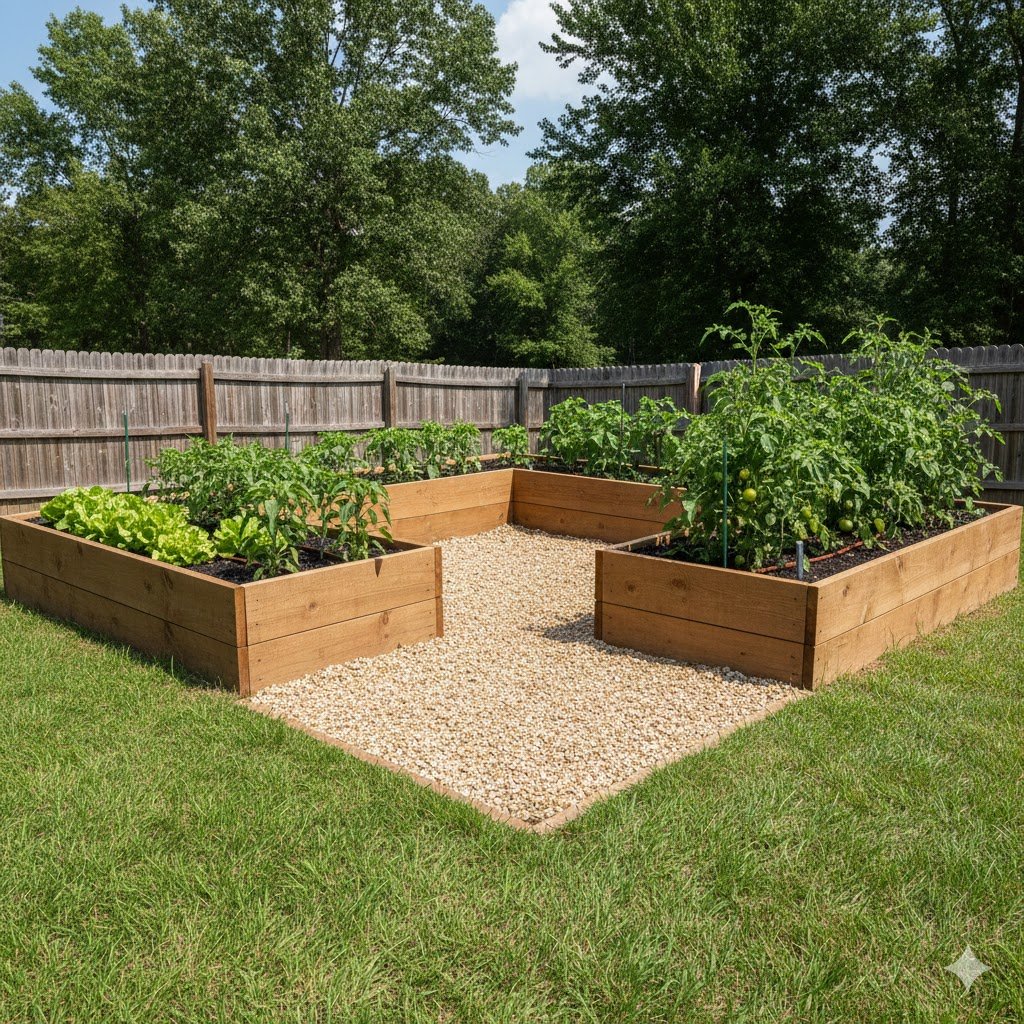
When you start getting serious about homesteading, you realize that square beds have a lot of wasted “pathway” space. A U-shaped bed solves this by creating a massive growing area with a single entry point. You stand in the middle of the “U,” and everything you need to harvest is within arm’s reach.
To build this, you’re essentially creating three long rectangular beds and joining them together. The “arms” of the U should be no wider than 3 feet so you can reach across them easily. The center notch should be wide enough for you to stand comfortably—or even fit a wheelbarrow if you’re fancy.
I usually build these using 2×12 Douglas Fir or Cedar boards. Because the spans are long, you must use internal bracing. Every 4 feet, I drive a wooden stake into the ground and screw the sideboards into it. This prevents the weight of the soil from bowing the wood outward over time.
This layout is incredibly efficient for vertical gardening. You can run a trellis across the back of the “U” for tall plants like corn or sunflowers, and use the side arms for lower-growing crops. It creates a “micro-climate” in the center that stays a bit more humid and protected from wind.
The U-shape also looks very intentional and professional. It defines a specific “garden zone” in your yard. While it requires more lumber and soil than a single rectangle, the productivity per square foot is much higher. It’s the ultimate setup for the backyard chef who wants a “grocery store” in their backyard.
6. Upcycled Tire Garden
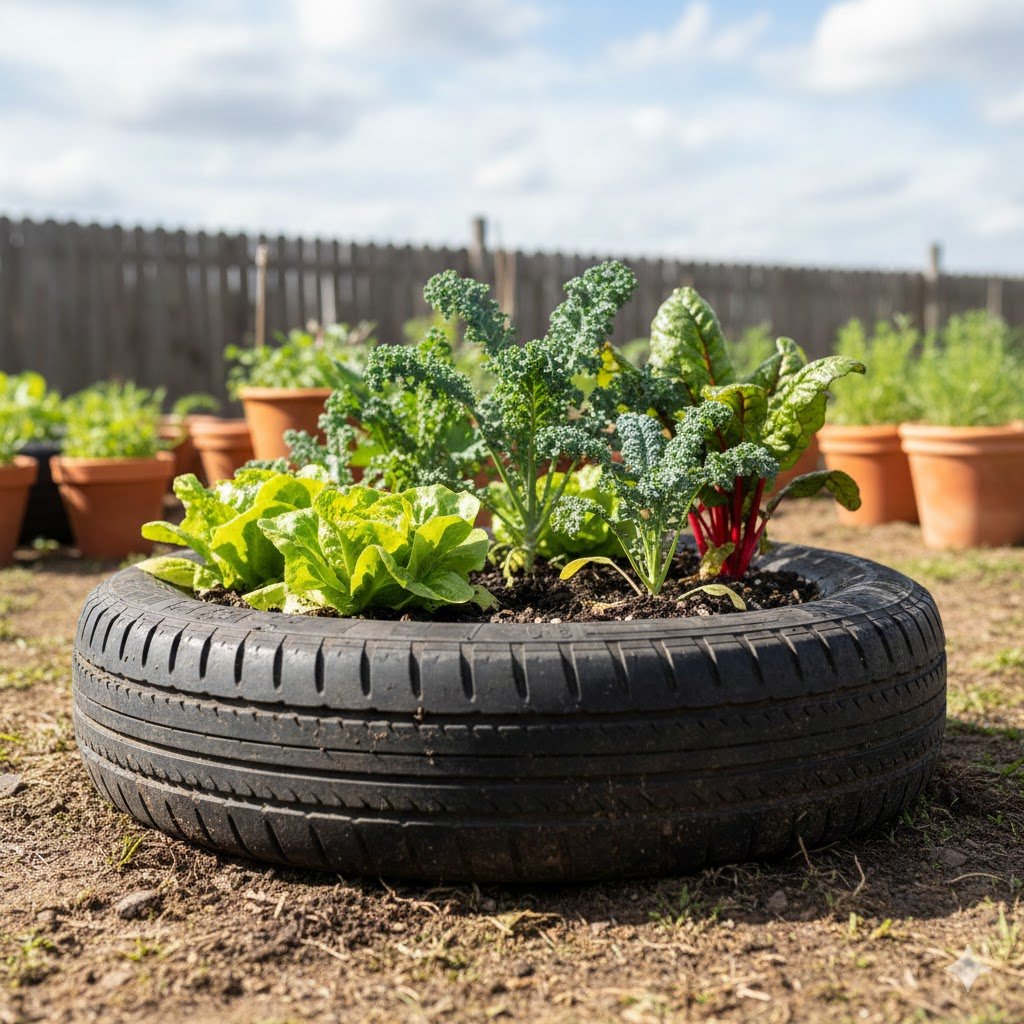
I know what you’re thinking—tires in the garden? But hear me out. Upcycling old tires is a fantastic way to keep them out of the dump, and they make surprisingly good individual planters. They are especially great for “hill” crops like potatoes, squash, or pumpkins.
Preparation is key here. You want to wash the tires thoroughly with soap and water. Some people worry about chemicals leaching, so I recommend using these for ornamental flowers or lining them with plastic if you’re growing food. A great trick is to use a jigsaw to cut off the top “rim” of the tire, which opens up the planting surface area.
Stacking tires is where the fun begins. You can create a “staircase” of tires on a slope to prevent erosion while growing a vertical wall of flowers. If you’re growing potatoes, you can start with one tire and add a second one as the plant grows, filling it with soil to encourage more tubers to form.
To make them look less like a junkyard and more like a garden, grab some outdoor-rated spray paint. Bright colors like turquoise, yellow, or terracotta can transform a black rubber tire into a vibrant piece of garden art. It’s a great project to do with kids because they can help pick the colors.
The thermal mass of the rubber is a secret weapon. It absorbs heat during the day and keeps the soil warm at night. This can give you a two-week head start on the season. It’s a quirky, eco-friendly, and virtually free way to expand your growing space.
7. The Tiered “Staircase” Bed
If your backyard is on a hill, don’t fight the slope—use it! A tiered or staircase bed turns a difficult-to-mow incline into a beautiful, productive focal point. It works by creating “steps” of soil, each held back by a wooden or stone retaining wall.
Start at the bottom of the hill. Build your first rectangular frame. The back of this frame will actually serve as the front of the next level up. You’ll need to “cut” into the hillside slightly to level each tier. Using long pieces of rebar to anchor the frames into the hill is a must to prevent the whole thing from sliding during a heavy rain.
Materials-wise, 4×4 or 6×6 landscape timbers work best here because they have the weight and thickness to act as retaining walls. I like to use timber screws (long, heavy-duty screws) to “knit” the layers together. Cedar is the gold standard, but pressure-treated wood (rated for ground contact) is a more budget-friendly alternative.
The beauty of tiers is that you can organize your plants by height and sunlight needs. Put the tallest plants at the top so they don’t shade out the ones below. You can also install a simple gravity-fed watering system, where water starts at the top and trickles down to the lower levels.
This design adds massive curb appeal. It transforms a “problem area” of the yard into a lush, green staircase. It’s a bit more labor-intensive because of the digging and leveling, but the result is a permanent structure that looks like it was designed by a pro.
8. Milk Crate Vertical Wall
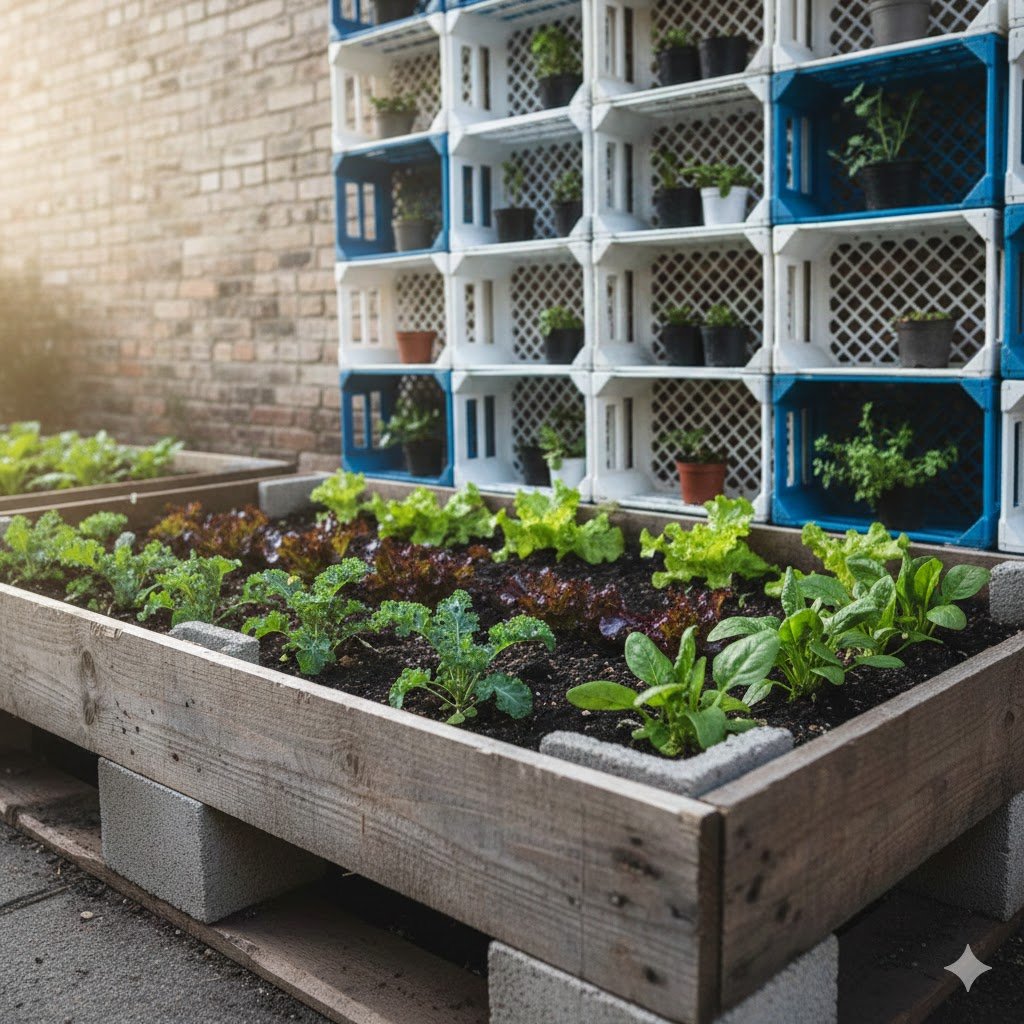
This is the ultimate “no-yard” solution. If all you have is a sunny wall or a balcony, milk crates are your secret weapon. They are lightweight, have built-in handles, and come with perfect drainage holes already included.
To make this work, you need a sturdy vertical support. I’ve seen people use old wooden pallets stood on end, or even a simple frame made of 2x4s. You can attach the milk crates to the frame using heavy-duty zip ties or screws with large washers. Make sure the frame is securely anchored to the wall so it doesn’t tip over.
Line each crate with landscape fabric to keep the soil in place. Because milk crates aren’t very deep, they are perfect for “shallow-root” crops. Think lettuces, spinach, strawberries, and herbs. You can essentially have a “salad wall” right outside your kitchen door.
The versatility is what I love most. If a frost is coming, you can easily snip the zip ties and bring the crates indoors. If one plant gets a disease, you can swap out that single crate without affecting the rest of the garden. It’s modular gardening at its finest.
For a cleaner look, stick to one color of crate—all black or all forest green looks surprisingly sophisticated. If you want a pop of color, mix and match. It’s a fun, industrial, and highly functional way to grow food in the city.
9. The Keyhole Garden
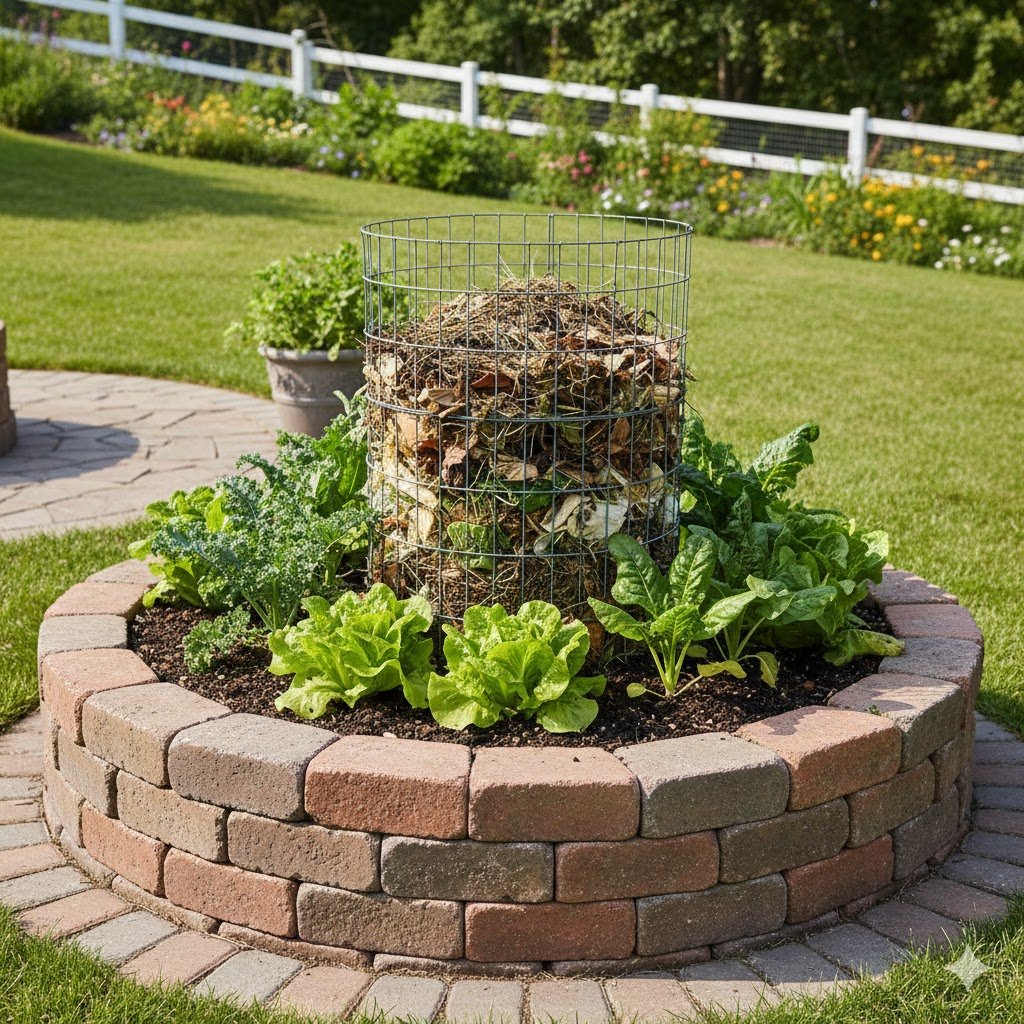
The Keyhole garden is a brilliant design that originated in Africa for areas with poor soil and little water. It’s a circular bed with a “slice” taken out—like a keyhole—so you can walk to the center. In the very middle sits a composting basket.
To build the outer wall, you can use stones, bricks, or even woven branches. The wall should be about waist-high. The center composting basket is usually made of chicken wire. As you add kitchen scraps and water to the center basket, the nutrients leach out into the surrounding soil, feeding your plants directly.
The soil in a keyhole garden is sloped. It should be highest near the center basket and slope down toward the outer edges. This encourages the nutrient-rich water to flow toward the roots. It’s a self-fertilizing, highly efficient system that requires very little maintenance once it’s set up.
I love this design because it’s a closed-loop system. Your kitchen waste goes in, and fresh vegetables come out. It’s also a great conversation piece. People are always fascinated by the “basket in the middle” and how it works.
If you have a circular patio or a round patch of grass, this fits the geometry perfectly. It’s an organic, beautiful way to garden that prioritizes soil health. It’s especially great for dry climates where every drop of water counts.
10. Log Cabin Style Bed
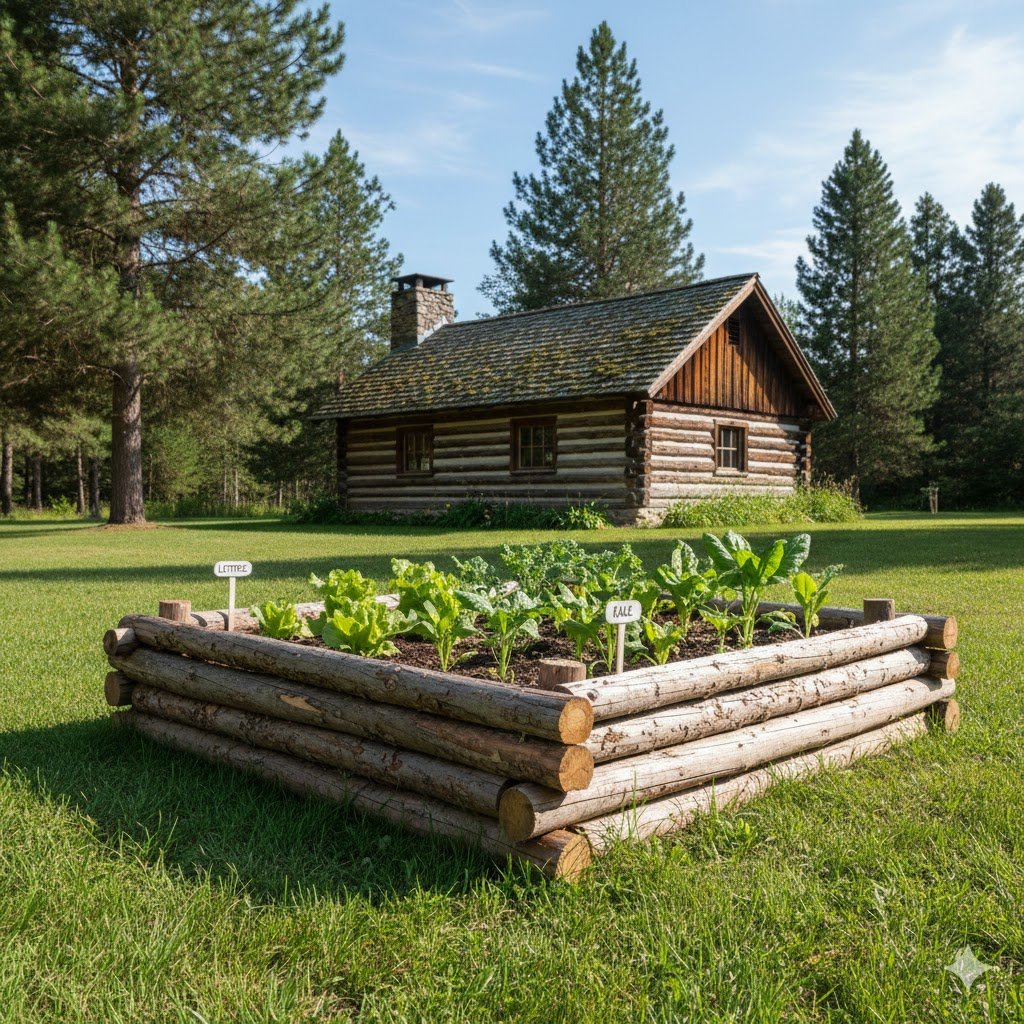
If you live near a wooded area or have recently taken down a tree, you have all the materials you need for a log cabin bed. This design uses small logs or thick branches stacked on top of each other, just like a pioneer cabin. It’s the most “natural” looking bed you can build.
Start with four of your straightest, thickest logs for the base. You can “notch” the ends with a chainsaw or a hatchet so they lock together, or simply stack them and drive long pieces of rebar through the corners to hold them in place. The height is up to you—just keep stacking until you’re happy.
One of the benefits of using raw logs is that as the wood slowly breaks down over the years, it actually feeds the soil. This is a concept called Hugelkultur. If you want to go full-on Hugelkultur, you can fill the bottom of the bed with smaller sticks and leaves before adding your topsoil.
To prevent the logs from rolling or shifting, I recommend digging a shallow trench (about 2 inches deep) for the first layer to sit in. This grounds the bed and prevents soil from washing out underneath. It’s a very sturdy design that can handle the pressure of a lot of soil.
This bed looks right at home in a cottage garden or a wooded backyard. It’s rustic, rugged, and costs absolutely nothing if you have access to timber. It’s a great way to turn “yard waste” into a productive garden feature.
11. Stacked Stone or Paver Bed
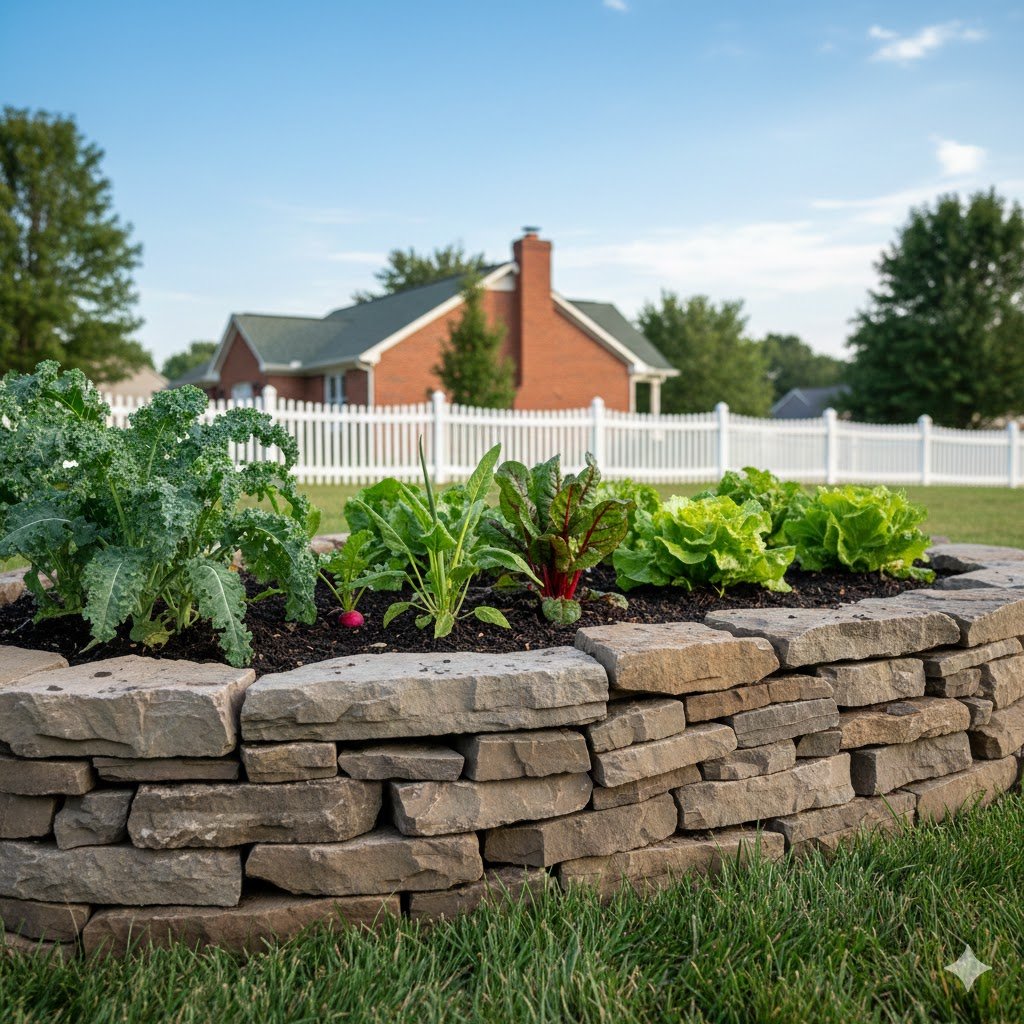
For a look that lasts a lifetime, you can’t beat stone. Whether you use natural fieldstone from your property or decorative pavers from the store, a stone raised bed is a permanent landscape feature. It doesn’t rot, it doesn’t blow away, and it looks better every year.
If you’re using pavers, look for the “retaining wall” type that has a small lip on the back. This lip allows the blocks to lock together as you stack them, preventing the wall from leaning outward under the weight of the soil. You don’t even need mortar for these—they stay put through gravity and friction.
For natural stone, it’s more like a puzzle. You want to “dry-stack” the stones, placing the larger, flatter ones at the bottom. Fill the gaps with smaller stones or soil. A dry-stacked stone wall actually provides tiny homes for beneficial insects like predatory beetles that eat garden pests.
Stone has incredible thermal mass. It stays cool in the heat of the day and releases that warmth at night. This is wonderful for Mediterranean herbs like rosemary, lavender, and sage. They love the drainage and the consistent root temperature that stone provides.
While stone is the most expensive and heavy material to work with, it’s a “one and done” project. You will never have to rebuild it. It adds significant value to your home and creates a timeless, elegant aesthetic in your outdoor space.
12. Bed with Integrated Trellis
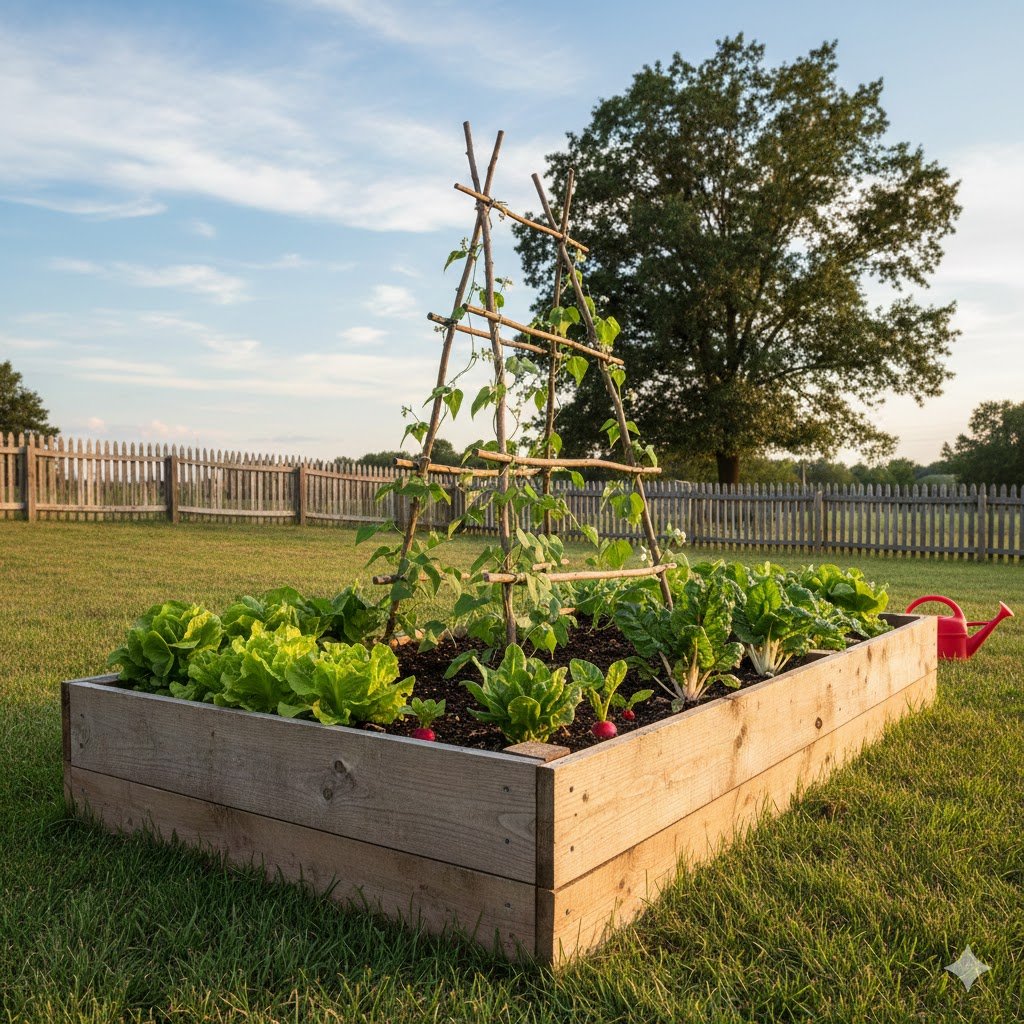
Why grow out when you can grow up? Adding a trellis directly to your raised bed allows you to grow vining crops like cucumbers, pole beans, and even small melons. It doubles your growing space without taking up any more of your yard.
Building this is easy. Simply attach two tall 2×2 or 2×4 posts to the back of your raised bed frame. You can then stretch cattle panels, nylon netting, or even a series of horizontal wires between the posts. I prefer cattle panels because they are rigid and can support the weight of heavy pumpkins.
Position your bed so the trellis is on the north side. This way, the tall climbing plants won’t shade out the smaller plants in front of them. It’s a great way to create a “living privacy screen” between you and your neighbors.
One pro-tip: make sure your trellis is anchored deeply into the bed frame. On a windy day, a trellis full of heavy bean vines acts like a sail. Use heavy-duty bolts to secure the uprights to the main garden box.
Watching a wall of green climb up your trellis is incredibly satisfying. It makes harvesting much easier—no more hunting through prickly cucumber leaves on the ground! It’s a functional, vertical upgrade that every raised bed should eventually have.
13. Enclosed Pest-Proof Bed
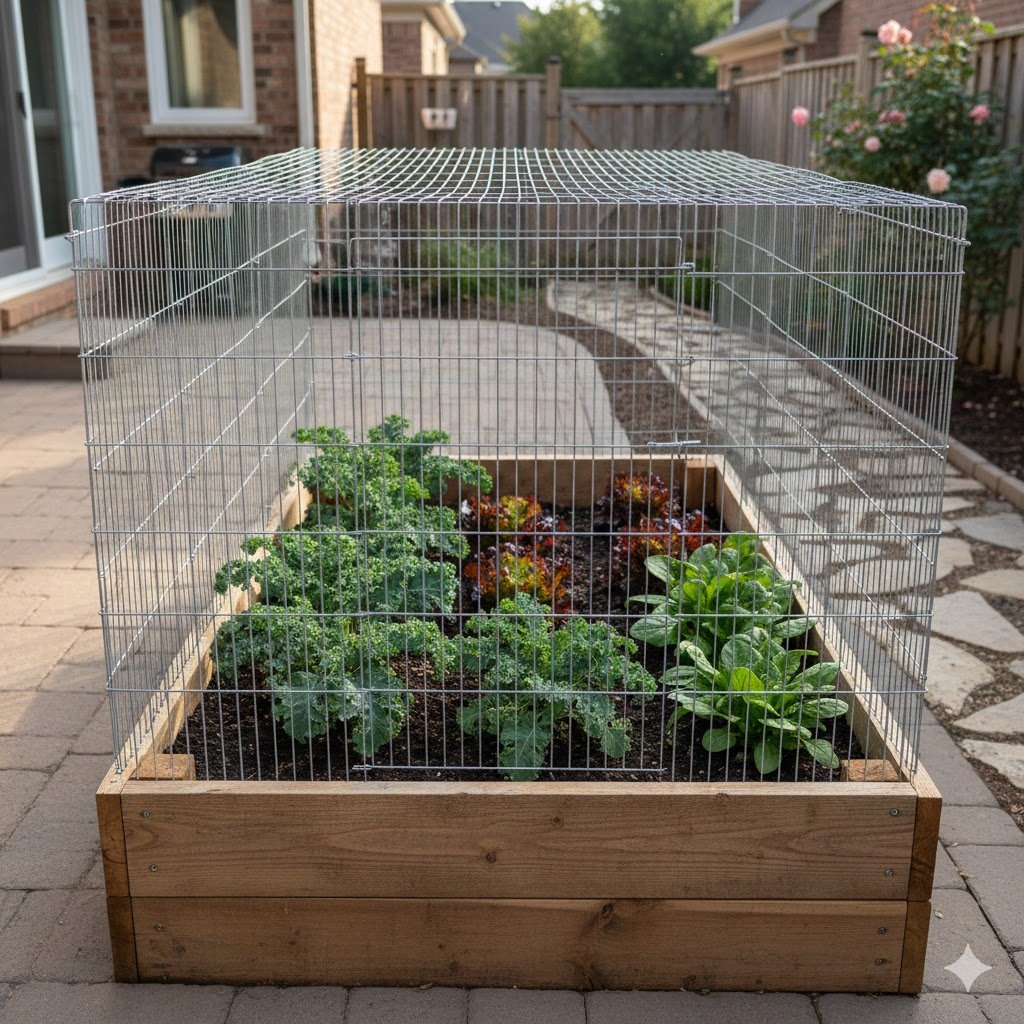
If you live in an area with deer, groundhogs, or particularly bold rabbits, you know the heartbreak of waking up to a mowed-down garden. An enclosed bed features a “cage” built right onto the frame. It’s like a mini-fortress for your vegetables.
The base is a standard raised bed, but you add a tall frame made of thin wood or PVC pipe. Cover this frame with hardware cloth (wire mesh) rather than plastic netting. Birds and small critters can get tangled in plastic netting, but hardware cloth is safe and effective.
The key to a good pest-proof bed is access. I like to build “hinged” panels or a lid that can be lifted. This allows you to weed and harvest easily without having to dismantle the whole cage. You can use simple cabinet hinges and a small latch to keep the “doors” closed.
During the early spring, you can even drape clear plastic over the mesh frame to turn it into a “cold frame.” This traps heat and lets you plant your crops several weeks earlier than everyone else. In the summer, swap the plastic for shade cloth if you live in a scorching climate.
This design gives you total peace of mind. You’ve worked hard on your garden; you deserve to be the one who eats the harvest! It’s a bit more work up front, but it saves you from the frustration of losing your crops to the local wildlife.
14. Self-Watering Wicking Bed
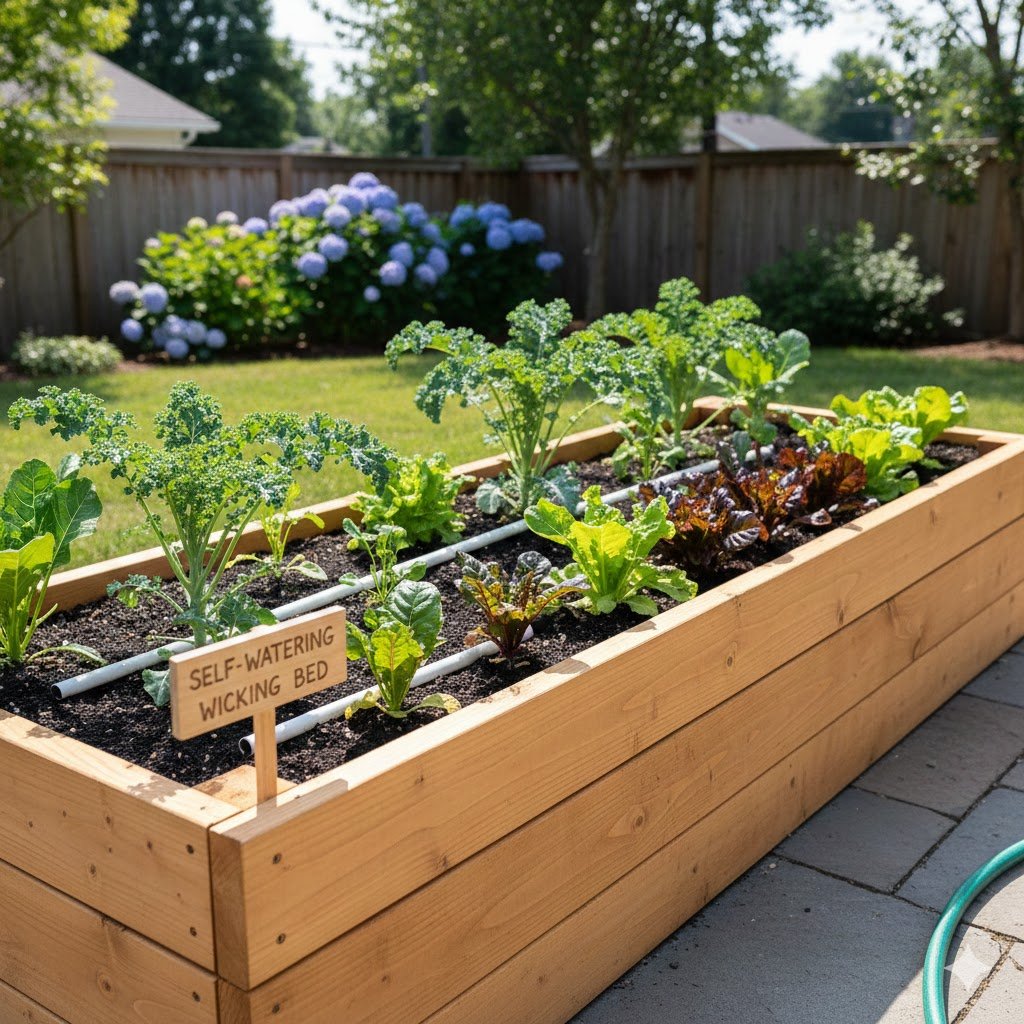
Wicking beds are the “set it and forget it” version of gardening. They have a water reservoir at the very bottom. The soil sits on a perforated platform above the water, and the moisture “wicks” upward to the roots through capillary action.
To build one, you need to line your raised bed with a heavy-duty, waterproof pond liner. Fill the bottom 4-6 inches with coarse gravel or “scoria” (lava rock). Place a perforated PVC pipe at the bottom—this will be your “fill tube” where you pour water in.
On top of the rocks, place a layer of landscape fabric to prevent the soil from clogging the reservoir. Then, fill the rest of the bed with a high-quality, peat-heavy soil mix. The peat is essential because it’s great at “pulling” the water up from the reservoir.
The biggest advantage is water efficiency. Since the water is underground, there is almost zero evaporation. Your plants get a constant, steady supply of moisture, which prevents issues like blossom end rot in tomatoes. It’s the perfect solution for busy people or those who travel frequently.
You only need to fill the reservoir every week or two, depending on the weather. Just look down the fill tube—if it’s dry, add water. It’s a sophisticated, high-tech way to garden that yields incredible results with very little daily effort.
15. The “L-Shaped” Corner Bed
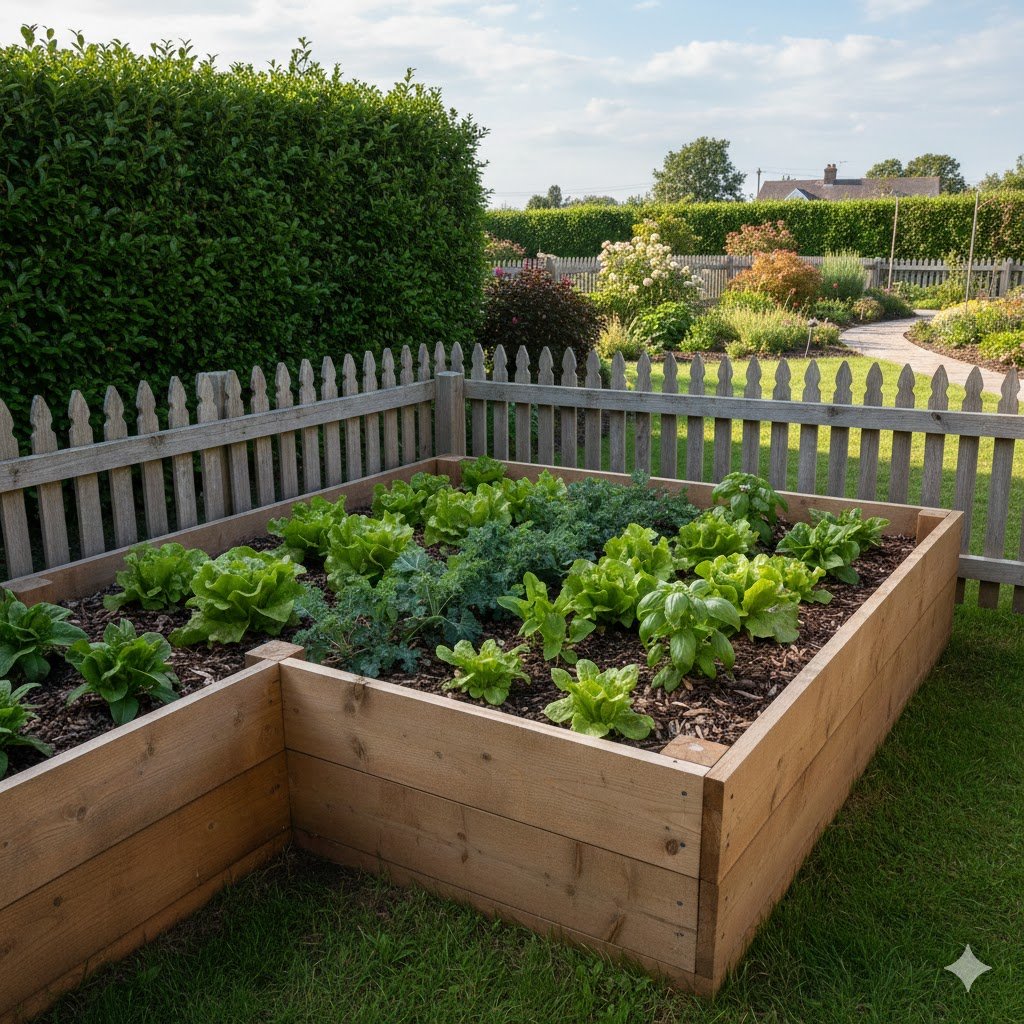
Most people have an unused corner in their yard or near their fence. An L-shaped bed is designed to tuck perfectly into these 90-degree angles. It’s a fantastic way to maximize space and soften the sharp corners of a property line.
Construction is similar to a standard rectangular bed, but you’re joining two sections at a right angle. Because you’ll have a “corner within a corner,” make sure the bed isn’t so deep that you can’t reach the very back of the “L.” I usually keep each “arm” about 3 feet wide.
These beds look beautiful when planted with a mix of flowers and vegetables. You can put a tall focal point, like a birdbath or a large perennial, in the very corner and let the vegetables fan out along the arms. It creates a very “landscaped” look rather than just a “vegetable patch.”
If you’re building this against a fence, make sure to leave a small gap for airflow, or line the back of the bed so the wet soil doesn’t rot your fence boards. I often use 4×4 posts at the joints to ensure the “L” shape stays perfectly square over the years.
It’s an efficient use of space that turns an “empty corner” into a lush, productive garden. It’s easy to build, looks professional, and provides a lot of growing area for the footprint it occupies.
Pro-Tips for Your DIY Success
Regardless of which design you choose, the real magic happens in the soil. Don’t just fill your beautiful new bed with “dirt” from your backyard. Use a mix of 1/3 high-quality compost, 1/3 peat moss or coconut coir, and 1/3 vermiculite. This “Mel’s Mix” is the gold standard for raised beds because it stays fluffy and nutrient-rich for years.
Also, think about what’s under the bed. If you have grass where the bed is going, you don’t necessarily have to dig it up. Just lay down a thick layer of plain brown cardboard (remove the tape!) and build the bed right on top. The cardboard will kill the grass and decompose, and the earthworms will love it.
Finally, don’t forget to mulch. A 2-inch layer of straw or wood chips on top of your soil will keep the moisture in and the weeds out. It’s the finishing touch that makes your DIY project look like a professional installation.
Which of these designs are you going to tackle this weekend? If you’re not sure where to start, I’d love to help you figure out the best materials for your specific climate. Leave a comment below with your backyard plans!