
The warm glow of a fireplace creates an instant feeling of comfort and coziness in any home. But what if your fireplace itself could use a little TLC? Enter shiplap – the trendy wooden paneling that’s taking the design world by storm. Shiplap adds a touch of texture and character, instantly elevating your fireplace from basic to breathtaking.
The best part? You don’t need a professional to achieve this stunning look. With a little DIY spirit and the right guidance, you can transform your fireplace with a beautiful shiplap makeover.
This guide explores 20+ inspiring DIY shiplap fireplace ideas to suit any style and skill level. Let’s dig in to find the perfect project to turn your fireplace into the focal point of your dreams!
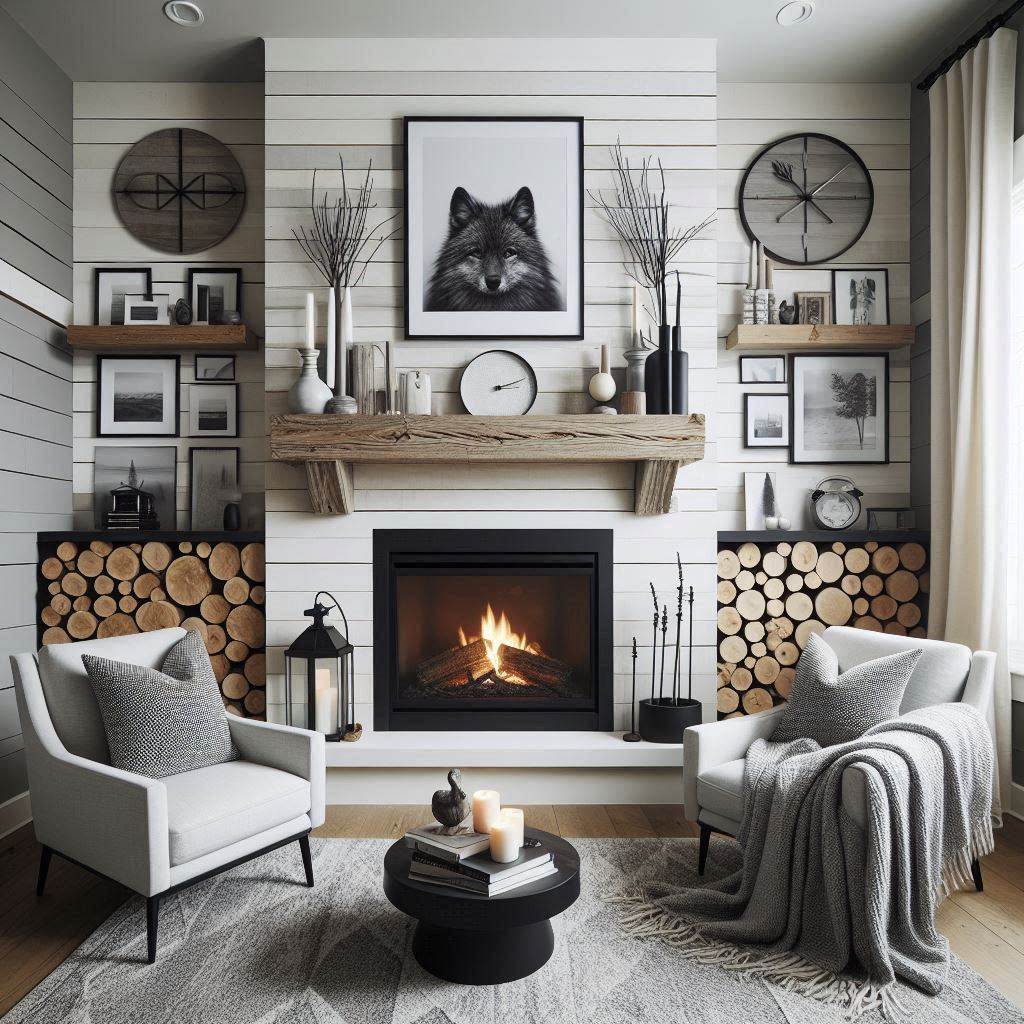
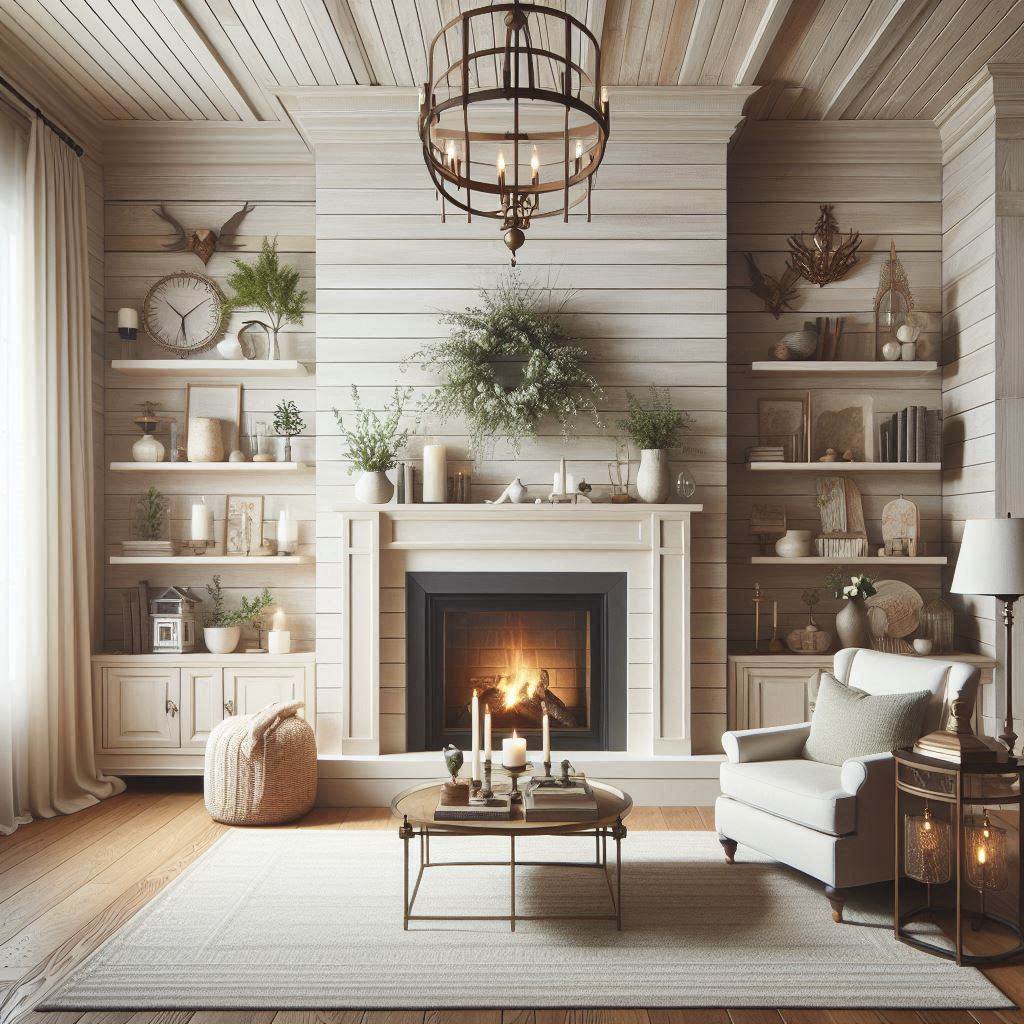
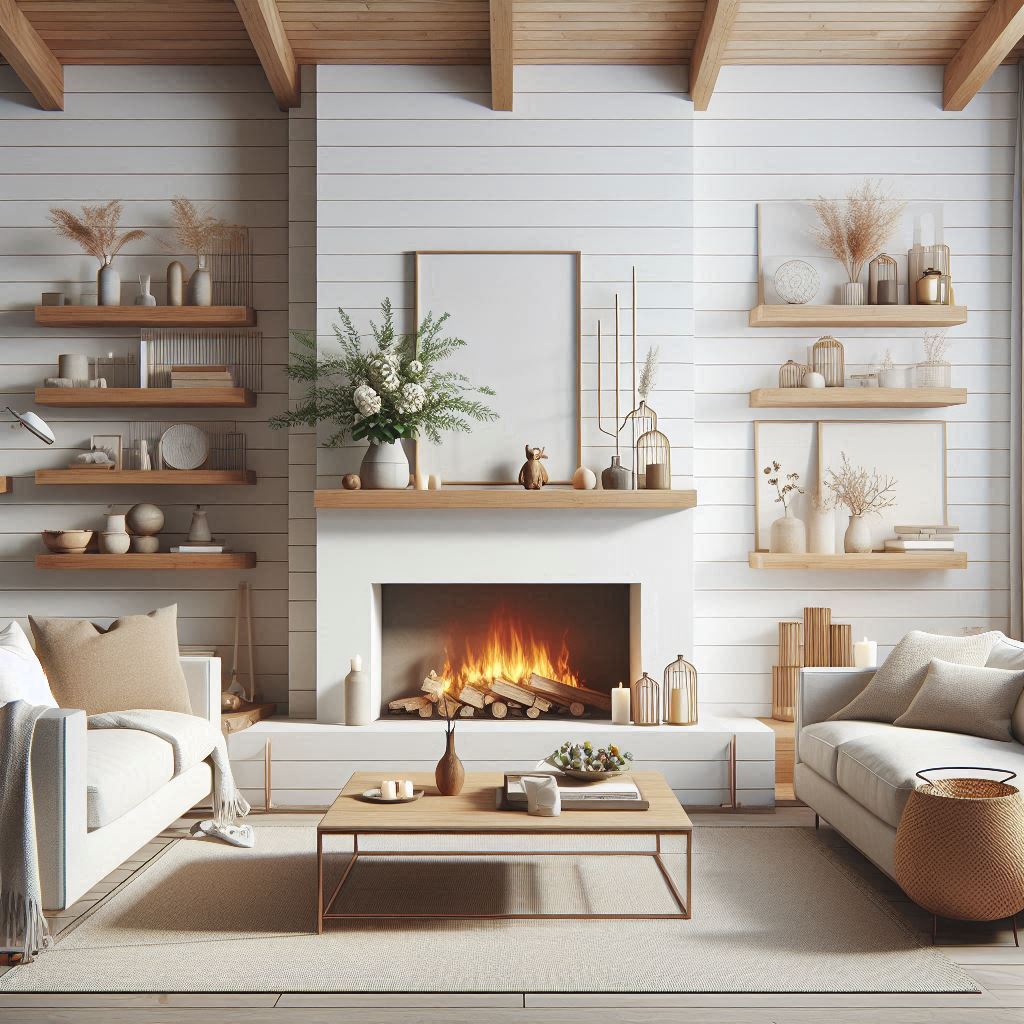
1. Classic Cozy: Timeless Elegance
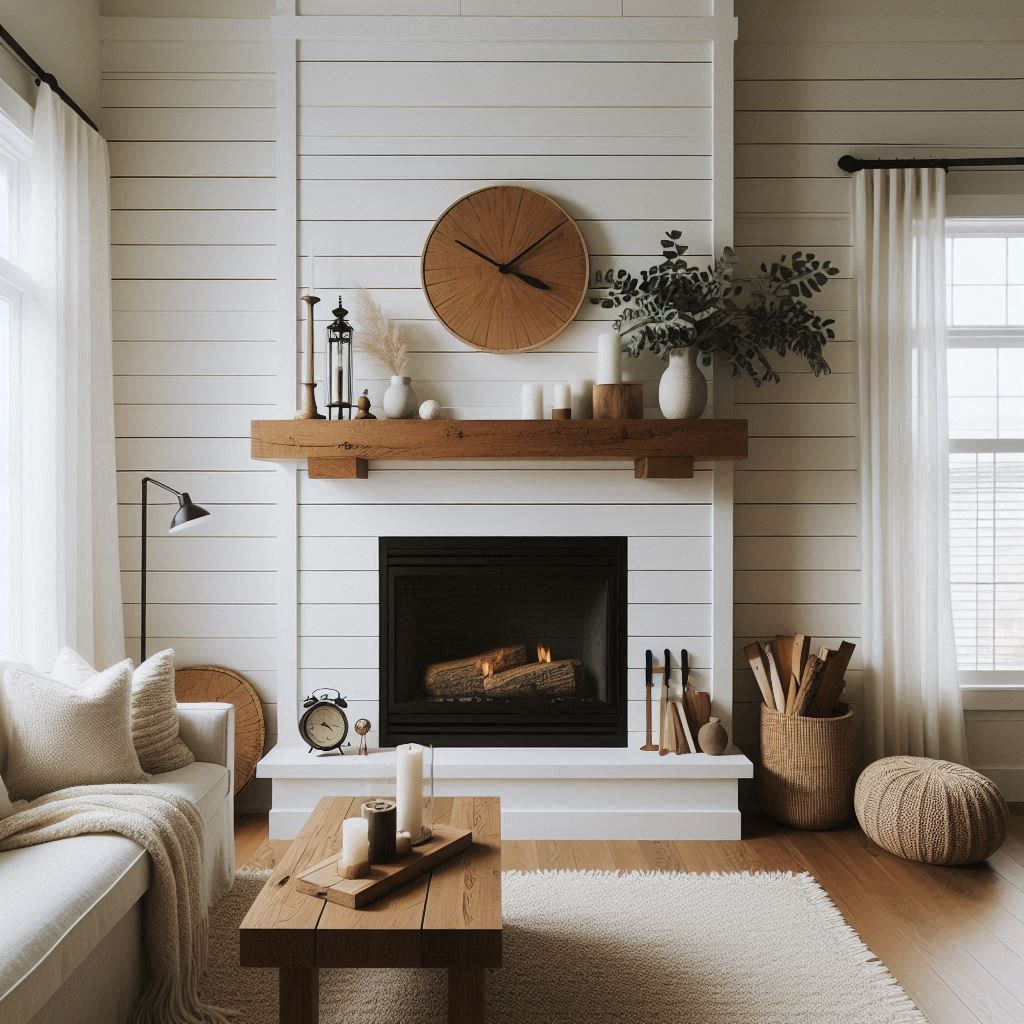
This look is all about achieving a warm and inviting atmosphere. Imagine crisp white shiplap paired with a chunky stained wood mantel – a perfect combination for farmhouse or traditional style homes.
Materials:
- White primed shiplap boards
- Stained wood for mantel (beams or reclaimed wood)
- Caulk
- Paint
- Nails or screws
Steps:
- Framing (Optional): If you’re building a fireplace facade from scratch, create a frame using studs and lumber.
- Shiplap Installation: Attach the shiplap boards horizontally to the existing fireplace structure or your newly built frame. Ensure a snug fit and use a level to maintain straight lines. Caulk any gaps between boards for a seamless finish.
- Mantel Creation and Installation: Design and build your mantel using stained wood beams or reclaimed wood for a rustic touch. Secure the mantel to the fireplace wall using sturdy brackets.
- Painting and Finishing Touches: Paint the shiplap white for a clean look or leave it natural for a more rustic feel. Decorate the mantel with candles, artwork, or greenery to complete the cozy ambiance.
2. Modern Minimalist: Sleek Sophistication
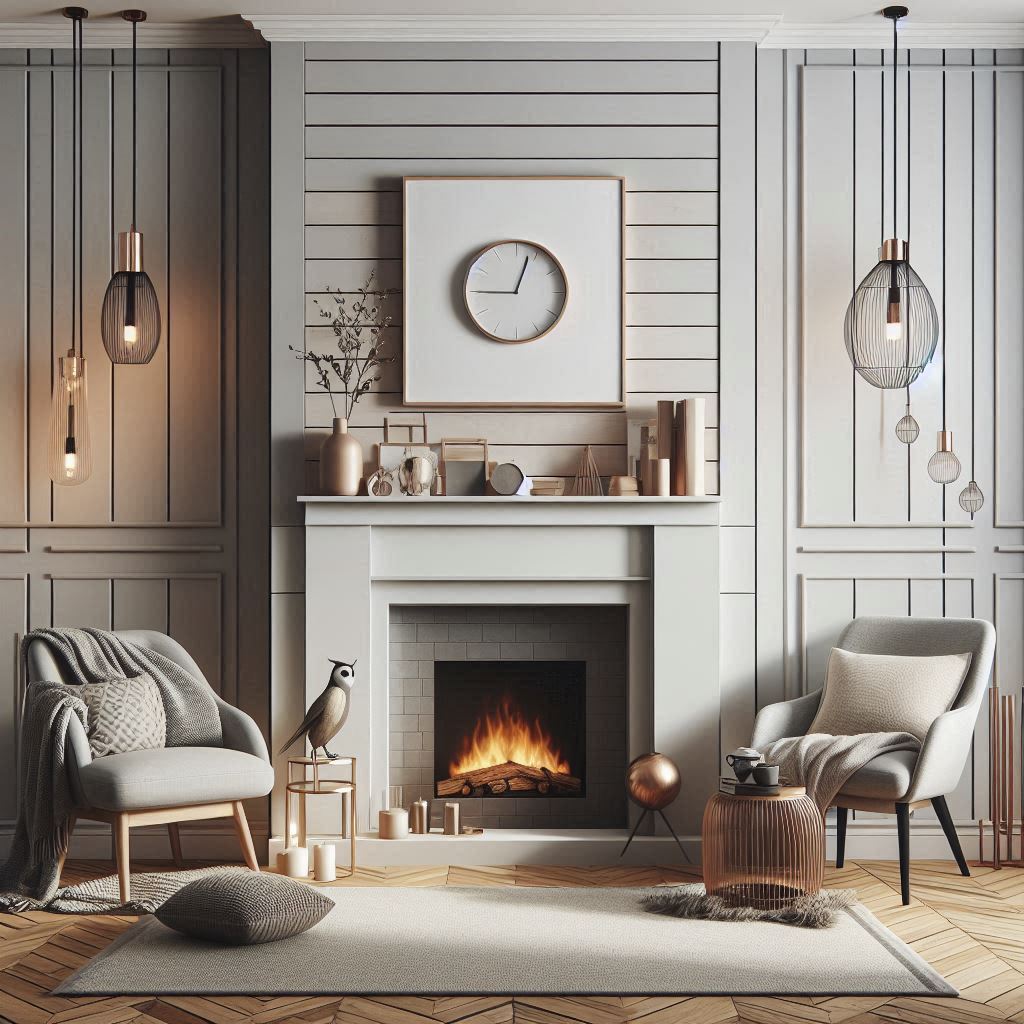
For a sleek and contemporary fireplace, embrace dark stained shiplap paired with a floating mantel. This minimalist approach creates a dramatic focal point without overwhelming the space.
Materials:
- Dark stained shiplap boards
- Metal brackets for floating mantel
- Caulk
- Paint (optional for shiplap)
- Nails or screws
Steps:
- Framing (Optional): Similar to the classic cozy design, framing might be needed if you’re building a new fireplace facade.
- Shiplap Installation: Install pre-stained shiplap boards horizontally, ensuring a tight fit and level placement. Caulk any gaps between boards for a polished look.
- Floating Mantel Creation and Installation: Design and build a sleek floating mantel using metal brackets. These brackets will be hidden behind the shiplap, creating the illusion of the mantel floating weightlessly. Secure the brackets to the wall and carefully place the mantel on top.
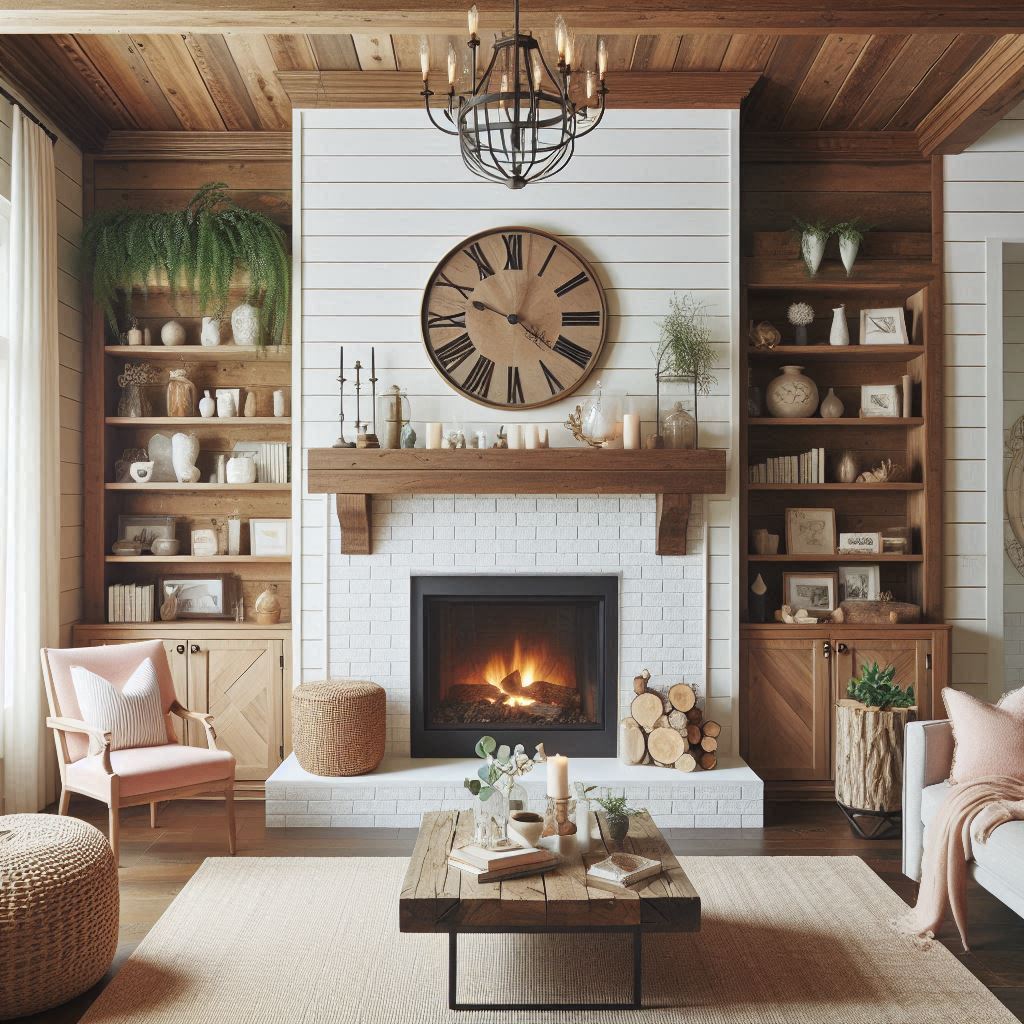
3. Rustic Chic: Embrace the Natural Charm
Infuse your living space with warmth and character by using weathered or distressed shiplap. Pair it with a natural wood mantel for a timeless, rustic elegance.
Materials:
- Weathered or pre-primed shiplap boards with stain for distressing
- Natural wood mantel (beam or slab)
- Caulk
- Nails or screws
Steps:
- Framing (Optional): As needed, build a frame for the fireplace facade.
- Shiplap Installation: Install the shiplap boards horizontally. For a distressed look, use sanding techniques or a specific distressing stain before attaching the boards. Caulk any gaps for a seamless finish.
- Natural Wood Mantel Selection and Installation: Choose a natural wood mantel that complements the distressed shiplap. You can opt for a simple beam or a more substantial slab. Secure the mantel to the fireplace wall for stability.
4. Bohemian Beauty: Unleash Your Creativity

Go beyond the ordinary with a bohemian-inspired fireplace. Whitewashed shiplap serves as a perfect backdrop for a textured or patterned mantel, adding a touch of whimsy to your space.
Materials:
- White shiplap boards
- Unique wood or tile for a patterned mantel
- Caulk
- Whitewash or stain
- Nails or screws
Steps:
- Framing (Optional): Build a frame if you’re creating a new fireplace facade.
- Shiplap Installation: Install the white shiplap boards horizontally. Instead of paint, consider using a whitewash for a softer, textured look. Caulk any gaps between boards.
- Patterned Mantel Creation and Installation: Design your unique mantel using patterned tiles, reclaimed wood with geometric cuts, or any element that reflects your bohemian style. Secure the mantel to the fireplace wall for stability.
5. Bold and Dramatic: Make a Statement
Don’t be afraid to break the mold! For a truly show-stopping fireplace, embrace a bold and dramatic look. Think black shiplap paired with a statement surround made of contrasting materials like tile, metal, or even brick.
Materials:
- Black primed shiplap boards
- Statement surround materials (tiles, metal sheets, etc.)
- Caulk
- Paint
- Nails or screws
- Construction adhesive (depending on surround material)
Steps:
- Framing (Optional): If necessary, build a frame for the fireplace facade.
- Shiplap Installation: Install the black shiplap boards horizontally, ensuring a tight fit and level placement. Caulk any gaps between boards for a polished look.
- Statement Surround Creation and Installation: Design your statement surround. Consider using contrasting colored tiles, textured metal sheets, or even reclaimed brick for a rustic touch. Depending on the material, you might need to cut and assemble the surround pieces before attaching them. Use a combination of nails/screws and construction adhesive for a secure hold.
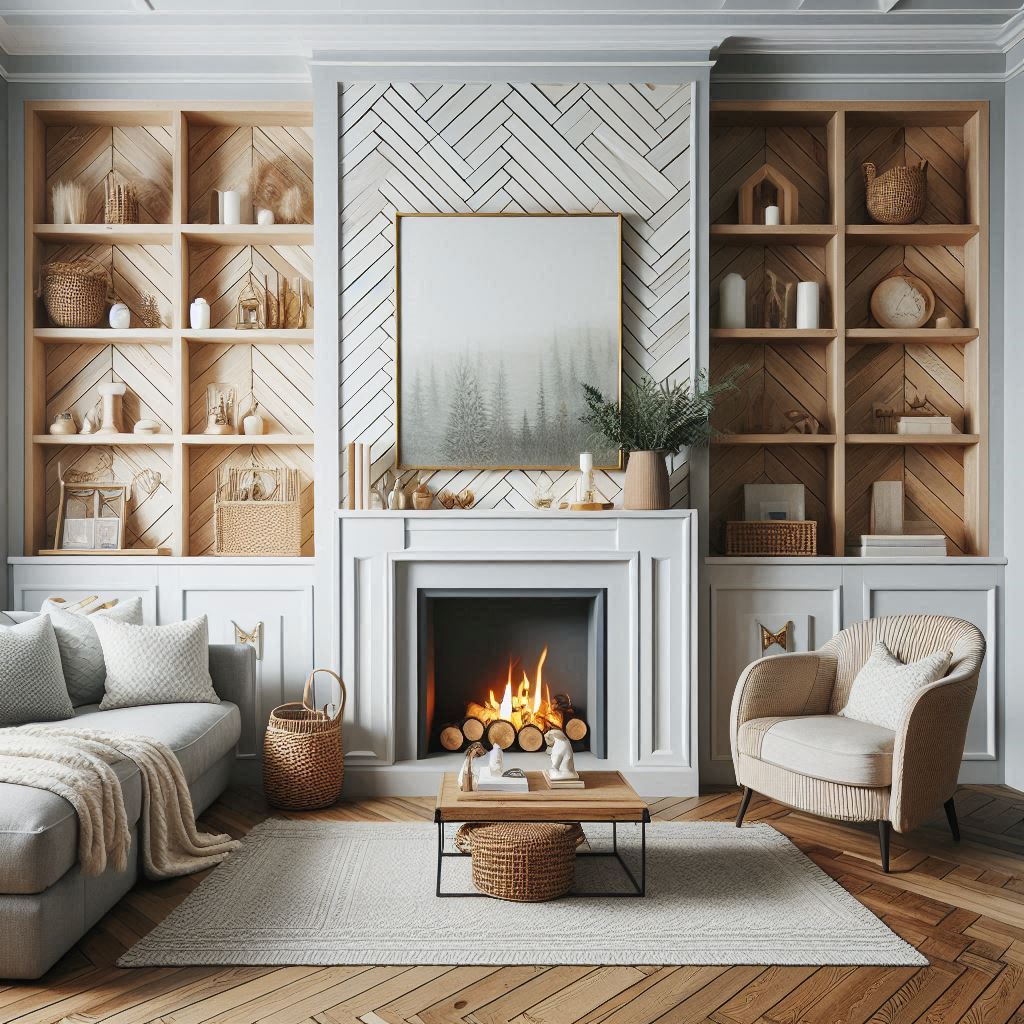
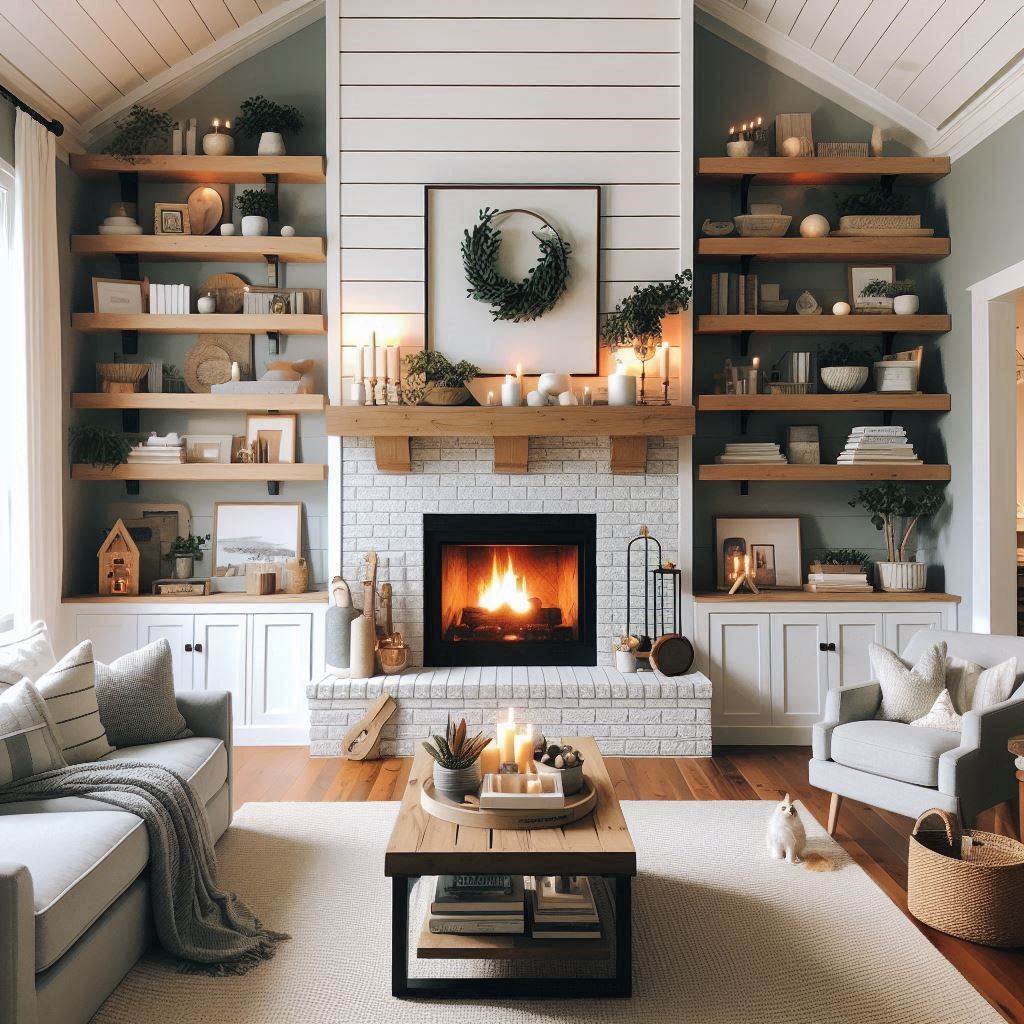
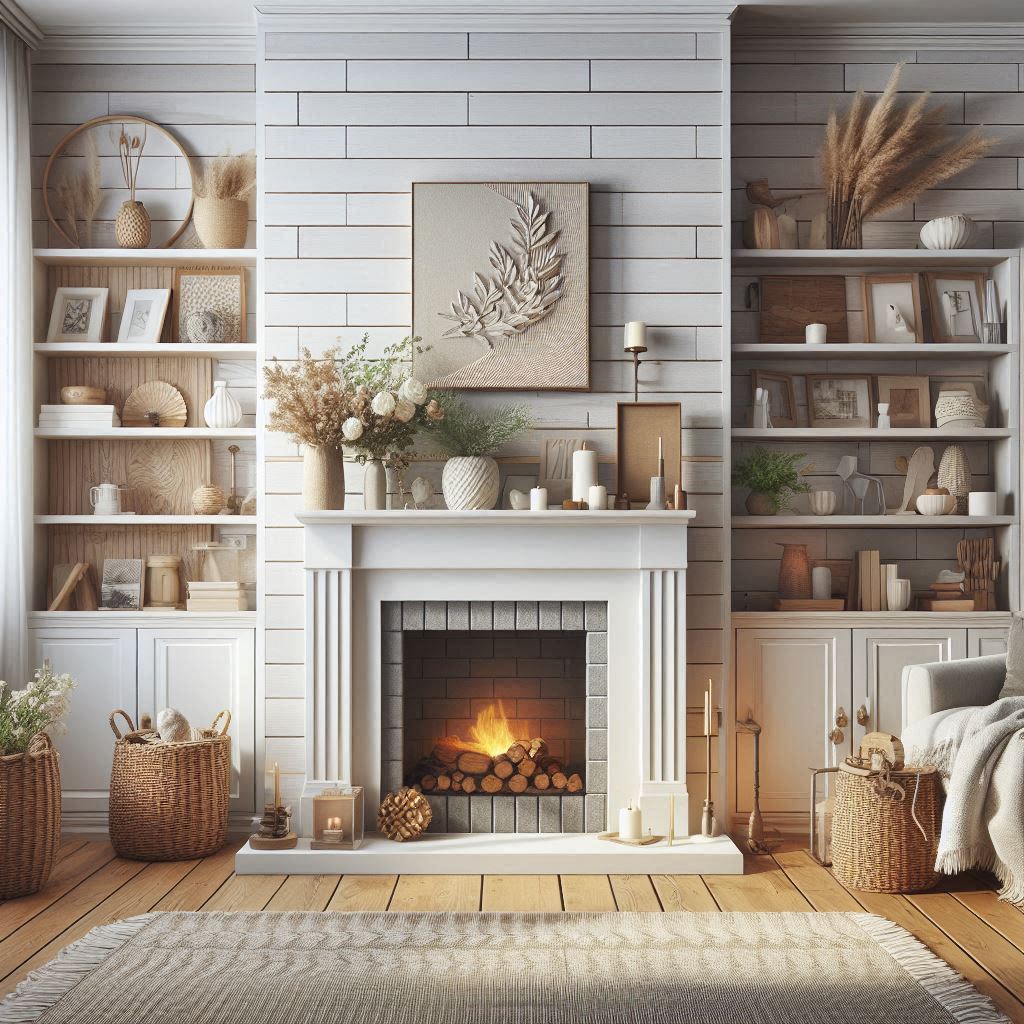
6. Shiplap with Built-Ins: Functionality Meets Style
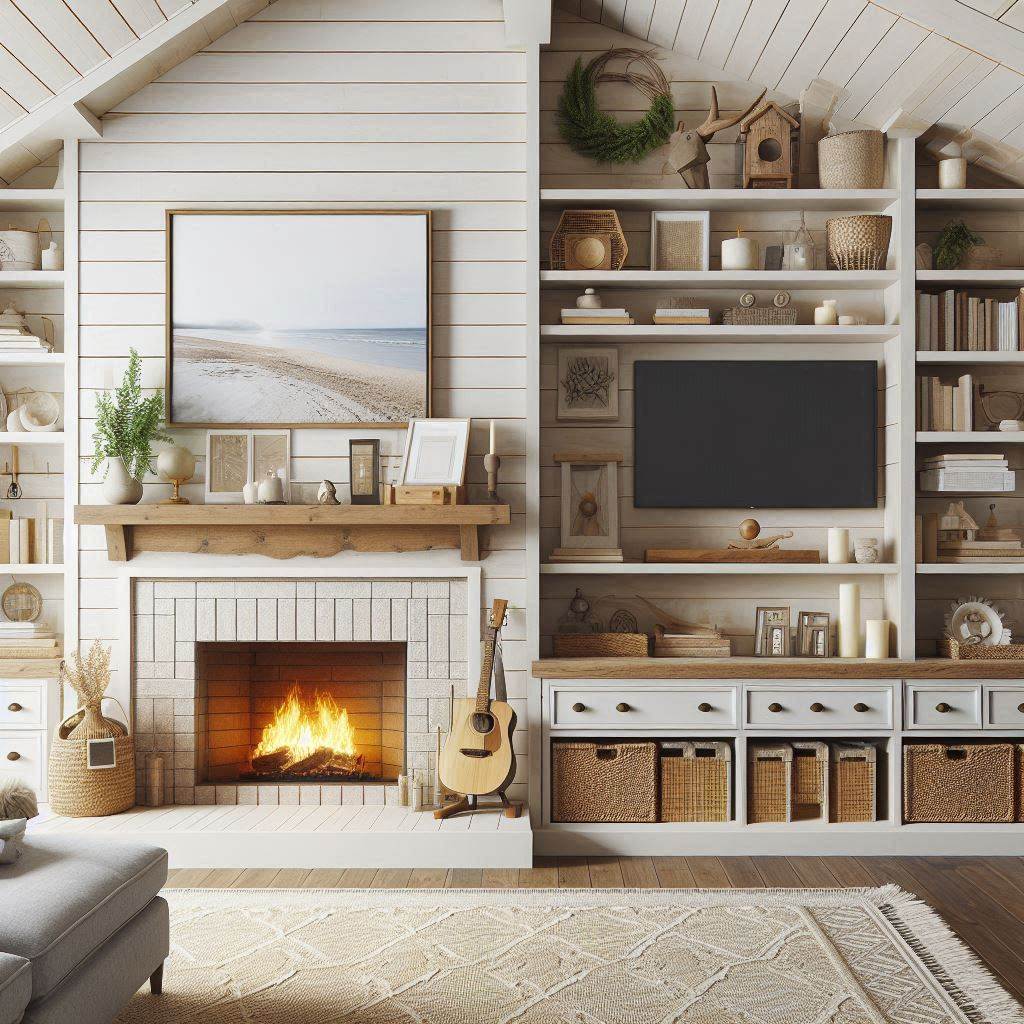
Maximize the functionality of your fireplace by incorporating built-in shelves or cabinets on either side. This design is perfect for displaying decorative items or storing firewood and fireplace accessories.
Materials:
- Shiplap boards
- Lumber for shelves/cabinets
- Caulk
- Paint
- Nails or screws
- Wood glue (for shelf construction)
Steps:
- Framing for Shiplap and Shelves/Cabinets: Build a frame for the fireplace facade, incorporating additional framing for the planned shelves or cabinets.
- Shiplap Installation: Install the shiplap boards horizontally, ensuring a snug fit and level placement. Caulk any gaps between boards for a seamless finish.
- Shelf/Cabinet Construction and Installation: Construct the shelves or cabinets using your chosen lumber. Ensure proper alignment and stability before attaching them to the frame.
- Painting and Finishing Touches: Paint the shiplap, shelves, and cabinets for a cohesive look. Decorate the shelves with your favorite items and utilize the cabinets for storage.
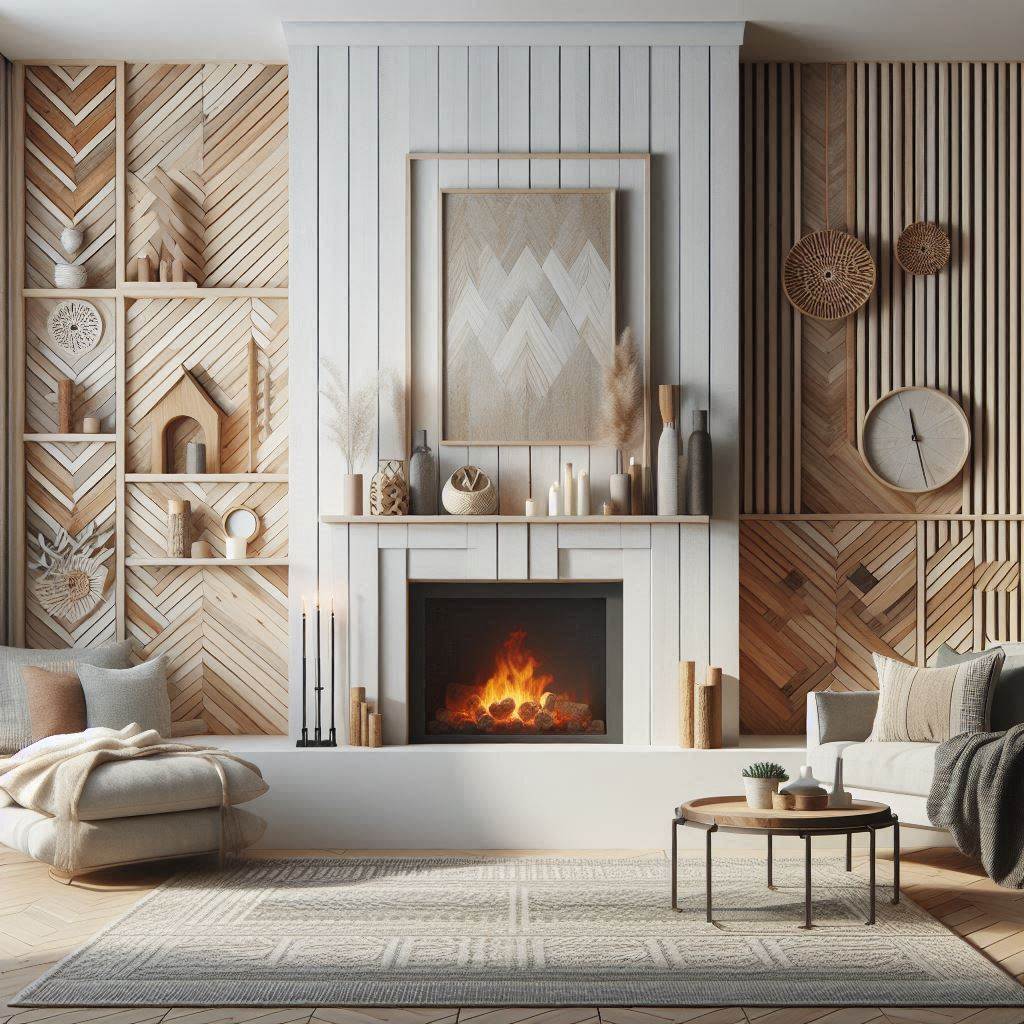
7. Herringbone Magic: A Touch of Pattern
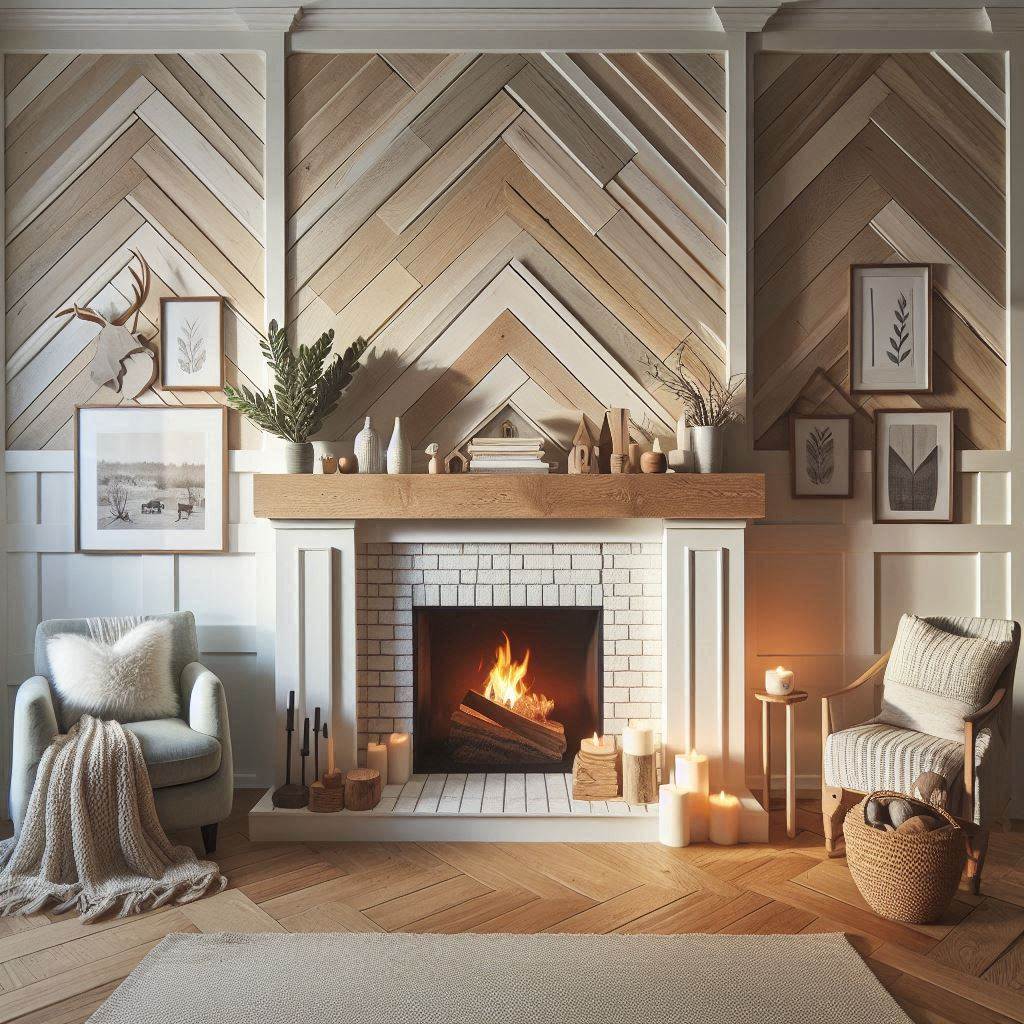
For a unique and eye-catching fireplace, consider a herringbone shiplap pattern. This geometric design adds a touch of sophistication and visual interest to your space.
Materials:
- Shiplap boards
- Caulk
- Paint
- Nails or screws
- Miter saw (for angled cuts)
Steps:
- Framing (Optional): Build a frame if you’re creating a new fireplace facade.
- Cutting Shiplap for Herringbone Pattern: This is the most crucial step. You’ll need to cut the shiplap boards at 45-degree angles to achieve the herringbone pattern. A miter saw will be helpful for precise cuts.
- Shiplap Installation: Install the pre-cut shiplap boards in a herringbone pattern, ensuring a tight fit and level placement. Precise cuts and careful planning are key for a successful herringbone design. Caulk any gaps between boards for a polished look.
- Painting and Finishing Touches: Paint the shiplap for a desired finish. The herringbone pattern itself adds visual interest, so you can keep the color palette simple.
8. Shiplap and Shiplap! Create Dimension with a Mix
Concept: This playful approach uses two different shiplap styles for added depth and texture.
Materials:
- Standard shiplap boards (horizontal planks)
- Board and batten shiplap boards (vertical planks with a central batten)
- Caulk
- Paint (optional)
- Nails or screws
Steps:
- Framing (Optional): Build a frame if necessary.
- Plan the Layout: Decide where you’d like to incorporate each shiplap style. A popular choice is horizontal shiplap for the main area and board and batten for the fireplace surround.
- Shiplap Installation: Install the standard shiplap boards horizontally for the main area. Then, install the board and batten shiplap vertically for the surround, ensuring a tight fit and level placement throughout. Caulk any gaps between boards.
- Painting (Optional): You can paint both shiplap styles the same color for a cohesive look, or choose contrasting colors for a bolder statement.
9. Halfway to Chic: The Power of the Half Wall
Concept: Embrace a modern, minimalist look with a shiplap accent wall that stops halfway up the existing fireplace structure.
Materials:
- Shiplap boards
- Caulk
- Paint
- Nails or screws
Steps:
- Framing (Optional): No framing is typically needed for this design.
- Measure and Mark: Determine the desired height for the shiplap wall and mark a level line across the fireplace structure.
- Shiplap Installation: Install the shiplap boards horizontally from the base of the fireplace to the marked line, ensuring a snug fit and level placement. Caulk any gaps between boards.
- Painting: Paint the shiplap for a polished look. You can also paint the existing fireplace structure above the shiplap for a cohesive finish (optional).
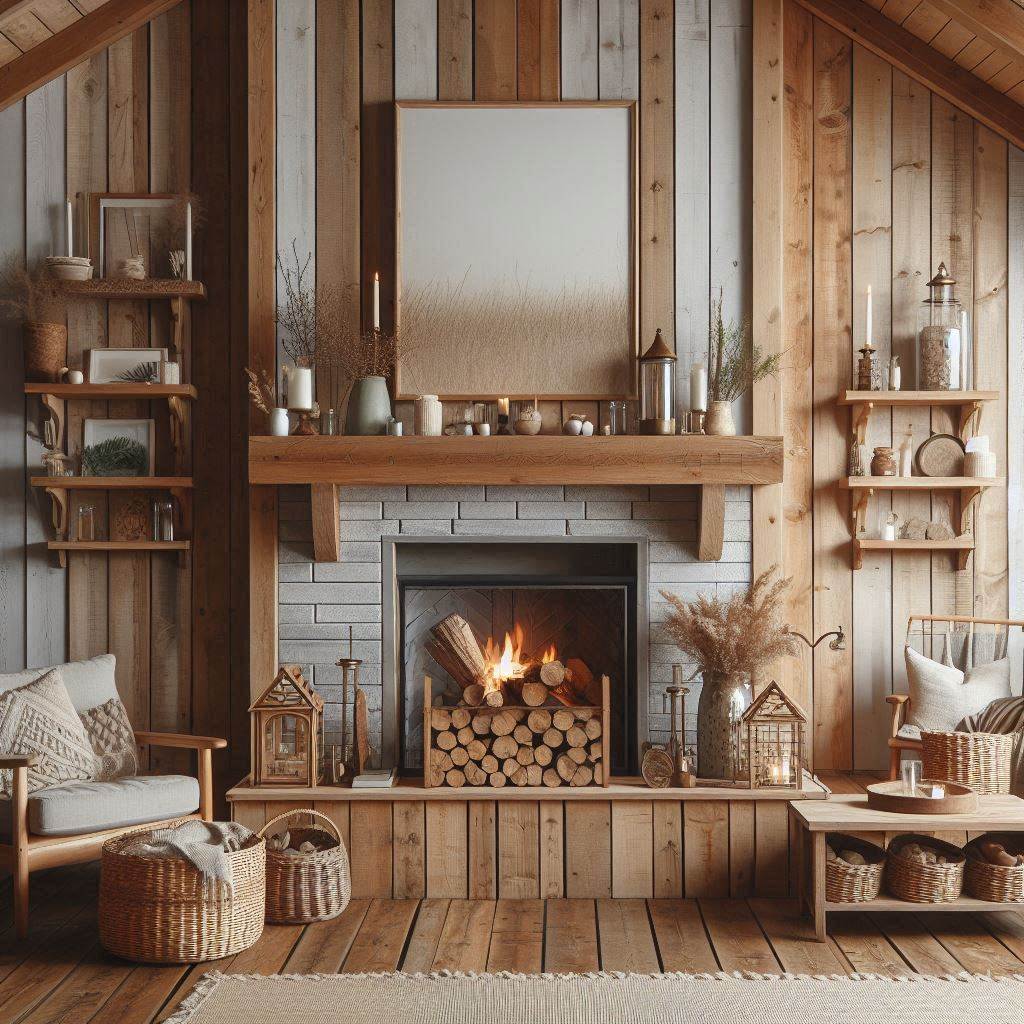
10. Peek-A-Boo Fireplace: The Charm of Open Shelving

Concept: Integrate open shelves directly into the shiplap design for additional functionality and a touch of rustic charm.
Materials:
- Shiplap boards
- Lumber for shelves
- Caulk
- Paint or stain
- Nails or screws
- Wood glue (for shelf construction)
Steps:
- Framing: Build a frame for the fireplace facade, incorporating additional framing for the planned shelves.
- Shiplap Installation: Install the shiplap boards horizontally, ensuring a tight fit and level placement. Caulk any gaps between boards.
- Shelf Construction and Installation: Construct the shelves using your chosen lumber. Ensure proper alignment and stability before attaching them to the frame.
- Painting/ Staining: Decide between painting the shiplap and shelves for a uniform look or staining the shelves for a rustic contrast. Decorate the shelves with your favorite items.
11. Shiplap Meets Stone: A Match Made in Heaven
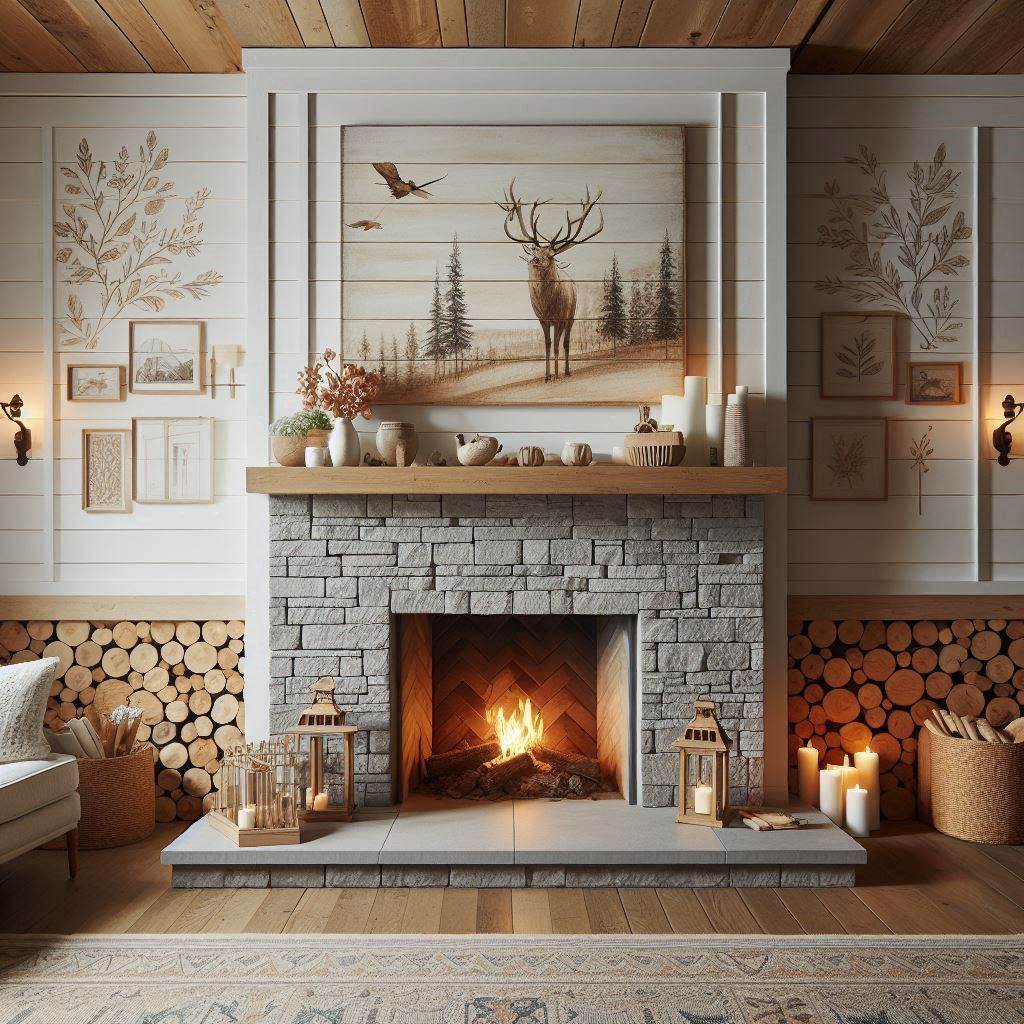
Concept: Introduce a touch of luxury by combining the warmth of shiplap with the timeless elegance of stone veneer.
Materials:
- Shiplap boards
- Stone veneer panels
- Caulk
- Mortar or construction adhesive (for stone veneer)
- Paint (optional)
- Nails or screws
Steps:
- Framing (Optional): Build a frame if necessary.
- Stone Veneer Installation: Follow the manufacturer’s instructions to install the stone veneer panels on the desired fireplace area (typically the surround). Ensure a secure fit using mortar or construction adhesive.
- Shiplap Installation: Install the shiplap boards horizontally on the remaining areas, ensuring a tight fit and level placement. Caulk any gaps between boards and around the stone veneer.
- Painting (Optional): You can paint the shiplap for a desired finish.
12. Go Vertical! Embrace the Unexpected
Concept: Challenge the traditional horizontal shiplap layout by installing the boards vertically for a sleek and modern look.
Materials:
- Shiplap boards (enough for vertical installation)
- Caulk
- Paint (optional)
- Nails or screws
Steps:
- Framing (Optional): Build a frame if necessary.
- Shiplap Installation: Install the shiplap boards vertically from the fireplace base to the ceiling, ensuring a snug fit and level placement. Caulk any gaps between boards.
- Painting (Optional): Paint the shiplap for a polished look. You can also paint the existing fireplace structure for a more unified, modern aesthetic.
13. Shiplap Meets Shiplap Meets… Wallpaper?
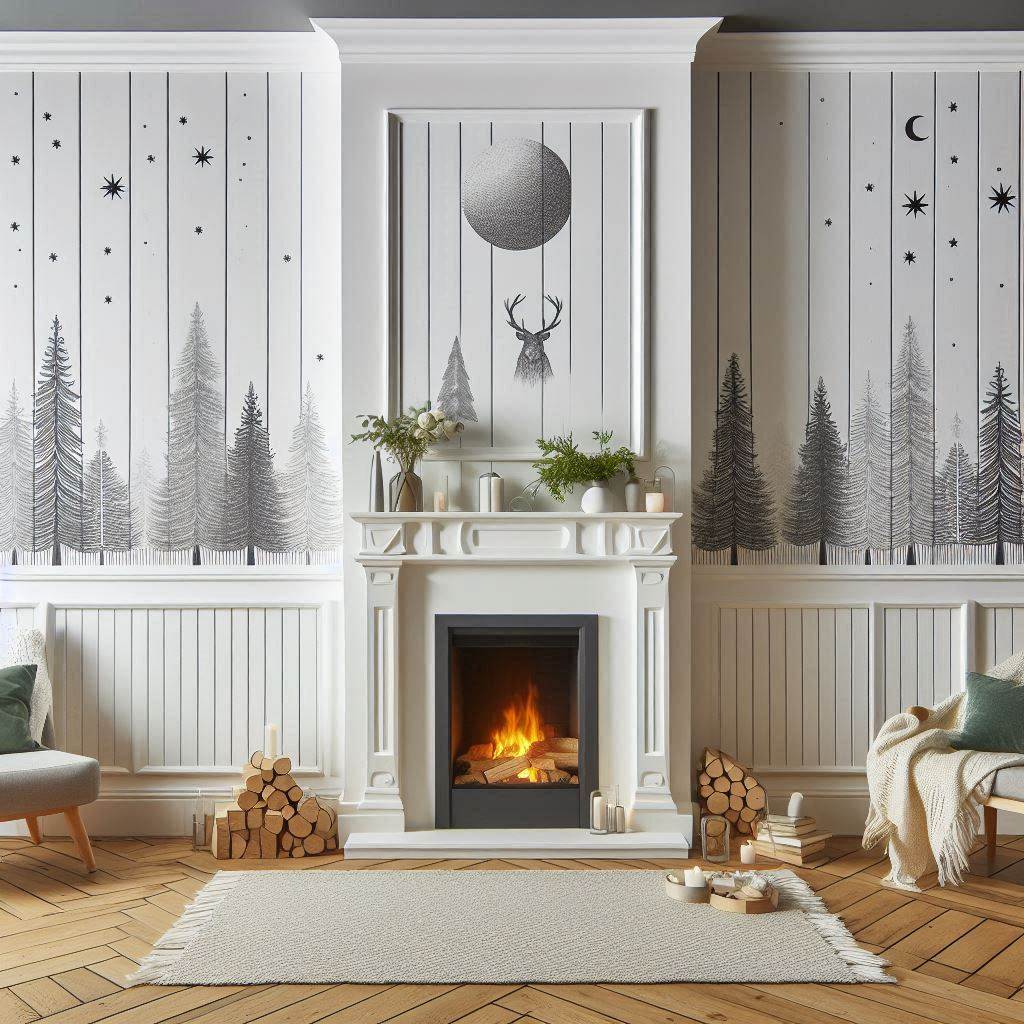
Concept: For a truly unique fireplace, combine shiplap with a bold wallpaper accent. This playful mix of textures and patterns creates a show-stopping focal point.
Materials:
- Shiplap boards
- Wallpaper of your choice
- Caulk
- Paint (optional for shiplap)
- Wallpaper paste
- Nails or screws
Steps:
- Framing (Optional): Build a frame if necessary.
- Plan the Layout: Decide where you’d like to incorporate the wallpaper. Popular choices include the fireplace surround or a vertical accent strip within the shiplap.
- Shiplap Installation: Install the shiplap boards horizontally throughout the fireplace facade, ensuring a tight fit and level placement. Caulk any gaps between boards.
- Wallpaper Application: Following the manufacturer’s instructions, apply the wallpaper to the chosen area. Ensure proper smoothing and trimming for a clean finish.
14. Shiplap for the Ceiling: Take it Up a Notch
Concept: Extend the shiplap treatment to the ceiling above the fireplace for a cohesive and dramatic effect.
Materials:
- Shiplap boards (enough for ceiling application)
- Caulk
- Paint
- Nails or screws (or appropriate fasteners for your ceiling type)
Steps:
- Framing (Optional): Framing might be necessary depending on your ceiling type. Consult a professional for guidance if needed.
- Shiplap Installation: Install the shiplap boards directly onto the ceiling surface (or pre-built frame) in your preferred pattern (horizontal, diagonal, etc.). Ensure a snug fit and proper support for the boards. Caulk any gaps between boards.
- Painting: Paint the shiplap and the existing fireplace structure for a unified look.
15. Shiplap for the Mantle: A Touch of Luxury

Concept: Elevate your fireplace by building a custom shiplap mantel for a built-in, seamless look.
Materials:
- Thick shiplap boards (enough for mantel construction)
- Lumber for framing (optional)
- Caulk
- Stain or paint
- Nails or screws
- Wood glue (for mantel construction)
Steps:
- Framing (Optional): If the existing mantel lacks the desired depth, build a frame using lumber for additional support.
- Mantel Construction: Design and build your custom mantel using thicker shiplap boards. Ensure proper stability and secure all pieces with wood glue and nails/screws.
- Attaching the Mantel: Secure the completed mantel to the fireplace structure.
- Finishing Touches: Stain or paint the mantel for a desired look.
16. Shiplap for Corners: A Detail-Oriented Approach
Concept: Add a touch of sophistication by wrapping shiplap around the corners of your fireplace for a polished and finished look.
Materials:
- Standard shiplap boards (enough for corner application)
- Miter saw (for angled cuts)
- Caulk
- Paint
- Nails or screws
Steps:
- Framing (Optional): No framing is typically needed for this project.
- Cutting Shiplap Boards: Use a miter saw to cut the shiplap boards at 45-degree angles to ensure a clean corner finish.
- Shiplap Installation: Install the pre-cut shiplap boards carefully around the fireplace corners, ensuring a tight fit and level placement. Caulk any gaps between boards.
- Painting: Paint the shiplap for a polished look. You can also paint the existing fireplace structure for a cohesive finish.
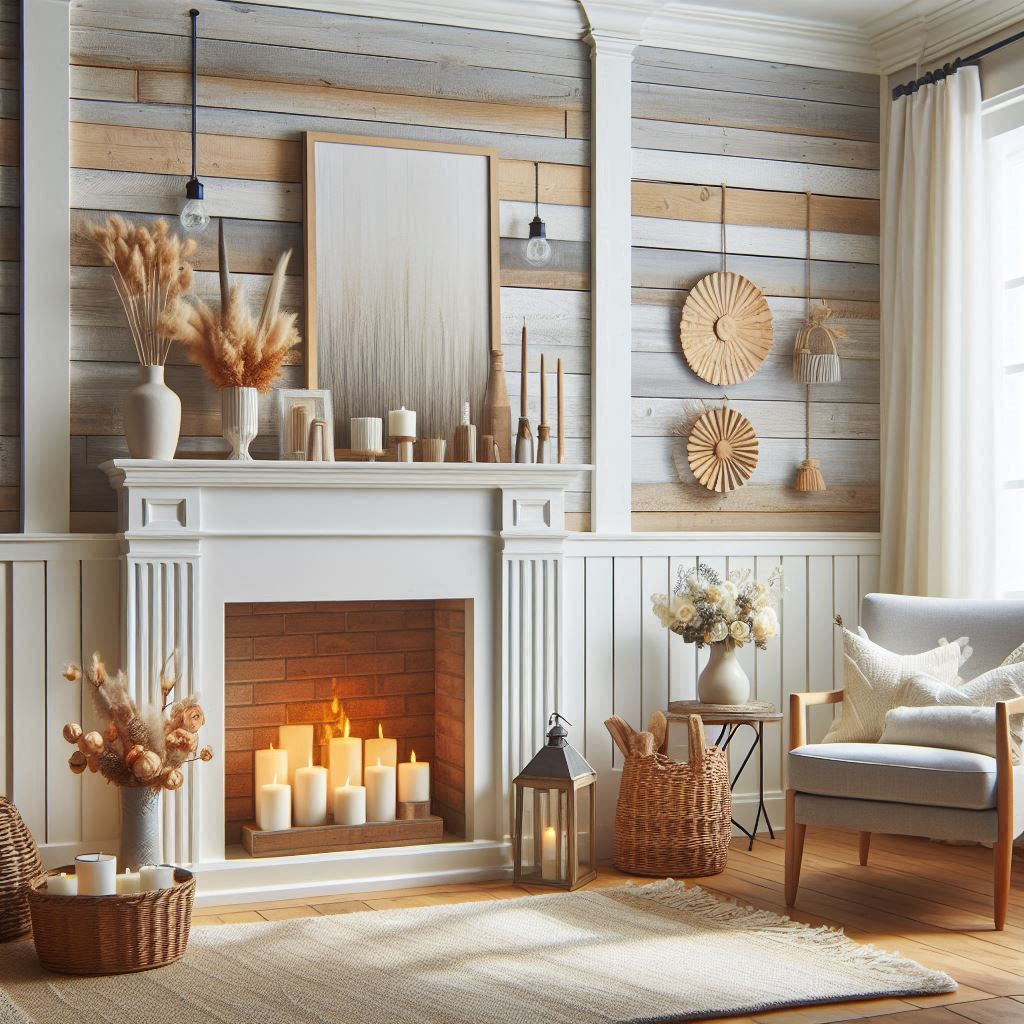
17. Reclaimed Shiplap for a Rustic Flair
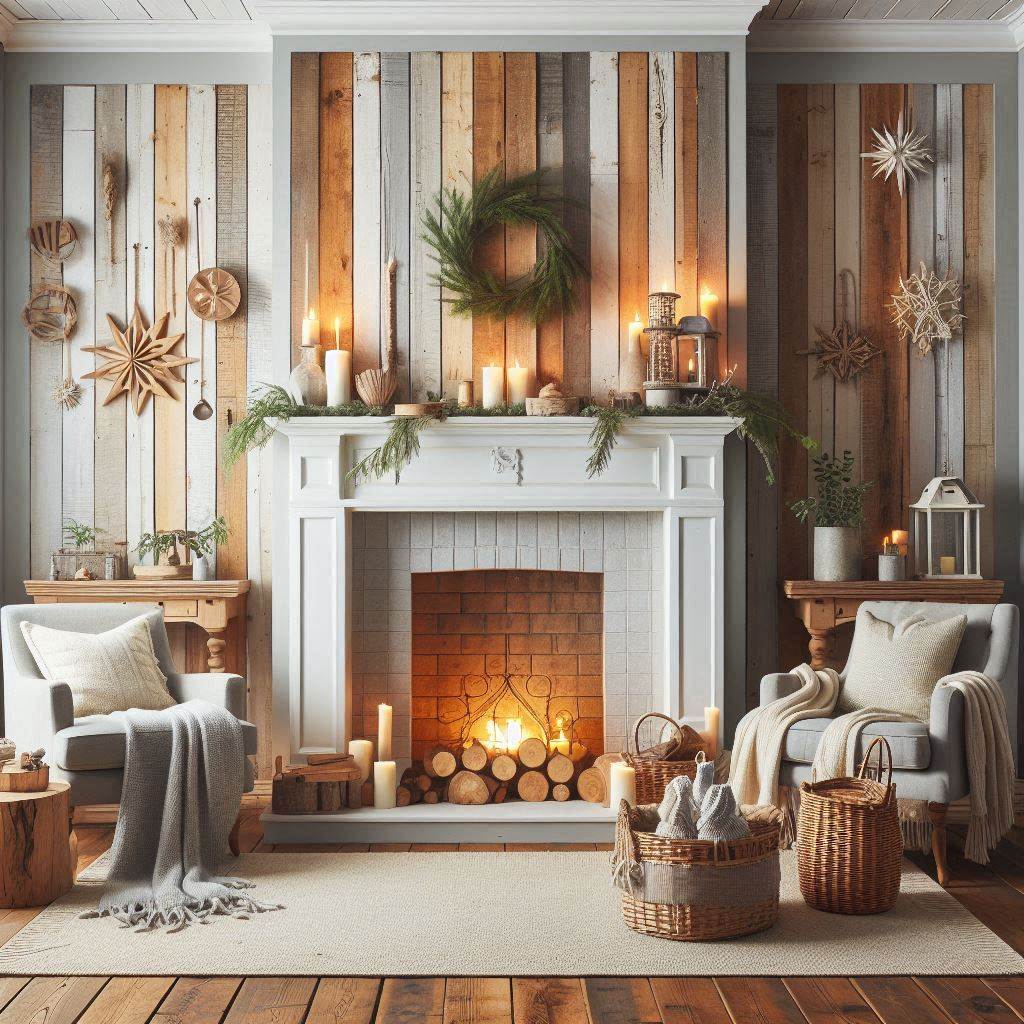
Concept: Embrace a unique, eco-friendly approach by using reclaimed shiplap for your fireplace project.
Materials:
- Reclaimed shiplap boards (ensure proper cleaning and sanding)
- Caulk
- Stain or paint (optional)
- Nails or screws
Steps:
- Framing (Optional): No framing is typically needed for this project.
- Reclaimed Shiplap Preparation: Clean and sand the reclaimed shiplap boards thoroughly to remove any dirt or debris. Be mindful of splinters and uneven surfaces.
- Shiplap Installation: Install the reclaimed shiplap boards horizontally, ensuring a tight fit and level placement as much as possible. Caulk any significant gaps between boards.
- Finishing Touches: You can choose to stain the reclaimed shiplap to enhance its natural character or paint it for a more uniform look.
18. Shiplap Meets Tile for a Touch of the Mediterranean
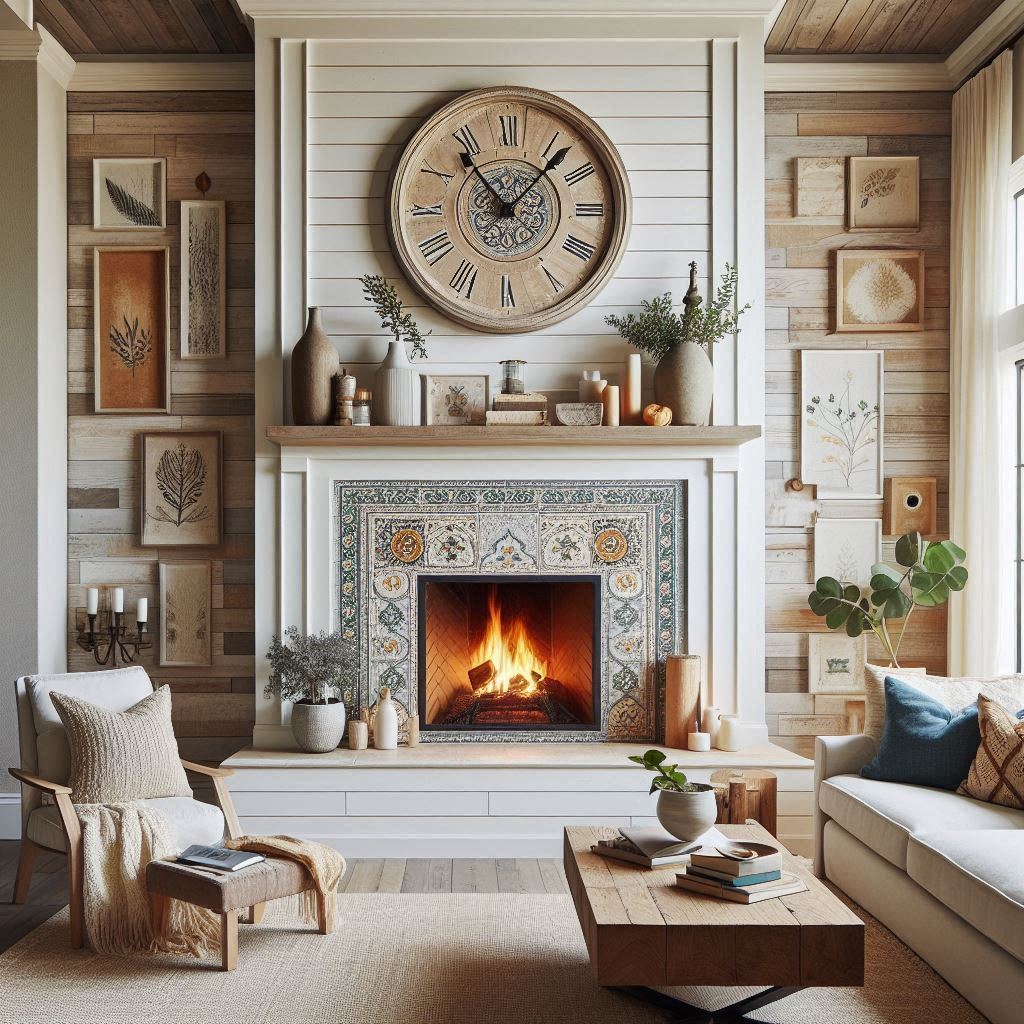
Concept: Channel the charm of the Mediterranean by incorporating colorful mosaic tiles within the shiplap design. This creates a vibrant and visually interesting fireplace surround.
Materials:
- Shiplap boards
- Mosaic tile sheets
- Caulk
- Tile adhesive
- Paint (optional for shiplap)
- Grout
Steps:
- Framing (Optional): Build a frame if necessary.
- Plan the Tile Layout: Decide on the placement and design of the mosaic tiles. Popular options include a full surround, a vertical accent strip, or a geometric pattern within the shiplap.
- Shiplap Installation: Install the shiplap boards horizontally throughout the fireplace facade, ensuring a tight fit and level placement. Caulk any gaps between boards.
- Tile Application: Following the manufacturer’s instructions, apply the mosaic tile sheets to the chosen area using tile adhesive. Ensure proper smoothing and trimming for a clean finish.
- Grouting: Once the tile adhesive cures, grout the spaces between the mosaic tiles for a finished look.
19. Shiplap with Floating Shelves: A Minimalist Masterpiece
Concept: Embrace a minimalist aesthetic by combining shiplap with sleek floating shelves for a modern and functional fireplace.
Materials:
- Shiplap boards
- Lumber for floating shelves
- Metal brackets for floating shelves
- Caulk
- Paint
- Nails or screws
- Wood glue (for shelf construction)
Steps:
- Framing (Optional): Build a frame if necessary.
- Shiplap Installation: Install the shiplap boards horizontally, ensuring a tight fit and level placement. Caulk any gaps between boards.
- Floating Shelf Construction: Design and build your floating shelves using your chosen lumber. Ensure proper stability and secure all pieces with wood glue and nails/screws.
- Installing Floating Shelves: Attach sturdy metal brackets to the wall behind the shiplap according to the manufacturer’s instructions. Carefully place the floating shelves onto the brackets for a seamless look.
20. Shiplap Accent Wall: Frame the Fire
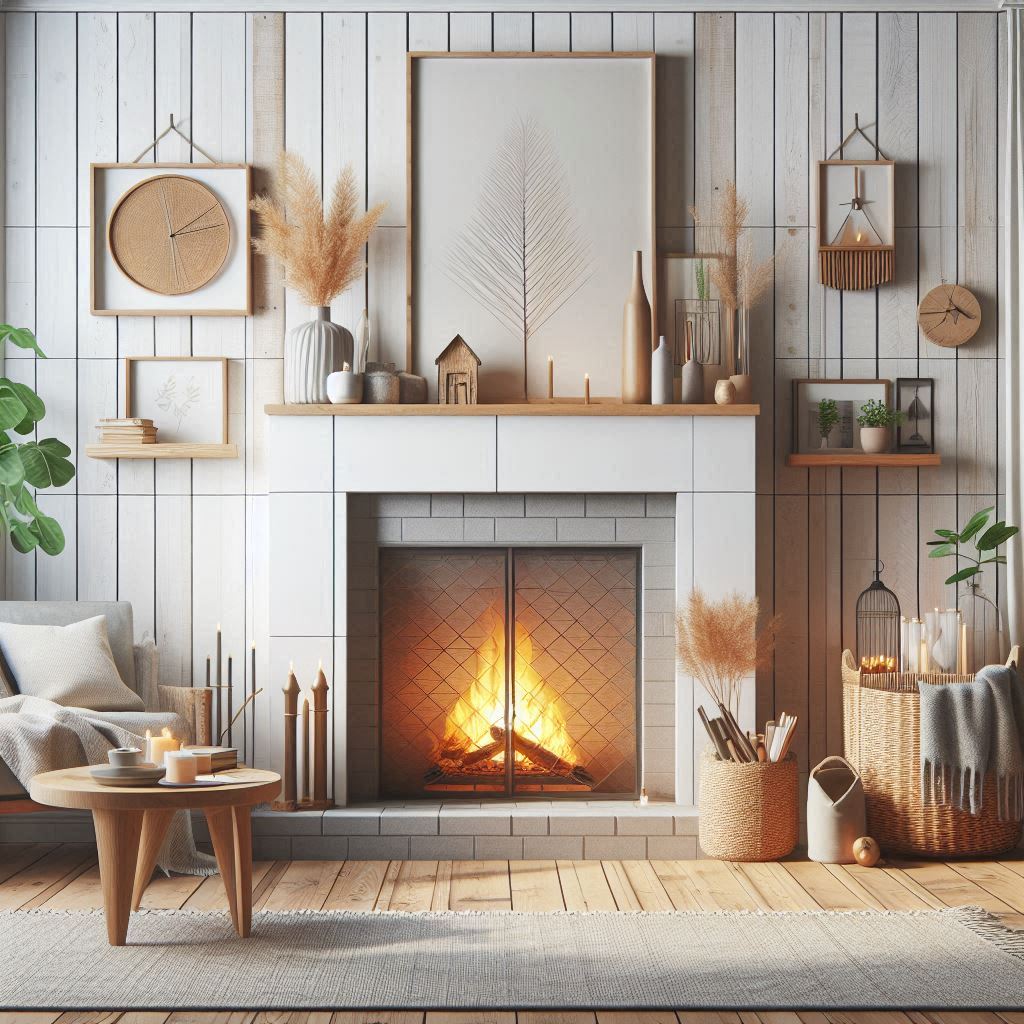
Concept: Create a dramatic focal point by installing a shiplap accent wall that frames the fireplace but doesn’t extend all the way to the ceiling.
Materials:
- Shiplap boards
- Caulk
- Paint
- Nails or screws
Steps:
- Framing (Optional): No framing is typically needed for this project.
- Measure and Mark: Determine the desired dimensions of the shiplap accent wall. Mark the outline on the wall, ensuring it frames the fireplace without reaching the ceiling.
- Shiplap Installation: Install the shiplap boards horizontally within the marked outline, ensuring a tight fit and level placement. Caulk any gaps between boards.
- Painting: Paint the shiplap for a polished look. You can also paint the existing wall surface outside the shiplap accent wall for a cohesive finish.
21. Shiplap and Shiplap Wainscoting for Textural Delight
Concept: Play with textures by combining horizontal shiplap on the main fireplace area with vertical shiplap wainscoting on the lower portion. This adds visual interest and a touch of elegance.
Materials:
- Standard shiplap boards (horizontal planks)
- Wainscoting shiplap boards (pre-cut with a raised panel design) or lumber for DIY wainscoting panels
- Caulk
- Paint
- Nails or screws
- Wood glue (for DIY wainscoting panels)
Steps:
- Framing (Optional): Build a frame if necessary.
- Plan the Layout: Determine the height for the wainscoting section. Mark a level line on the fireplace structure to separate the two shiplap styles.
- Wainscoting Installation:
- Option A (using pre-cut wainscoting panels): Follow the manufacturer’s instructions to install the wainscoting panels on the lower portion of the fireplace, ensuring a tight fit and level placement.
- Option B (DIY wainscoting): Construct your own wainscoting panels using lumber and decorative trim pieces. Secure the panels to the fireplace structure with wood glue and nails/screws.
- Shiplap Installation: Install the standard shiplap boards horizontally above the wainscoting section, ensuring a tight fit and level placement. Caulk any gaps between boards.
- Painting: Paint both the shiplap and wainscoting sections for a cohesive look. You can choose contrasting colors for added visual interest (optional).
22. Rainbow Shiplap: Embrace the Playful
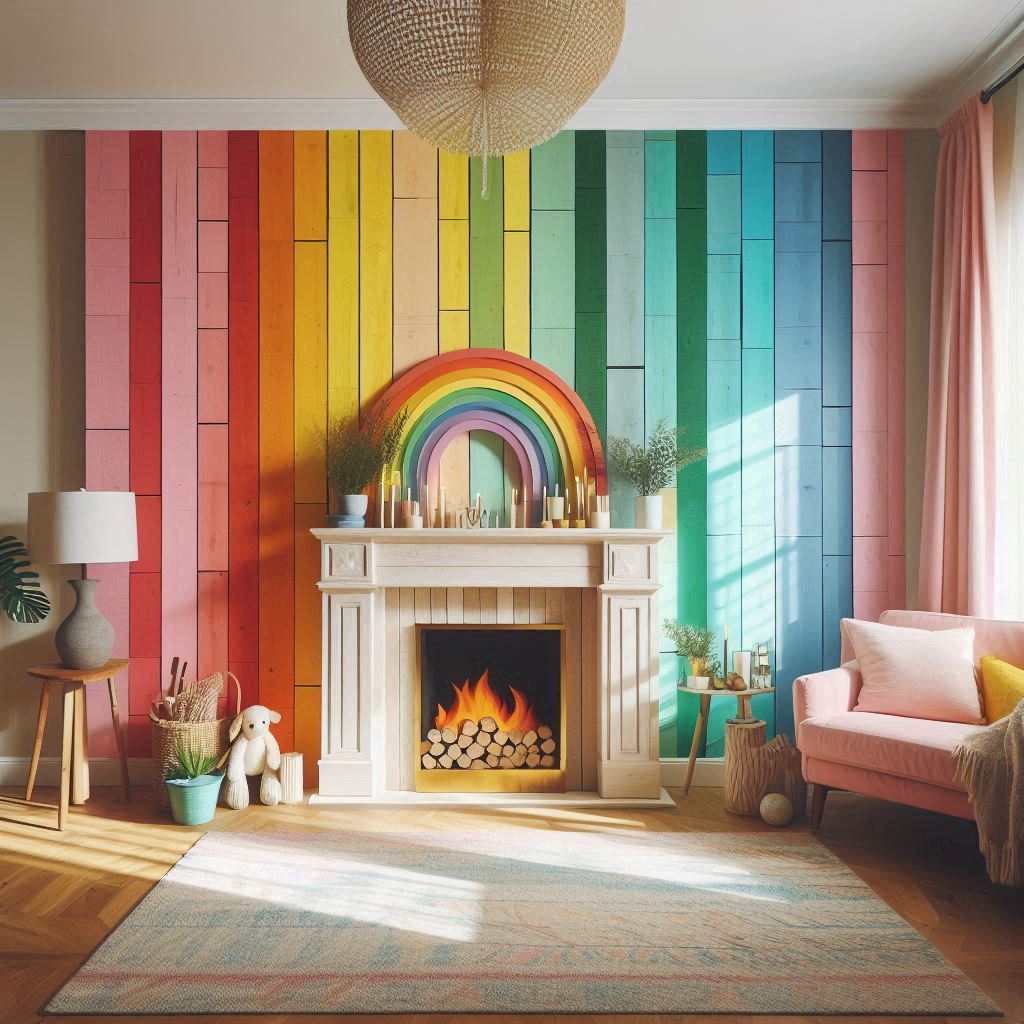
Concept: Ditch the traditional color palette and create a vibrant and whimsical fireplace with a rainbow shiplap design.
Materials:
- Shiplap boards
- Paint in various colors
- Caulk
- Nails or screws
Steps:
- Framing (Optional): Build a frame if necessary.
- Plan the Color Scheme: Decide on the color combination for your rainbow shiplap. You can choose a gradient effect, alternating colors, or a geometric pattern.
- Painting the Shiplap Boards: Pre-paint all the shiplap boards in your chosen colors before installation. Ensure proper drying time.
- Shiplap Installation: Install the pre-painted shiplap boards according to your color scheme, ensuring a tight fit and level placement. Caulk any gaps between boards.
23. Shiplap Meets Fireplace Insert: Update Your Electric Fireplace
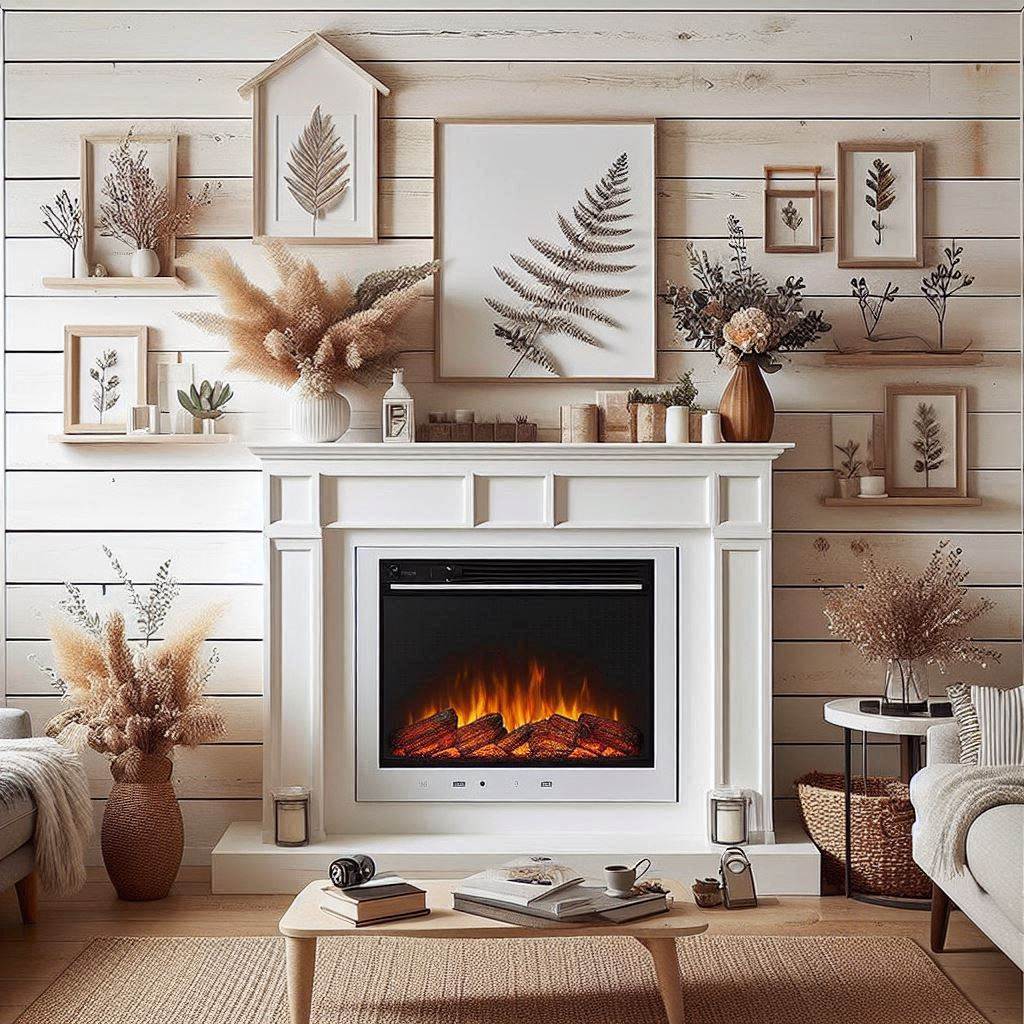
Concept: Breathe new life into your existing electric fireplace by building a shiplap surround and mantel for a more traditional and inviting look.
Materials:
- Shiplap boards
- Lumber for mantel construction
- Caulk
- Paint or stain
- Nails or screws
- Wood glue (for mantel construction)
Steps:
- Measure the Electric Fireplace: Carefully measure the dimensions of your electric fireplace to ensure the new surround and mantel will fit properly.
- Framing (Optional): Depending on the existing design of your electric fireplace, you might need to build a frame for additional support for the shiplap and mantel.
- Shiplap Installation: Install the shiplap boards around the electric fireplace, ensuring a tight fit and level placement. Caulk any gaps between boards.
- Mantel Construction: Design and build your mantel using lumber. Ensure proper stability and secure all pieces with wood glue and nails/screws.
- Installing the Mantel: Secure the completed mantel to the fireplace structure, ensuring it doesn’t block the electric fireplace’s venting or operation.
- Finishing Touches: Paint or stain the shiplap and mantel for a desired look.
Wrap Up
With these 20+ DIY shiplap fireplace ideas, you have a wealth of inspiration to transform your fireplace into a stunning focal point. Remember, choose a design that reflects your personal style and skill level. Don’t be afraid to experiment and personalize the ideas to create a fireplace that’s uniquely yours.
Feel free to share your DIY shiplap fireplace project in the comments below! We’d love to see your creativity come to life.