
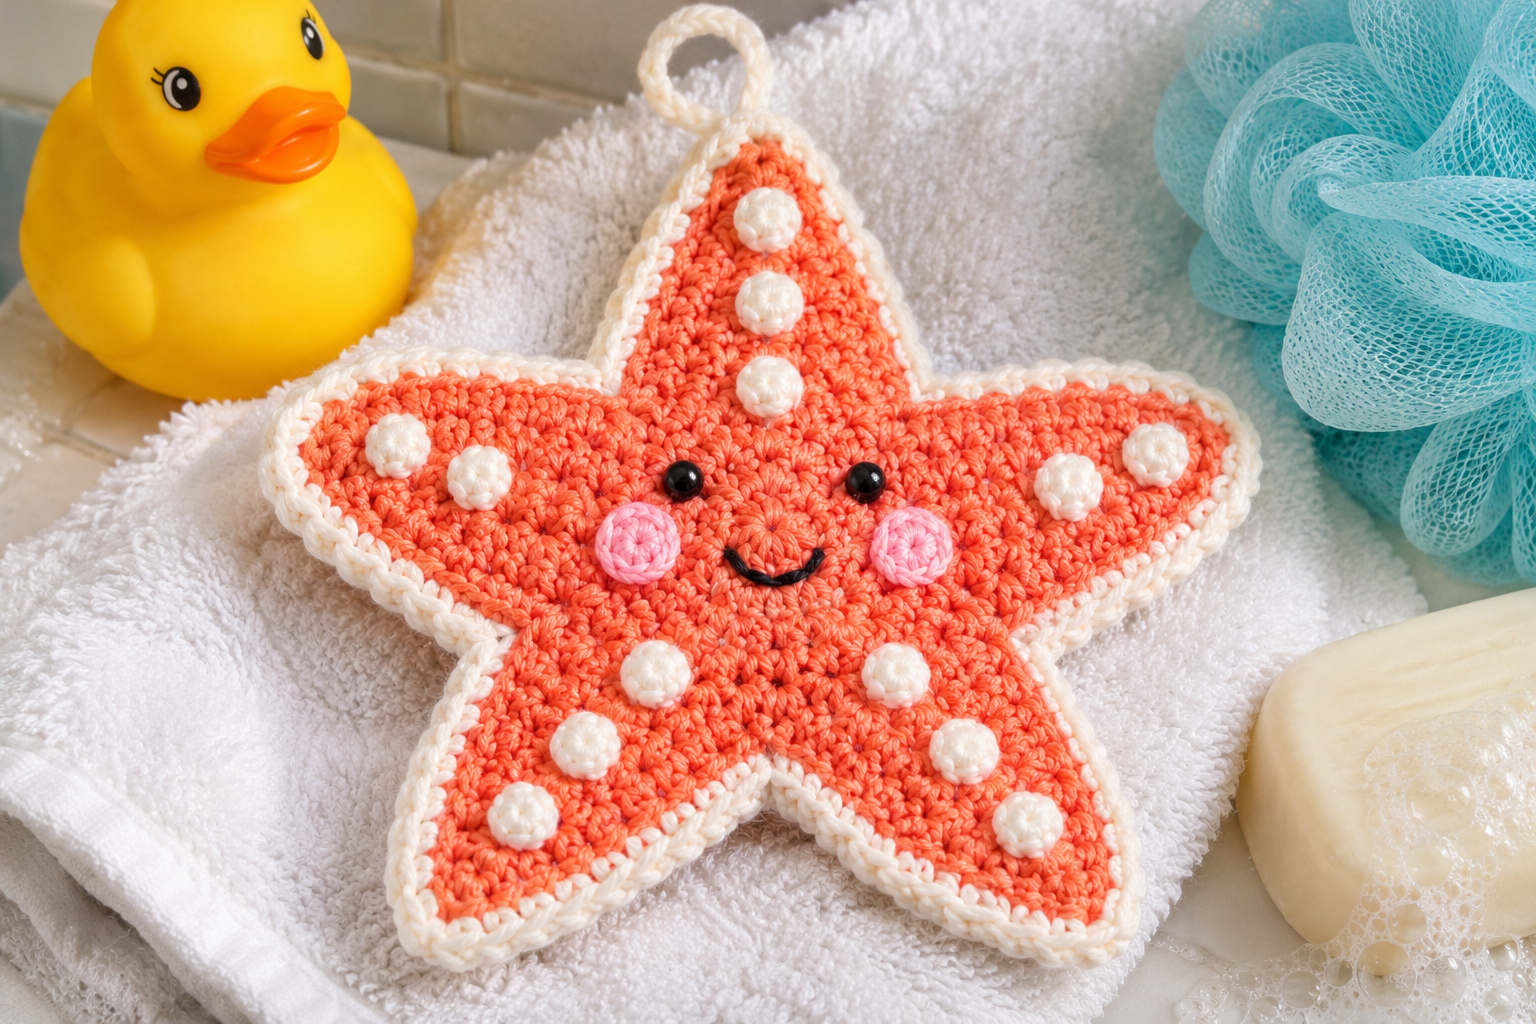
A starfish looks like the easiest shape in crochet: five points around a center. The trouble starts when it’s meant for a baby. Narrow arms get chewed. Plastic eyes and glued-on details work loose. A flat motif with no structure curls at the tips the first time it goes through the wash. And a lot of “free pattern” roundups send you to ten different blogs, half of which have disappeared or moved behind a paywall.
Every pattern below is written out in full, right here. The first one builds the basic star. The other ten reuse it for a softie, a rattle, a washcloth, a beanie, a blanket, and more, with only the finishing changed. Work the first one once and the rest mostly come down to how you assemble it.
Yarn, Hook, and Safety Decisions to Make Before You Start
Yarn. For anything a baby will hold, wear, or bathe with, pick a smooth, plied yarn that can go in the washing machine. Cotton is absorbent, holds its shape, and doesn’t split, which makes it the better choice for the washcloth and anything that gets wet. It has almost no stretch, though, so it’s harder on the hands. Acrylic and cotton-acrylic blends are softer and springier and easier to wash, but acrylic can lose its bounce if you press it with a hot iron. Skip mohair, eyelash, and brushed yarns for baby items: they shed fibers, and babies put everything in their mouths.
Hook size. Use a hook one or two sizes smaller than the yarn label suggests, especially for anything stuffed. Worsted-weight labels often suggest a hook of 5 mm or larger, while a 3.5 to 4 mm hook gives the dense fabric that keeps stuffing from showing through the stitches. For flat pieces like the blanket appliqué, the label size is fine.
Small parts. Federal toy rules for children under three use a test cylinder roughly 1.25 inches wide, and anything that fits inside it counts as a choking hazard. That is why the patterns here use embroidered details rather than buttons, beads, or plastic safety eyes. A face worked in tight satin stitch can’t be pulled off. Even so, tug-test every seam and every embroidered detail before the item goes anywhere near a baby.
Sleep. The American Academy of Pediatrics advises keeping soft objects and loose bedding out of a baby’s sleep space during the first year. So the softie, the blanket, and the headband in this list are for awake, supervised time, not the crib. The wall garland is for decoration only and belongs well away from the crib.
Abbreviations (US terms). MR = magic ring; ch = chain; sl st = slip stitch; sc = single crochet; hdc = half double crochet; inc = 2 sc in the same stitch; sc2tog = single crochet two together (a decrease).
The Eleven Patterns
1. The Basic Starfish Motif That Every Other Pattern Builds On
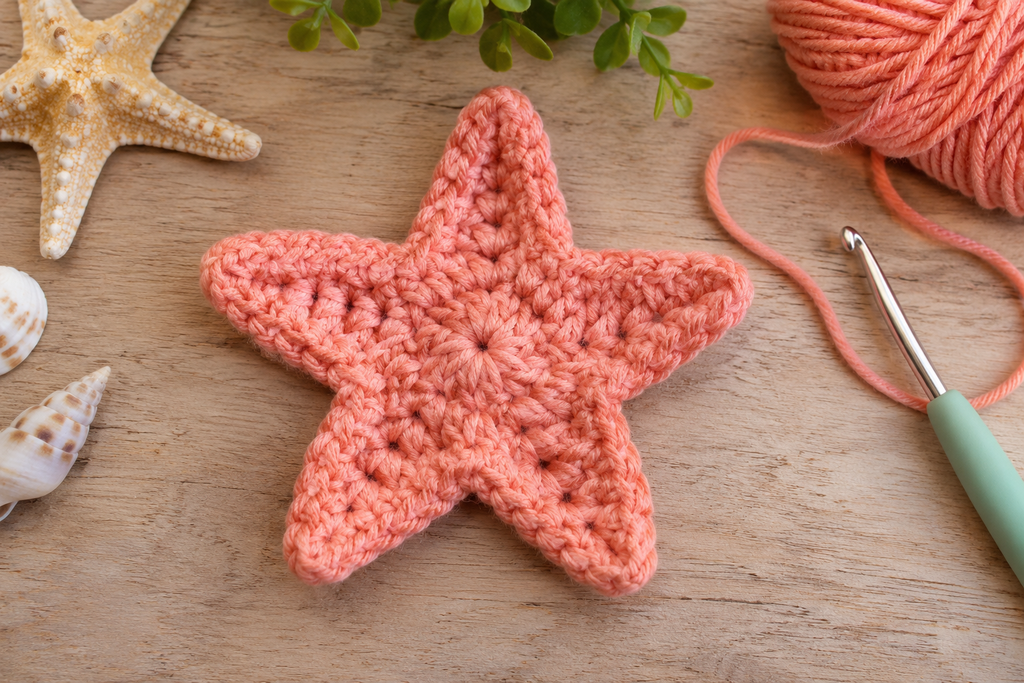
Real starfish are more accurately called sea stars, since they aren’t fish. Most have five arms, and colors run from orange and red to purple and sandy tan, so you have plenty of yarn choices. This version is a flat circle with five tapered arms worked outward from its edge, using nothing beyond sc, inc, and sc2tog.
Materials: worsted-weight cotton or washable acrylic, a 3.5 to 4 mm hook, a stitch marker, a yarn needle.
The center circle (worked in a spiral, no joining; mark the first stitch of each round):
- Round 1: MR, 6 sc in the ring. (6)
- Round 2: inc in each stitch. (12)
- Round 3: (sc in next stitch, inc) six times. (18)
- Round 4: (sc in next 2 stitches, inc) six times. (24)
- Round 5: (sc in next 3 stitches, inc) six times. (30)
The arms are worked back and forth in rows on the stitches of Round 5, six stitches per arm. For arm 1, use the first six stitches of Round 5, where your marker sits.
- Row 1: sc in the next 6 stitches. Ch 1, turn.
- Row 2: sc in each of the 6 stitches. Ch 1, turn.
- Row 3: sc2tog, sc in the next 4 stitches. (5) Ch 1, turn.
- Row 4: sc in the next 3 stitches, sc2tog. (4) Ch 1, turn.
- Row 5: sc2tog, sc in the next 2 stitches. (3) Ch 1, turn.
- Row 6: sc in the next stitch, sc2tog. (2) Ch 1, turn.
- Row 7: sc2tog. (1) Fasten off.
For the next arm, join yarn with a sl st in the next unworked stitch of Round 5, ch 1, sc in that stitch and the next 5, then repeat Rows 2 to 7. Do this five times in total, so all 30 stitches are used. Weave in the ends.
Moving the decrease from the start of one row to the end of the next keeps each arm symmetrical. If you always decrease on the same side, the arms lean. In worsted weight with a 4 mm hook, expect roughly 5 to 6 inches from tip to tip, but tension varies enough that you should measure your own.
Variation: for a sunflower-style star with six arms, extend the circle with Round 6, (sc in next 4 stitches, inc) six times, to reach 36 stitches, then work six arms of six stitches each.
2. A Stuffed Starfish Softie With an Embroidered Face
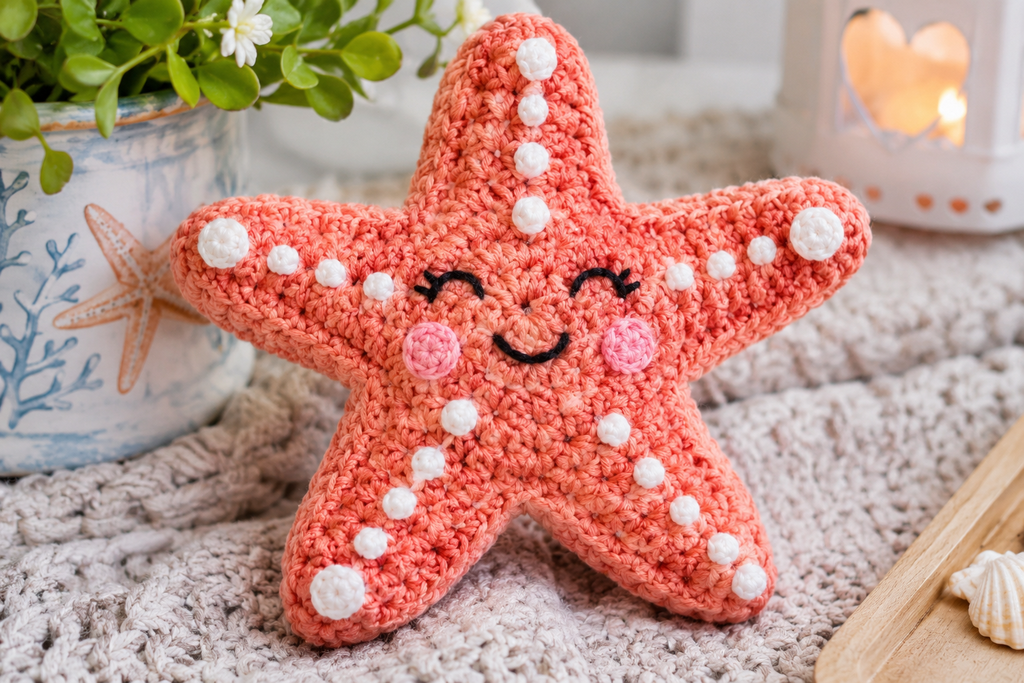
This is the most familiar baby starfish, and the one where hook size matters most.
Make two basic motifs. Hold them wrong sides together, and with the hook one size smaller than you used for the motifs, sc through both layers all the way around. Place one sc in each row-end along the sides of an arm, 3 sc in the single stitch at each tip so the point stays sharp, and 1 sc in the shared stitch at each valley between arms. Stop with about two arms left open.
Stuff in small pieces, pushing the fiberfill into each arm with the blunt end of a chopstick. Overstuffed arms bulge and show gaps. Understuffed arms flop, and a floppy arm bends back on itself. Aim for firm but still squeezable, then close the last two arms.
For a face, embroider two small eyes and a short smile with yarn or embroidery floss in tight satin stitches, anchoring each stitch at the back of the work. A plain starfish with no face is also entirely correct and removes one more thing to check.
3. Starfish Appliqué for a Baby Blanket (Stroller or Car Seat Size)
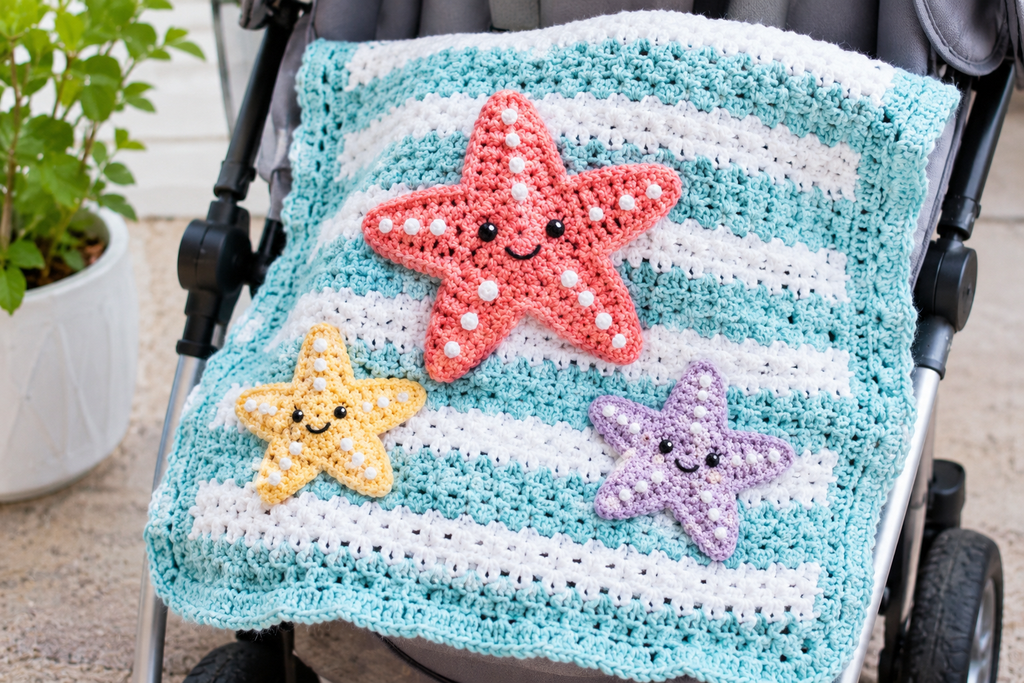
Appliqué is the easiest way to get a starfish onto a blanket you already have or have already crocheted. A stroller-size blanket is commonly around 30 by 36 inches, though baby blanket sizes vary, so check the dimensions of the one you’re decorating.
For the best effect, make three stars in different sizes and group them in a corner rather than centering one. The basic motif is your medium size. For a larger one, work a sixth round, (sc in next 5 stitches, inc) five times, which brings the circle to 35 stitches. Then work five arms of seven stitches each: Rows 1 and 2 straight, Rows 3 to 8 each decreasing by one stitch. For the small one, use the mini starfish in pattern 11.
Sew each star on with a yarn needle and matching yarn, using a small whip stitch around the arm edges and a few anchoring stitches at each tip so the arms can’t flip up and catch a finger. Avoid fabric glue. It stiffens the area, and when it eventually peels, the starfish becomes a loose object.
4. A Newborn Beanie With a Starfish Crown
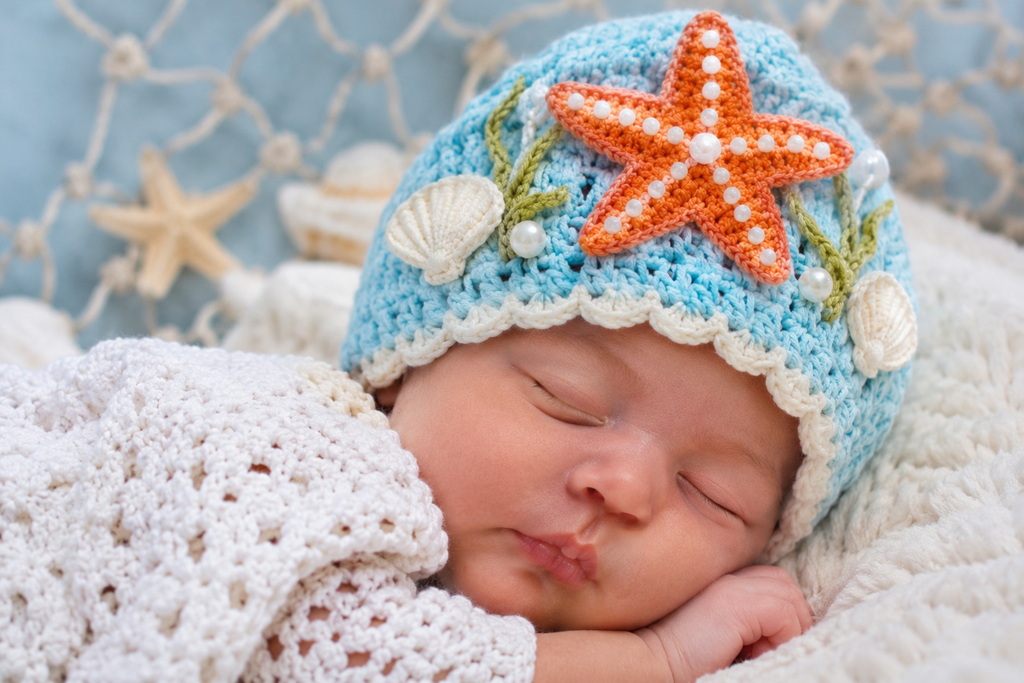
A plain beanie needs no stitch-by-stitch pattern when you’re working to measurement rather than a printed gauge.
Work the circle exactly as in Round 1 to Round 5, then keep adding rounds of (sc in next N stitches, inc) six times, with N going up by one each round, until the flat circle measures about 4 inches across for a newborn or about 4½ inches for a baby of 0 to 3 months. Then work in sc without increasing until the hat is long enough to cover the ears. That is roughly 4 to 5 inches measured from the crown center, but confirm this against a hat size chart such as the one published by the Craft Yarn Council, because babies vary.
Make a basic starfish motif in a contrasting color and sew it to the crown, stitching down both the center and each arm tip. Skip the pom-pom. It is the first thing a baby pulls off and puts in the mouth.
Hats are for going out. Take them off indoors in a warm room and whenever the baby falls asleep.
5. A Starfish Washcloth for the Bath
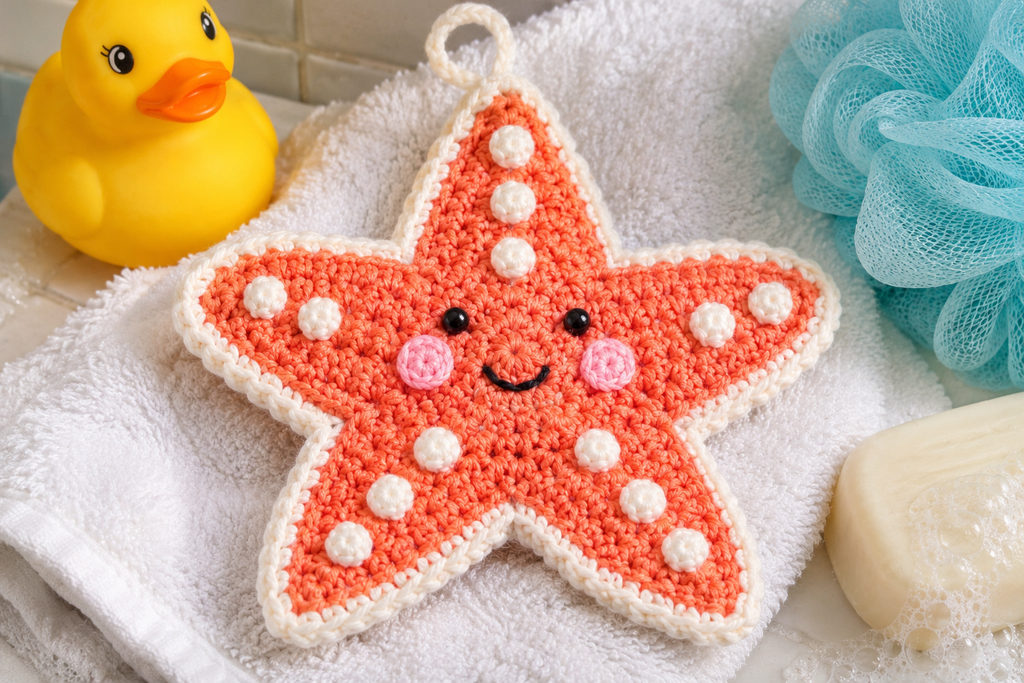
This is the least fiddly pattern here because nothing gets stuffed and nothing can come loose.
Work the basic motif in 100% cotton, in a pale color so you can spot leftover soap or dirt. Then edge it: join yarn at any valley and work sc evenly around, 1 sc in each row-end along the arms, 3 sc in each tip stitch, and 1 sc at each valley. The edging firms up the arms so they don’t curl in the water.
Cotton gets softer with washing, so a new cloth feels crisper than it will after a few washes. Rinse it and let it air-dry fully between uses. A damp cotton cloth left in a bag or on a counter holds moisture longer than most people expect.
6. A Crochet-Covered Teething Ring With a Mini Starfish
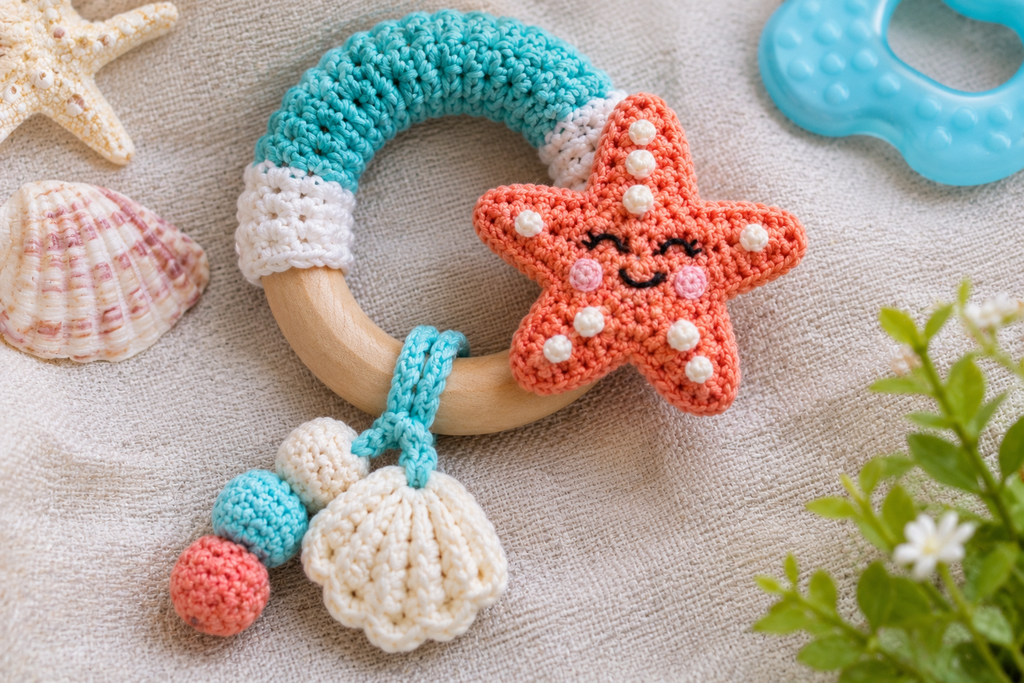
Wooden teething rings are sold by makers who intend them for babies, usually in untreated beech or maple. A crocheted cover adds texture and a place to attach a starfish. This is the one pattern in the list I would handle with the most care.
Buy a solid wooden ring from a seller that markets it specifically as a teether, not a craft ring from a macramé or sewing aisle, since craft rings may be stained or sealed with finishes not intended for mouths. With a smooth cotton yarn and a small hook, join yarn to the ring and sc around it, packing the stitches snugly until the ring is covered, then sl st to the first stitch. Sew the mini starfish from pattern 11 firmly onto one spot.
Understand what this is and isn’t. A crocheted cover is a texture, not a tested teether, and a baby who chews will wet and wear it down. Check it for loosening stitches before every use, wash it often, and retire it when the yarn starts to fray.
7. A Starfish Rattle With a Sealed Insert
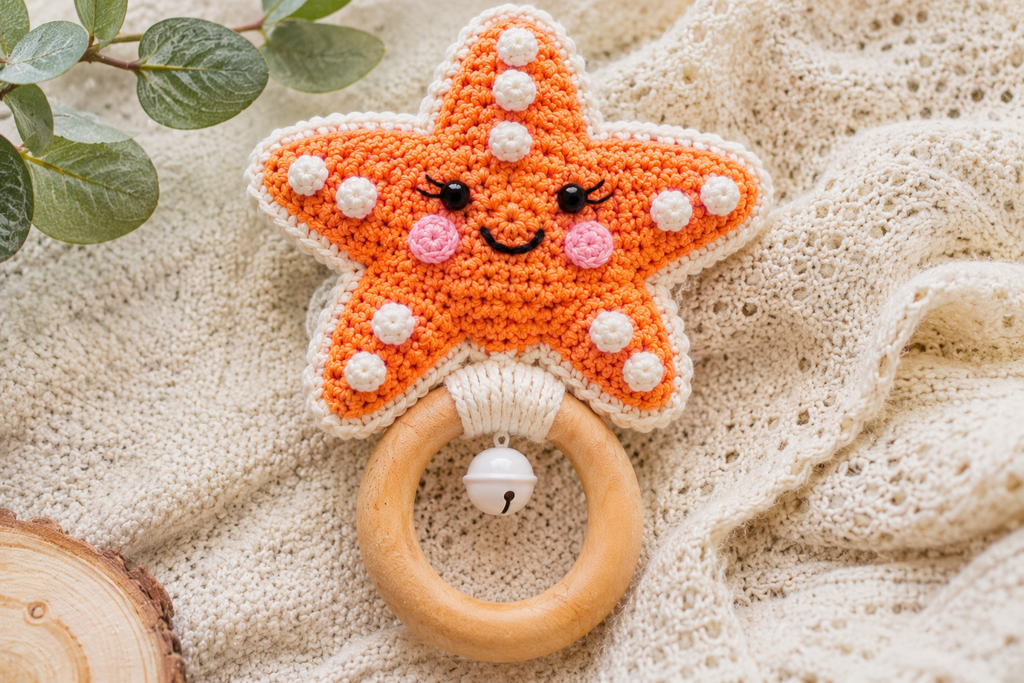
The sound in a handmade rattle comes from a plastic rattle insert sold for toy making. The risk is that insert coming loose, so the build matters more than the look.
Make a stuffed starfish as in pattern 2, but before closing, place the insert in the center with stuffing packed snugly around it so it can’t shift into an arm. Sew the final opening shut with doubled strong thread, working a second row of stitches over the first. Give the closed seam a firm tug test and shake the toy to confirm the insert stays put.
Some inserts are not washable, so check the packaging. If the rattle can’t go through a machine, spot-clean it, and if a seam ever starts to open, take it out of use.
8. A Starfish Garland for the Nursery Wall
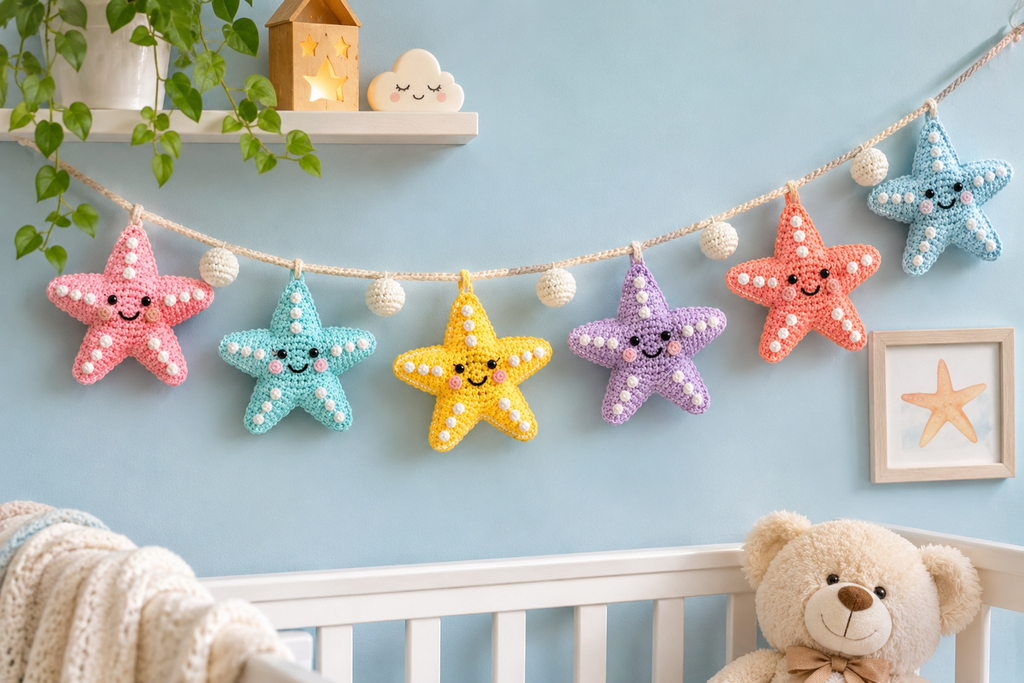
A garland is decoration, not a toy, and the baby should never be able to reach it.
Make five starfish in a mix of sizes, using the mini, basic, and larger versions from the earlier patterns. Block each one: for cotton, dampen it, pin it flat with the arms spread evenly, and let it dry. Then sew each star to a length of twine or ribbon, spacing them unevenly for a more natural look.
Hang it on wall hooks across a dresser or window, well above and away from the crib and changing area. A cord within a baby’s reach is a strangulation hazard, so the safe rule is that if the baby could grab any part of it, it doesn’t go up.
9. A Giant Starfish Mat for Newborn Photos
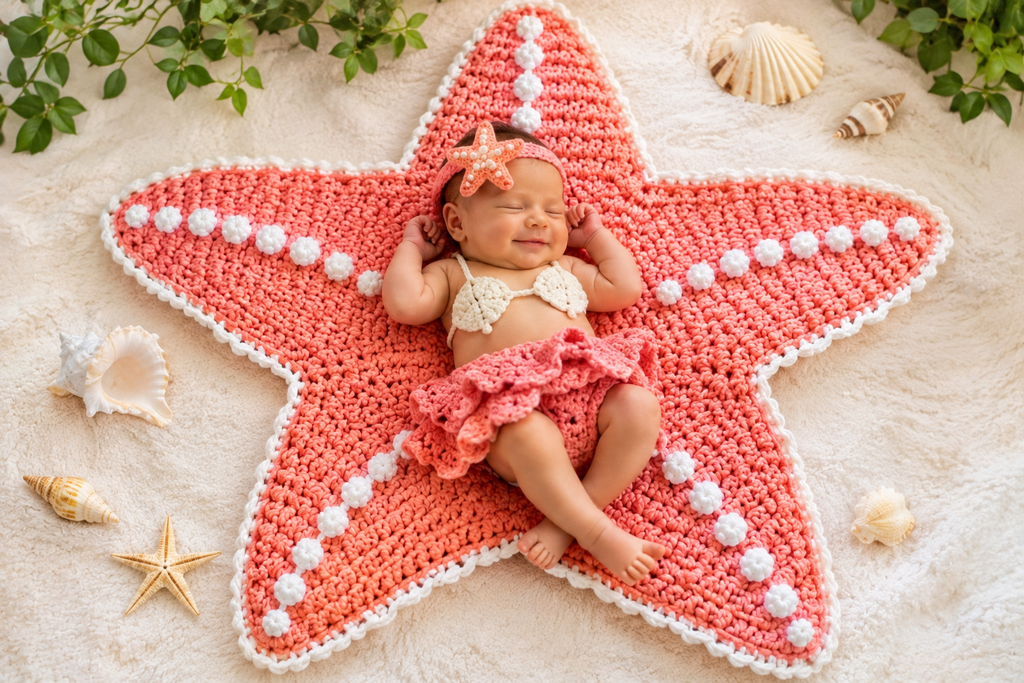
A big starfish makes a clean backdrop for a supervised photo session, with the baby lying on it rather than inside it.
Use bulky-weight yarn and a hook around 6.5 mm or larger, and extend the circle well past 30 stitches. After Round 5 (30 stitches), continue with 5 repeats per round:
- Round 6: (sc in next 5 stitches, inc) five times. (35)
- Round 7: (sc in next 6 stitches, inc) five times. (40)
- Round 8: (sc in next 7 stitches, inc) five times. (45)
- Round 9: (sc in next 8 stitches, inc) five times. (50)
Each arm then uses ten stitches. Work Rows 1 to 4 straight, then decrease one stitch per row, alternating sides, from Row 5 through Row 13, finishing on a single stitch. Because the mat is so large, work the arms with the front side facing you on every row if you can: it makes the front and back look more alike. Expect noticeable stretch, and block it flat.
A photo mat is for short supervised sessions, with the baby always watched and always on their back. It should never be left under a sleeping baby.
10. A Starfish Headband for Photo Props
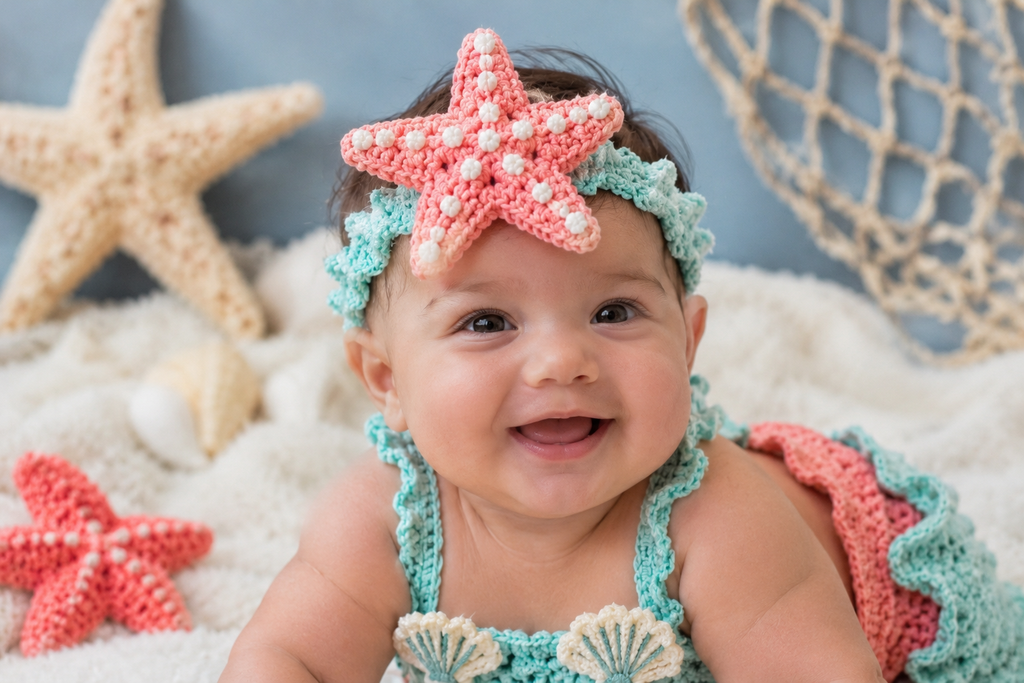
Headbands are a common newborn photo prop, but they are also the riskiest accessory in this list, so the build is deliberately plain.
Make a band 1 to 1½ inches wide in hdc worked in the back loops only, which creates a stretchy, ribbed fabric. Size it to fit the baby’s head comfortably with a bit of stretch, and test it against the baby’s measurement rather than a number from a chart, because newborn heads vary widely. Skip elastic, which can cut into skin if it’s too tight, and rely on the stretch of the ribbing. Sew a mini starfish to the front, anchoring each arm tip flat.
Use it for the length of the photo session and take it off afterward. Never leave it on a sleeping baby or one who is unsupervised.
11. Mini Starfish for Shower Favors and Keepsakes
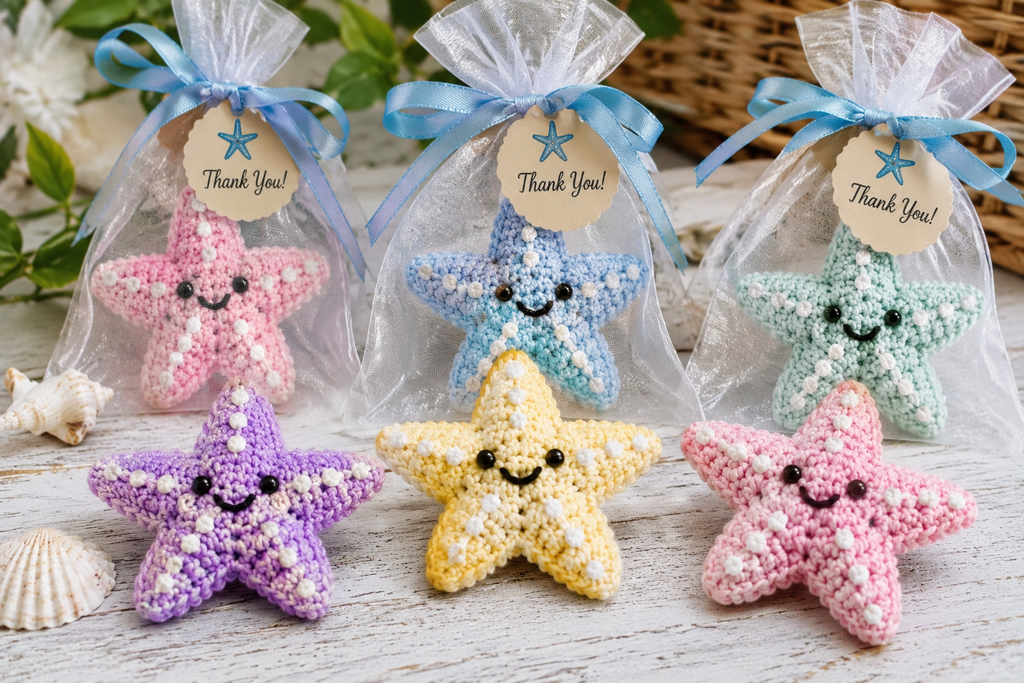
A tiny starfish is quick to make, and a few in different yarn colors turn into baby shower favors, gift-tag decorations, or Christmas ornaments. This one is not a baby toy. It is small enough to count as a choking hazard, so use it for decoration only, kept away from infants.
Materials: sport or fingering weight cotton, a 2.5 to 3 mm hook.
- Round 1: MR, 5 sc. (5)
- Round 2: inc in each stitch. (10)
- Round 3: (sc in next stitch, inc) five times. (15)
Arms (three stitches each): join yarn in the next unworked stitch, ch 1, then:
- Row 1: sc in the next 3 stitches. Ch 1, turn.
- Row 2: sc in each of the 3 stitches. Ch 1, turn.
- Row 3: sc2tog, sc in the next stitch. (2) Ch 1, turn.
- Row 4: sc2tog. (1) Fasten off.
Repeat for all five arms. Dip the finished star in a stiffener appropriate for the yarn if you want crisp points, or attach it to a gift tag with a short loop of ribbon.
Questions Readers Often Have
Why do my starfish arms curl instead of lying flat?
Usually it’s because every decrease sits on the same side of the arm, which pulls it into a curve. Alternate the decrease from the start of one row to the end of the next. If a flat piece still curls, block it: pin cotton damp and let it dry. For acrylic, hold a steamer or iron a short distance above the surface without touching it, since pressing acrylic can flatten it permanently.
Can I use a regular chain-2 start instead of a magic ring?
Yes. Ch 2 and work the first round into the second chain from the hook. The center will be a bit looser, and on a stuffed toy a loose center can open slightly over time, so a magic ring is better there. On flat pieces like the washcloth the difference barely shows.
Can the stuffed starfish and the rattle go in the washing machine?
Check the yarn label first, then put the toy in a mesh bag on a gentle cycle and air-dry it. Inspect the seams afterward. A rattle with a plastic insert may not be machine-washable, so check the insert’s packaging and spot-clean if in doubt.
Final Thoughts
Work the basic motif first and measure it before committing to a bigger project, because your hook and tension will decide how large every other pattern comes out. Keep the face and any small details embroidered, never attached, and tug-test every seam. And treat the sleep rule as fixed: the softie, the blanket, the headband, and the photo mat are for supervised, awake time.

About Syprose Kiche
Syprose Kiche is the creator and writer behind My Besuited Home, a practical home and garden website covering DIY projects, gardening, lawn care, landscaping, home improvement, and outdoor living. She focuses on turning everyday homeowner questions into clear, practical guides backed by careful research and useful real-world considerations.