
Is your living room floor currently a minefield of dried pasta, stray sequins, and half-empty glue sticks? I’ve been there. My first year as a “DIY mom,” I tried to make a life-sized ladybug out of paper-mâché that ended up looking more like a soggy, red boulder. It took three days to dry and eventually became a permanent, accidental ottoman in our playroom.
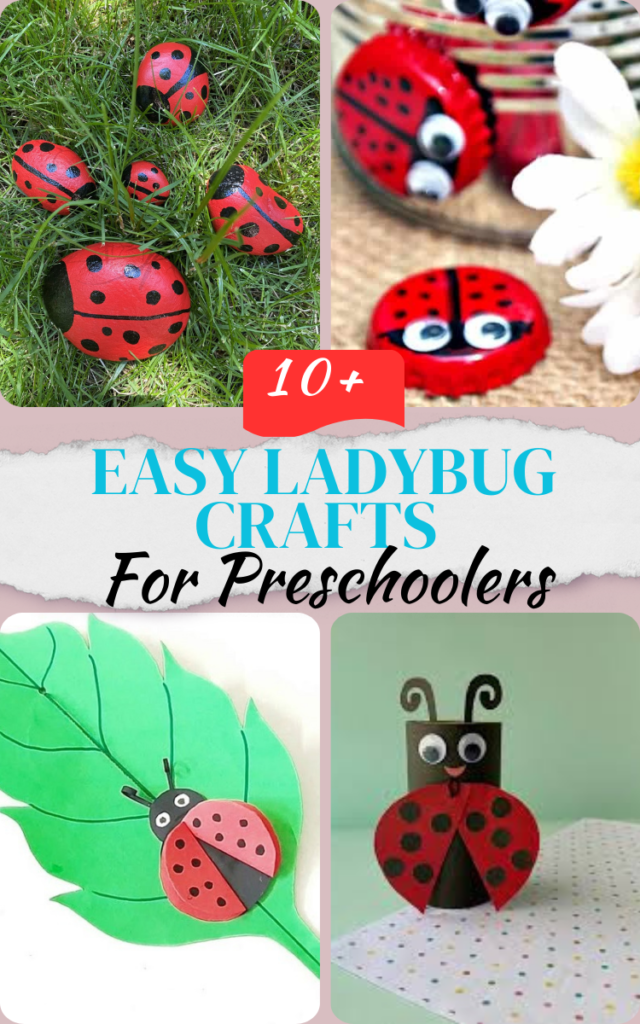
We want crafts that actually keep a four-year-old’s attention for more than thirty seconds without requiring you to buy a $400 3D printer. These 11 ladybug crafts are the ones I swear by—they’re cheap, they’re fast, and they actually look like ladybugs when you’re done.
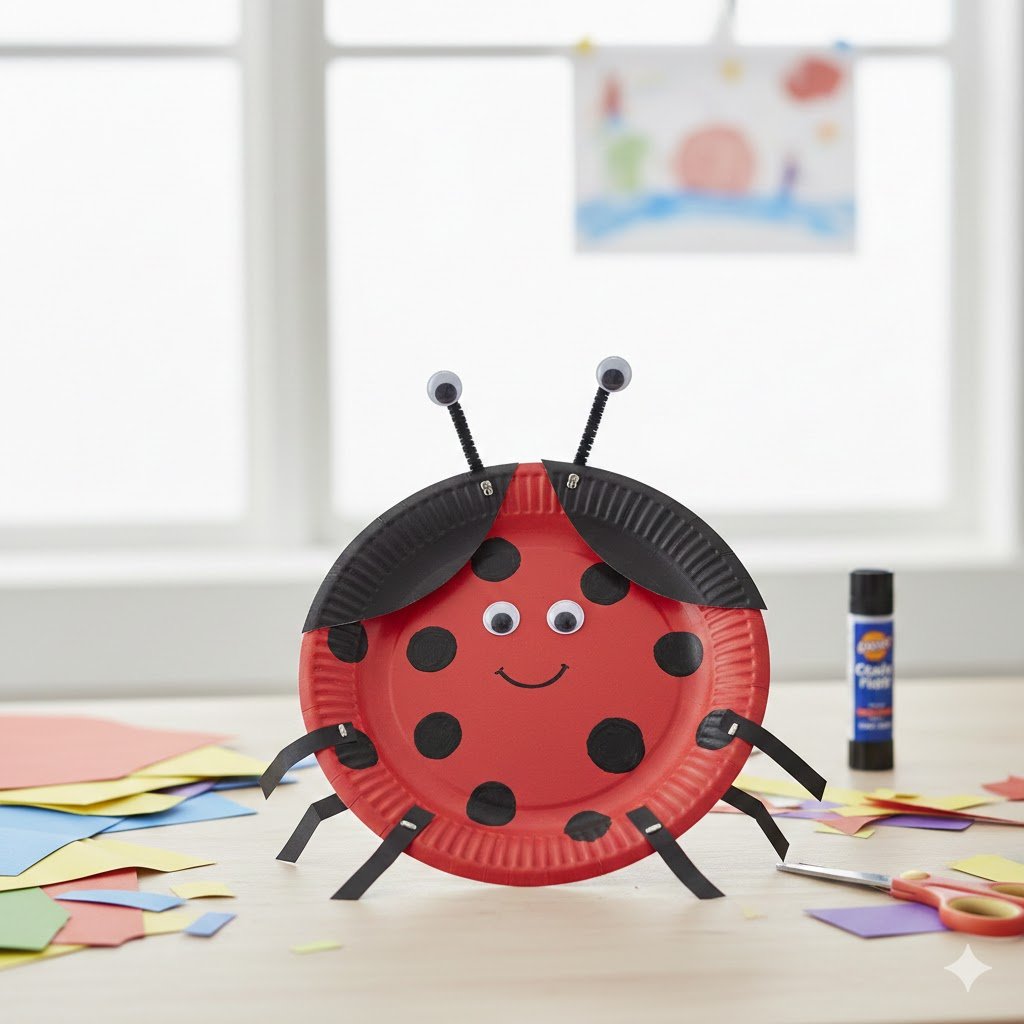
1. Paper Plate Ladybug Craft for Toddlers

Paper plates are the holy grail of preschool crafting. I always keep a bulk pack from the dollar store in my pantry because they are sturdy enough to handle the “aggressive” painting style of a three-year-old. When my daughter was little, she once painted a paper plate so heavily with red tempera that it actually started to wilt, but it still held together.
To get started, you just need a standard white paper plate, some red paint, and black construction paper. Have your kiddo paint the entire back of the plate red. While that’s drying—and I highly suggest using a hairdryer if you want to avoid a “toddler meltdown” over wait times—cut out a semi-circle of black paper for the head.
The best part is the spots. I’ve found that using a circular sponge brush or even just their thumbprints makes for a much more “authentic” look than trying to cut out perfect circles yourself. Glue the head on one end, add some googly eyes, and you’ve got a classic ladybug.
I’m telling you, don’t bother with expensive acrylics here. Standard washable poster paint is your best friend. It cleans off the dining table with a single wipe, whereas acrylics will stay on your mahogany forever as a bitter reminder of “Art Time 2026.”
2. Egg Carton Ladybug DIY Projects
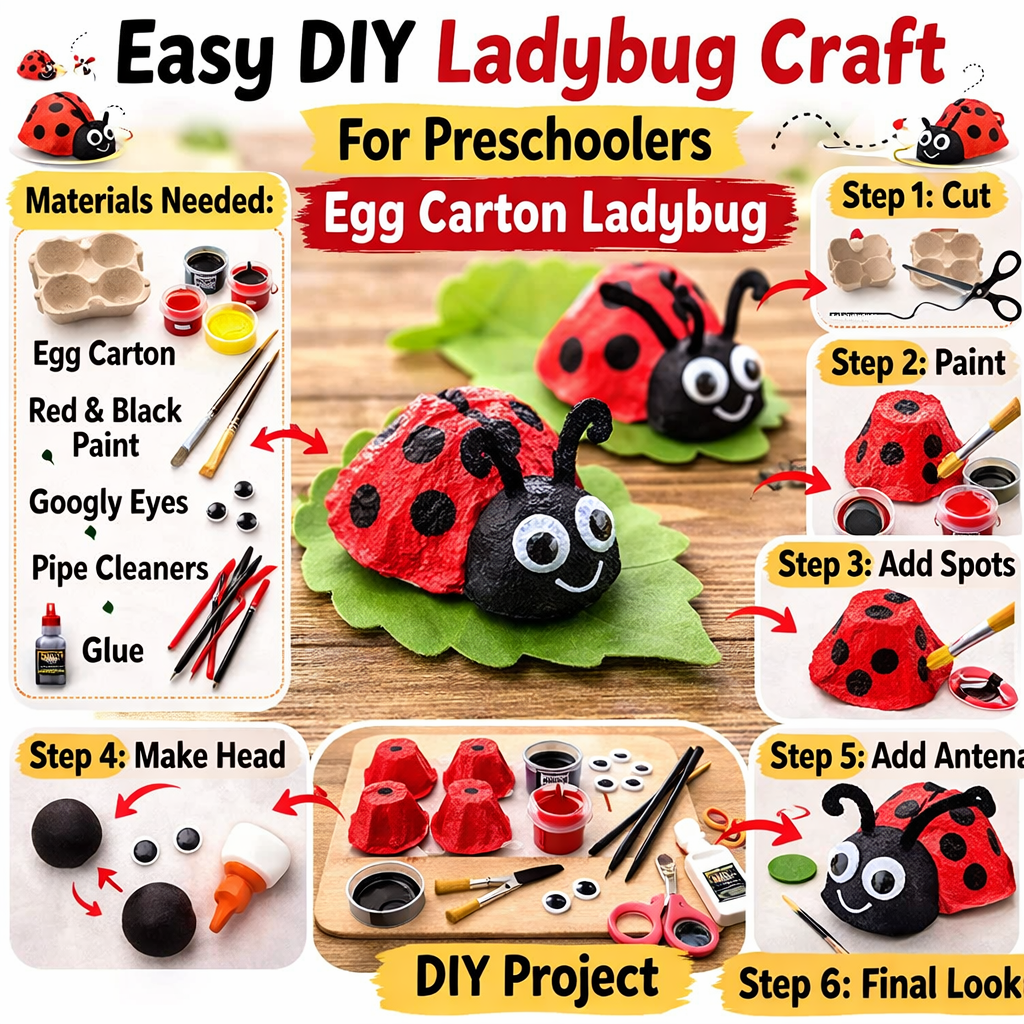
Stop throwing away your egg cartons. Seriously. I once built an entire “bug city” out of recycled cardboard because I forgot to buy actual toys for a rainy weekend. Egg cartons are the perfect shape for a ladybug’s shell because they already have that natural curve.
Cut the individual “cups” out of a cardboard egg carton. If you’re using the plastic or styrofoam ones, just stop right now—paint won’t stick to them, and you’ll end up with a flaky, red mess all over your carpet. Stick to the grey pulp cardboard. It soaks up the paint beautifully.
Give your preschooler a cup and let them go to town with red paint. Once it’s dry, they can use a black marker to draw the line down the back and add the dots. For the antennae, I like to poke two tiny holes in the front and thread a bit of black pipe cleaner through.
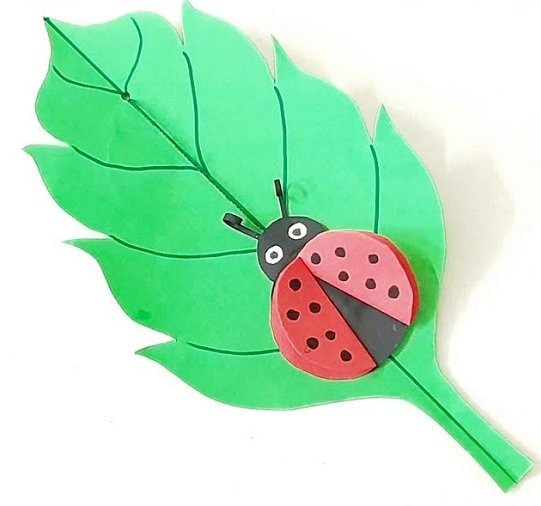
If you want to get fancy, glue a green leaf-shaped piece of felt to the bottom so the ladybug has a place to “sit.” This makes the craft feel like a finished toy rather than just a piece of trash you painted red. It’s a great way to teach them about recycling while keeping them busy for a solid twenty minutes.
3. Easy Ladybug Corner Bookmarks
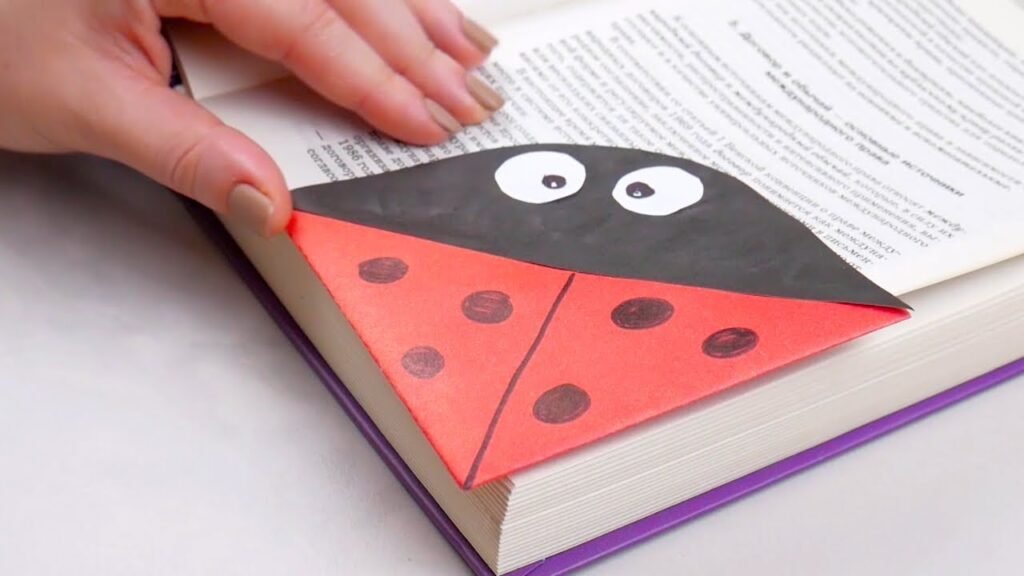
I’m a sucker for a craft that actually serves a purpose. My house is full of half-finished books with dog-eared pages, which drives me absolutely nuts. These corner bookmarks are a great way to get kids excited about reading while also saving your books from permanent creases.
You start with a square piece of red cardstock. You’ll do a few simple folds to create a pocket that slips over the corner of a page. If your preschooler isn’t great at folding yet, you do the origami part and let them handle the “beautification” process.
Cut out a black heart shape and glue it to the top to represent the wings. Then, let the kids use a hole punch on black paper to create the spots. Using a glue stick is much better here than liquid glue—liquid glue makes the paper buckle, and then the bookmark won’t actually slide onto the book.
My son made about twenty of these in one sitting. We ended up giving them to the neighbors. It’s a low-mess craft that doesn’t require any drying time, which is a massive win in my book.
4. Painted Rock Ladybugs for Garden Decor
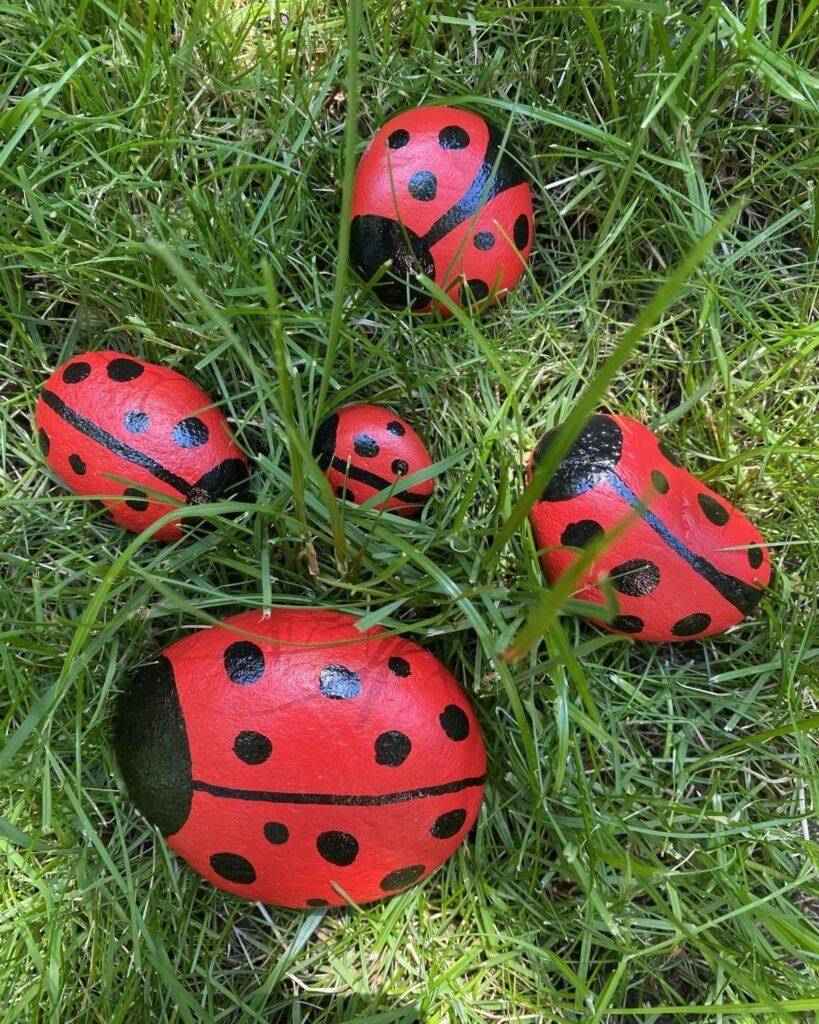
This is my favorite “outdoor” craft. A few years ago, I tried to make an “elaborate” stone path in my backyard that ended up looking like a rock slide. To hide the mistakes, I started painting the smaller stones into bugs. Now, it’s a family tradition.
Find smooth, flat stones at the park or in your driveway. Scrub them first! If there’s dirt on the rock, the paint will peel off by Tuesday. Once they’re dry, have the kids paint the whole rock red. For stones, I actually do recommend outdoor craft paint or even a paint pen, because washable paint will disappear the first time it rains.
Once the red base is dry, use a black paint pen to draw a line down the middle and a black circle at the front for the face. The kids can then dot on the spots. For the eyes, two white dots with smaller black dots inside make the ladybug look “surprised” and adorable.
Place these in your flower pots or along the edge of your walkway. It gives the kids a sense of pride to see their artwork “living” in the garden. Just a heads up: toddlers love to throw these, so maybe keep the “rock gallery” at ground level.
5. Toilet Paper Roll Ladybug Art
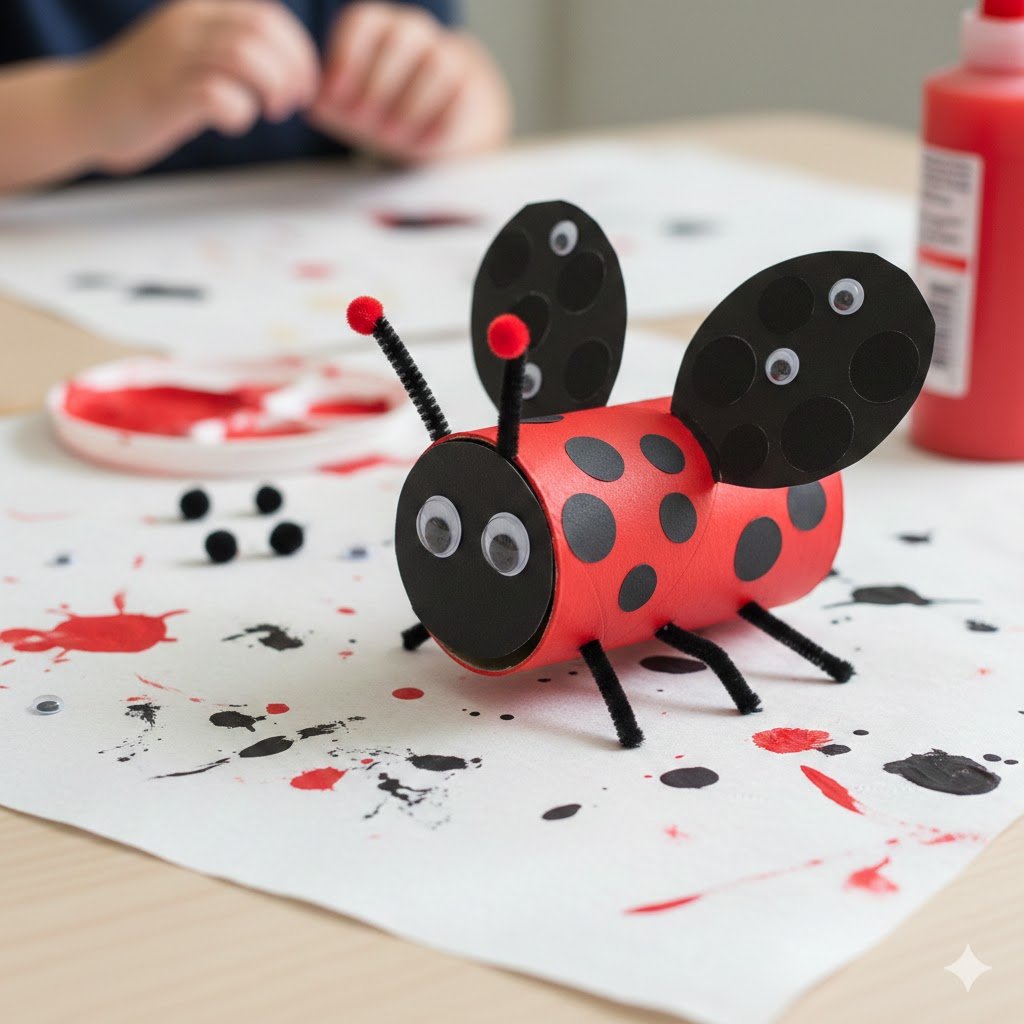
The humble toilet paper roll is the backbone of the DIY world. I’ve probably used a thousand of these in my life. For this version, we aren’t making a flat ladybug; we’re making a “standing” one that can actually move around.
Wrap the tube in black construction paper. Then, cut two large red circles for the wings. Cut the circles in half so you have four wings total (though two usually suffices for a preschooler’s attention span). Have them decorate the red wings with black spots before you glue them to the back of the tube.
I’ve found that stapling the wings is much more effective than gluing. Glue takes too long to set on a curved surface, and the wings will just slide off, leading to a frustrated four-year-old. A quick staple at the top of the wing keeps it secure forever.
Add some googly eyes and pipe cleaner antennae to the top of the tube. My kids used to use these as “finger puppets” by sticking their hands inside the roll. It’s a simple, vertical craft that stands up on a shelf, making it way easier to display than flat paper crafts.
6. Cupcake Liner Ladybug Cards
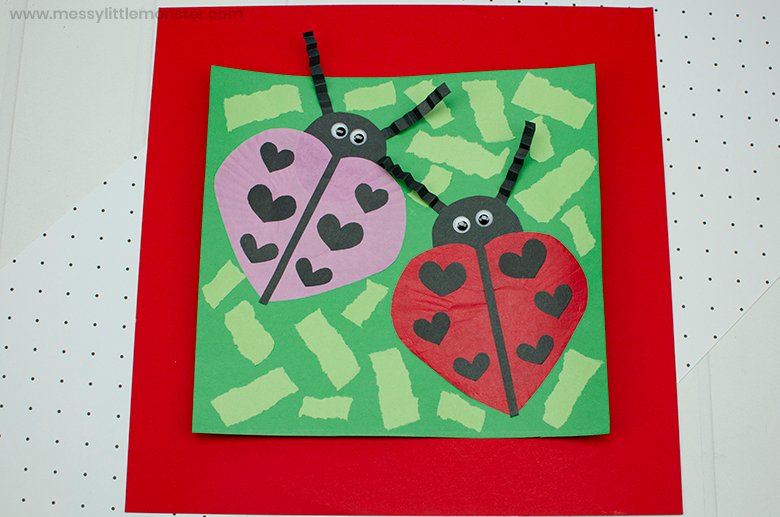
If you have a birthday coming up or just want to send a “missing you” note to Grandma, this is the way to do it. Cupcake liners are naturally pleated, which gives the ladybug wings a really cool texture that you just can’t get with flat paper.
Take a red cupcake liner and flatten it out as much as possible. Fold it in half, then slightly pull the two sides apart at the bottom to create a “V” shape—this looks like the wings are starting to open up. Glue this onto a piece of cardstock.
The “body” of the ladybug can just be a black circle tucked slightly under the top of the liner. Use a black marker to draw the legs and antennae directly onto the cardstock. It creates a 3D effect that looks way more expensive than it actually is.
One tip: use the “foil” lined cupcake liners if you can find them. They hold their shape much better and the color is way more vibrant than the cheap paper ones that turn translucent when you apply glue.
7. Fingerprint Ladybug Jar
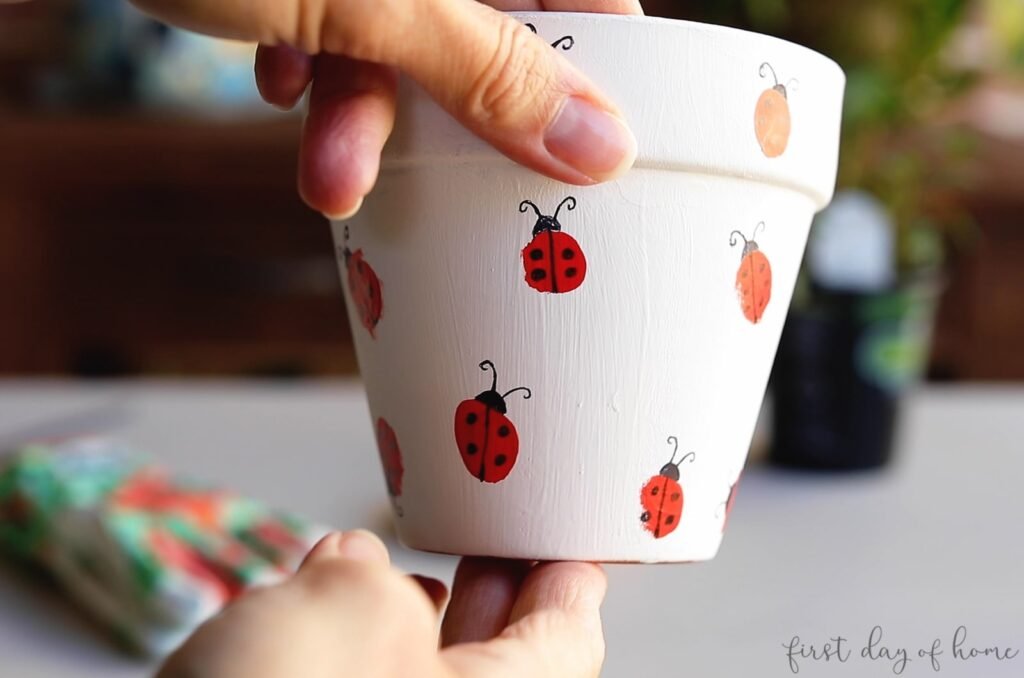
This is less of a “toy” and more of a keepsake. I did this with my kids when they were tiny, and I still have the jar on my desk. It’s a great way to capture how small their hands were without the mess of a full handprint.
Take a clean glass or plastic jar. Use a light blue or green paint to create a “background” on the outside—maybe some grass or a blue sky. Then, have your child dip their index finger into red paint and press it onto the jar in various spots.
Once those red fingerprints are dry, use a fine-tip permanent marker to add the tiny legs, antennae, and spots. It turns their little fingerprints into a swarm of ladybugs. It’s incredibly cute and makes a great gift for teachers.
Don’t use a thick marker for this; it’ll smudge on the paint. A Sharpie is usually your best bet. If you mess up, a little rubbing alcohol on a cotton swab will take the marker right off without ruining the base paint (usually).
8. Bottle Cap Ladybug Magnets

I am a hoarder of bottle caps. Metal, plastic, it doesn’t matter. They are the perfect size for refrigerator magnets. I once tried to make a giant mosaic out of bottle caps on my garage wall, but I ran out of caps and now it just looks like a weird, metallic “blob.” Stick to small projects like this one.
Paint the top of a plastic bottle cap red. Since plastic is slippery, you might need two coats. Once dry, add the black details. Then, glue a small round magnet to the inside of the cap.
I strongly recommend using a hot glue gun for the magnet part. Tacky glue or school glue just won’t hold the weight of the magnet over time, and you’ll end up finding the “ladybug” on the floor while the magnet stays on the fridge. Obviously, the adult should handle the hot glue part!
These are great for holding up the other art your kid brings home from school. They’re functional, cute, and use up items that would otherwise end up in the bin. Plus, kids love seeing their “bugs” crawling all over the refrigerator.
9. Leaf-Printing Ladybug Scene
Nature crafts are a double win because you have to go for a walk to get the supplies. We spent an entire afternoon last fall “hunting” for the perfect leaves, which burned off enough energy that the kids actually napped. Total parenting victory.
Find a few large, sturdy leaves. Paint the flat side of the leaf green and press it onto a piece of white paper like a stamp. This creates a beautiful, textured “home” for your ladybugs. Let the green paint dry completely.
Then, you can either paint ladybugs directly onto the leaves or use the fingerprint method from earlier. The contrast of the red bugs against the green leaf print is really striking. It looks like a little piece of forest floor art.
Make sure the leaves aren’t too crunchy/dry, or they’ll just crumble when you press down on them. Fresh, “bendy” leaves work best. If you want to keep the art forever, you can even laminate the page once it’s done.
10. Coffee Filter Ladybug Sun Catchers
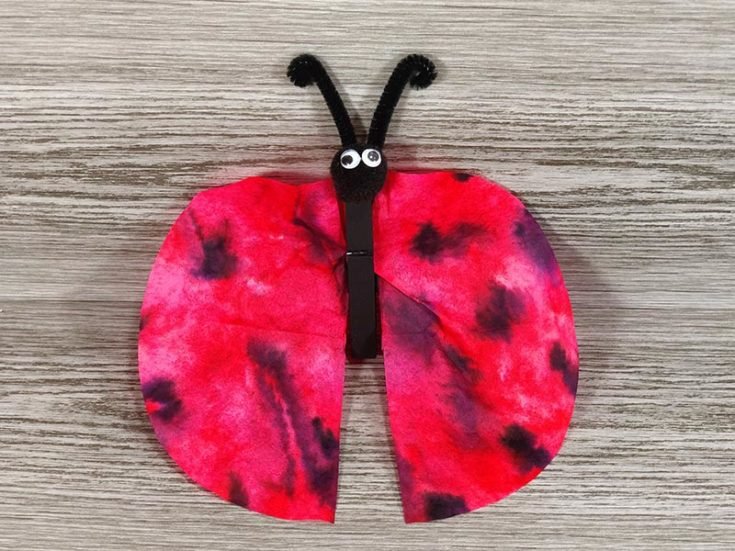
If you have a window that gets a lot of sun, you have to try this. Coffee filters are great because they’re porous, so the colors bleed together in a really “artsy” way that makes even a toddler look like a pro.
Have the kid color a coffee filter with red washable markers. Then, take a spray bottle with water and lightly mist the filter. The red ink will spread out and fill the whole circle. It’s like magic to a four-year-old.
Once it’s dry, they can use a black marker to add the spots. Tape these to a sunny window. The light shines through the thin paper and makes the red look like glowing stained glass. It’s one of the prettiest crafts on this list and costs basically nothing.
Just a warning: don’t over-saturate the filter with water. If it’s dripping wet, the red ink will just run off the paper and onto your counter, leaving you with a pinkish-grey filter and a very stained workspace.
11. Bonus: Pompom Ladybug Friends
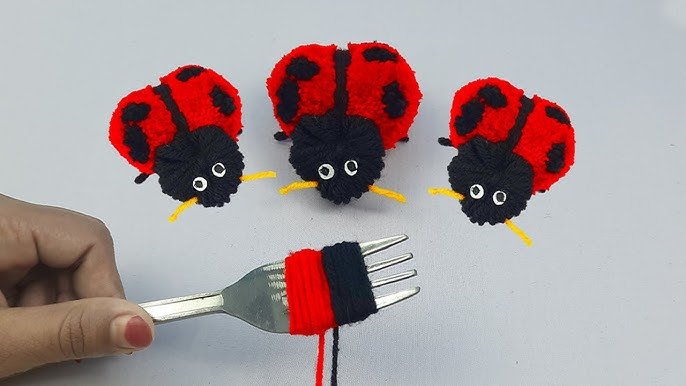
I couldn’t leave this one out. If you have a bag of craft pompoms, you have an instant ladybug. This is a “no-paint” craft, which is perfect for those days when you just cannot handle the thought of cleaning up a mess.
Glue a small black pompom to a large red pompom. That’s the head and the body. Glue on some tiny googly eyes, and you’re 90% done. For the spots, you can either glue on tiny black sequins or just use a little bit of black felt.
These are “fidget” friendly. Kids can carry them around in their pockets or keep them in a little shoebox “house.” They’re soft, tactile, and take about three minutes to make.
Real Talk: What Not to Do
Look, I’ve tried the “Pinterest-perfect” versions of these, and some things just aren’t worth the headache. Skip the glitter. I know, I know—it’s pretty. But glitter is the “herpes of craft supplies.” You will be finding red sparkles in your floorboards until the year 2035. If you want shine, use metallic markers or glossy paint.
Also, avoid using “real” googly eyes on anything that’s going outside. The sun melts the glue, and the rain ruins the paper backing inside the eye. If it’s for the garden, just paint the eyes on. Trust me, it saves you from having a bunch of “blind” stone bugs scattered around your yard.
Lastly, don’t worry about symmetry. Ladybugs in nature aren’t perfect. If your kid puts all seven spots on one side, just call it a “special edition” ladybug. The point is the process, not a gallery-ready sculpture.
Parting Wisdom
At the end of the day, your kid isn’t going to remember if the ladybug’s spots were perfectly circular. They’re going to remember that you sat on the floor with them and didn’t freak out when a little red paint got on the rug (which, by the way, comes out with a bit of dish soap and cold water).
Keep it simple, keep it messy, and keep a damp rag nearby.
What’s your go-to trick for cleaning up paint messes, or do you have a favorite bug craft I missed? Let me know in the comments—I’d love to hear your “DIY disaster” stories!