

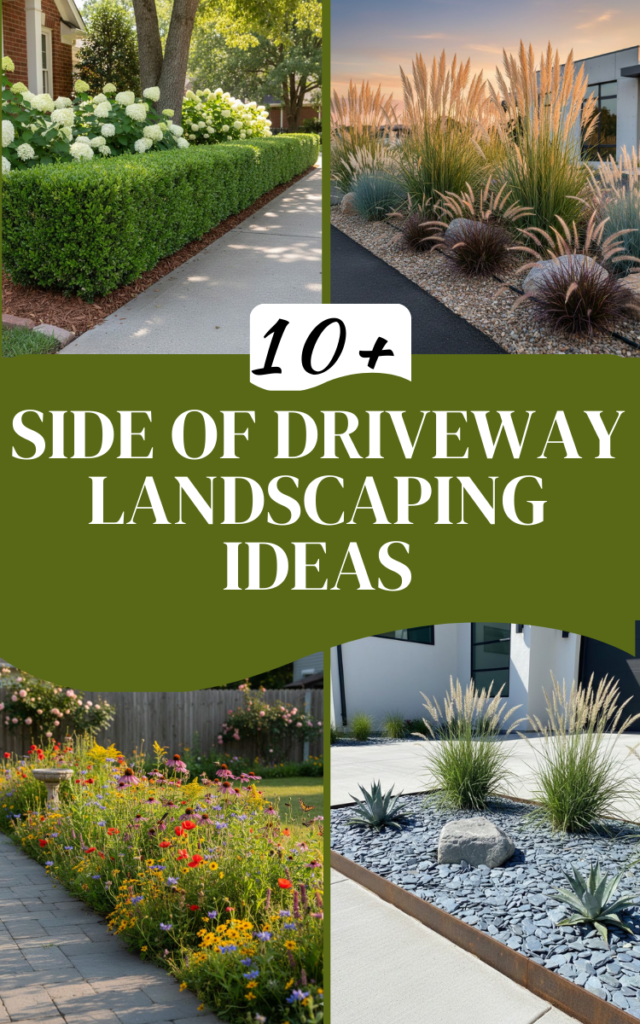
Stop me if you’ve seen this before: you spend a fortune on a beautiful paver driveway, but the edges look like a neglected construction site. Or worse, you’ve got that “landing strip” of weeds and gravel that makes your whole house look tired. I’ve spent fifteen years trying to tame the narrow, often-baked, and salt-crusted strips of land next to driveways, and I’ve killed more “unkillable” plants than I care to admit.
One summer, I thought I’d be clever and plant mint along the edge to “smell nice” when I drove over it. By August, that mint had staged a coup, swallowed my neighbor’s mailbox, and was actively trying to get into my crawlspace. I’m here to make sure you don’t do that. Whether you’re dealing with a steep slope, a tiny strip of dirt, or a boring flat stretch, we’re going to fix your curb appeal without turning your weekends into a full-time job.
1. Low Maintenance Rock Garden Edging
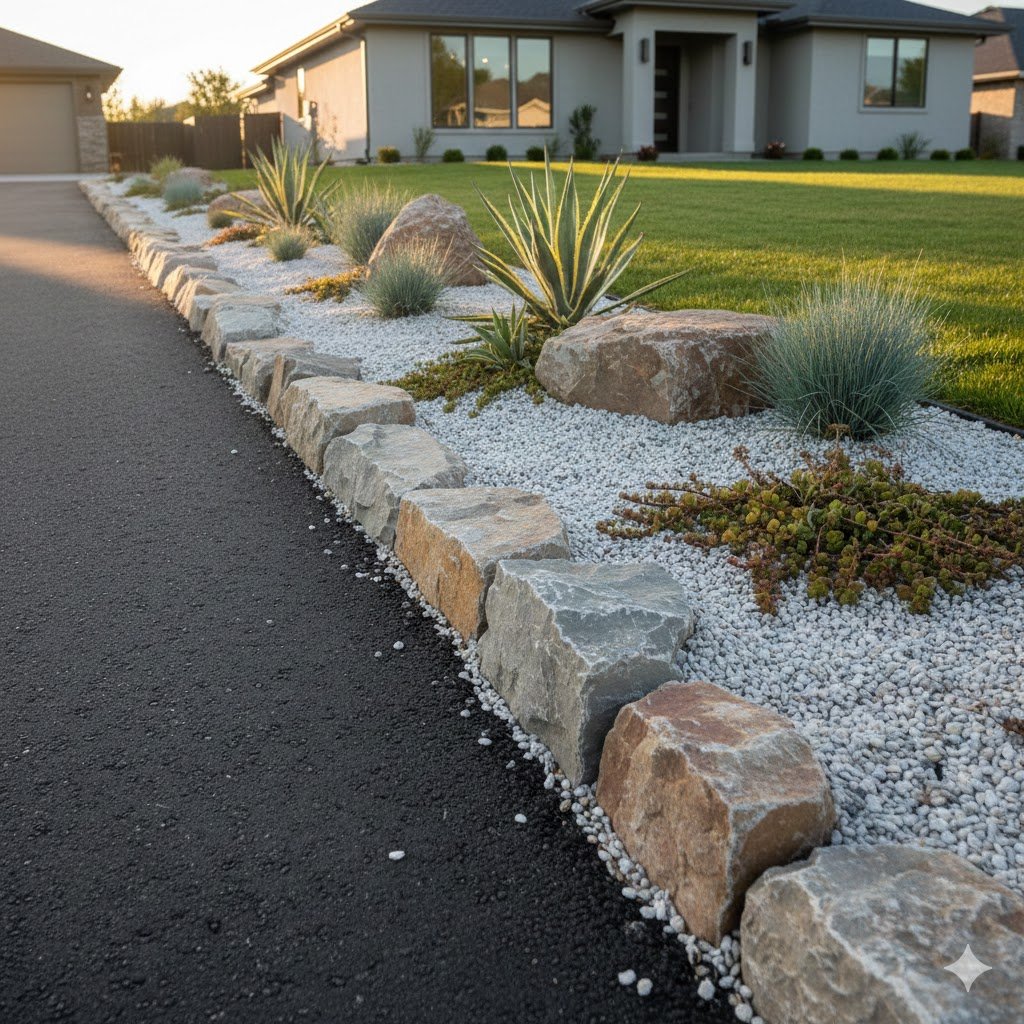
If you’re tired of the “mow, weed, repeat” cycle, stone is your best friend. But I’m not talking about those bags of white marble chips from the big-box store that turn yellow in three weeks. I’m talking about actual river rock or crushed granite. I’ve found that using 1-to-3-inch river stones is the sweet spot because they are heavy enough that your leaf blower won’t send them flying into the next county, but small enough to look intentional.
When you’re looking for low maintenance driveway landscaping, people often forget the “underlayment.” Forget that thin black plastic weed barrier—it’s garbage. Water pools on top of it, and weeds grow right through the seams anyway. I use a heavy-duty professional geotextile fabric. It lets the soil breathe but keeps the rocks from sinking into the mud the first time it rains.
The trick to making a rock border look like a professional did it (and not like a pile of debris) is “nesting.” I like to take a few larger “anchor” boulders—maybe three or four per twenty feet—and bury them about a third of the way into the ground. It gives the eye a place to rest and makes the landscaping feel like it’s been there forever.
I once tried to save money by just dumping gravel over the dirt without digging a trench. Big mistake. Within two months, the gravel had migrated onto the driveway, and I ended up hitting a pebble with the lawnmower that cracked my truck’s side window. Dig a 3-inch deep trench first. Your wallet and your windows will thank you.
2. Drought Tolerant Ornamental Grasses
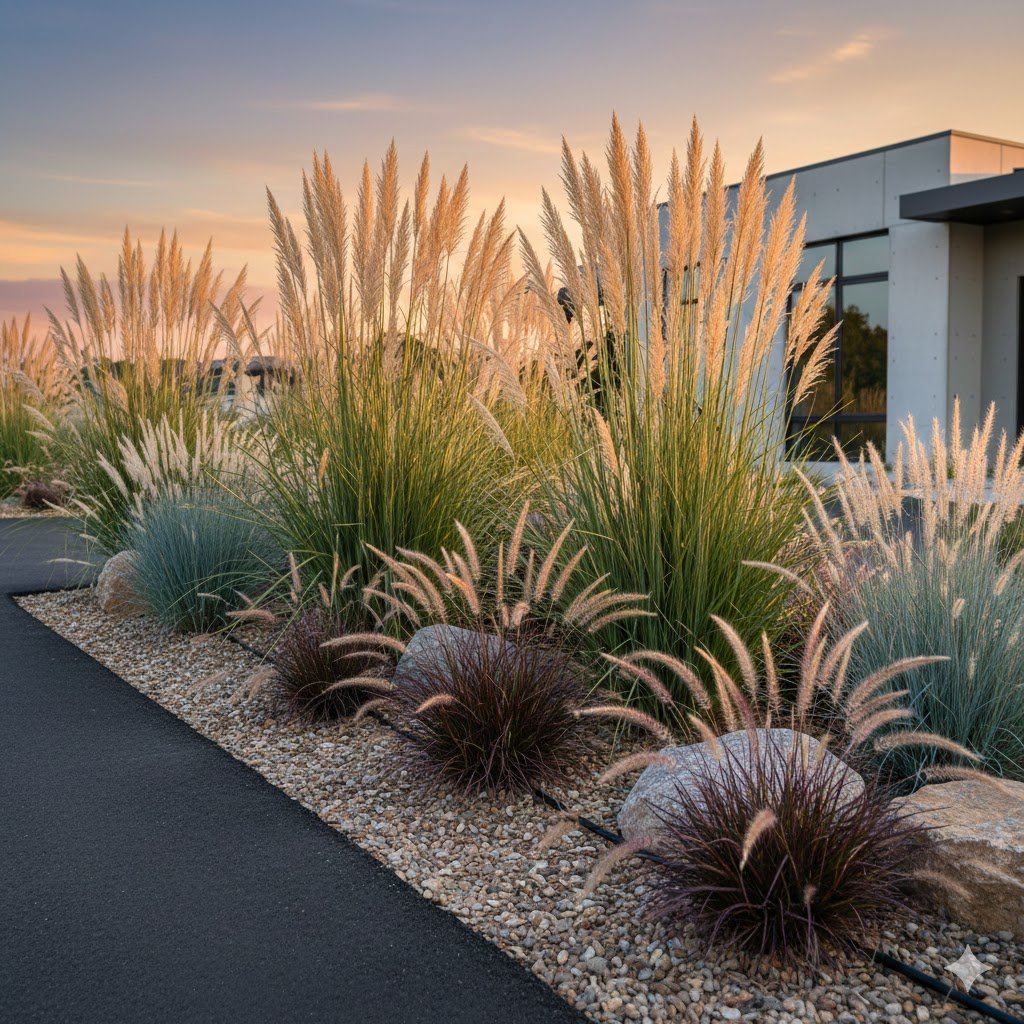
My driveway gets about ten hours of screaming direct sunlight every day. It’s basically a frying pan. Most flowers just wilt and give up by July. That’s why I’m obsessed with ornamental grasses like Little Bluestem or Mexican Feather Grass. These plants are the marathon runners of the garden; they don’t care about the heat, and they actually look better when you ignore them.
Searching for best plants for driveway borders usually brings up things like hostas, but hostas will fry like bacon next to hot asphalt. Grasses, on the other hand, love it. I love the way they move in the breeze—it softens the hard, industrial line of the concrete. Plus, they provide “winter interest,” which is just a fancy gardener way of saying they don’t look like a depressing patch of mud when it snows.
One thing I’ve learned the hard way: check the “mature width” on the tag. I once planted Pampas grass too close to the pavement. Within two years, it was so wide that my husband couldn’t open the passenger door of the car without getting poked by sharp blades of grass. Give them room to breathe. I usually space my mid-sized grasses at least three feet apart.
Maintenance is a joke, which is why I love them. You literally just haircut them down to about four inches in early March before the new growth starts. That’s it. No deadheading, no finicky fertilizers, and no crying over wilted petals. If you want a “set it and forget it” vibe, this is your winner.
3. Modern Paver and Gravel Combo
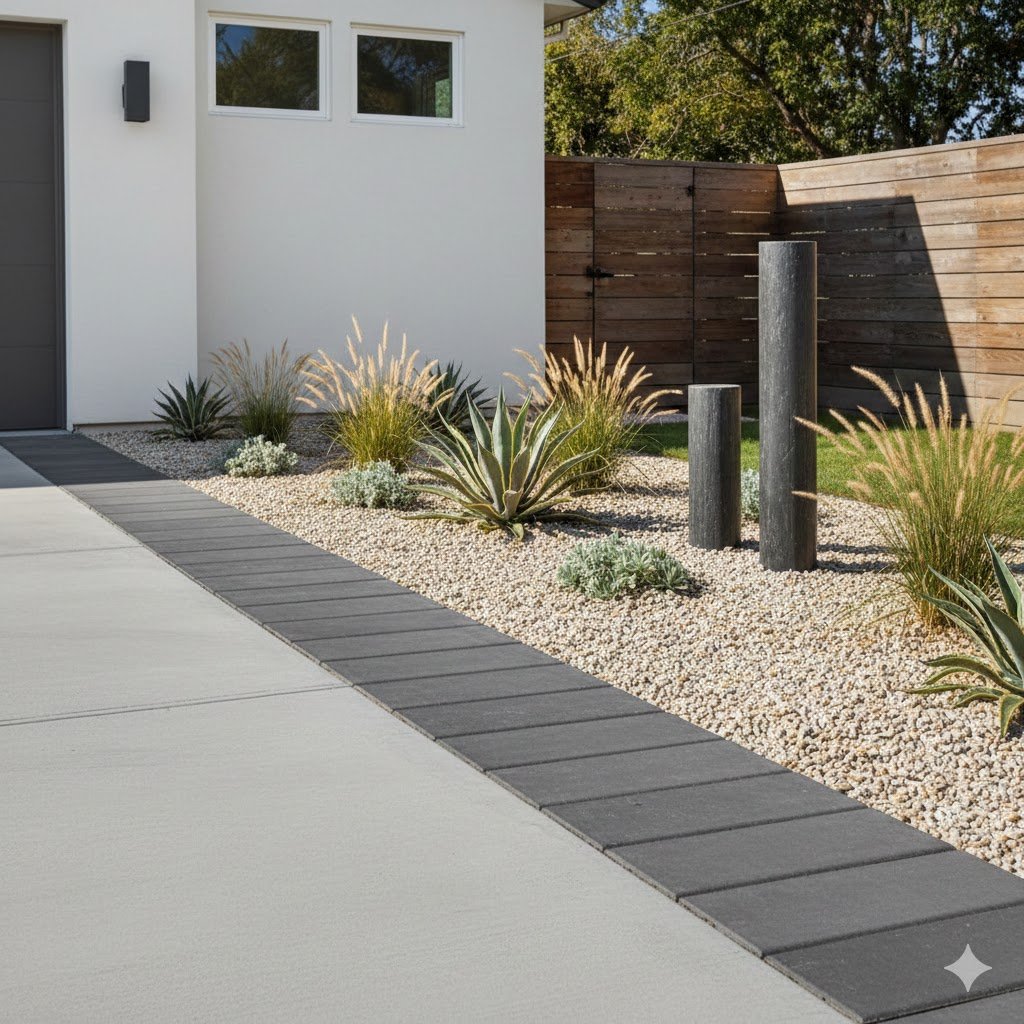
This is the look all the “fancy” houses in my neighborhood are doing right now, and honestly, it’s one of the few trends that actually works. You lay down large, rectangular concrete pavers (say 12×24 inches) with about a 3-inch gap between them, then fill those gaps with dark basalt or pea gravel. It’s a very clean, architectural look that handles driveway drainage solutions perfectly.
I’m a big fan of this because it solves the “overshoot” problem. We’ve all had that friend who can’t park a car to save their life and ends up driving two wheels onto your lawn. With a paver-and-gravel strip, if someone wheels off the driveway, they’re hitting a solid surface instead of rutting up your grass and leaving a muddy mess for you to fix.
The key here is the base. Don’t just set pavers on top of the grass. You have to excavate about six inches, put down four inches of compacted “crushed minus” (that’s the dusty gravel that gets hard like concrete), and then a layer of leveling sand. If you skip the compaction, your pavers will eventually start to tilt and look like a set of crooked teeth.
I’ve found that using a contrasting color works best. If your driveway is gray asphalt, use a light tan or white stone. If your driveway is light concrete, go for a dark charcoal stone. It creates a “frame” for your property that makes even a basic ranch-style house look like a custom build. It’s a bit of sweat equity upfront, but you’ll never have to mow that strip again.
4. Flowering Perennial Border
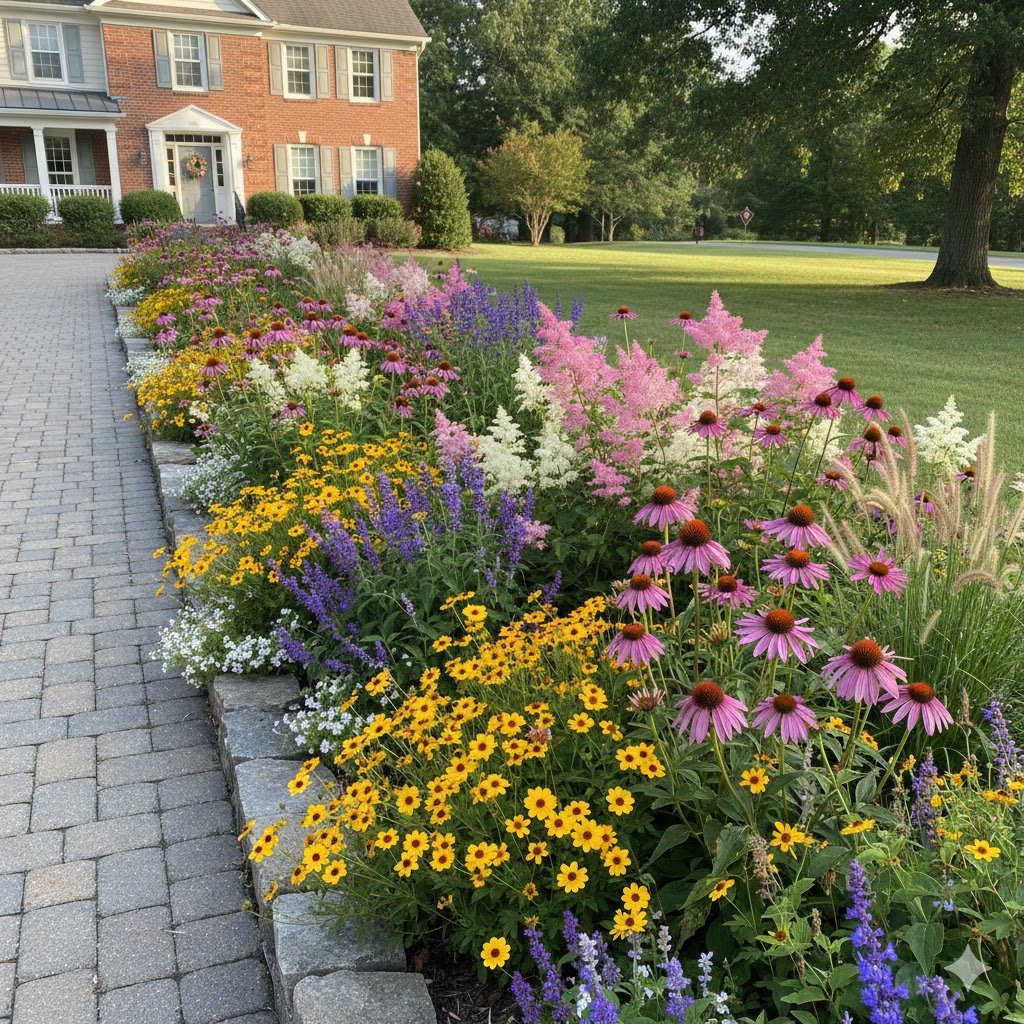
If you absolutely must have color, go with perennials. Annuals are a total waste of money for a driveway—you’re basically throwing twenty-dollar bills into a blender every spring. For colorful driveway landscaping ideas, I stick to the “tough guys”: Lavender, Walker’s Low Catmint (not the invasive kind!), and Coneflowers.
Lavender is my top pick for the edge of a driveway because every time your car door hits a branch, or you brush past it, it releases that amazing scent. It loves the heat that radiates off the pavement. Just make sure you have “lean” soil. I once pampered my lavender with high-quality potting soil and fertilizer, and the plants literally turned black and died within a week. They like to struggle a little; it builds character and better oils.
The “Catmint” I mentioned is a lifesaver. It looks like lavender but it’s practically indestructible. I’ve seen a delivery truck back over a patch of Catmint, and the stuff was blooming again two weeks later. It provides a soft, hazy purple border that hides the ugly transition from the concrete to the rest of the yard.
One pro tip: plant in “drifts.” Don’t buy one of ten different things. Buy ten of one thing. When you plant in long, repeating groups, it looks intentional and high-end. A jumble of different plants just looks like a clearance rack at the nursery exploded. Keep it simple, keep it hardy, and make sure they can handle the occasional “oops” from a stray tire.
5. Boxwood Hedge for Formal Edging

For those who want a “stately manor” look, a low-growing boxwood hedge is the way to go. It creates a permanent, green structure that looks great even in the middle of January. I like to use ‘Winter Gem’ or ‘Green Velvet’ boxwoods because they stay relatively small and don’t require you to be out there with shears every single weekend.
When people search for formal driveway entrance ideas, they usually see these perfectly manicured hedges. The mistake I see most often is planting them too close together. They need air circulation, or they’ll develop blight—a nasty fungus that turns them brown and crispy. I space mine so the leaves are just barely touching when they’re young; they’ll fill in soon enough.
I’ll be honest: boxwoods are an investment. They aren’t cheap. But they add actual appraised value to your home. I had a client who put in a 50-foot run of boxwoods along her driveway, and when she sold her house, the realtor told her that specific feature was what sold the buyers. It says, “A person who knows what they’re doing lives here.”
Just a heads-up on the “Real Talk” side: keep the dogs away from them if you can. Dog urine is like acid to boxwoods and will leave ugly yellow “dead zones” in your hedge that take years to grow back. If your driveway is a popular neighborhood dog-walking route, maybe stick to the rock garden idea instead.
6. Edible Driveway Strips
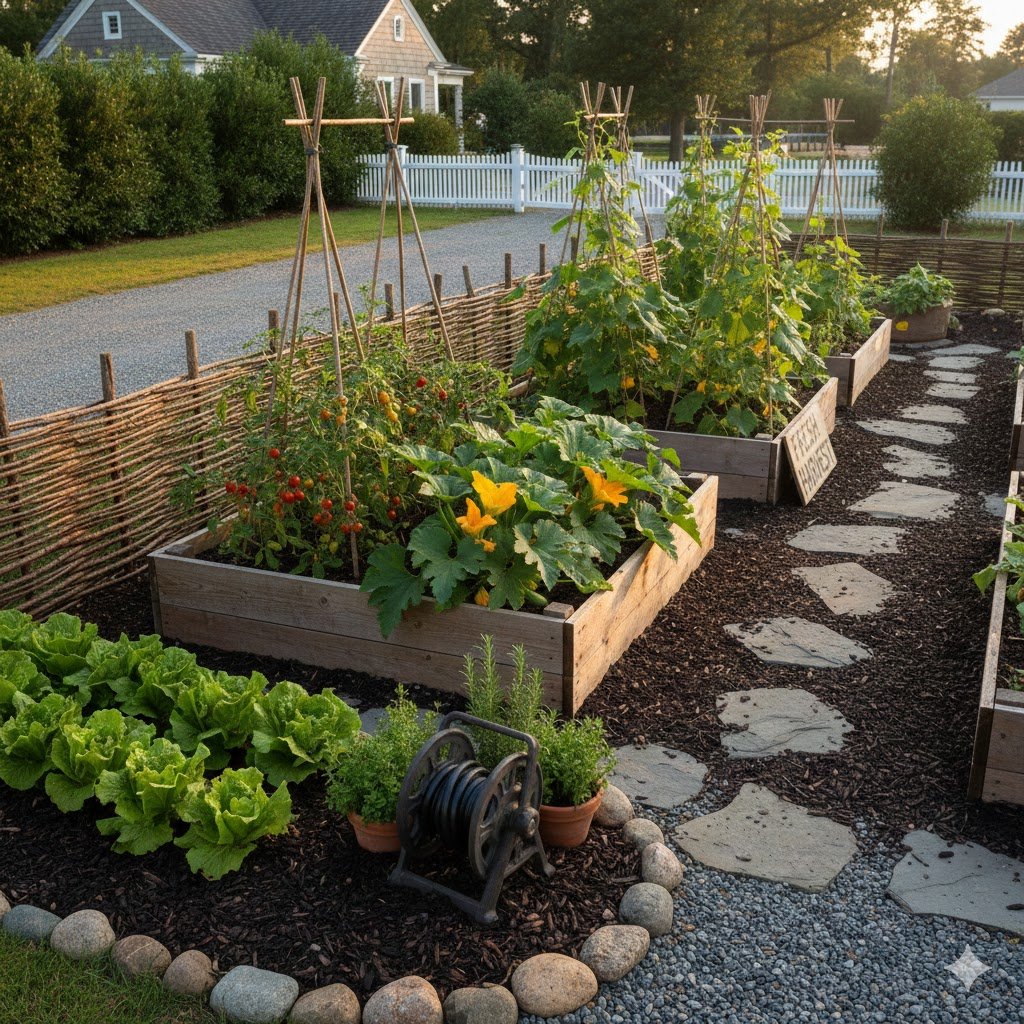
I know it sounds crazy, but I’ve started seeing people plant “Step-able” herbs like Creeping Thyme right at the edge of the pavement. It’s a “bonus” idea because it’s not for everyone, but if you have a narrow gap, it’s brilliant. It handles light foot traffic, smells like a Mediterranean kitchen, and needs zero mowing. Just don’t use pesticides if you plan on actually eating it!
7. Naturalized River Rock Dry Creek Beds
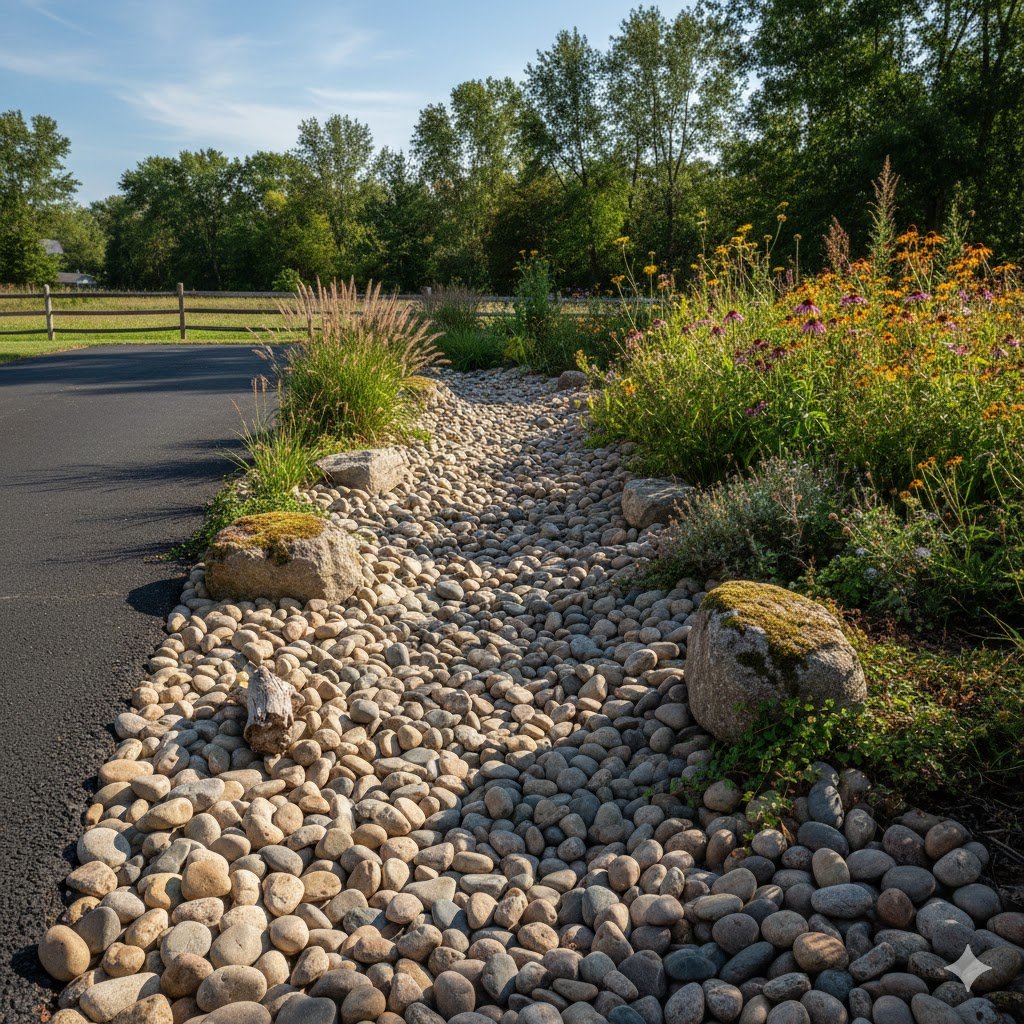
If your driveway turns into a small river every time it rains, you don’t just have a landscaping problem—you have a drainage crisis. I learned this the hard way when my “charming” mulch bed floated away and clogged the city storm drain during a July thunderstorm. That’s when I discovered the magic of the dry creek bed. It’s one of the most functional driveway drainage solutions because it looks like a deliberate design choice while secretly channeling water away from your foundation.
To make this look like a piece of nature and not a construction site, you need a mix of stone sizes. I use a base of 1-to-2-inch “river jacks,” then nestle in larger “cobbles” (about 4 to 8 inches) along the edges to act as banks. It creates a meandering, organic path that runs parallel to your straight driveway. I’ve found that a perfectly straight rock line looks stiff and fake; give it a little wiggle, and it suddenly feels like a high-end mountain retreat.
For the “Real Talk” on this one: don’t just dump rocks on the dirt. You absolutely must use a heavy-duty landscape fabric underneath. If you don’t, the silt from the rainwater will eventually fill the gaps between the rocks, and you’ll have weeds growing out of your “creek” within a season. I spent an entire weekend hand-scrubbing mud off river rocks because I skipped the fabric once. Never again.
If you want to take it up a notch, tuck a few “marginal” plants like Blue Flag Iris or Sedge along the edges of the rocks. These plants love “wet feet” but can handle drying out between storms. It’s a bulletproof way to handle runoff while making your neighbors think you hired a professional landscape architect.
8. Low-Profile Groundcovers for Narrow Strips
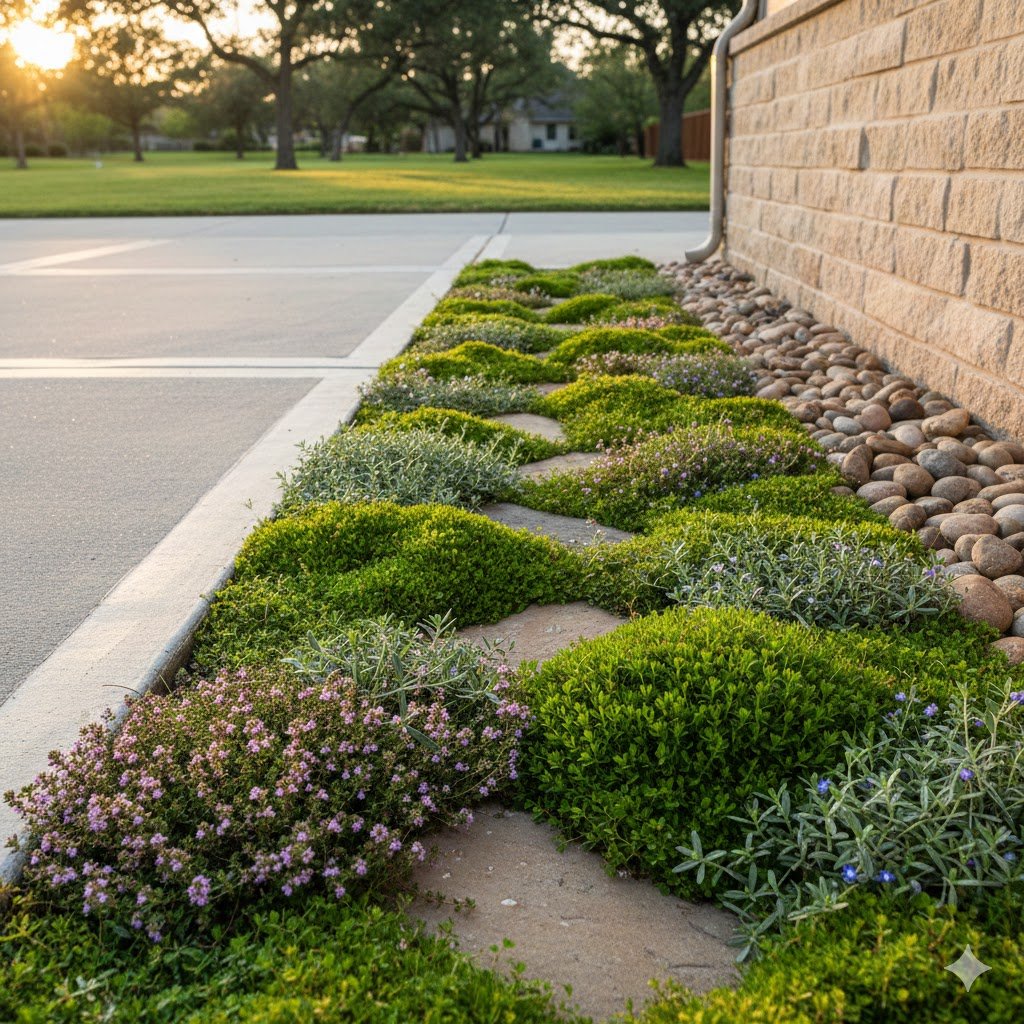
Sometimes you only have a 12-inch gap between your driveway and a fence or a walkway. You can’t fit a bush there, and grass is a nightmare to trim in such a tight spot. This is where I swear by “steppable” groundcovers. My personal favorite is Creeping Thyme or ‘Angelina’ Sedum. These plants are the ninjas of the garden world—they stay low, spread fast, and don’t care if a stray tire clip them occasionally.
When people search for driveway border plants for narrow spaces, they often get suggested Ivy. Please, for the love of your house’s siding, do not plant Ivy. It’s an invasive monster that will eventually try to eat your car. Creeping Thyme, however, stays put and releases a hit of fragrance every time you step on it getting out of the car. It’s like a natural air freshener for your driveway.
I’ve found that the trick to getting groundcovers to carpet quickly is “plugging.” Instead of buying one big pot, buy a flat of small plugs and space them about 6 inches apart in a diamond pattern. By the end of the first summer, they’ll have knitted together into a solid green mat. I once tried to grow these from seed on a sloped driveway edge, and the first rain washed all my “carpet” into the street. Buy the plants; skip the seeds.
One thing to watch out for is “crown rot.” If your driveway holds puddles, these little guys will melt. Make sure the soil is slightly sandy or well-draining. If you have heavy clay, mix in some grit before you plant. It’s a small extra step that saves you from buying the same plants twice next spring.
9. Modern Steel Edging and Decorative Slate
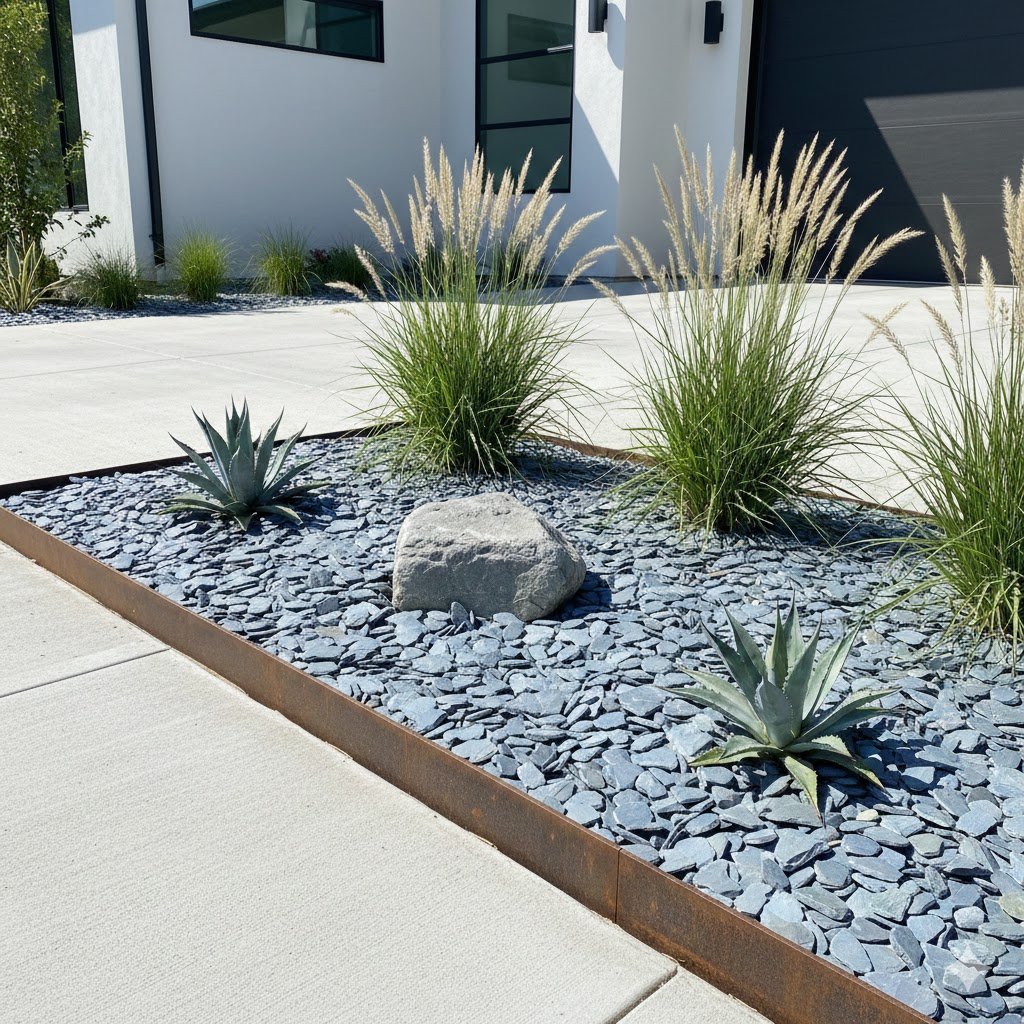
If you like a clean, industrial look, you’ve got to check out weathered steel (often called Corten) edging. It’s that thin metal stripping that develops a beautiful, rusty orange patina over time. I used to think metal edging was just for commercial parking lots, but then I paired it with dark gray slate chips next to a concrete driveway, and it looked incredible. It’s the ultimate modern driveway landscaping hack.
The reason I love steel over plastic or wood is that it stays straight. It doesn’t warp in the sun, and it doesn’t rot in the rain. You hammer it into the ground, and it creates a razor-sharp line that keeps your gravel exactly where it belongs. I once used pressure-treated 4x4s for a driveway border, and within three years, they had twisted so badly they looked like pretzels. Steel is a “one and done” job.
When using slate chips or “mini nuggets,” go for a depth of at least two inches. Slate is flat, so it packs down nicely and is actually quite comfortable to walk on if you happen to step out of the car onto it. It doesn’t roll around like pea gravel does. It’s the closest thing to a “paved” surface without actually pouring more concrete.
A quick warning: steel edging is sharp until it’s installed. Wear heavy gloves. I have a scar on my thumb from a “quick” installation back in 2018 that reminds me daily to respect the metal. Also, make sure you buy the stakes that lock into the edging, or the frost will eventually push the whole strip out of the ground.
10. Tiered Retaining Wall Planters
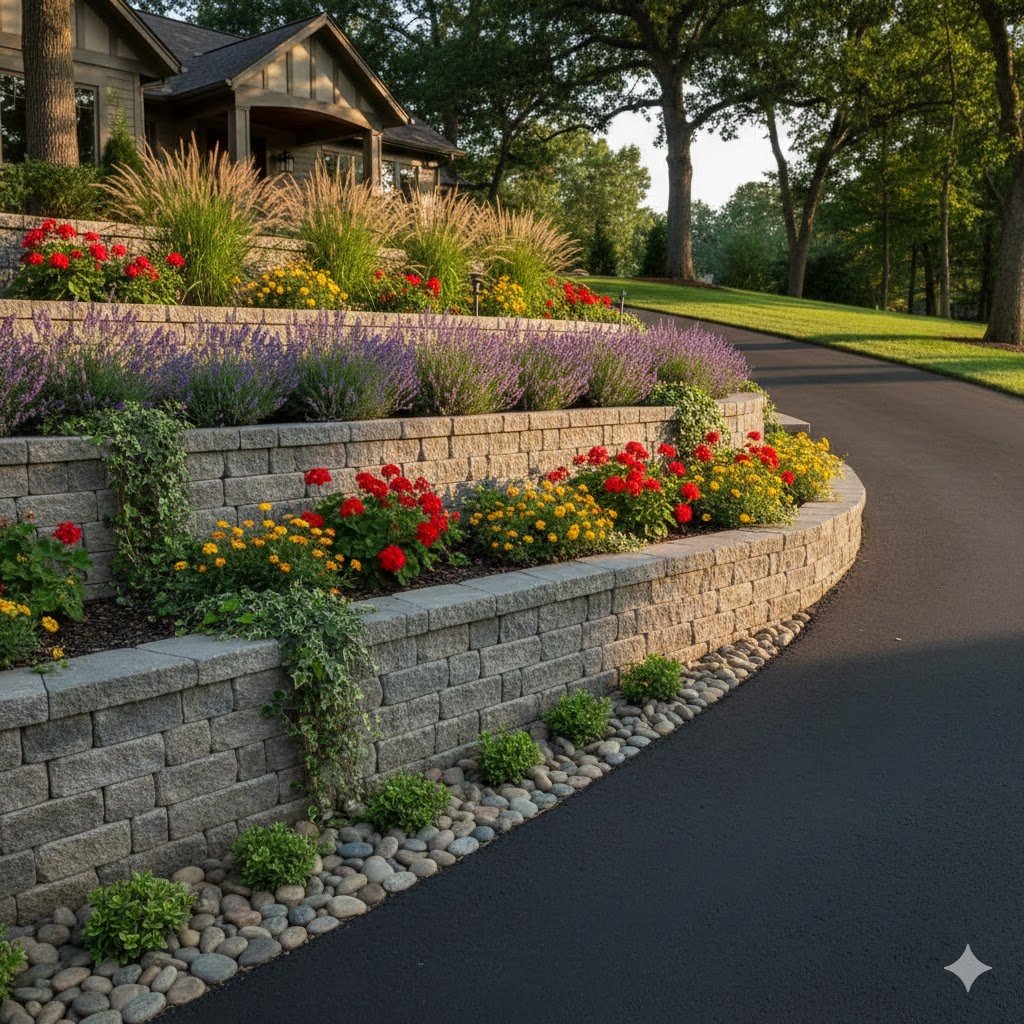
If your driveway is cut into a hill and you’re staring at a vertical wall of dirt every time you park, you need a retaining wall. But don’t just build a flat block wall; that looks like a fortress. I’m a huge fan of “tiering” the wall—building two or three smaller steps instead of one giant one. It creates “planting pockets” that turn a boring slope into a vertical garden.
For landscaping a sloped driveway, I usually go with tumbled concrete blocks or natural stacked stone. The “tumbled” look is more forgiving if you aren’t a master mason; it hides small gaps and leveling errors beautifully. I once tried to build a perfectly level “slick” block wall, and because I was off by a quarter-inch at the base, the top looked like a staircase to nowhere. Use textured stone; it’s a lifesaver for DIYers.
In those tiers, I love to plant “spillers”—plants that hang over the edge of the stone. Creeping Phlox or ‘Silver Falls’ Dichondra are great choices. They soften the hard edges of the stone and make the whole structure feel like it’s been part of the landscape for decades. It turns a “problem area” into the centerpiece of your curb appeal.
The most important part of this is the “backfill.” You can’t just put dirt behind a wall. You need at least 6 inches of clear gravel and a perforated “weep pipe” to let water out. If you don’t give the water a way to escape, the weight of the wet soil will eventually push your expensive wall right onto your car. I’ve seen it happen, and it’s a heartbreak you don’t want.
11. The “Wildflower Strip” for Pollinators
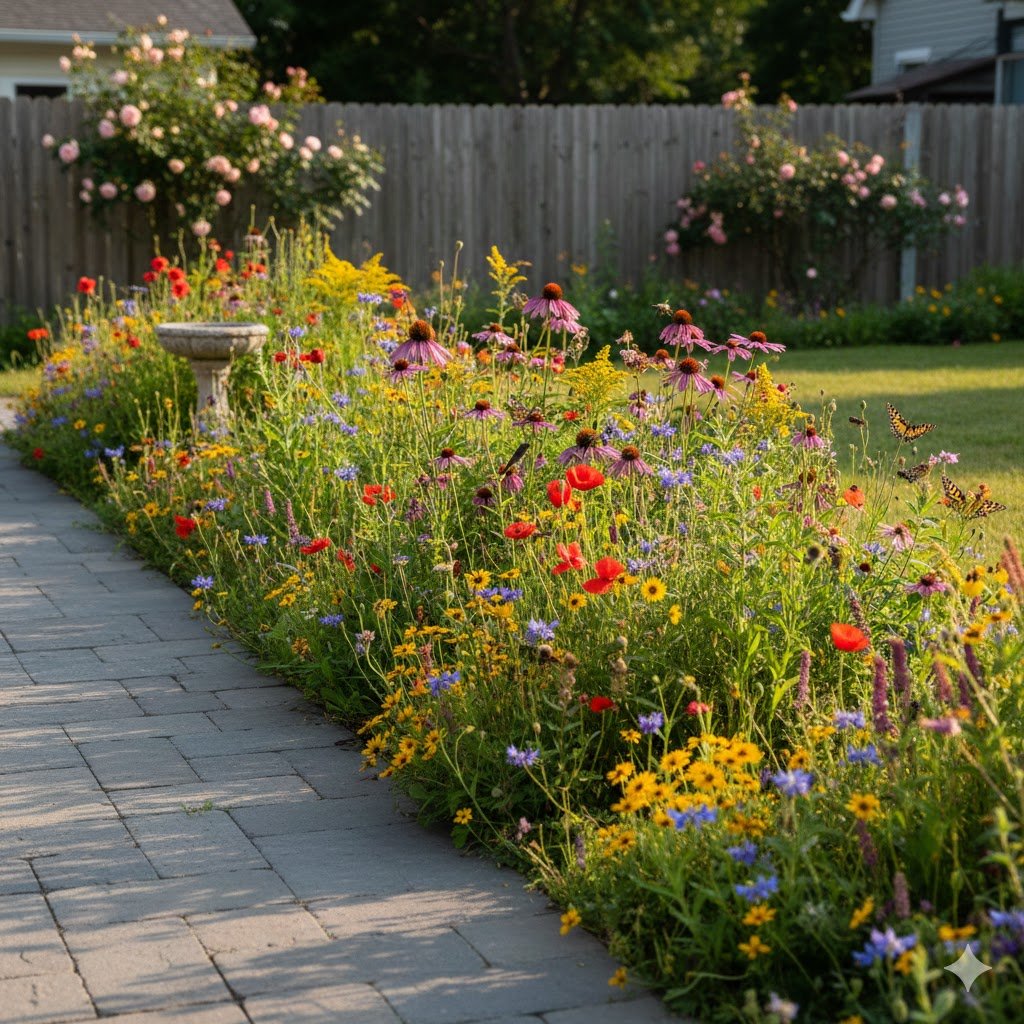
If you have a long, rural driveway and miles of “side” to cover, don’t try to manicure it. You’ll go crazy. Instead, go for a native wildflower mix. It’s great for the bees, it’s gorgeous in the summer, and it requires almost zero water once it’s established. This is my go-to for large scale driveway landscaping because it’s cost-effective and looks like a meadow.
The secret to a successful wildflower strip isn’t just scattering seeds and hoping for the best. You have to clear the existing weeds first. I once threw $100 worth of “meadow in a can” over a patch of crabgrass, and all I got was taller crabgrass. You need to scalp the area, scuff up the dirt, and then press the seeds into the soil (don’t bury them deep—most need light to germinate).
I like to include a “mown strip” between the wildflowers and the driveway. Just a one-foot wide path of short grass or gravel. This makes the wildflowers look like a “choice” rather than “I forgot to mow the lawn.” It adds that “gardener’s touch” that separates a beautiful landscape from a messy field.
The best part? You only have to mow it once a year in late autumn after the seeds have dropped. It’s the ultimate low-effort, high-reward strategy. Plus, seeing butterflies and goldfinches right outside your car window every morning is a much better way to start the day than looking at a patch of brown turf.
The Real Talk: What’s Not Worth Your Time
Let’s get real for a second. There are things you see on Pinterest that are absolute nightmares in reality.
- Mulch alone: Unless you want to spend every Sunday morning sweeping wood chips off your driveway, don’t just use mulch at the edge. Rain washes it away, and cars kick it up.
- Plastic edging: That cheap, curly green or black plastic edging you “dig” in? It will heave out of the ground the first time it freezes. It looks tacky and eventually breaks into sharp shards.
- Delicate flowers: Forget Petunias or Impatiens. They can’t handle the “heat island” effect of a driveway. They’ll be dead by July 4th.
- Solar Lights: Most of the cheap $5 solar stakes look like a runway for a tiny airport. If you want lighting, invest in low-voltage wired lighting or high-quality solar pucks that sit flush with the ground.
Parting Wisdom
The biggest mistake you can make with your driveway landscaping is trying to do too much. Pick one “theme”—either stone, grass, or a specific hedge—and commit to it the whole way down. Consistency is what makes a landscape look professional and expensive.
I’ve spent years fixing my “random plant” mistakes, and I can tell you that a unified look is much easier on the eyes (and your back). Start with a clean edge, choose plants that can handle the heat, and don’t be afraid to use a little more stone than you think you need.
What’s the biggest struggle you’re having with your driveway right now? Is it a weird slope, or are you just tired of looking at weeds? Let me know in the comments below, and I’ll try to help you troubleshoot it!