
My back still aches when I think about the year I tried to haul three-hundred-pound limestone troughs into my backyard just to get that “English cottage” look. I nearly broke my spirit and my favorite shovel before I realized there’s a much lighter, cheaper way to get that weathered stone aesthetic. If you’re working with a tiny balcony or a postage-stamp patio, you don’t have room for heavy machinery or massive boulders.
You need hypertufa. It’s essentially a lightweight, porous concrete mix that looks like it was plucked from a centuries-old garden in the Cotswolds. I’ve spent the last decade perfecting my “mud pies” so you don’t have to deal with the heartbreak of a planter cracking in the first frost or, worse, looking like a gray blob of sidewalk cement.
1. The Classic Hypertufa Trough for Succulents
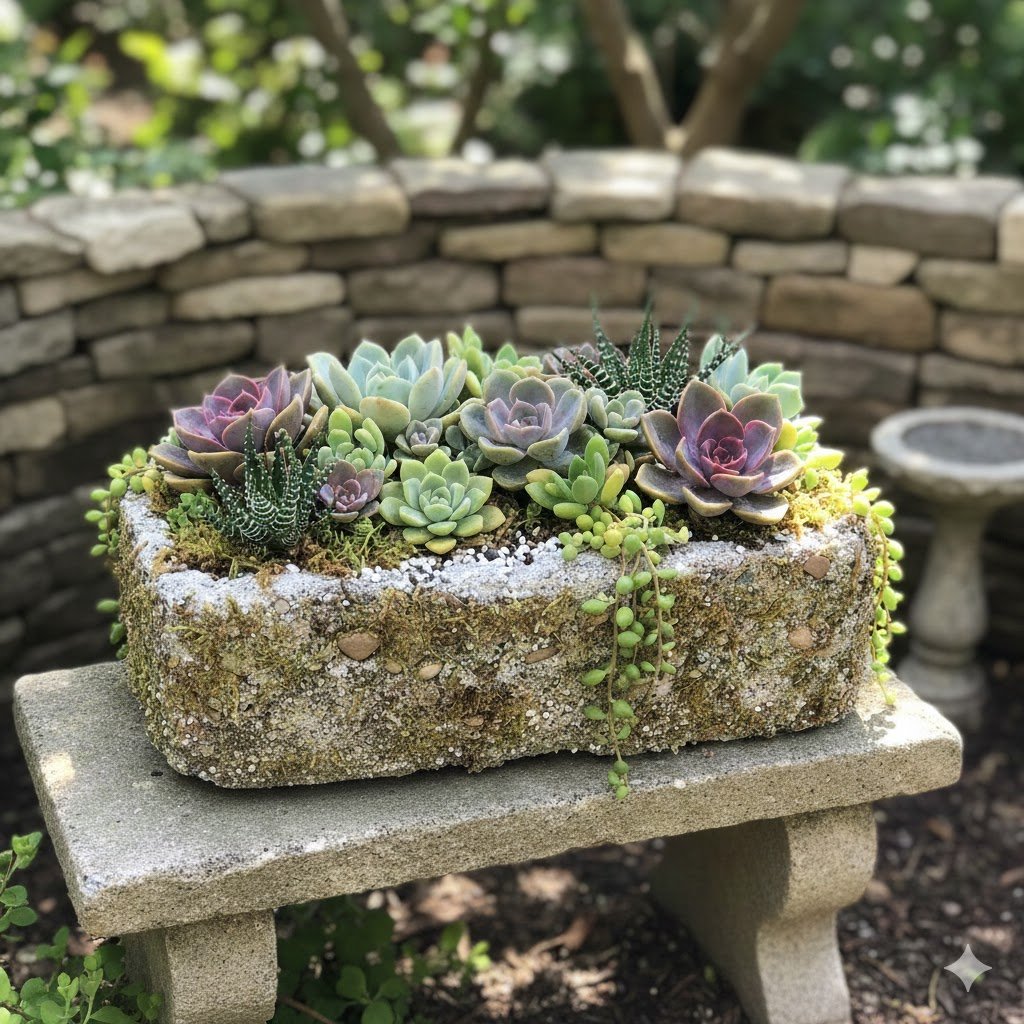
When people search for DIY stone planters, they usually want that rugged, craggy look that makes a simple hen-and-chicks plant look like a work of art. In a tiny garden, every inch of “shelf space” matters. A trough allows you to create a miniature landscape without taking up the floor space a round pot would.
I remember my first trough—it was lopsided and I accidentally used too much water. It ended up looking more like a melted marshmallow than a stone basin. The trick is the consistency; you want it to feel like gritty cottage cheese. If it’s runny, it’ll slump. If it’s too dry, it’ll crumble the moment you try to unmold it.
For a small space, I recommend using a plastic dishpan or even a sturdy shoebox as your mold. You’re aiming for something shallow. Most people make their walls way too thick because they’re afraid of breakage. Trust me, two inches is the “sweet spot” for strength without making the thing weigh a ton.
Once it’s cured, I love to take a wire brush to the edges. This is where the magic happens. You knock off those “perfect” plastic lines from the mold and reveal the texture of the peat moss inside. It goes from looking like a craft project to looking like a relic.
2. Miniature Alpine Crevice Gardens
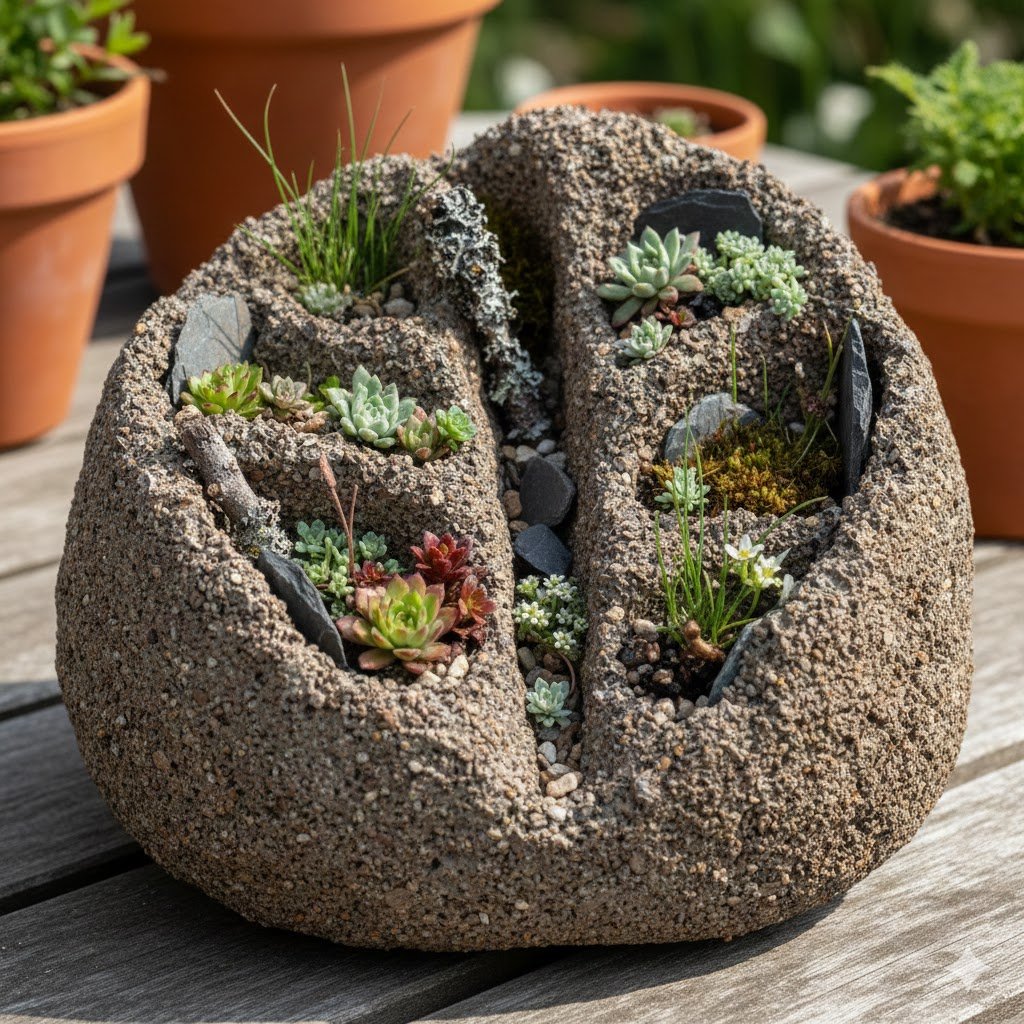
If you’ve got a small footprint, go vertical—or at least, go “mini-mountain.” An alpine garden in a container is the ultimate solution for gardeners who love variety but lack acreage. I once tried to build a full-scale rockery in a rental property; let’s just say the landlord wasn’t thrilled about the literal ton of granite I left behind.
With hypertufa, you can create “crevice” inserts. You mix up a batch of the stuff and, instead of a smooth bowl, you create jagged, flat shards. Once they’re dry, you stand them up vertically inside a larger hypertufa pot. This mimics the natural rock strata where alpine plants thrive.
These plants love the drainage hypertufa provides. Because the material is porous, it breathes. It prevents that “swamp-root” death trap that happens in glazed ceramic pots when you get a sudden summer downpour. I’ve found that Saxifrages and tiny Sedums are much happier when their roots can touch the cool, damp walls of a tufa pot.
Just a heads-up: don’t use shiny, new tools for this. I ruined a perfectly good kitchen spatula trying to smooth out crevices. Stick to a cheap trowel or, better yet, your gloved hands. There’s something therapeutic about squishing the mix into place, even if your neighbors think you’ve finally lost it.
3. Whimsical Hypertufa Toadstools
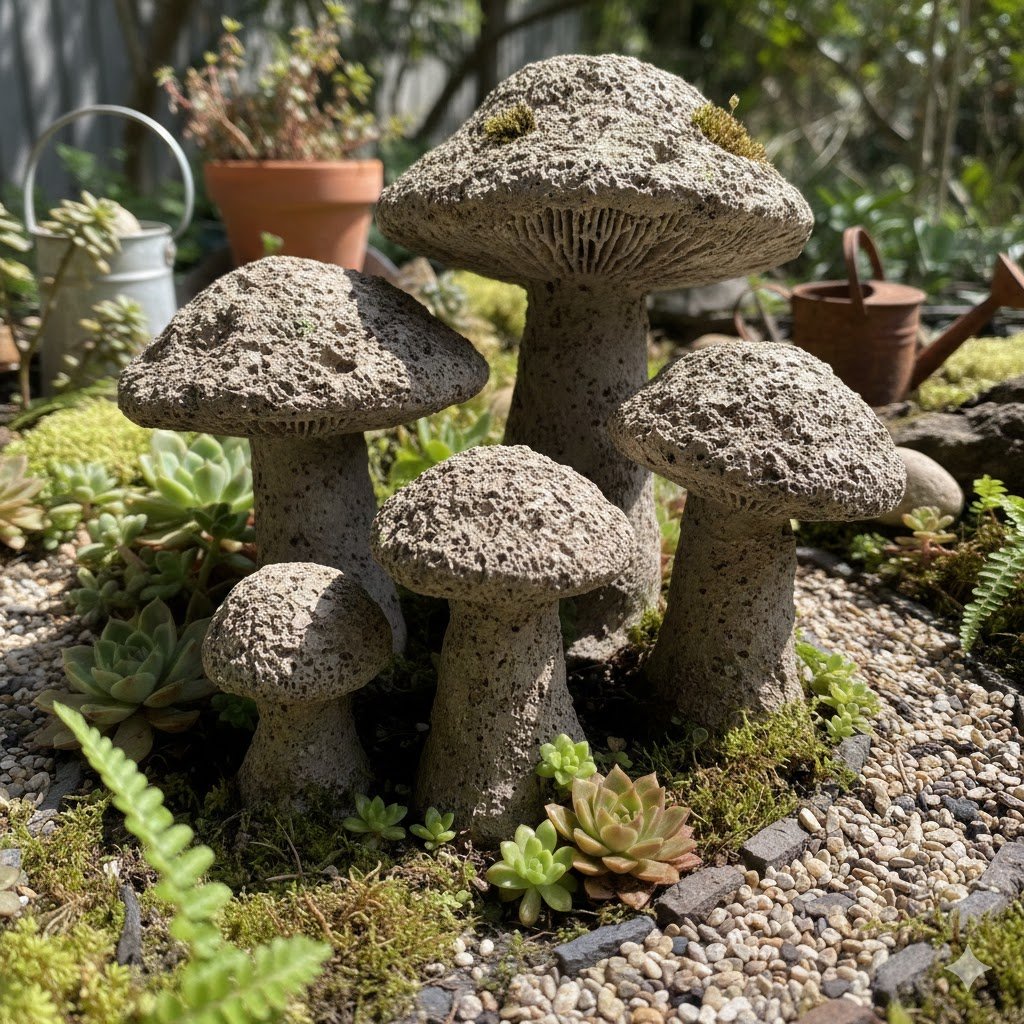
Let’s be honest: most garden gnomes are tacky. I said it. But a few handmade garden mushrooms tucked under a fern? That’s classy. In a small garden, these provide “visual height” without blocking the view or crowding out your actual plants.
The secret to a good toadstool is the mold. I’ve found that cheap plastic bowls from the dollar store make the best “caps,” and a section of PVC pipe or even a Pringles can works for the “stem.” I once used a literal sour cream container for a stem and it worked brilliantly, though I did have to explain the circular ridges to a very confused garden club member.
When you’re assembling these, don’t just glue the cap to the stem. While the mix is still wet (the “green” stage), carve a little divot in the bottom of the cap so the stem fits snugly inside. It’s like a giant, stony LEGO set.
I’m a big fan of “shaving” the stems with a knife after they’ve sat for 24 hours. It gives them a woody, organic texture. If you leave them perfectly smooth, they just look like concrete cylinders. Give them some character! A little wonkiness is what makes them look like they grew there overnight.
4. Texturized “Leaf” Casting Stepping Stones
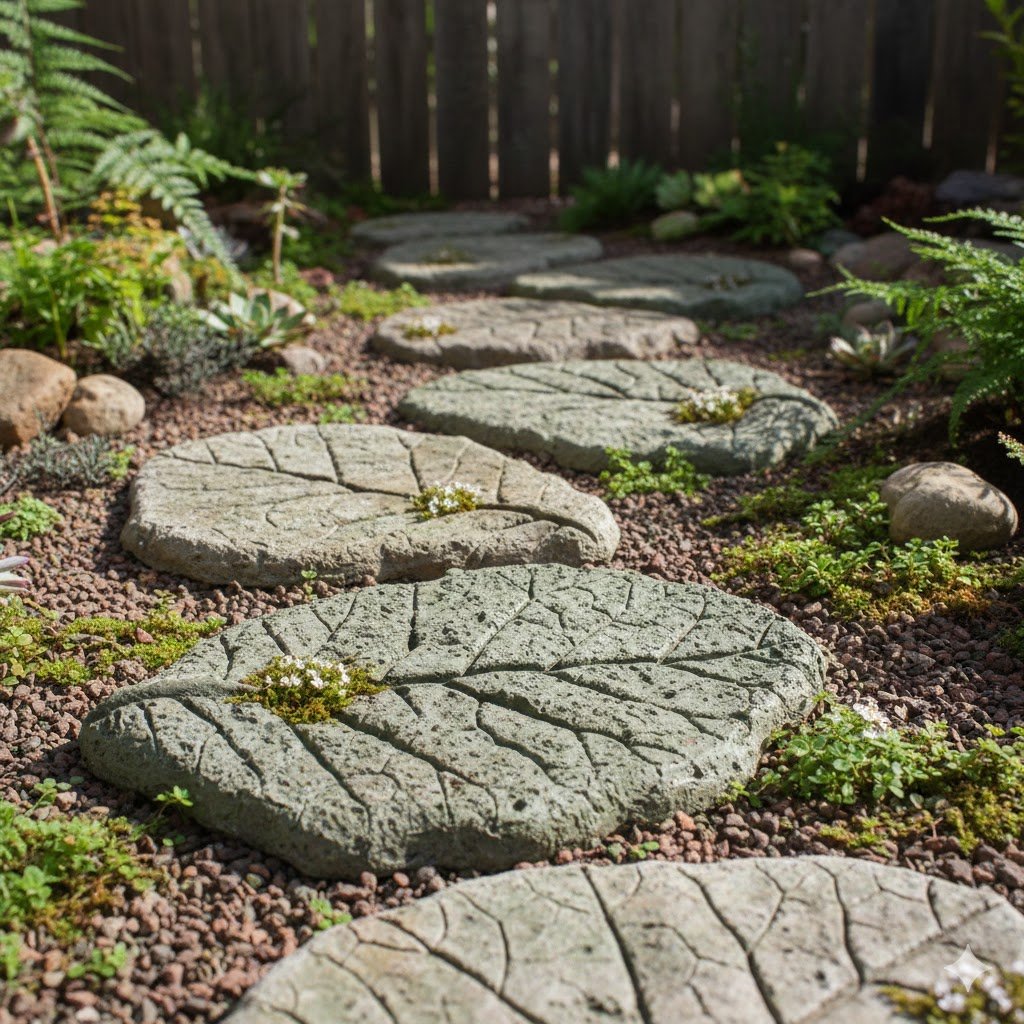
If you have a tiny path—maybe just three steps from the door to the bench—you don’t want industrial pavers. You want leaf-print stepping stones. These are incredibly popular because they capture the intricate veins of Hostas or Rhubarb leaves, turning a functional walkway into a gallery.
I’ll be the first to tell you: do not use thin leaves. I tried it with a maple leaf once and the detail was so shallow it vanished after two rainstorms. You need the “heavy hitters.” Think Gunnera, Hosta ‘Sum and Substance,’ or even a large cabbage leaf from the grocery store if you’re desperate.
The trick is to pile your hypertufa mix into a mound on a flat board, then press the leaf vein-side down into the muck. You want those veins to bite deep into the mix. I usually weight it down with a bit of sand or a flat board for the first few hours.
Quick side note: I’ve found that adding a handful of synthetic fibers (the kind they use for deck concrete) keeps these from snapping if someone actually walks on them. Without the fibers, one heavy boot-heel and your beautiful leaf is a jigsaw puzzle of sadness.
5. Floating “Stone” Islands for Small Water Features
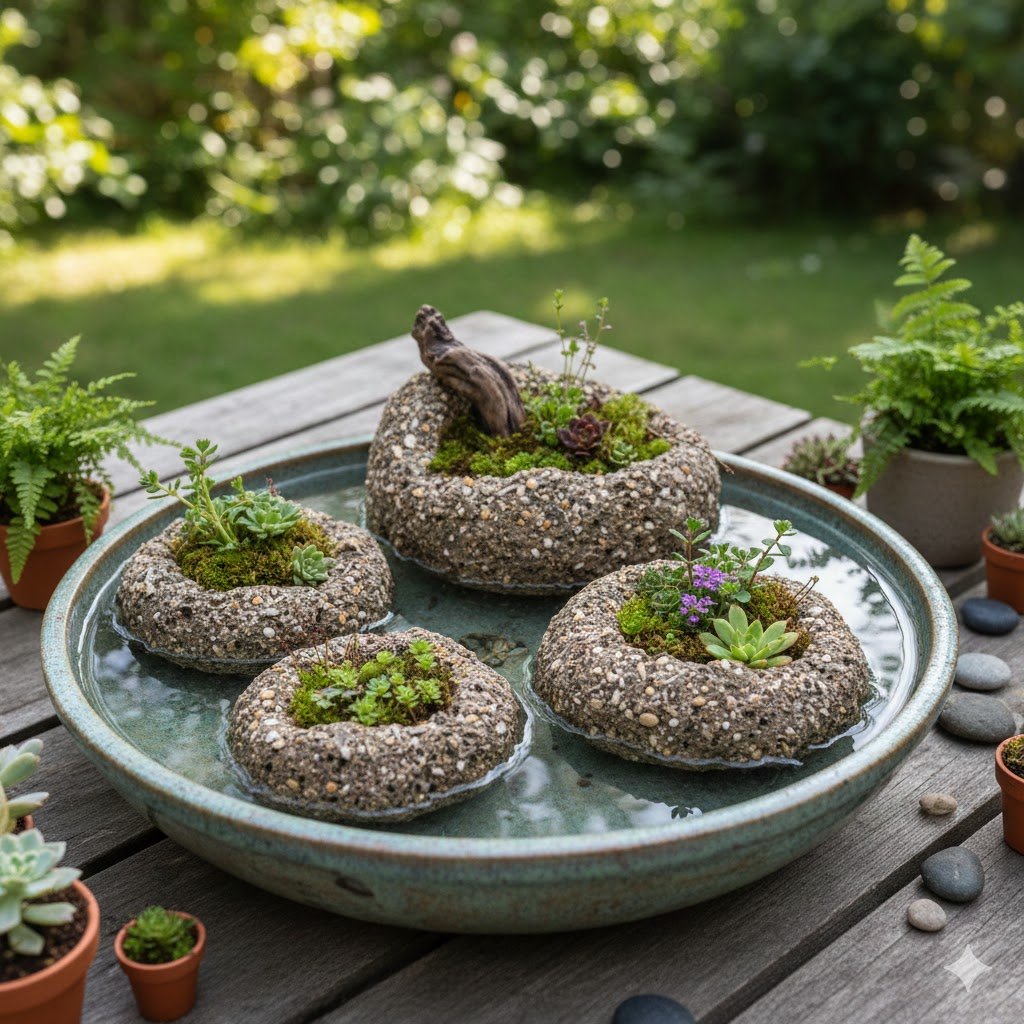
You don’t need a pond to have a water feature. A galvanized bucket or a large ceramic bowl can be a “pond,” but it looks lonely without plants. Floating hypertufa planters allow you to have greenery in the water without the pot sinking to the bottom and drowning the plant.
To make these, you incorporate chunks of styrofoam directly into the hypertufa mix or use a styrofoam ring as the base of your mold. It feels like magic. You have what looks like a heavy volcanic rock, but it bobs on the surface like a cork.
I once made a set of three different sizes for a client with a balcony. We tucked tiny water-loving mosses and miniature rushes into the center. It turned a boring tub of water into a tiny ecosystem.
Make sure you leach these well before putting them in water with fish. Hypertufa is alkaline when it’s fresh. If you plop a brand-new “island” into a small bowl of water, the pH will spike and your goldfish will not be happy. I usually leave mine in a bucket of water for a week, changing the water daily, until the “slime” stops appearing.
6. The “Old World” Sphere
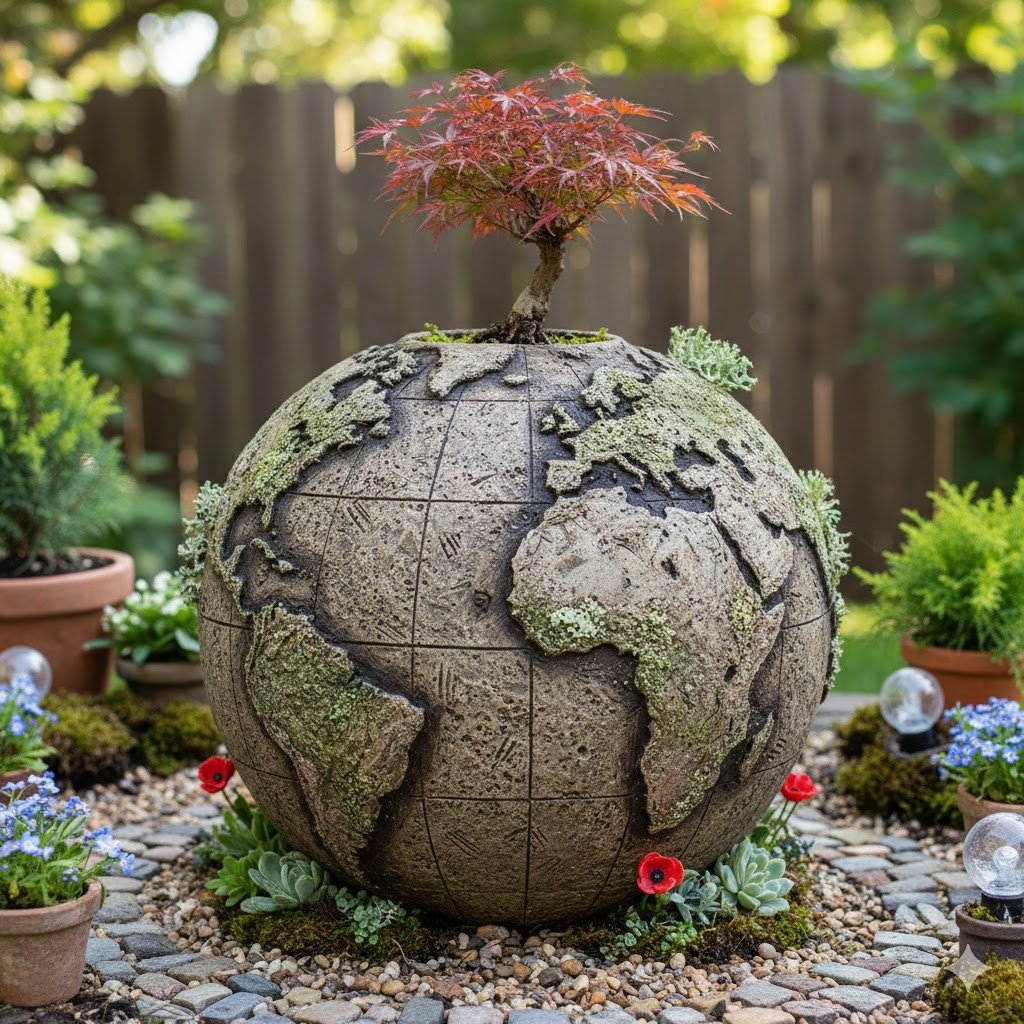
Small gardens often lack a focal point. A hypertufa garden sphere acts like an architectural anchor. It looks like an old cannonball or a weathered planet tucked between your lavender.
The easiest way to do this is to use a cheap rubber playball from the toy aisle. You cut a small hole, stuff the mix inside (this takes patience and a lot of poking with a stick), and let it cure. Then, you literally “birth” the sphere by cutting away the rubber.
I’ve made dozens of these, and the best ones are the ones that aren’t perfectly round. I like to take a rasp to them once they’re out of the mold to give them a “hand-carved” look. In a small space, three spheres of different sizes (think 4, 6, and 8 inches) look much more professional than one giant one.
7. Wall-Hanging “Stone” Pockets
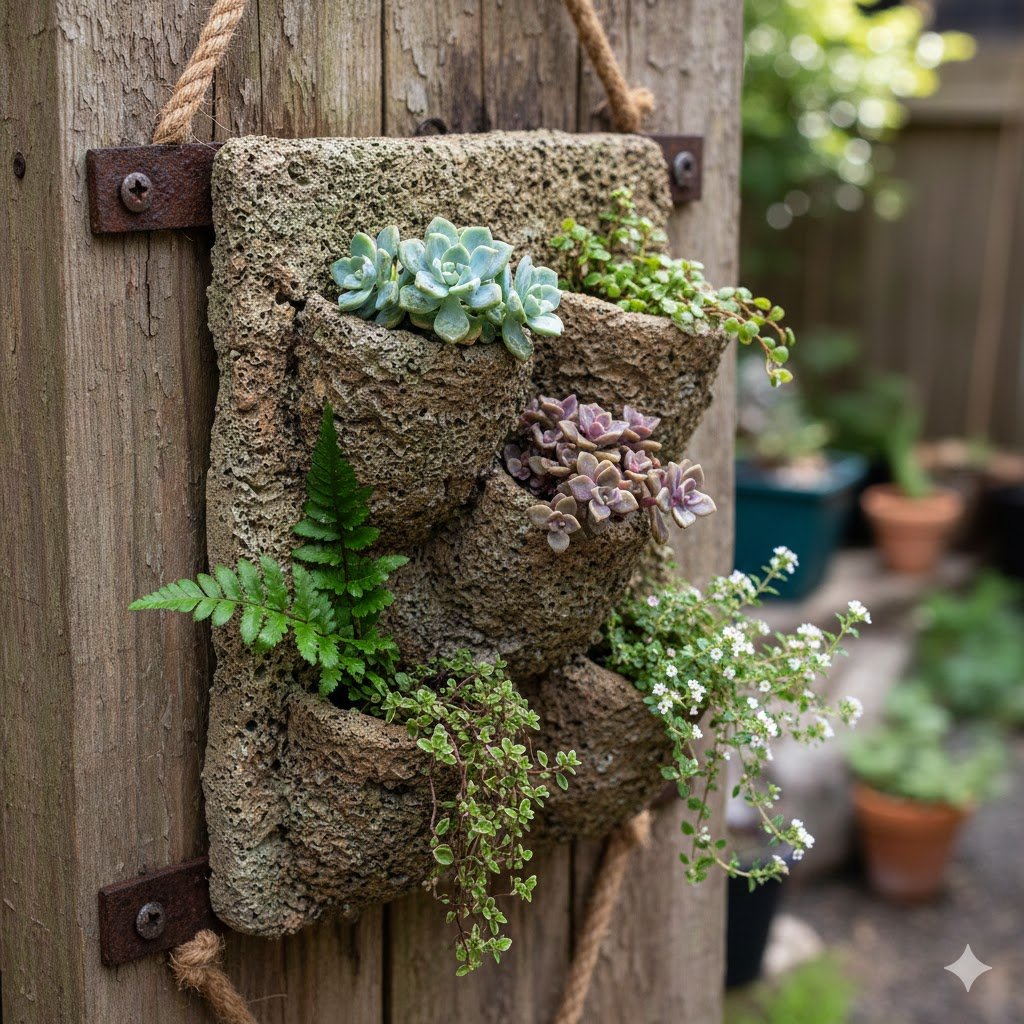
When you have zero floor space, you look at the walls. I started making hanging hypertufa pockets after I realized my fence was looking a bit bare. These are basically “half-pots” with a flat back and a wire loop embedded in the cement.
To make these, you use a ball of crumpled newspaper or a half-melted plastic bottle as the interior form, and build the “nest” around it on a flat surface.
These are perfect for air plants or succulents that don’t need much soil. Because they’re lightweight, you can hang them on a standard fence nail without worrying about the whole thing coming down in a windstorm. Just make sure the wire loop you embed is thick—I use 12-gauge copper wire because it won’t rust and snap three years down the line.
8. Hypertufa “Bark” Planters
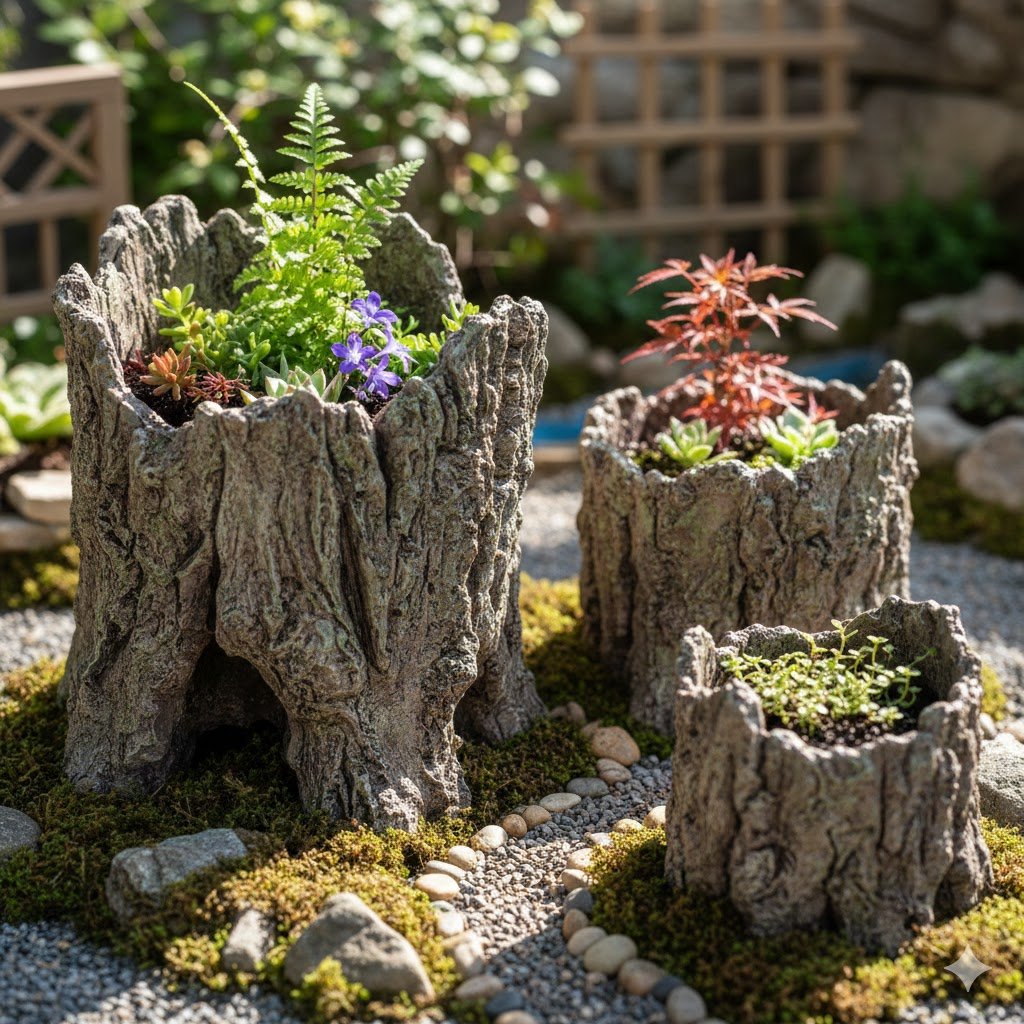
If you want your garden to look like a fairy tale, you can mold hypertufa to look like old tree stumps. I call these my faux-bois basins.
Instead of a smooth mold, you use a piece of real bark (or a textured silicone mat) to press into the exterior of your wet mix. I once found a piece of deeply furrowed oak bark in the woods that made the most incredible “stump” planter.
These look stunning when planted with ferns or woodland flowers. In a tiny urban garden, they provide that “touch of the forest” that we all crave. Plus, unlike real wood, they won’t rot away in three seasons. They’re basically eternal stumps.
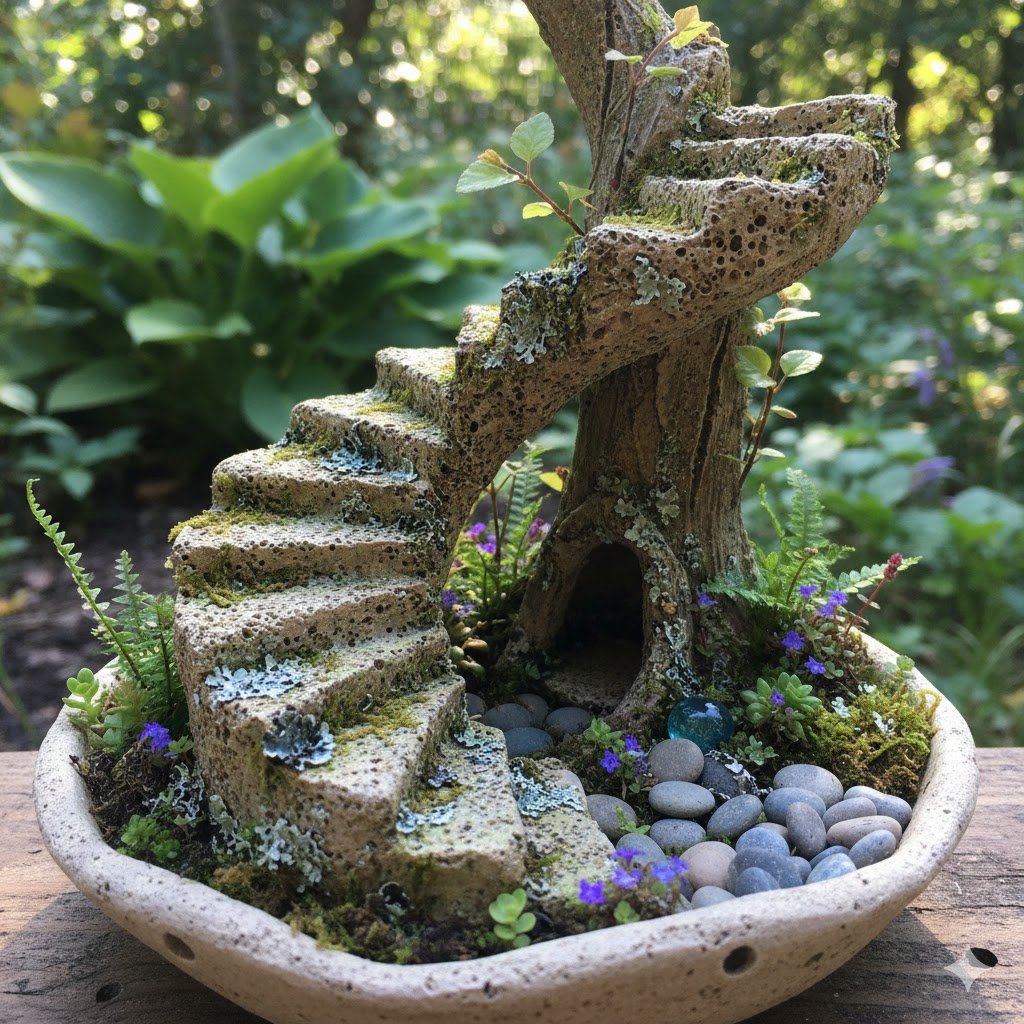
9. Miniature “Fairy” Stairs

I’m not talking about the plastic glittery stuff. I’m talking about architectural mini-stairs that lead to nowhere. In a small container garden, these create a sense of scale and mystery.
You can “layer” small slabs of hypertufa like a staircase inside a large pot. It draws the eye upward and gives you different levels to plant tiny creeping thymes.
I usually make these by pouring a flat sheet of hypertufa about an inch thick, letting it get “leather-hard,” and then snapping it into irregular rectangles. The rough, snapped edges look like natural quarried stone. It’s a lot more convincing than trying to mold individual tiny steps.
10. The “Basalt” Column Cluster
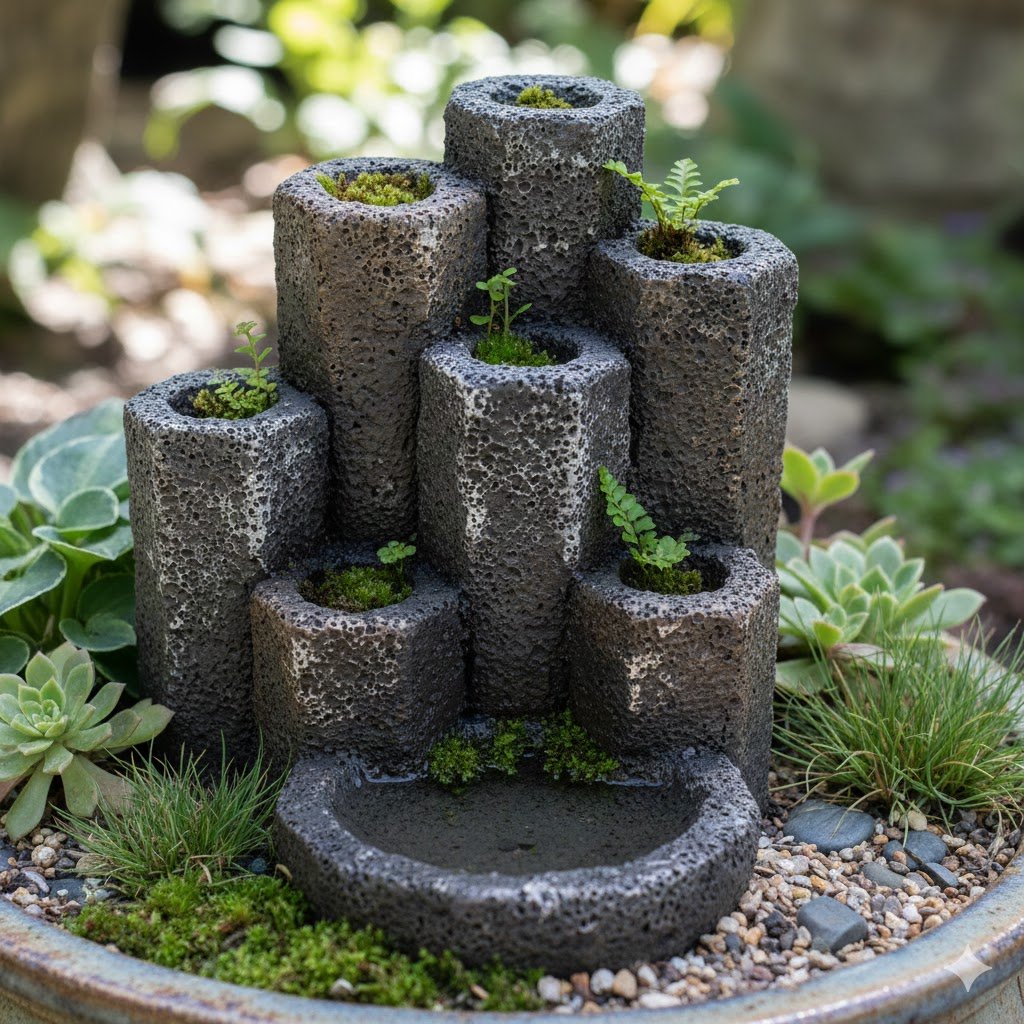
If you love modern design, you can create geometric hypertufa columns. Use square or hexagonal cardboard mailing tubes as your molds.
Stand three of them up at different heights—say 6, 12, and 18 inches. When you peel the cardboard away, you have these sleek, stony pillars. You can even carve a small “well” in the top of the tallest one for a tea light or a tiny trailing plant.
In a small garden, these vertical elements create a “skyline” effect. It makes the space feel organized and intentional, rather than just a collection of random pots.
11. Hypertufa Lanterns (The “Bonus” Project)
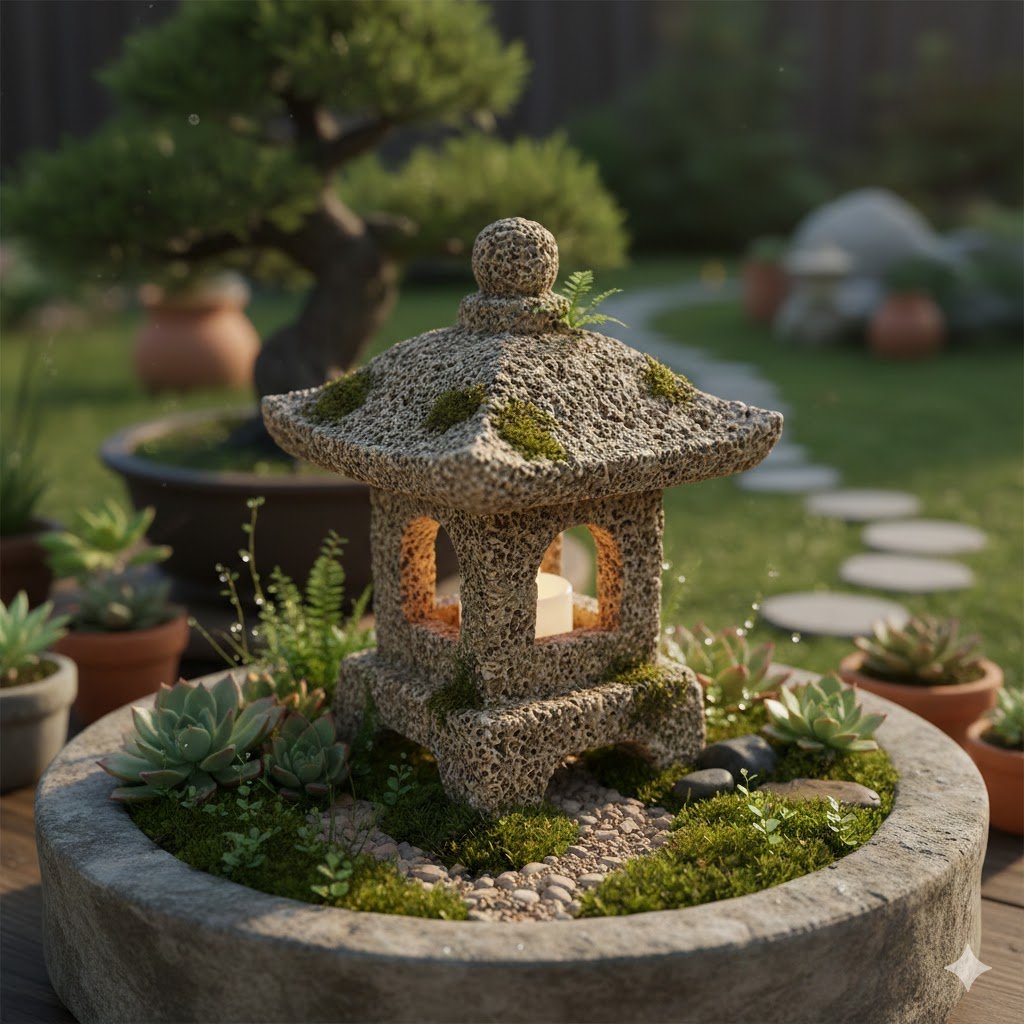
I saved this for last because it’s a bit finicky, but the payoff is huge. You can make hollow stone lanterns by using two nested boxes as your mold.
Once the “box” is formed, you use a drill or a small saw (while the mix is still slightly soft) to cut out “windows.” At night, with a battery-operated candle inside, the light glows through the “stone.” It’s the ultimate way to add ambiance to a tiny patio without spending a fortune on high-end lighting.
Real Talk: What They Don’t Tell You on Pinterest
I love hypertufa, but let’s get real for a second. There is a lot of “curated” misinformation out there that will lead to a crumbly mess in your driveway.
- The “Secret” Ingredients: You’ll see people swearing by adding liquid acrylic or specialized dyes. I’ve found that most of those “upgrades” are a total waste of money. Plain old Portland cement, peat moss, and perlite (or vermiculite) do 95% of the heavy lifting. Don’t buy the “designer” mixes; you’re just paying for fancy packaging.
- The Curing Process: This is where most people fail. You cannot—I repeat, cannot—just leave your project in the sun to dry. If it dries too fast, it won’t be strong. It needs to cure. I keep mine wrapped in heavy-duty trash bags for at least a week. I call it the “mummy phase.” It’s ugly, it’s sweaty, and it’s absolutely necessary.
- Weight Matters: Even though it’s “lightweight,” a 24-inch trough is still going to be heavy once you add wet soil and plants. Don’t build a massive project on your dining room table unless you want to call a chiropractor. Build it where it’s going to live, or at least on a rolling cart.
- The Moss Myth: You’ve probably seen those “moss milkshake” recipes where you blend moss and buttermilk and wipe it on the pot. In my experience, that just smells like rotting dairy and attracts flies. If you want moss, keep the pot in the shade and keep it damp. Nature will find it. Don’t waste your blender on it.
Parting Wisdom
The beauty of hypertufa isn’t just the low cost; it’s the fact that it gets better with age. Every year your project sits outside, it will collect a little more lichen, a little more “patina,” and look more like it belongs to the earth.
Don’t strive for perfection. The “mistakes”—the cracks, the thumbprints, the slightly off-center edges—are what give these pieces soul. I’ve never had a “perfect” project that I loved as much as the one that had a little character.
So, are you ready to get your hands dirty, or are you still worried about making a mess? If you’ve got a specific small space you’re trying to decorate, let me know in the comments—I’d love to help you brainstorm a custom mold idea!