

Your neighbors probably think I’m a bit eccentric because I spend more time talking to my snapdragons than my actual family, but after fifteen years of mud-caked boots, I’ve learned one thing: a beautiful garden and a productive cut flower garden are two very different beasts. If you try to harvest flowers from your front-yard “curb appeal” beds, you’ll end up with a patchy, depressed-looking landscape that looks like a moth got loose in a fabric store.
I once tried to grow “Instagram-worthy” bouquets in a circular Victorian mound. It was a disaster. I couldn’t reach the middle to deadhead, the stakes looked like a construction site, and I tripped over a garden gnome and took out my prize dahlias. To save you the heartbreak (and the bruised shins), I’ve put together the only layouts that actually work for people who want to fill their vases every single week.
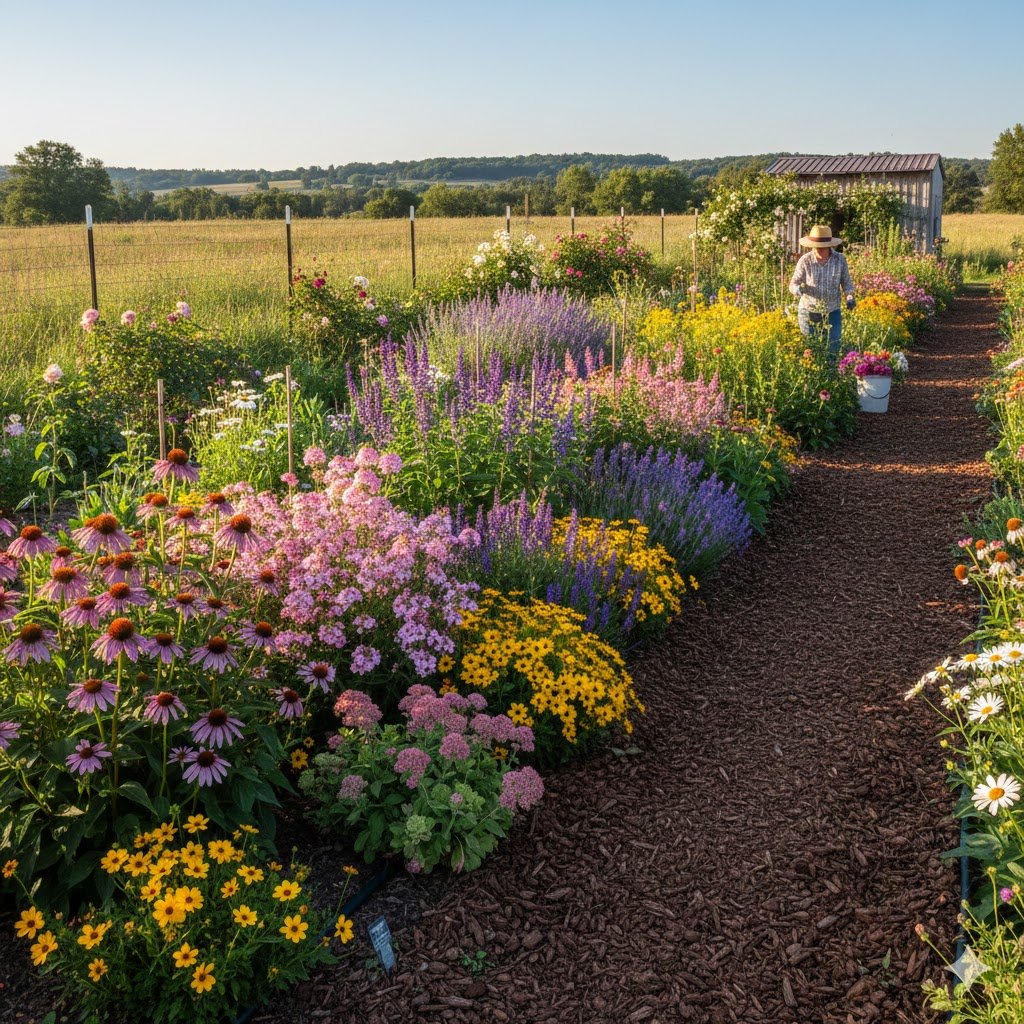
1. The Classic Long Row Cutting Garden
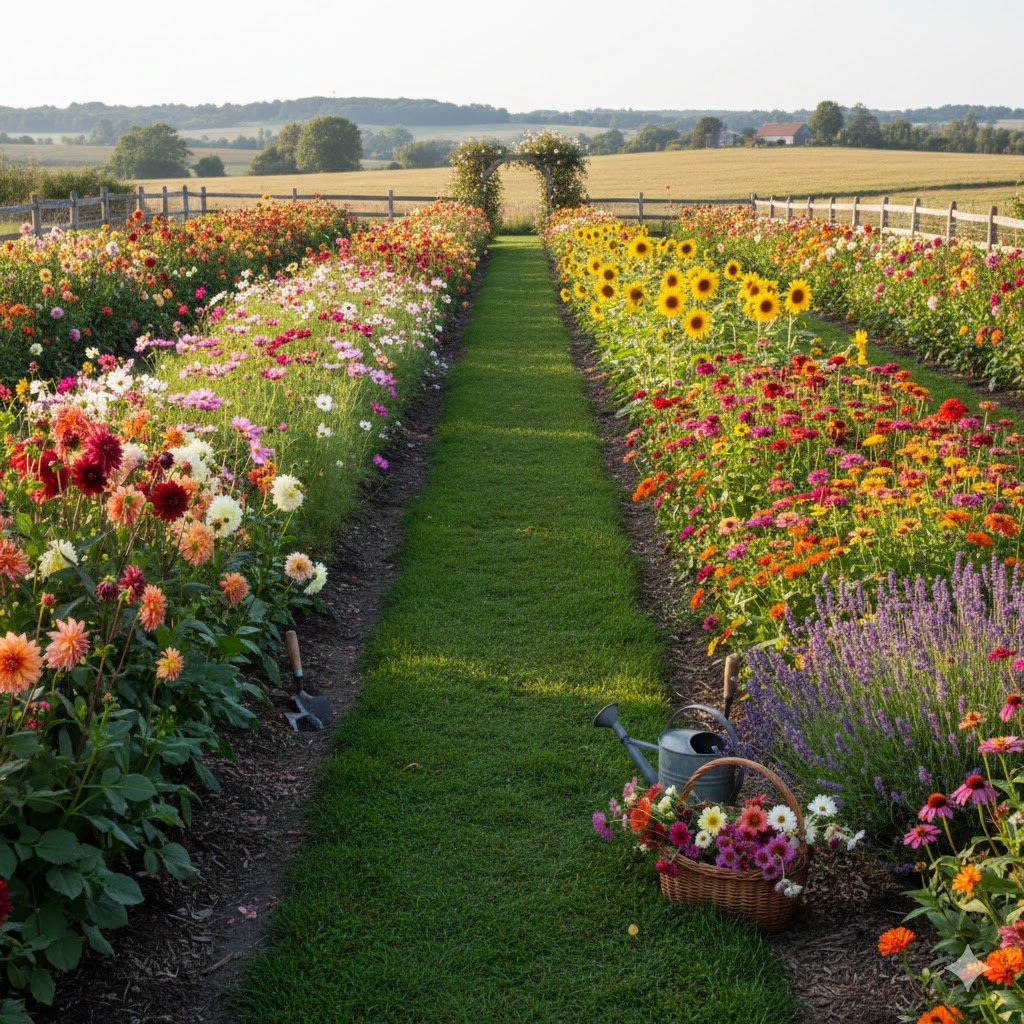
When I first started, I wanted curves and whimsy. Now? I want efficiency. The long row layout is basically a farm in miniature, and it is hands-down the best way to grow flowers if you actually plan on cutting them. Think of it like a grocery store aisle, but instead of cereal, you’ve got zinnias.
I usually keep my rows about 3 feet wide. Any wider and you’re overstretching your lower back trying to reach the center flowers, which is a one-way ticket to a chiropractor’s office. I leave about 18 to 24 inches for paths between the rows. I know, I know—it feels like “wasted” space, but when the mid-July heat hits and the plants are 4 feet tall, you’ll need that room to maneuver your harvest bucket without snapping off heads.
The beauty of rows is the irrigation. I lay down simple drip tape once in the spring, and I’m done. No more standing out there with a hose for two hours while mosquitoes use my neck as a buffet. If you’re looking for high-yield “cut and come again” flowers, rows are the only way to go.
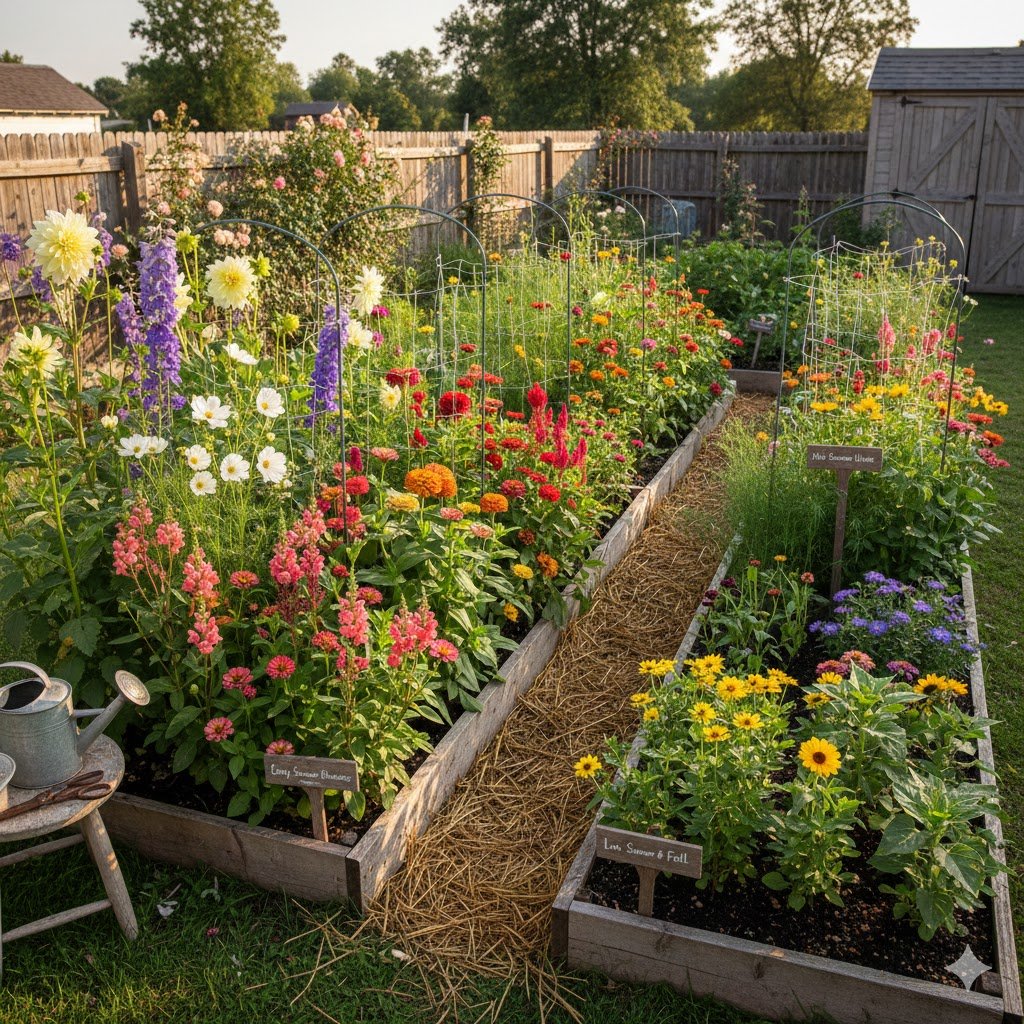
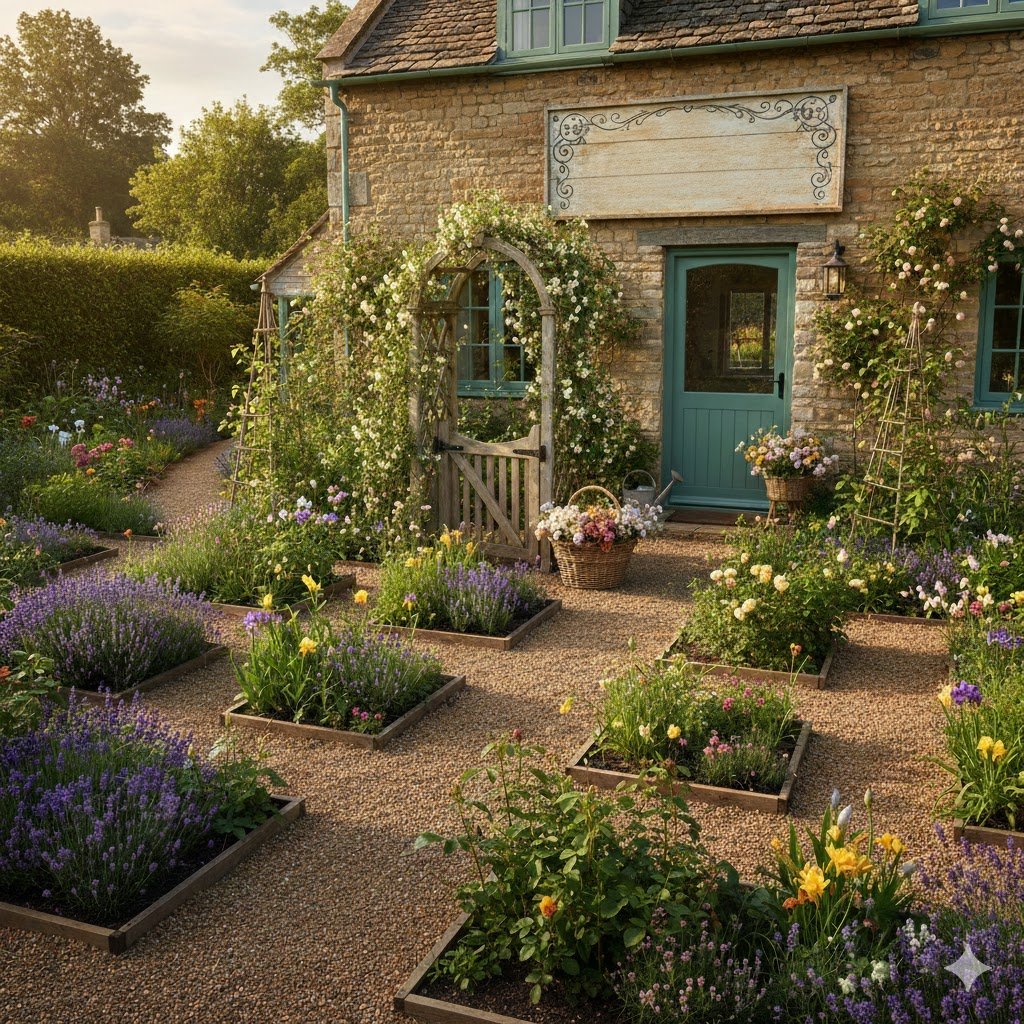
2. The High-Efficiency Raised Bed Grid
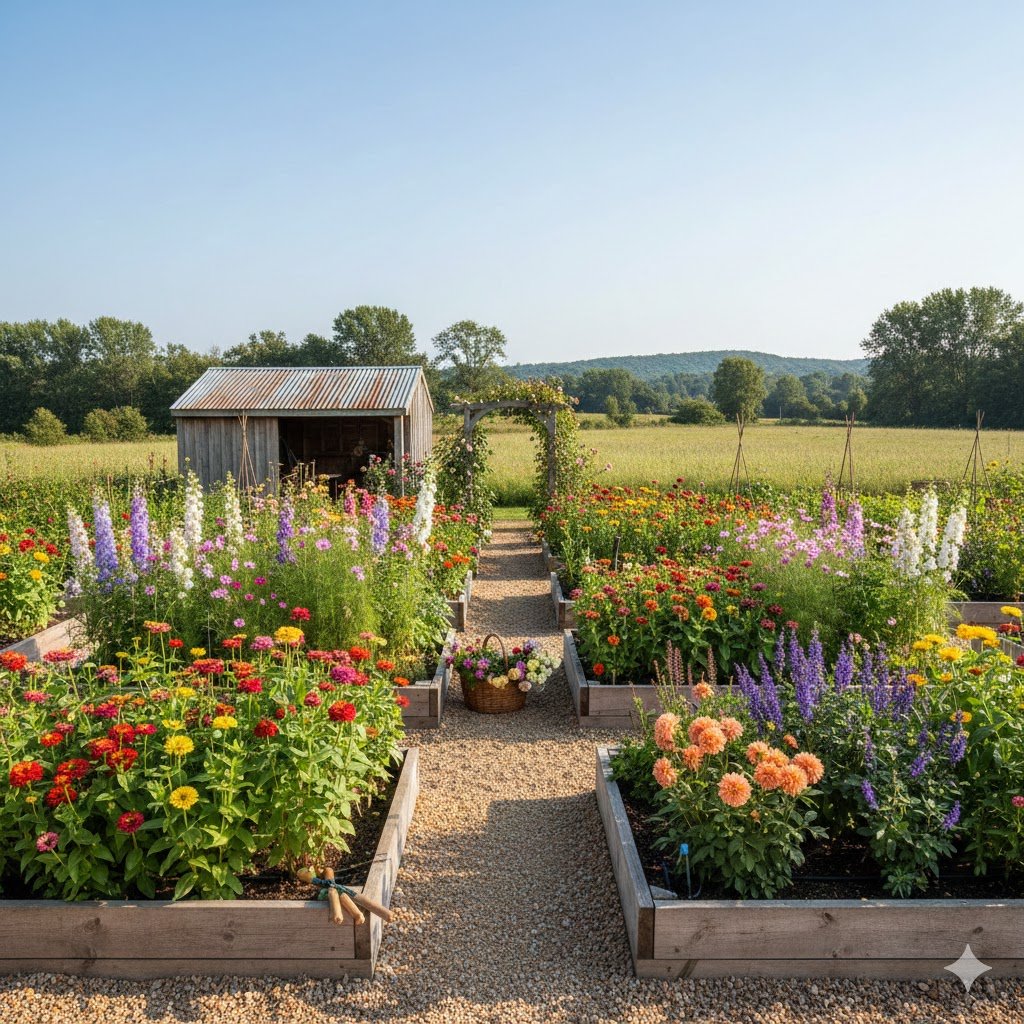
If you’ve got a small backyard or soil that’s basically just glorified New Jersey clay (like mine), raised beds are your best friend. But don’t just throw seeds in there and hope for the best. I use a grid system that would make a librarian proud. I categorize my beds by “cool season” and “heat lovers” so I’m not digging up half a bed to replant the other half.
In a standard 4×8 raised bed, I can fit an incredible amount of stems. I divide the bed into sections: one for focal flowers like Ranunculus, one for “fillers” like Ammi or Feverfew, and a tiny corner for some greenery. This prevents the “jungle effect” where the aggressive cosmos swallow up the delicate sweet peas.
One year, I neglected the grid and planted mint in a corner of my raised bed. By August, the mint had staged a violent coup and was strangling my lisianthus. Don’t be like me. Keep your aggressive spreaders in their own pots or very strictly defined zones within your grid.
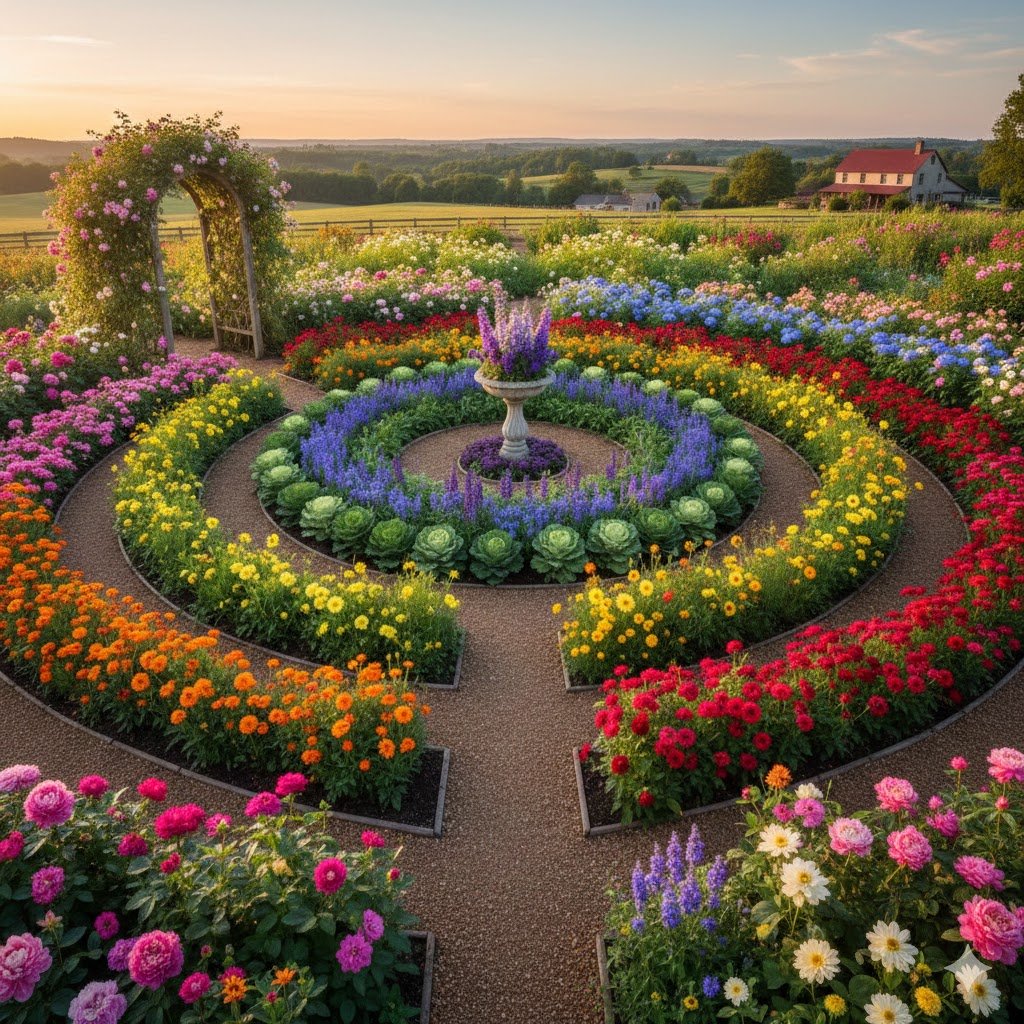
3. The U-Shaped “Walk-In” Garden Layout
This is the layout I use when I want to feel like the protagonist of a romantic comedy. A U-shaped bed allows you to step into the garden. You are surrounded by blooms on three sides, which makes harvesting feel less like a chore and more like a spa day.
The “arms” of the U should be accessible from both the inside and the outside. This gives you maximum surface area for planting without ever having to step on the soil. Compacting your soil is the quickest way to kill your drainage, and a U-shape prevents that entirely. I put my tallest plants—like Sunflowers or Amaranthus—on the very back “bar” of the U so they don’t shade out the shorter gems.
I’ve found that the U-shape is also the best for supporting heavy hitters. You can easily run a horizontal trellis (the “corral” method) across the arms of the U. This keeps your stems straight. There is nothing more frustrating than a “wonky” tulip that refuses to sit right in a vase because it grew at a 45-degree angle.
4. The Perennial Border with Cutting Pockets
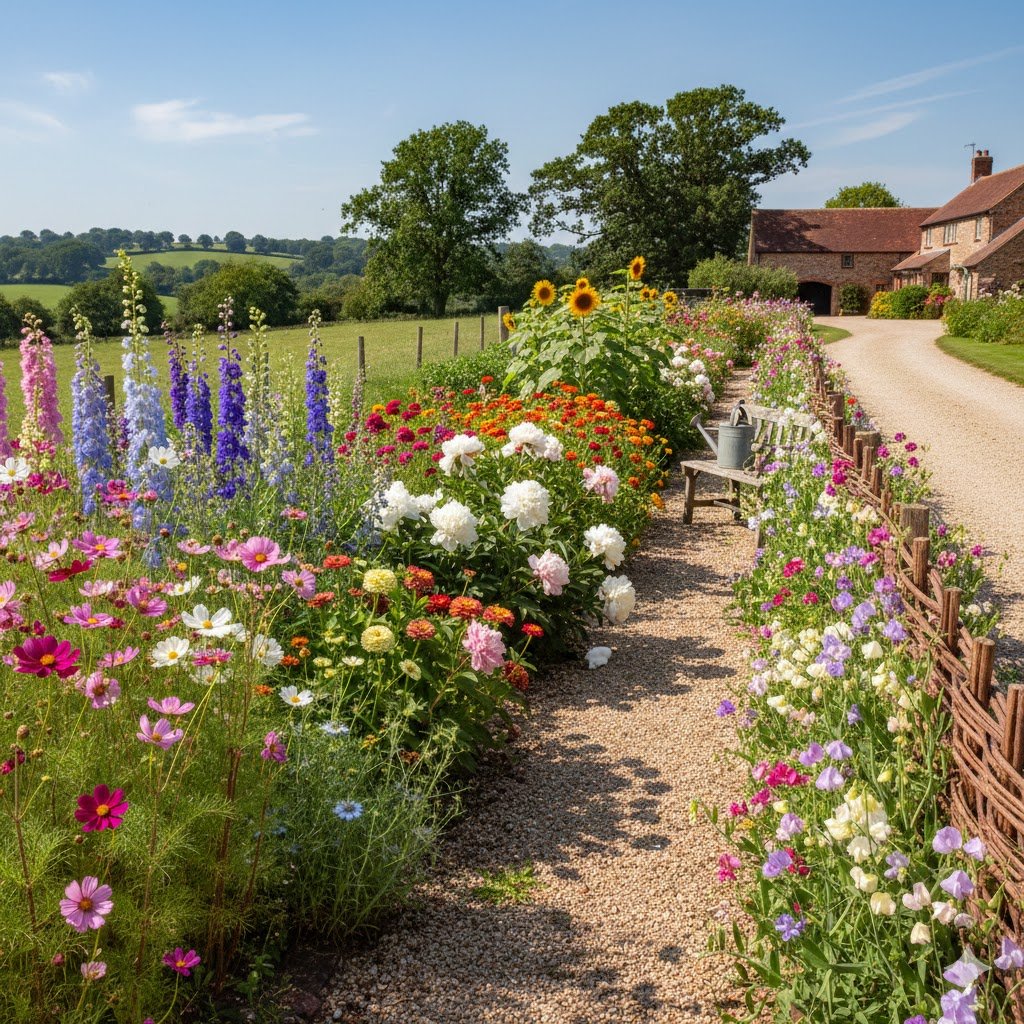
Maybe you don’t want your backyard to look like a commercial farm. I get it. The “Pocket” layout is where you integrate cutting flowers into your existing landscape. The trick here is to plant in “drifts” of at least 7 to 10 plants. Planting just one or two of something is a waste of time—you won’t have enough for a full bouquet.
I like to hide my “cutting” plants behind my “show” plants. For example, I’ll plant a row of sturdy Peonies in the front, and tucked right behind them, I’ll have my messy-but-productive Zinnias. By the time the Peonies are done blooming and looking a bit ragged, the Zinnias rise up to take the spotlight.
A side note on this: I’ve found that using “landscape” perennials as fillers is a total waste of money if you want long stems. Those little mounding plants look pretty on Pinterest, but they have 4-inch stems that are impossible to work with. Stick to varieties specifically bred for cutting, even if they look a little “leggy” in the garden.
5. The Fence-Line Vertical Flower Garden
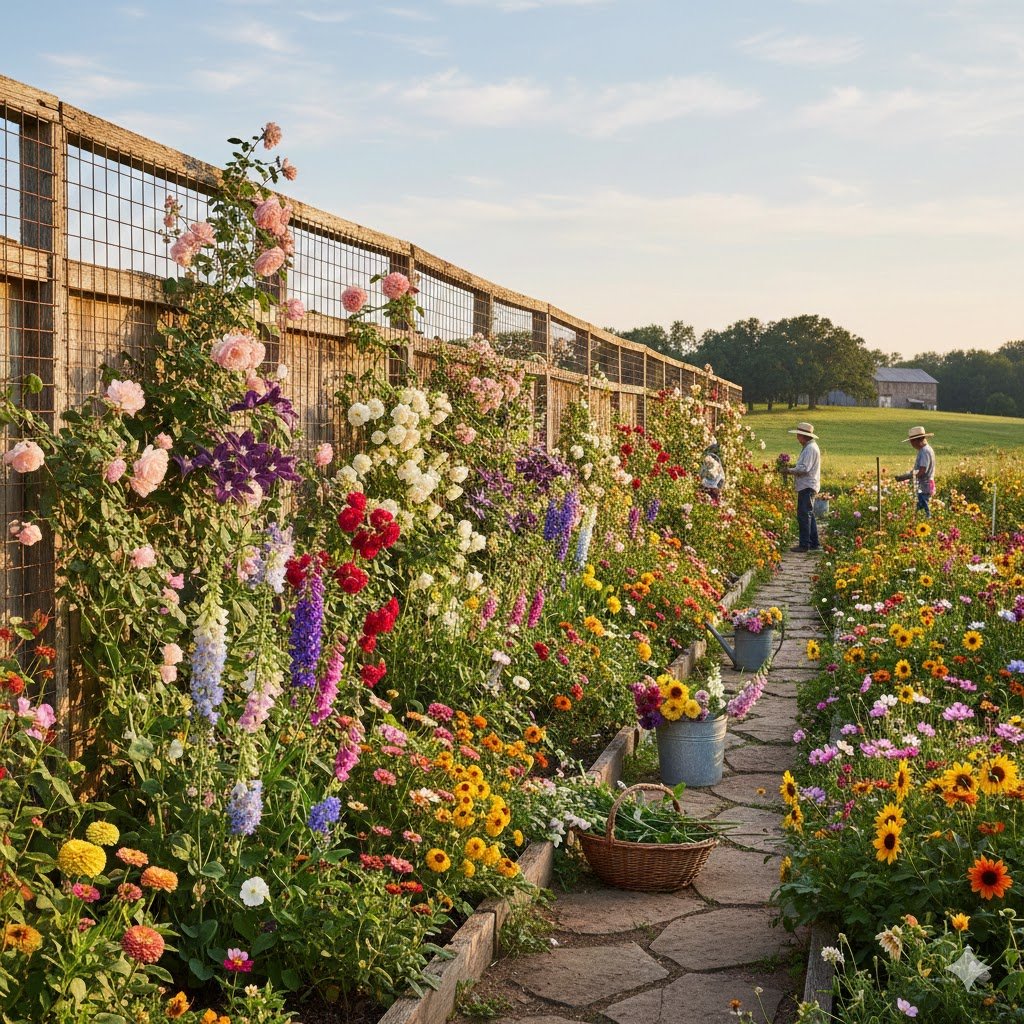
If you are short on space, stop looking at the ground and start looking at your fences. Sweet peas, Clematis, and climbing roses are the MVPs of the small cut flower garden. I use simple cattle panels leaned against the fence to create a vertical wall of blooms.
The key to a vertical layout is “pinching.” I used to be terrified to pinch off the tops of my young plants—it felt like I was murdering them. But if you don’t pinch your climbers, you’ll get one long, sad vine with two flowers at the very top where you can’t reach them. Pinch them back, and they’ll reward you with a bushy, bloom-heavy wall.
I once grew “Cup and Saucer” vines all the way up my back porch. It was gorgeous until I realized the hummingbirds had moved in and would dive-bomb me every time I tried to take a cutting. It’s a trade-off, but having fresh vines to drape over the side of a tall vase makes your arrangements look professional.
6. The “Succession” Patch (Small but Mighty)
You don’t need a half-acre to have flowers all summer. You just need a “Succession Patch.” This layout is less about the shape and more about the timing. I divide a small 4×4 area into four quadrants. Every two weeks, I plant a new round of fast-growing seeds like sunflowers or cilantro (yes, the flowers are great fillers).
This prevents the “all or nothing” harvest. There is nothing worse than having 500 zinnias in July and absolutely zero flowers in September. By rotating your layout through the season, you keep the vase full until the first frost.
I’ve found that trying to do “succession” in a large, messy field is a nightmare. You forget what you planted where. In a tight, 4×4 layout, you can easily see which quadrant is “spent” and ready for a fresh round of compost and new seeds.
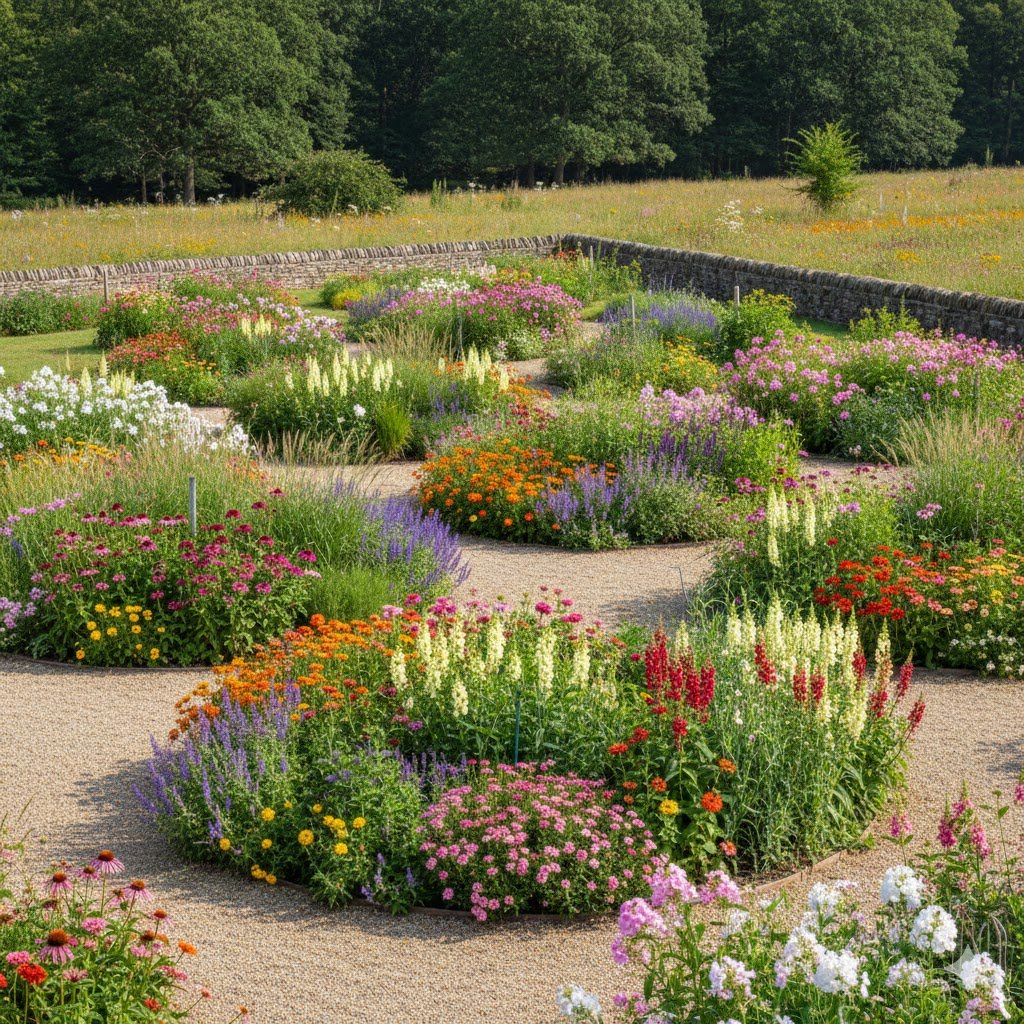
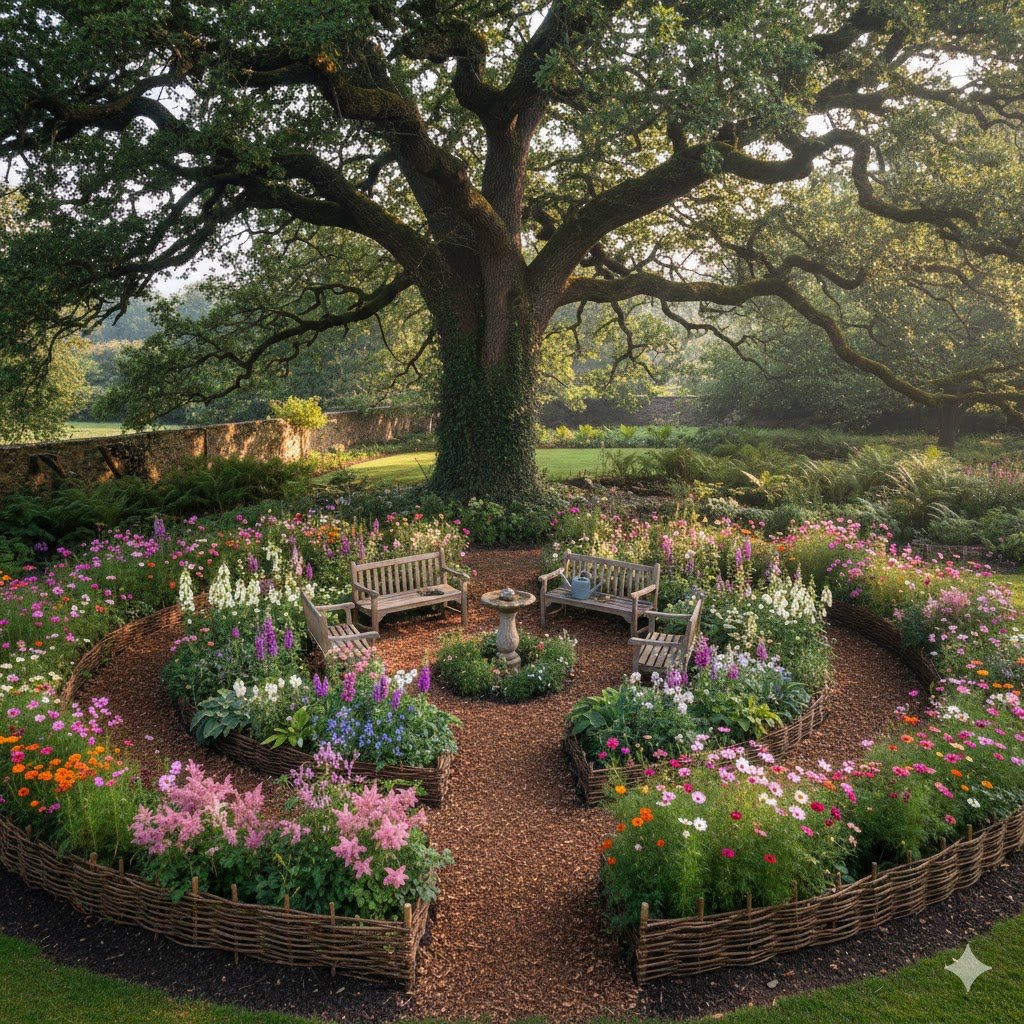
7. The “Rainbow Wheel” Circular Layout
I’ll be the first to admit that straight lines are easier for my old back, but sometimes you want a garden that feels like a destination. The “Rainbow Wheel” is a circular plot divided into wedges like a giant pizza. Each “slice” is dedicated to a specific color palette.
I tried this three years ago because I was tired of my bouquets looking like a box of melted crayons. By grouping your “cool” blues and purples in one wedge and your “hot” oranges and reds in another, you can harvest an entire arrangement’s color scheme just by standing in one spot. It’s a massive time-saver when you’re rushing to put together a host gift before a dinner party.
One thing I learned the hard way: put a permanent focal point in the very center, like a birdbath or a trellis for sweet peas. If you try to plant flowers all the way to the middle, you’ll end up doing a clumsy ballet move to reach them and inevitably crush your favorite stems. Make sure your “pizza slices” aren’t deeper than 3 feet so you can reach every bloom from the perimeter or the center path.
8. The Low-Maintenance Perennial “Mother Plant” Row
If you’re like me and some days your knees just say “not today,” you need a layout dedicated to perennials. These are the “one and done” plants. You plant them once, and they come back every year like a loyal dog. I keep my perennial cutting row separate from my annuals because their needs are totally different.
My perennial row is anchored by Hydrangeas, Peonies, and Hellebores. I’ve found that mixing these with annuals is a recipe for disaster because when you go to pull out your dead zinnias in the fall, you’ll accidentally yank up a dormant (and expensive) peony bulb. Keep the “permanent” residents in their own zip code.
I once thought I could save space by interplanting tulips between my perennials. It worked for exactly one season until the perennials grew so large they smothered the bulbs. Now, I give my perennials a solid 3 feet of breathing room. It looks sparse in year one, but by year three, you’ll be drowning in stems without having to sow a single seed.
9. The “Shade Seeker” Under-Tree Layout
Most people think you need 8 hours of blistering sun to grow flowers. I used to think that too, until I realized my kitchen table was empty every spring because I had no “woodland” style fillers. If you have a big oak tree or a shady side of the house, that’s your secret weapon for a diverse cutting garden.
I use a “layered” layout under the canopy. I put the taller, shade-loving shrubs like Pieris or Mock Orange in the back and the delicate “jewelry” flowers like Lily of the Valley and Astilbe in the front. These plants provide those airy, ethereal textures that make a bouquet look like it cost $100 at a boutique florist.
Fair warning: tree roots are greedy. I tried planting directly into the ground under an old maple and the tree basically ate my flowers for breakfast. Now, I use large, stylish pots or very shallow raised beds with a barrier at the bottom. It keeps the tree out of the flower’s lunch, and the dappled light keeps the blooms from scorching in the July heat.
10. The Driveway “Cutting Border”
If you’re staring at a boring strip of grass next to your driveway, you’re looking at prime real estate. I turned my driveway “hell strip” into a cutting border, and it’s the best decision I ever made. Since it’s usually backed by a hard surface (the driveway), it stays warmer in the spring, which means earlier blooms.
For this layout, I stick to “tough as nails” varieties. Think Yarrow, Echinacea, and hardy Salvia. These plants don’t mind a little heat radiating off the asphalt or the occasional stray basketball from the neighbor’s kids. I keep the taller stuff toward the house and the shorter “spillers” toward the street so I don’t create a blind spot when backing out.
I once planted giant 10-foot sunflowers right at the end of the driveway. They were magnificent until the mailman complained he couldn’t see oncoming traffic. I felt like a jerk. Now, I keep the driveway heights under 3 feet. It’s still productive, but I’m no longer a neighborhood traffic hazard.
11. The “Kitchen Door” Fragrance Square
This is my “selfish” garden. It’s a small, 4×4 square right outside the back door. The layout here isn’t about volume; it’s about scent. I plant highly fragrant flowers like Stocks, Mignonette, and Heliotrope.
I’ve found that putting the “stinky” (the good kind) flowers right by the door reminds me to cut them. If they’re buried in the main garden 50 feet away, I often miss their peak scent. In this layout, I use a “checkerboard” pattern with paving stones so I can walk through it in my slippers without getting muddy.
One quick side note: don’t plant Mint in this square unless it’s in a buried pot. I made that mistake in 2012 and I’m still pulling mint out of my porch cracks. Keep your aromatic herbs like Lavender and Rosemary in this layout, too—they make incredible “greenery” for your vases and smell better than any candle you can buy.
12. The “Double-Duty” Edible Cutting Garden
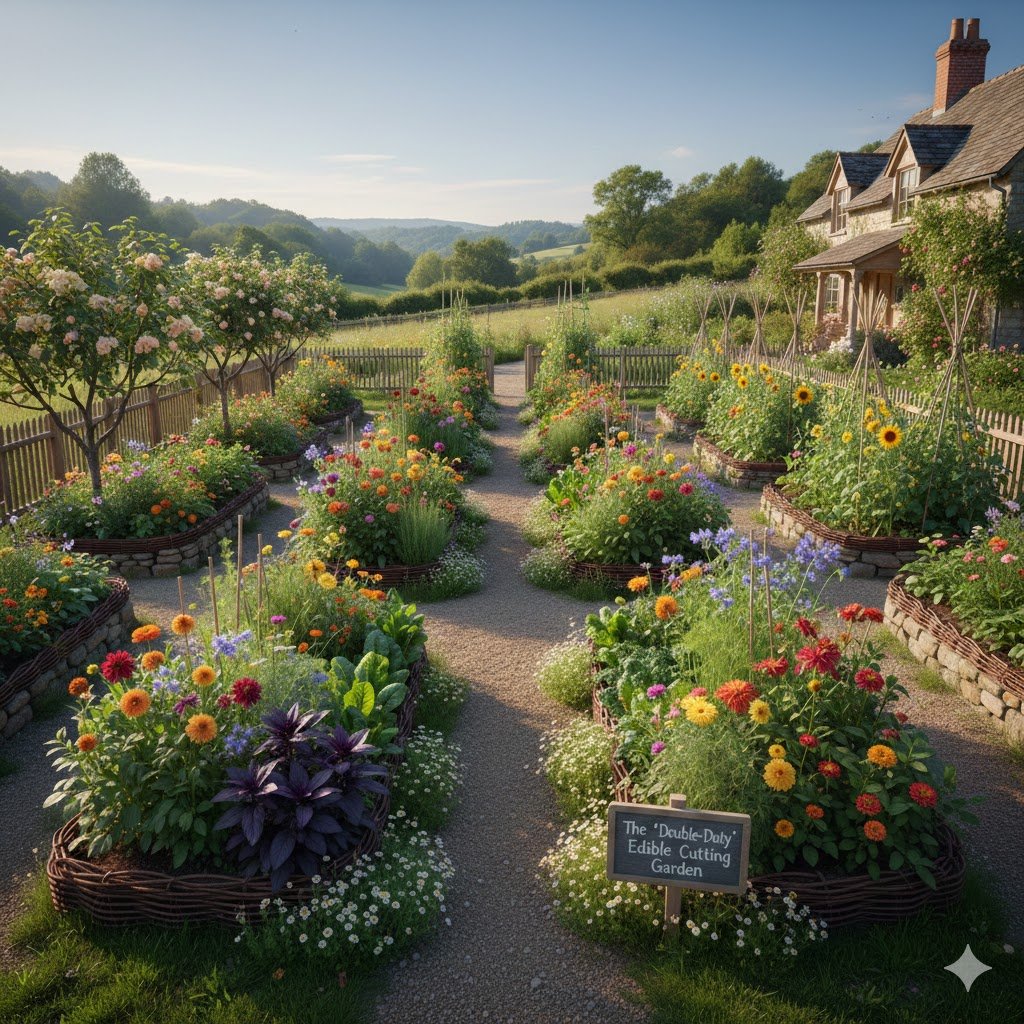
I’m a big fan of making my plants work twice as hard. Why grow a hedge when you can grow a “snack-and-snip” border? In this layout, I intermingle flowers with vegetables that have beautiful blooms or foliage.
I plant “Bright Lights” Swiss Chard next to Snapdragons, and Scarlet Runner Beans on the trellises. The yellow flowers of a bolting Bok Choy or the purple blossoms of Chives are some of my favorite “secret” fillers for arrangements. It looks like a cottage garden but feeds the soul and the stomach.
The real talk on this one? Be careful with your sprays. If you use any kind of pesticide on your flowers, you can’t eat the veggies next to them. I keep this entire section 100% organic. Also, watch out for the squash. I once let a pumpkin vine wander through my zinnias, and it strangled them like a green boa constrictor. Keep the “crawlers” on the ground and the “cutters” in the air.
13. The “Curb Appeal” Stepped Terrace
If your yard has a slope, don’t fight it—terrace it. I built three levels of “stairs” using cedar 4x4s. This layout is brilliant because it naturally separates your plants by height. The top tier gets the sun-soaking giants like Dahlias, the middle tier gets the medium-sized “fillers,” and the bottom tier gets the low-growing gems.
Terracing also solves the drainage problem that plagues so many gardens. Flowers hate “wet feet,” and a stepped layout ensures that water moves through the soil instead of sitting in a puddle. It’s basically a self-draining flower factory.
I once tried to build a terrace out of cheap landscape timbers I found on a “free” site. Big mistake. They rotted in two years and the whole thing collapsed during a thunderstorm. If you’re going to build up, use quality materials. It’s a headache to fix a “landslide” in the middle of blooming season.
14. The Container “Cutting Gallery” on the Deck
Don’t let a lack of “dirt” stop you. If you only have a balcony or a deck, you can still have a cutting garden. I use “The Gallery” layout, which involves grouping different sized pots together. The trick is to have at least three pots of the same flower so you have enough to actually make a bouquet.
I use 10-gallon grow bags for larger things like “ProCut” Sunflowers and smaller ceramic pots for things like Pansies or Sweet Alyssum. This layout is great because if one plant starts looking “spent” or ugly, you just move the pot to the back and bring a fresh one to the front. It’s like a rotating stage for your flowers.
I’ve found that people often underestimate how much water containers need. I once went away for a weekend in August and came back to a “hay garden” instead of a flower garden. If you go with a container layout, get a cheap automatic drip kit for your outdoor faucet. It’ll save your sanity and your stems.
The “Real Talk”: What’s Not Worth Your Effort
Listen, I’m going to be honest with you because that’s what neighbors do. Do not waste your time trying to grow “exotic” seeds you bought off a sketchy ad on social media. I once spent forty dollars on “Blue Peony” seeds that turned out to be common radishes. Stick to reputable seed houses.
Also, skip the “Wildflower Mix” bags for a cut flower garden. They are 90% filler and 10% flowers that die the second you cut them. You’ll end up with a tangled mess of weeds and maybe three sad daisies. If you want a cut flower garden, you have to be intentional.
And for the love of all things green, don’t forget the paths. I once skipped putting down mulch on my paths to “save money.” The first rain turned my garden into a slip-and-slide of mud. I spent more time cleaning my kitchen floor than I did enjoying my flowers. Woodchips, straw, or even old carpet—put something down.
Parting Wisdom
The best layout is the one you’ll actually walk into every morning. If you build a massive, complicated garden at the very back of your property, the weeds will win by July. Put your cutting garden somewhere you can see it from your kitchen window. That way, when you see a stray weed or a drooping stem while you’re sipping your coffee, you’ll actually go out and fix it.
I’ve made plenty of mistakes, from planting mint in the ground to forgetting to label my dahlia tubers (that was a fun “mystery” spring, let me tell you). But that’s how you learn.
What’s the biggest “fail” you’ve had in your garden so far? Drop a comment below and let’s laugh about it together—I bet I’ve done something worse!