

If you walk into a high-end home decor store in January, you’re greeted by a sea of velvet hearts, gold-trimmed vases, and rustic wooden signs—all with price tags that make your wallet cringe. I love a beautiful home, but I refuse to spend $40 on a wreath that I’m only going to hang for three weeks. If you’re like me, you want the “Anthropologie aesthetic” without the “Anthropologie invoice.”
That is exactly why I headed to my local Dollar Tree with a $20 bill and a dream. You see, the secret to high-end DIY isn’t the price of the materials; it’s the technique you use to transform them. With a little bit of matte paint, some hot glue, and a creative eye, those plastic bins and glass jars can become the centerpiece of your Valentine’s mantle.
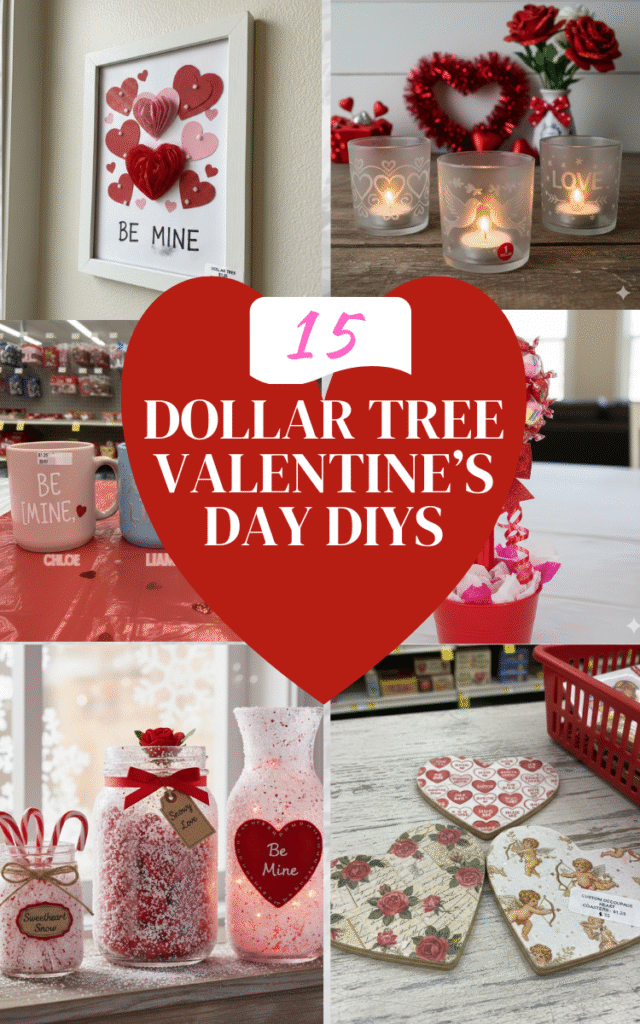
In this guide, I’m walking you through 15 of my favorite Valentine’s Day DIY projects. We are going to “de-Dollar” these items until they look like they were plucked straight from a boutique. Whether you’re decorating for a Galentine’s brunch or just want to add some cozy “XOXO” vibes to your living room, these projects are simple, fast, and incredibly affordable.
Setting Up for Success: The DT Staples
Before we dive into the specific projects, let’s talk about your “survival kit.” Every time I go to Dollar Tree, I check these specific aisles first. These are the building blocks for almost every high-end look we’re going to create today.
First, always check the floral section for foam blocks and wire. Even if you don’t like the look of the fake flowers, the structural items are gold. Second, the hardware aisle usually has twine, wood glue, and sometimes even small screwdrivers. Finally, never skip the kitchen aisle—the glassware there is the best canvas for “faux” finishes like mercury glass or frosted textures.
If you don’t have a stash of acrylic paint at home, grab the basic white, black, and red tubes at the craft aisle. My biggest tip? If you want your projects to look expensive, avoid “shiny” plastic finishes. Use matte or chalk paint whenever possible to give your items a sophisticated, weighted look.
Category A: Trendy Tiered Tray & Table Decor
1. The Vintage-Style Gumball Machine
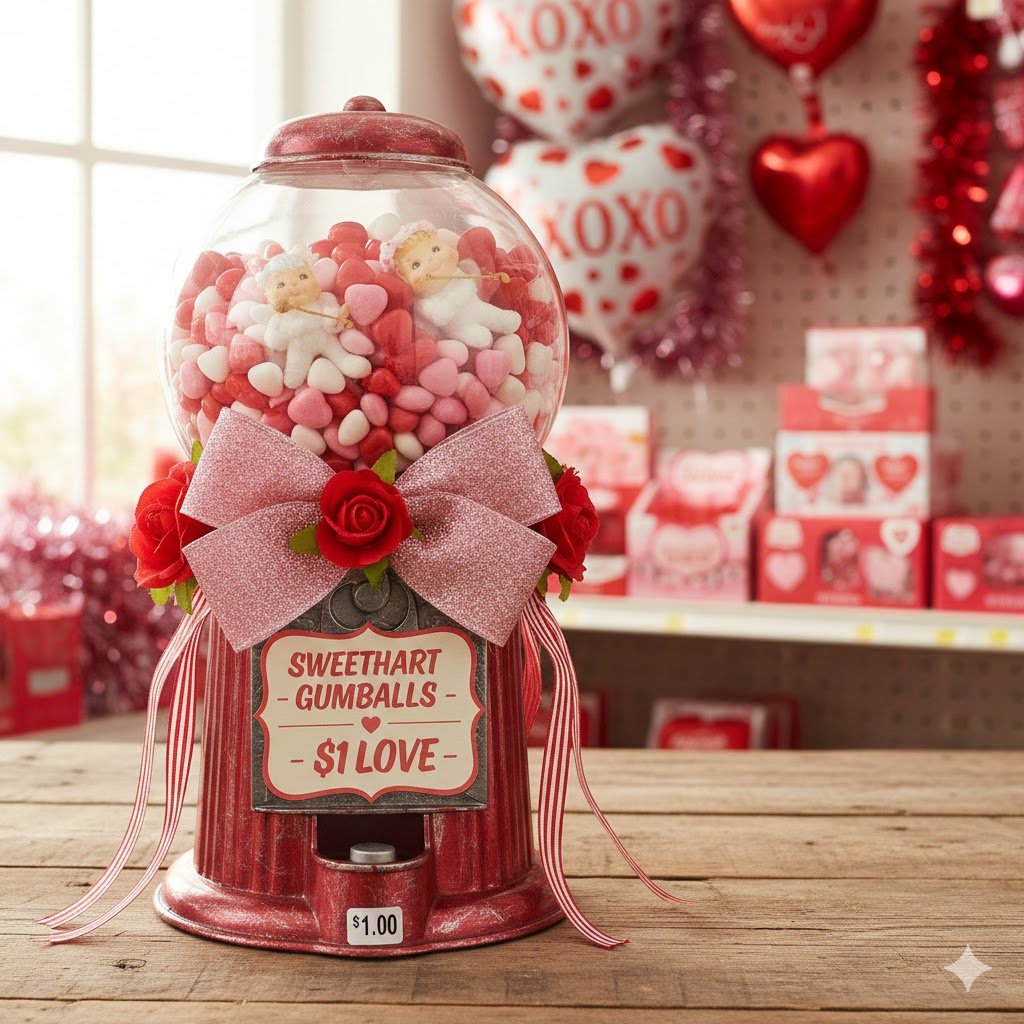
I am obsessed with the nostalgic look of old-fashioned gumball machines, but the metal ones can be pricey. This DIY uses a small terracotta pot, a glass bowl, and a wooden knob to create a stunning candy jar that looks like a vintage find. It’s perfect for holding conversation hearts or red M&Ms on your kitchen counter.
To start, you’ll need a 4-inch terracotta pot and its matching saucer, a small round glass floral bowl, and a wooden cabinet knob (or a large wooden bead). First, flip your pot upside down—this is your base. Paint the pot, the saucer, and the knob in a classic “Valentine Red” or a trendy “Dusty Rose” using matte acrylic paint.
Once the paint is dry, use E6000 glue or a heavy-duty hot glue to attach the bottom of the glass bowl to the top of the inverted pot. Make sure it’s centered so it doesn’t tip over! While that sets, glue your wooden knob to the center of the terracotta saucer. This saucer will act as the “lid” for your machine.
To give it that extra “high-end” touch, you can add a small silver or gold painted square to the front of the pot to mimic the coin slot. I’ve even seen people use a silver metallic marker to draw a “5 cents” logo on the front. It’s a tiny detail that makes a massive difference in the finished look.
Fill it with your favorite seasonal candy and place the lid on top. This piece is a total conversation starter. It’s chunky, colorful, and looks like something you’d find at a specialty candy shop. Plus, you can easily repaint it for Easter or Christmas later!
2. “Love” Scrabble Tile Wall Art

Large-scale Scrabble tiles are a huge trend in farmhouse decor right now. Typically, these sell for $5 to $10 per letter online, but we can make them for about $1.25 each using Dollar Tree supplies. We’re going to use the small wooden square plaques found in the craft section to create a “LOVE” or “XOXO” display for your mantle.
First, grab four of the square wooden plaques. If they have twine hangers attached, go ahead and snip those off. Sand the edges slightly if they’re a bit rough. I like to stain mine using a “faux stain” technique—just mix a little brown acrylic paint with a lot of water and wipe it on with a rag. This lets the wood grain peek through.
Once your “stain” is dry, it’s time for the lettering. You can use a stencil, a Cricut machine, or even just freehand it with a black permanent marker. Place a large capital letter in the center of each square. Don’t forget the tiny number in the bottom right corner (for example, “L” is 1, “O” is 1, “V” is 4, and “E” is 1)!
To make these look professionally made, I recommend using a matte sealer spray over the top. This prevents the ink from smudging and gives the wood a finished, furniture-like feel. You can lean these against the back of a tiered tray or use Command strips to stick them directly to the wall in a crossword pattern.
These are wonderful because they add height and texture to your decor. The natural wood tone balances out all the bright reds and pinks of Valentine’s Day, keeping the look sophisticated and modern.
3. Faux Mercury Glass Vases
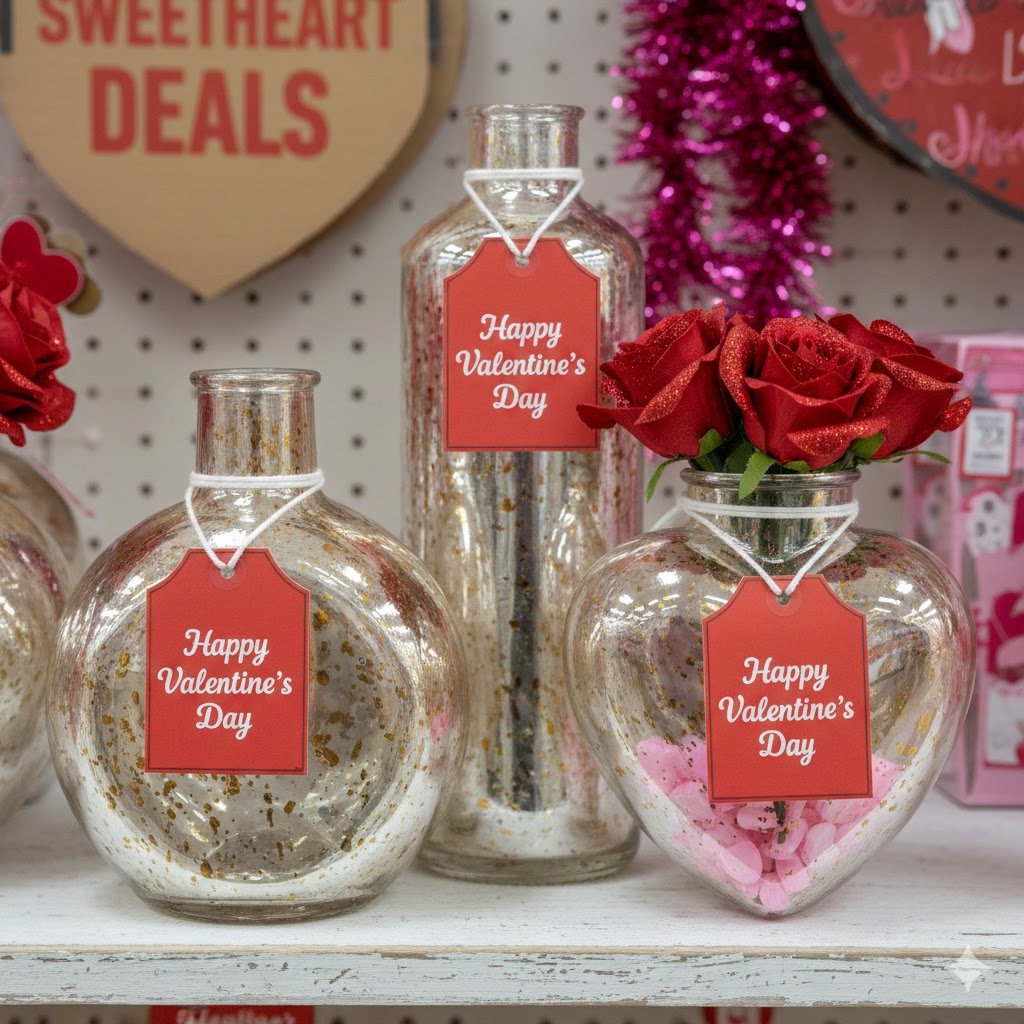
Mercury glass is stunning, but it’s notoriously expensive because of the silvering process. You can mimic this “mottled silver” look on any Dollar Tree glass vase with just two things: silver spray paint and a spray bottle of water. This project turns a $1.25 cylinder vase into something that looks like it belongs in a wedding centerpiece.
Start with a clean glass vase from the DT glassware aisle. Mix a solution of half water and half vinegar in a spray bottle. Lightly mist the inside of the glass so that small beads of water are clinging to the surface. You don’t want it dripping; just a light “dewy” look is perfect.
While the water is still beaded up, spray a very thin layer of silver metallic spray paint inside the vase. Wait about a minute, and then take a paper towel and lightly “blot” the inside. The paint will stick to the glass but not to the water beads, creating those beautiful “cracks” and “bubbles” that define mercury glass.
Repeat this process two or three times until you reach the level of opacity you want. If you want a warmer look, you can do a final light mist of gold or copper paint. The result is a shimmering, reflective finish that looks incredibly high-end when it catches the light of a candle.
These vases look best when grouped in threes of varying heights. I love putting white tulips or red roses in them. Because the paint is on the inside, make sure you use a small plastic liner if you’re putting real water inside, or stick to high-quality faux florals to protect the finish.
4. Mini “Conversation Heart” Tiered Tray Signs
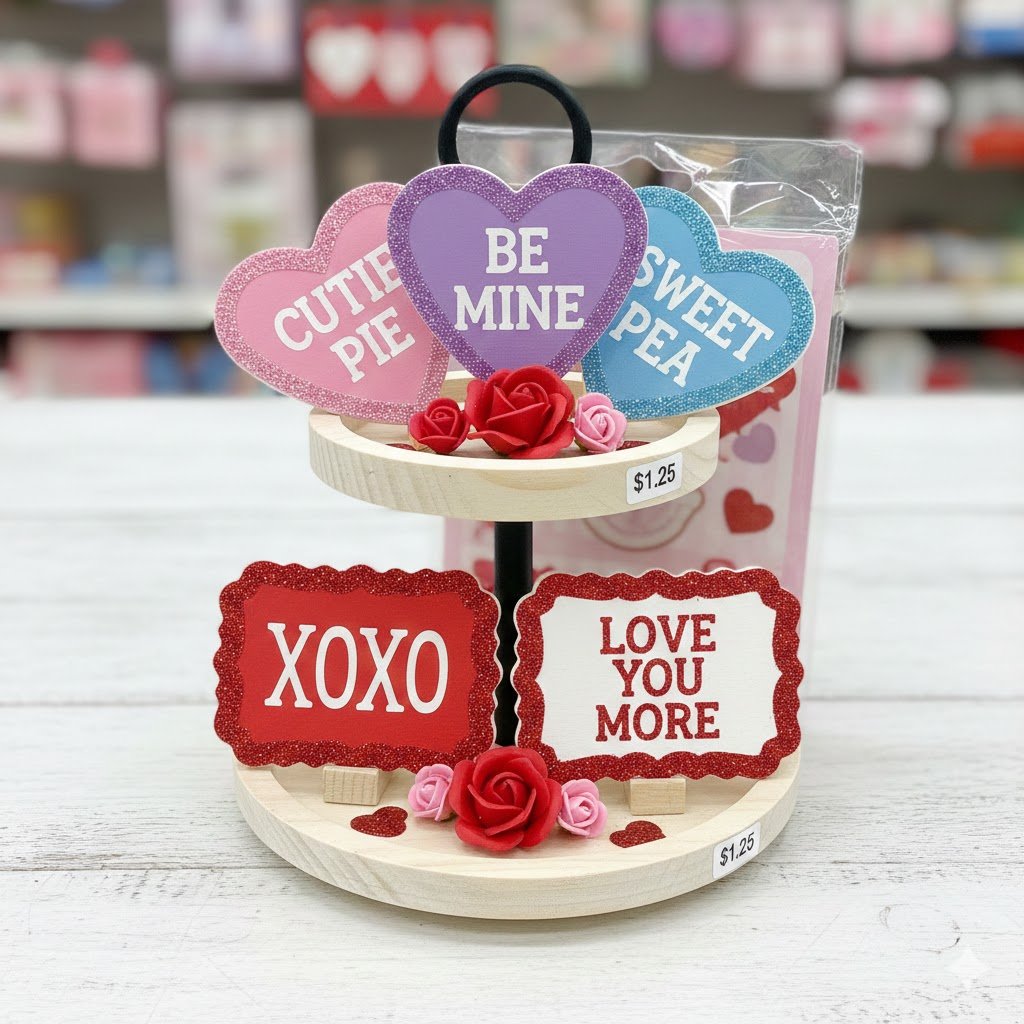
Tiered trays are the ultimate way to display small DIYs, but finding tiny signs that fit can be tricky. We’re going to make our own using the small wooden “houses” or crates found in the Dollar Tree craft section. The goal is to make them look like oversized, 3D conversation hearts.
Choose three or four small wooden shapes and paint them in pastel “candy” colors: pale yellow, mint green, light lavender, and baby pink. I recommend using two coats of paint to get a solid, opaque finish that hides the wood grain. We want these to look as smooth as the actual candy!
Once the base coat is dry, use a red paint pen to write classic phrases like “BE MINE,” “HUG ME,” or “CUTE.” If your handwriting isn’t great, you can use letter stickers or even rub-on transfers. The key is to keep the font simple and “blocky” to match the iconic look of the hearts.
To take it up a notch, I like to take a sanding block and very lightly distress the edges. This gives them a “shabby chic” look that fits perfectly with farmhouse or cottage-core decor. It also helps the bright pastel colors feel a bit more grounded and “homey.”
These look adorable tucked into the corners of a tiered tray alongside some greenery and a bowl of real conversation hearts. They’re small, lightweight, and add a pop of color that instantly brightens up a kitchen or coffee bar.
Category B: High-Impact Wall & Door Decor
5. The “Pizza Pan” Door Hanger
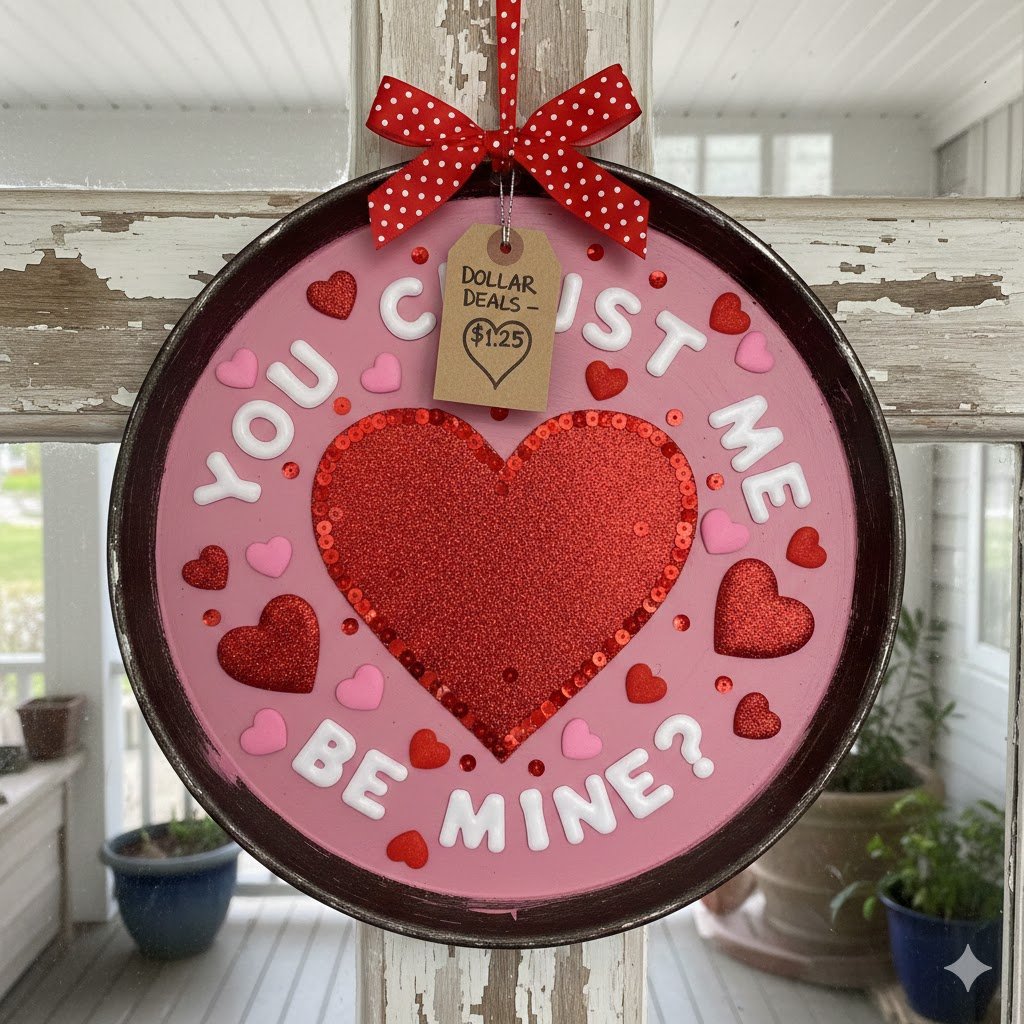
This is one of the most famous Dollar Tree hacks for a reason. Those silver metal pizza pans are the perfect size for a front door wreath alternative. With a little paint and some ribbon, you can create a circular “welcome” sign that looks like custom-cut metal or wood.
First, give the pizza pan a good scrub to remove any oils. Then, prime it with a spray primer so your paint doesn’t chip off the metal. I like to paint mine with white chalk paint for a clean, farmhouse base. You can use a sponge to dab the paint on, which creates a slightly textured look that hides the fact that it’s a kitchen pan!
Next, you can add a large “Happy Valentine’s Day” or “Home” decal. If you don’t have a vinyl cutter, look in the DT sticker aisle—they often have large, beautiful wall decals that work perfectly on these pans. Alternatively, you can use a stencil and black acrylic paint to create a buffalo check border or a floral design.
To finish the edges, take some thick nautical rope (found in the DT hardware or craft section) and hot glue it all the way around the rim. This hides the “lip” of the pizza pan and gives it a finished, framed look. Add a large, messy bow at the top using burlap and red ribbon.
To hang it, simply hot glue a loop of twine to the back. These are surprisingly durable and can withstand a covered porch. When people ask where you got it, they will never believe it started in the kitchen aisle for a buck-twenty-five.
6. Boho Tassel Heart Wreath
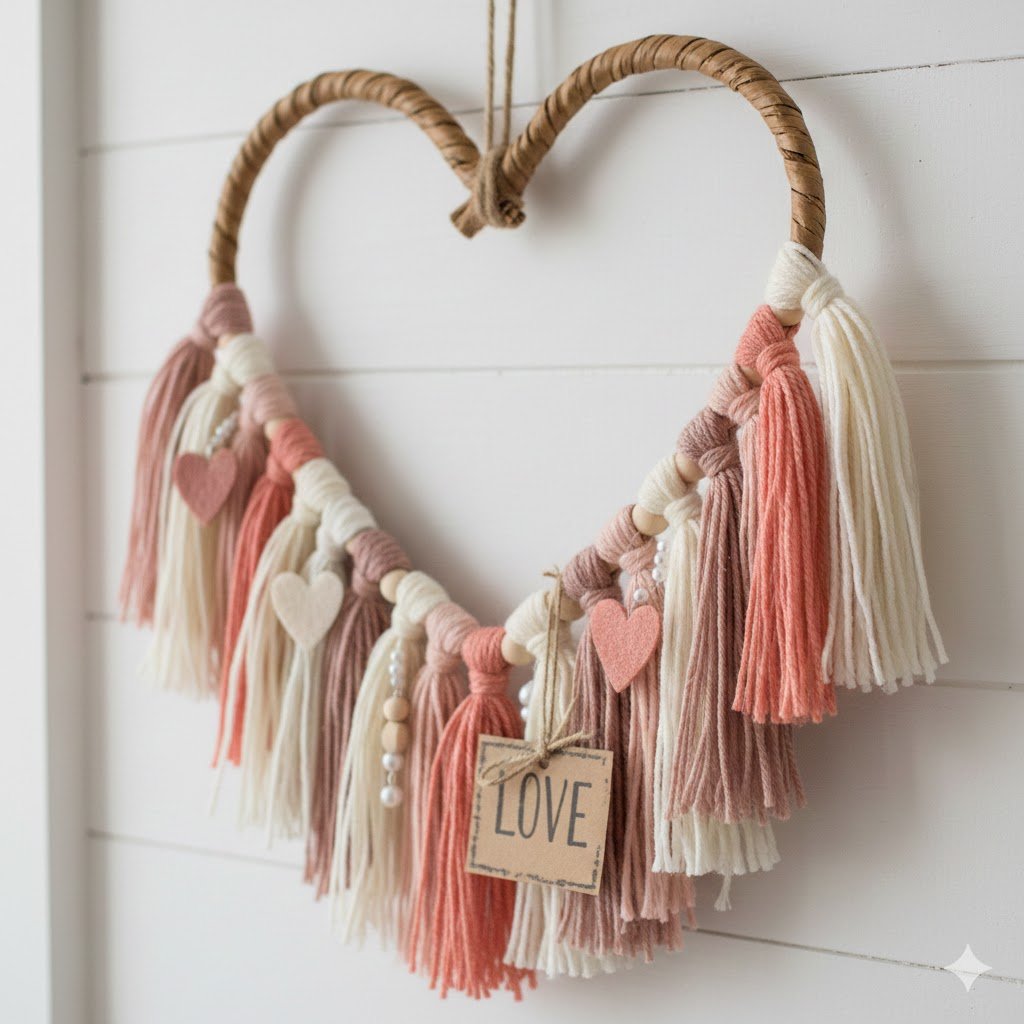
If your style leans more toward “Boho” or “Modern Organic,” this project is for you. We’re going to use a wire heart wreath form and a few cotton mop heads to create a textured, fringe-heavy wreath. It looks like something you’d find at a trendy boutique for $50, but it’s purely Dollar Tree materials.
First, buy two of the cotton string mop heads from the cleaning aisle. Detach the strings from the plastic base—it’s usually easy to just snip them off. You’ll also need the wire heart frame from the floral section. Start by “looping” the strings onto the frame using a simple “Lark’s Head” knot (fold the string in half, put the loop under the wire, and pull the tails through).
Continue doing this all the way around the heart. You want the strings to be very close together so the wreath looks full and “shaggy.” Once the frame is covered, you’ll have a wild, stringy heart. This is where the magic happens: take a pair of sharp scissors and “groom” the wreath.
Trim the strings so they are all an even length, or create a “tapered” look where the fringe gets longer toward the bottom point of the heart. To give it more dimension, I like to take a fine-tooth comb and brush out the cotton strings. This makes them look soft, fluffy, and more like expensive macramé cord.
You can leave it natural white for a clean look, or you can “dip dye” the bottom of the fringe in some pink fabric dye or even watered-down acrylic paint. This “ombre” effect is very high-end and adds a custom touch to your Valentine’s decor.
7. Hand-Rolled Felt Rose Heart
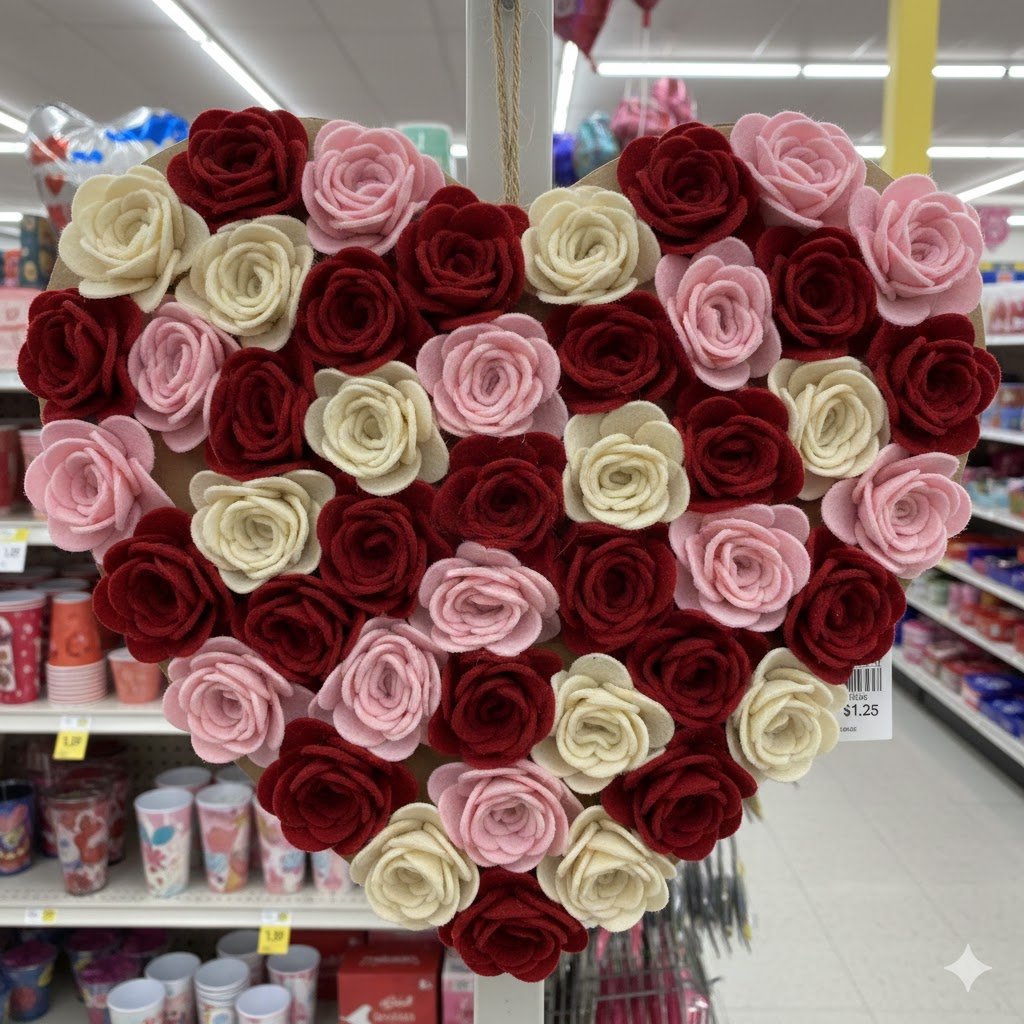
This project is a bit more time-consuming, but the result is breathtakingly romantic. It’s a “3D” wreath made entirely of felt roses. Because it’s so textured, it looks great on an interior door, above a bed, or as part of a gallery wall.
You’ll need a styrofoam heart form and several packs of red or pink felt. To make a rose, cut a circle out of the felt (about 3-4 inches wide). Then, cut that circle into a spiral, starting from the outside and moving toward the center. Take the outer “tail” of the spiral and start rolling it tightly toward the middle.
Once you reach the center of the spiral, put a dab of hot glue on the bottom to hold the roll together. It will naturally bloom into a beautiful rose shape! Repeat this until you have about 30-40 roses. I like to mix different shades of red and burgundy to give the wreath more depth and realism.
Once your roses are ready, start gluing them onto the styrofoam heart. Start at the top and work your way down, making sure to place them as close together as possible so no foam shows through. You can even tuck in some small faux leaves or pearls between the roses for extra detail.
The finished product is incredibly lush. It has a weight and a presence to it that plastic wreaths just can’t match. It’s soft, elegant, and looks like a labor of love (which it is!).
8. Framed 3D Paper Hearts

Shadow boxes are a great way to add “depth” to your wall decor. For this DIY, we’re using a simple Dollar Tree picture frame and some decorative scrapbook paper to create a 3D heart “specimen” art piece. It’s clean, modern, and very easy to customize to your home’s color palette.
Pick out a frame—I prefer the ones that look like light wood or have a clean black finish. Remove the glass and the backing. For the background, cut a piece of plain white cardstock to fit the frame. This will be your “canvas.”
Next, choose three or four different patterns of red and pink scrapbook paper. Cut out small, identical hearts (you can use a paper punch if you have one, or just a template). Fold each heart exactly in half to create a crease down the middle.
Glue the “spine” of the fold onto your white cardstock, arranging the hearts in neat rows or a circular pattern. Because they are only glued at the crease, the “wings” of the hearts will pop off the page, creating a beautiful 3D effect. Once you’re happy with the layout, put the glass back into the frame (or leave it out if the hearts are too tall).
This looks very “curated” and professional. It’s the kind of art that makes people stop and look closer. You can make a set of three small frames to hang vertically for a bigger impact in a hallway or entryway.
Category C: Cozy Lighting & Ambiance
9. Etched Glass Candle Holders
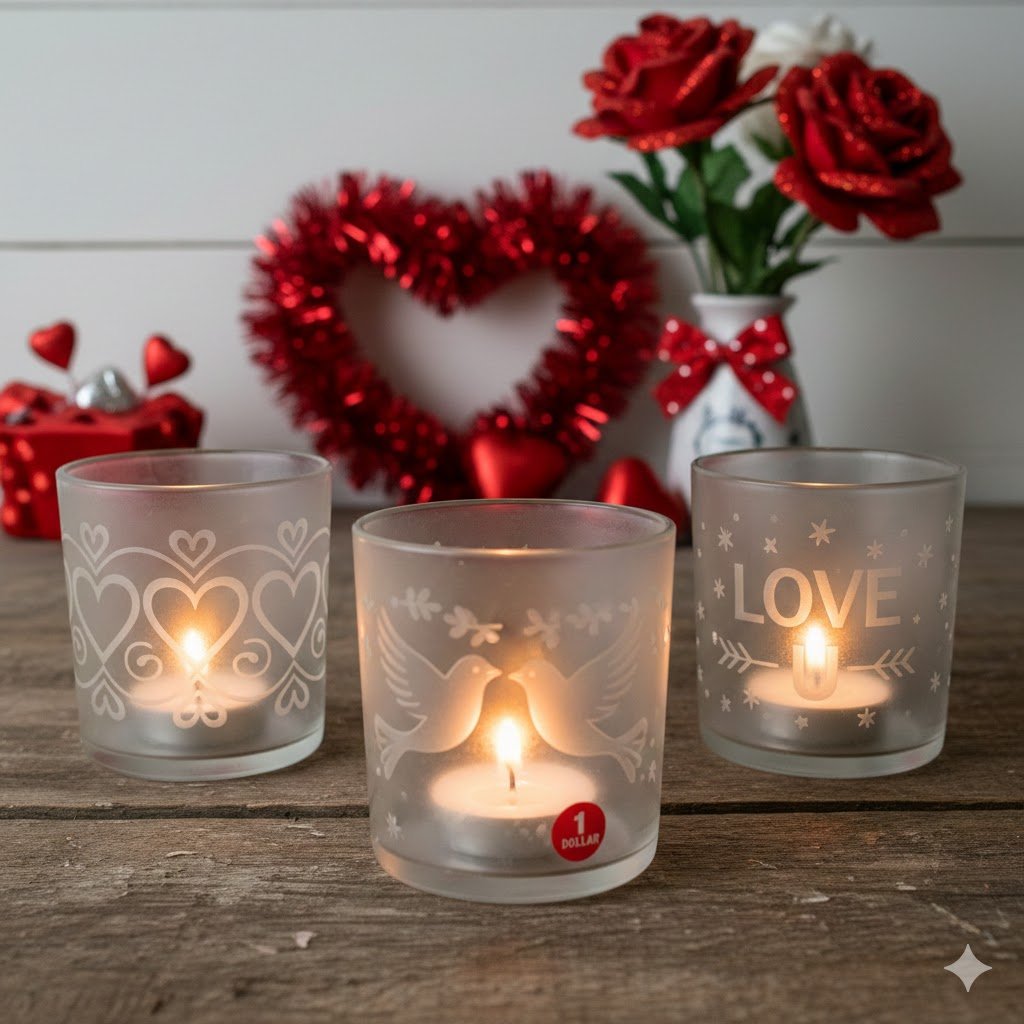
Etched glass has a frosted, permanent look that is much classier than stickers. While “etching cream” isn’t sold at Dollar Tree, you can achieve a similar look using white frosted contact paper or “sea glass” spray paint. This project turns basic glass cylinders into elegant, glowing lanterns.
Start with the tall glass “candle chimneys” or the standard cylinder vases. Clean the glass with rubbing alcohol to ensure a perfect bond. Using a heart-shaped hole punch or a pair of scissors, cut several small hearts out of contact paper.
Stick these hearts onto the glass in a random “falling” pattern. Make sure the edges are pressed down firmly so no paint can seep under. Then, take the vase outside and give it two light coats of “frosted glass” spray paint (or white matte paint if you want a more opaque look).
Once the paint is dry to the touch, carefully peel off the contact paper hearts. You’ll be left with clear glass “windows” in the shape of hearts, while the rest of the glass has a beautiful, soft-focus frosted finish. When you place a candle inside, the light will beam brightly through the clear hearts.
I love using these on a dinner table. The frosted glass hides the “clutter” of the candle wax, but the heart cutouts let the flickering light shine through. It’s a subtle, sophisticated way to do Valentine’s Day without it feeling “cheesy.”
10. Twine-Wrapped Wine Bottles
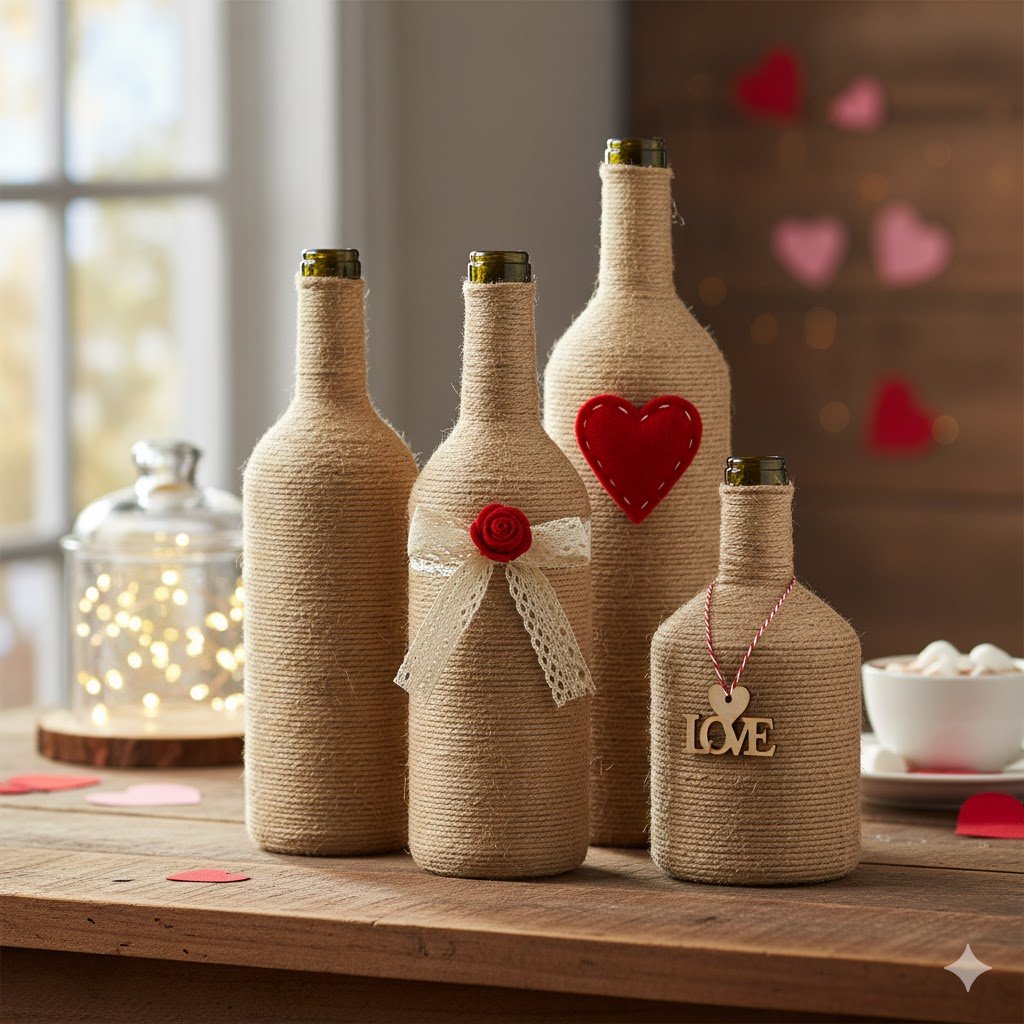
Don’t throw away those empty glass bottles! Upcycling them into decor is one of the most eco-friendly ways to craft. We’re going to turn a standard bottle into a rustic, textured vase using just jute twine and some paint.
Start by painting your bottle a solid color—white or light pink works best. This ensures that any tiny gaps in the twine won’t show the green or brown glass underneath. Once the paint is dry, put a dab of hot glue at the very bottom of the bottle and secure the end of your twine.
Slowly wrap the twine around the bottle, adding a small dot of glue every few inches to keep it secure. You can wrap the whole bottle, or just do the middle section for a “banded” look. The texture of the twine instantly gives the bottle a high-end, “Pottery Barn” feel.
To add a Valentine’s touch, you can use a different color of twine or a thin ribbon to “stitch” an “X” and an “O” over the top of the base layer. Alternatively, you can hot glue a small wooden heart to the center of the bottle.
These look fantastic as a centerpiece for a rustic Valentine’s brunch. Put a single stem of dried eucalyptus or a faux cotton boll inside for a modern look. The combination of the rough twine and the delicate flowers is perfectly balanced.
11. “Snowy” Epsom Salt Jars

As we transition from winter to Valentine’s Day, I love decor that feels “cozy” but still bright. These “snowy” jars use Epsom salt to create a sparkling, crystalline finish that looks like sugar-coated glass. It’s incredibly cheap and looks like a million bucks when lit from within.
Take a standard Mason jar and brush a thick layer of Mod Podge (or white glue) all over the outside. While the glue is still wet, roll the jar in a tray of Epsom salts. The salts will stick to the glue, creating a chunky, frosted texture that glitters like real snow or ice.
Once it’s dry, tie a piece of red velvet ribbon or some red-and-white baker’s twine around the neck of the jar. You can even tuck in a small sprig of red berries or a tiny evergreen clipping. The contrast between the “icy” white jar and the “warm” red ribbon is stunning.
To make them safe, use the LED tea lights from the Dollar Tree party aisle rather than real candles. The Epsom salt can sometimes flake off if it gets too hot, and the LED lights provide a consistent, worry-free glow.
Place these on your windowsill or mantle. At night, they look like glowing snowballs. It’s a great way to keep the “winter magic” alive while celebrating the season of love.
Category D: Thoughtful Gifts & Favors
12. Personalized Mugs with Vinyl
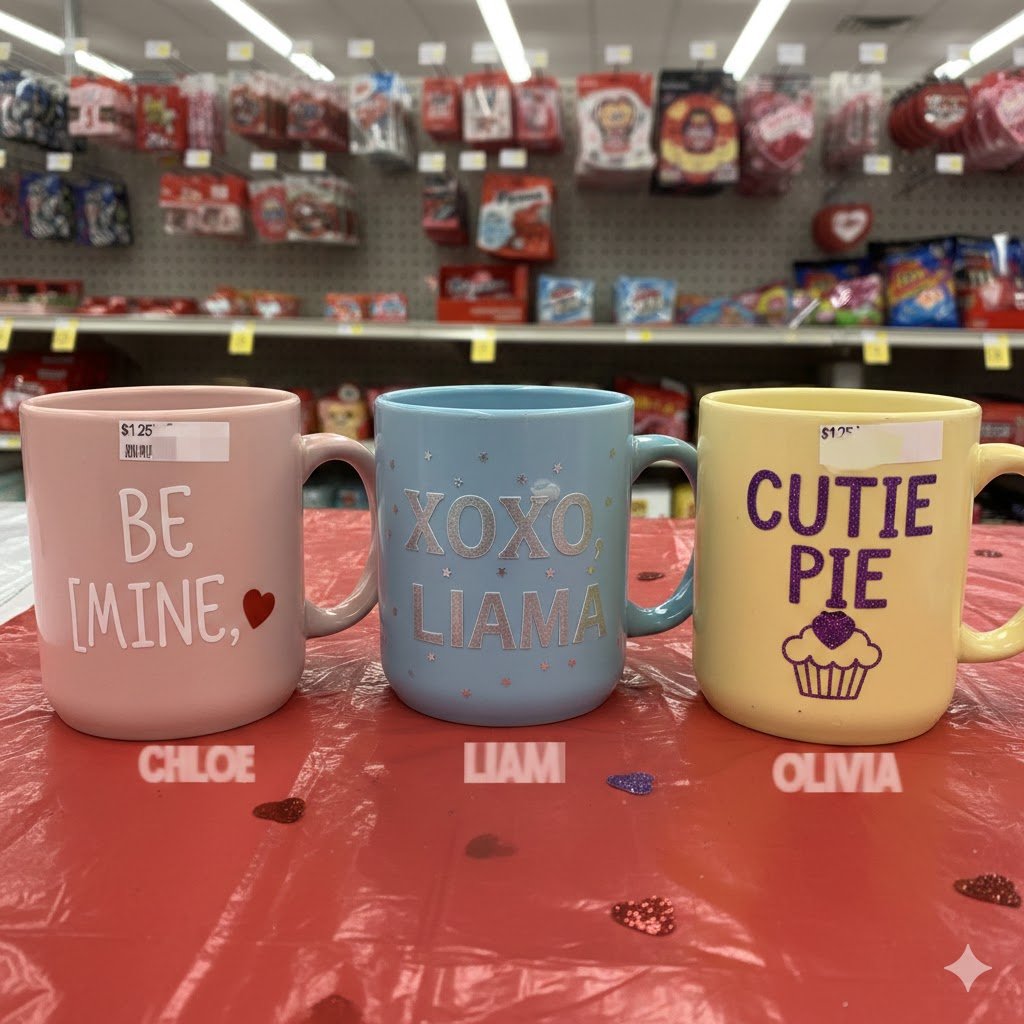
Custom mugs are a staple of Etsy shops, but you can make your own for a fraction of the cost. Dollar Tree always has solid white or black ceramic mugs. With a little bit of vinyl or a specialized paint marker, you can create a professional-grade gift.
The key to making these look “high-end” is the design. Avoid cluttered images; instead, go for a minimalist “monogram” or a tiny heart on the handle. If you’re using a permanent marker, make sure it’s an oil-based paint pen. Write your design, let it dry for 24 hours, and then “bake” the mug in the oven at 350 degrees for 30 minutes to set the ink.
If you have a vinyl cutter, use “Permanent Outdoor Vinyl.” This will hold up much better to hand-washing. I love doing “His and Hers” mugs with simple “X” and “O” designs on the front. It’s clean, modern, and very giftable.
To turn this into a full gift, fill the mug with a packet of hot cocoa, some marshmallows, and a DT stirring spoon. Wrap the whole thing in clear cellophane and tie it with a bow. It’s a $3 gift that looks like it cost $15.
Remember, the “boutique” look comes from simplicity. Don’t feel like you have to cover the whole mug. A single, well-placed word like “Darling” or “Loved” in a gold script font is all you need.
13. “Spa Day” Mason Jar Gift
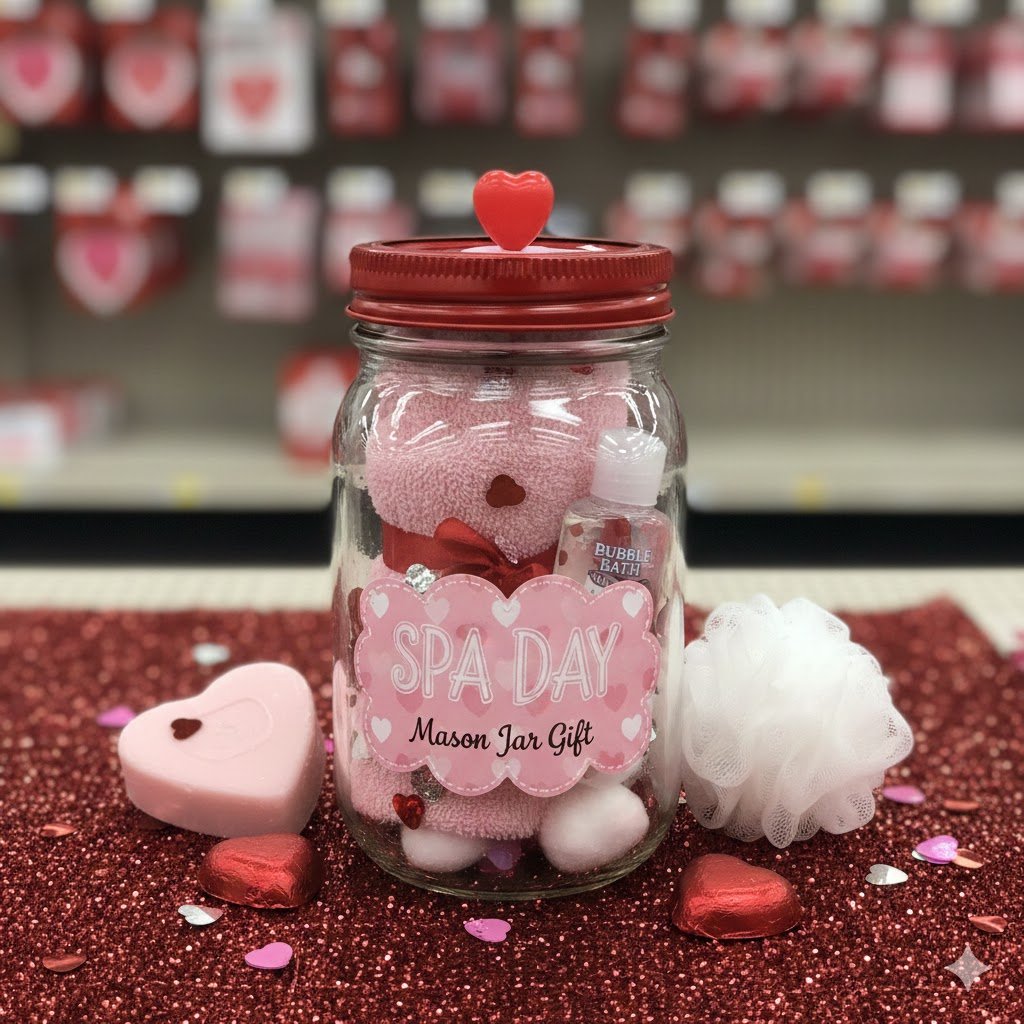
Self-care is a huge part of Valentine’s Day (especially for Galentine’s!). You can assemble a beautiful “Spa in a Jar” using exclusively Dollar Tree items. The secret is in the color coordination; if all the items inside the jar match a specific color palette (like pink and gold), the gift looks curated and expensive.
Start with a large wide-mouth glass jar. Fill the bottom with some pink paper shred or cotton balls to act as a cushion. Then, head to the DT beauty aisle. Look for items like: a pomegranate face mask, a pink nail polish, a small tin of hand cream, and a loofah.
Layer these items inside the jar so that the prettiest labels are facing outward. You can even include one of the small $1.25 candles. The beauty aisle at Dollar Tree has stepped up its game lately—you can often find “charcoal” or “rose water” themed items that look very trendy.
For the finishing touch, create a custom label for the top of the jar. You can print out a circular “Self-Care Kit” or “Love Yourself” sticker and glue it to the lid. Wrap a piece of lace or ribbon around the rim of the jar to hide the metal threads.
This is a fantastic gift for teachers, coworkers, or best friends. It’s practical, thoughtful, and because it’s all contained in a glass jar, it feels like a “premium” gift set you’d find at a department store.
14. Custom Decoupage Heart Coasters
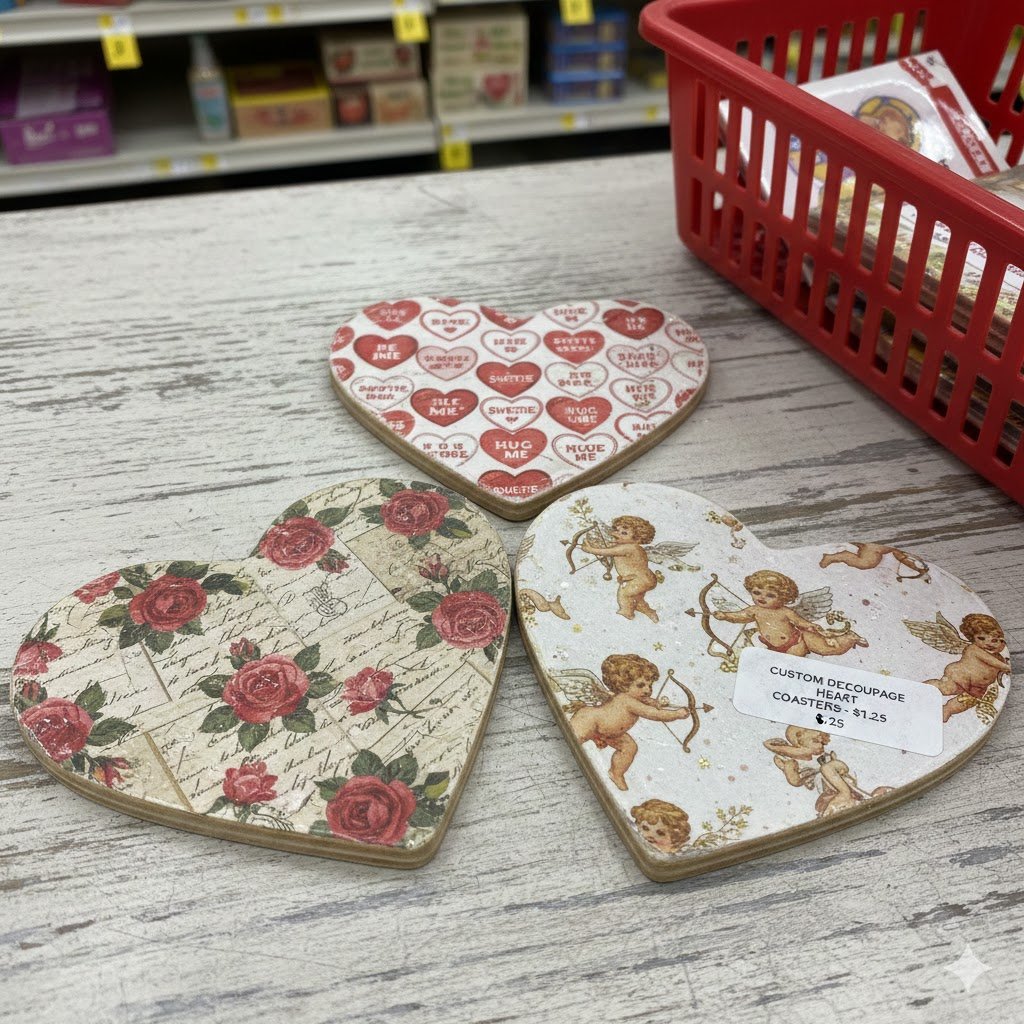
Coasters are a subtle way to bring holiday decor into a room without it being overwhelming. Dollar Tree sells small wooden rounds or white ceramic tiles that are perfect for this. We’re going to use the “decoupage” technique with decorative napkins to create beautiful, patterned coasters.
First, find a pack of Valentine-themed napkins with a pattern you love (floral, hearts, or even just a pretty red marble). Separate the layers of the napkin until you have just the thin, top ply with the print on it. This is the most important step—if you leave the bottom plies on, the design will wrinkle and peel.
Apply a thin layer of Mod Podge to your wooden round or tile. Carefully lay the napkin ply over the top, smoothing out any bubbles with your finger. Once it’s dry, use a nail file to “sand” off the excess napkin hanging over the edges. This gives you a perfectly clean, crisp edge.
Apply two more layers of Mod Podge over the top to seal it. To make them truly functional and “high-end,” I recommend finishing them with a clear acrylic spray sealer. This makes them waterproof so condensation from a cold glass won’t ruin the paper.
Glue a small piece of felt or some “cork” circles (also found at DT) to the bottom to protect your furniture. These look like hand-painted ceramic tiles once they’re finished. They make a great housewarming gift or a cute addition to your coffee table.
15. The Candy Topiary Centerpiece
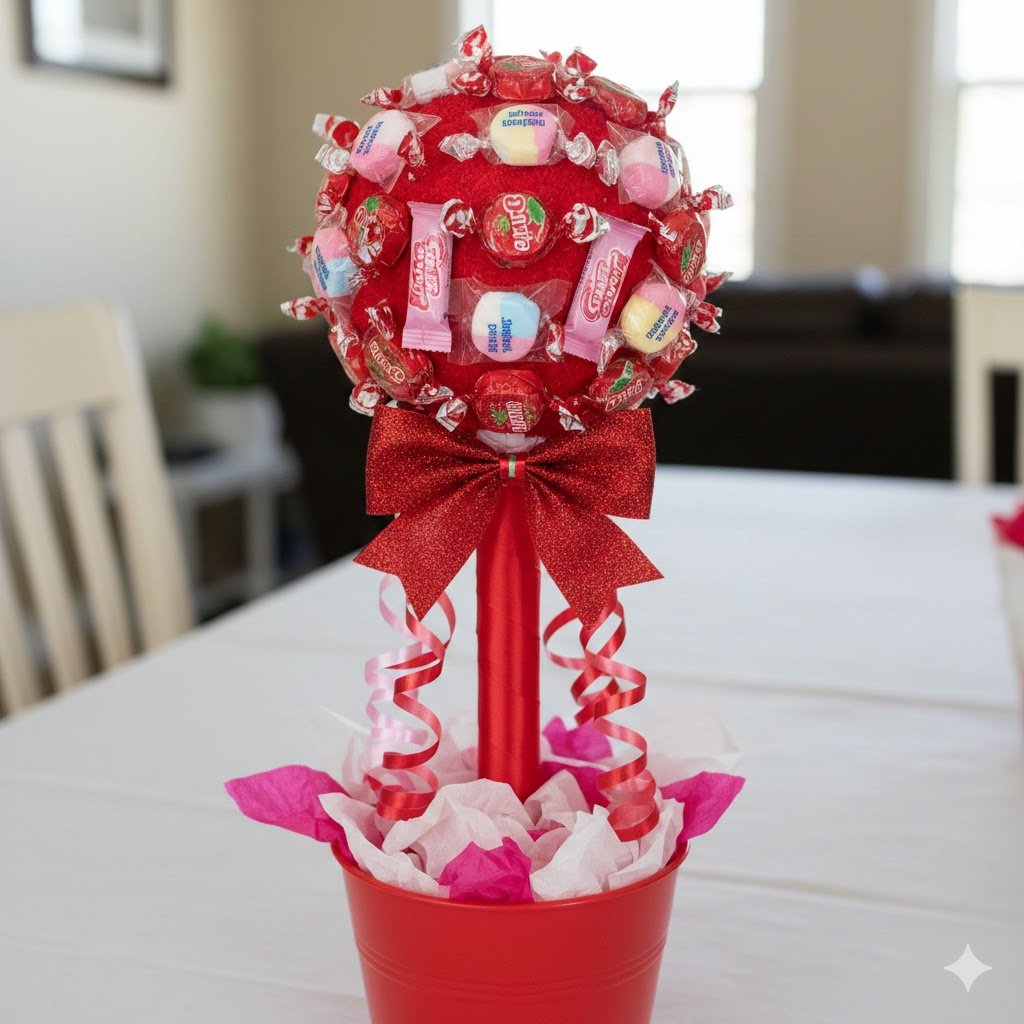
Finally, let’s make a “statement piece.” This candy topiary looks like something out of a high-end floral shop. It adds height to a table and serves as a functional snack for guests.
You’ll need a small terracotta pot, a wooden dowel, a styrofoam ball, and a few bags of “strawberry cream” hard candies or foil-wrapped chocolates. Start by painting your pot and dowel. You can use a metallic gold for the dowel to give it a “luxe” feel.
Secure the dowel into the pot using some floral foam and cover the top of the foam with Spanish moss or shredded paper. Then, place the styrofoam ball on top of the dowel. Now for the fun part: use hot glue to attach the candies to the foam ball until it’s completely covered.
Try to keep the candies as close together as possible so no foam is visible. If you’re using foil-wrapped chocolates, be careful with the hot glue so you don’t melt the chocolate! Once the ball is covered, it looks like a “tree” of sweets.
This is a great centerpiece because it’s both a decoration and a treat. It has a whimsical, “Alice in Wonderland” feel that is perfect for Valentine’s Day. Plus, you can easily pull the candies off and eat them!
Pro-Tips for “De-Dollaring” Your Decor
The biggest mistake people make with Dollar Tree DIYs is leaving them in their “raw” state. To get that high-end look, you have to go the extra mile with finishing touches.
1. The Power of Paint: Never settle for the “plastic-y” look of an item. A coat of matte, chalk, or metallic spray paint can transform the texture of an object instantly. 2. Mixing Textures: High-end decor usually features a mix of materials—wood, metal, glass, and fabric. If your project feels “flat,” try adding a piece of twine, a velvet ribbon, or a wooden bead. 3. Lighting Matters: Avoid the “cool-toned” or “blue” LED lights. Always look for “warm white” or “amber” flickering tea lights. They create a much more expensive, cozy atmosphere that mimics real candlelight.
Wrap Up
Creating a beautiful, festive home doesn’t have to mean spending a fortune. As we’ve seen with these 15 projects, all it takes is a little bit of imagination and a few “staple” supplies to turn budget items into boutique-quality decor. From the “shaggy” boho heart wreath to the elegant mercury glass vases, these DIYs allow you to express your style without the stress of a high price tag.
The best part about DIY is that you can customize every single piece to match your home’s specific color palette. If you’re not a fan of bright red, go for muted mauves and champagne golds. If you love the farmhouse look, lean heavily into the twine and wood projects.
Which of these projects are you going to try first? I’d love to see your creations! Tag me in your photos or leave a comment below with your favorite Dollar Tree hack. Happy crafting, and Happy Valentine’s Day!