
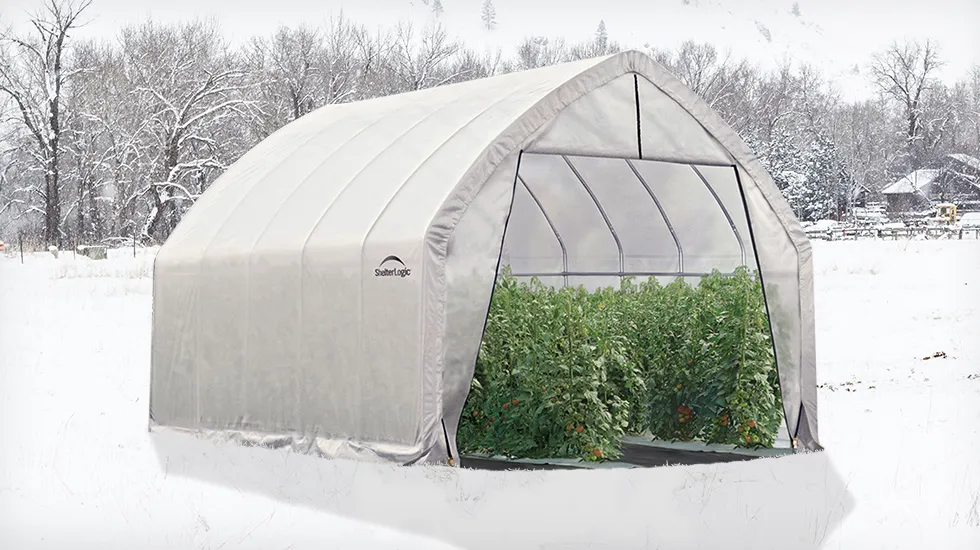
Winter in the garden can feel like a standoff between your hope for fresh greens and the reality of a biting frost. I’ve spent many mornings scraping ice off glass panes, wondering if my seedlings would survive the night without me caving in and running an expensive extension cord out to the yard. Relying on electricity isn’t just a drain on the wallet; it feels like a tether that keeps us from truly gardening in sync with the environment.
The good news is that you don’t need a power grid to keep your greenhouse productive. By leaning into basic physics and some old-school homesteading wisdom, you can create a self-sustaining sanctuary that stays warm while the rest of the world is shivering. Here is how I trap every bit of warmth the sun offers and keep it locked inside where it belongs.
1. Harnessing Thermal Mass
The simplest way to think about thermal mass is to view it as a battery, but instead of storing electricity, it stores calories of heat.1 During the day, objects with high density—like water, stone, or concrete—soak up the sun’s radiation. I’ve found that even on a cloudy day, these materials manage to grab whatever energy is available, holding onto it long after the sun dips below the horizon.
Water is my absolute favorite medium for this because it has an incredible “specific heat capacity,” meaning it can hold a lot of energy without getting boiling hot.2 I recommend sourcing several 55-gallon steel or plastic drums, painting them a matte black, and filling them to the brim. Line them along the north wall where they can catch the full force of the midday sun; by nightfall, they’ll act like giant radiators, slowly leaching warmth back into the air.
If you don’t have room for giant barrels, don’t overlook your floor. Switching from a wood-chip floor to dark flagstone or even a thick layer of gravel can change the entire thermal profile of your space. It’s a passive system that requires zero moving parts—just a commitment to using materials that “remember” the sun’s touch.
2. The Power of Compost Heating
If you’ve ever turned a compost pile in the middle of November and seen steam billowing out, you’ve witnessed a biological furnace in action. Microbes are tiny powerhouses, and when you give them the right mix of nitrogen-rich “greens” and carbon-rich “browns,” they generate significant heat as a byproduct of digestion.3 It’s an elegant solution because you’re essentially heating your plants with the very material that will eventually feed them.
To make this work inside a greenhouse, you need volume. A small bucket won’t do; you need a pile at least three feet high and wide to maintain its core temperature. I like to build a “hotbed” by digging a trench right into the greenhouse floor, filling it with fresh manure and straw, and topping it with six inches of high-quality soil. The decomposing material underneath provides “bottom heat” to the roots of your plants, which is often more important for survival than air temperature.4
The trade-off here is a bit of extra humidity and the occasional earthy scent, but the results are hard to argue with. You do have to be a bit of a “microbe manager,” ensuring the pile stays moist but not soggy. It’s a hands-on method that keeps you active in the garden during the slow months, and there is something deeply satisfying about knowing your soil is working just as hard as you are.

3. Subterranean Heating (Earth Tubes)
Even when the air is a brutal $-10^{\circ}C$, the earth just a few feet below your boots stays remarkably consistent, usually hovering around $12^{\circ}C$. We can tap into this “geothermal” stability without fancy heat pumps. The goal is to move the air from your greenhouse through pipes buried deep in the soil and then back into the structure, using the ground as a natural heat exchanger.
In a passive setup, this relies on the principle of convection. As the air in the greenhouse warms up near the roof, it can be directed down into buried “earth tubes.” While it won’t make your greenhouse feel like a tropical resort, it provides a crucial baseline. It prevents the air from ever reaching a “killing frost” level, acting as a safety net for your most sensitive crops.
I’ve seen the best results when people combine this with a “Walipini” or pit-style greenhouse. By sinking the entire structure a few feet into the ground, you’re using the earth as a massive insulator. The soil doesn’t just provide heat; it prevents the wind from whipping away the warmth you’ve worked so hard to collect. It’s a big project to start, but it’s a one-time investment that pays off every winter for decades.
4. Double-Layer Insulation
Heat loss is the primary enemy of the winter gardener, and most greenhouses are notoriously “leaky” when it comes to thermal energy.5 A single pane of glass or a thin sheet of plastic has almost zero R-value (insulation power). To fix this, you need to create “dead air” space. Think of it like putting a parka on your greenhouse; it’s the air trapped between the layers that actually keeps the heat from escaping.
One of the most effective “hacks” I’ve used is high-grade, UV-protected bubble wrap.6 It sounds a bit DIY, but the large bubbles create thousands of tiny pockets of trapped air that significantly slow down conductive heat loss. You can simply spray a fine mist of water on your glass panes and press the bubble wrap against it—it sticks like magic and can be peeled off once the spring thaw arrives.
If you’re using a plastic film greenhouse, consider adding a second interior layer of 6-mil poly. Even a gap of just an inch or two between the layers creates a thermal break that can keep the interior 5 to 10 degrees warmer than a single-layered structure. It’s a relatively inexpensive weekend project that pays for itself in saved plants within the first month of a cold snap.
5. Passive Solar Collectors
While the greenhouse itself is a solar collector, you can “supercharge” its intake by building dedicated collectors. These are essentially shallow, insulated boxes with a dark interior and a clear cover, often filled with something like black-painted soda cans or metal coils. As air passes through these boxes, it heats up rapidly and is then vented into the greenhouse.
I’m a big fan of the “soda can” method because it’s a fun way to upcycle. You stack the cans to create vertical chimneys inside the box, and the sun heats the metal, which in turn heats the air inside the cans. Without a fan, you can still get air moving through natural convection—hot air rises and flows into the greenhouse while cooler air is pulled into the bottom of the collector to be warmed.7
Another low-tech trick is to use reflective surfaces. I’ve used Mylar blankets or even just plywood painted with reflective silver paint on the north wall of the greenhouse. This bounces the sunlight that would normally hit the back wall right back onto your plants and your thermal mass barrels. It’s about making sure not a single photon of light is wasted.

6. Horticultural Fleece and Internal Tents
Think of your greenhouse as the first line of defense, but not the last. On those nights when the forecast looks particularly grim, I’ve learned that “nesting” my plants is the best way to ensure they see the morning. By creating a micro-climate within the greenhouse, you are reducing the volume of air that needs to stay warm around the actual foliage.
Horticultural fleece, also known as frost cloth, is a lightweight fabric that breathes but traps a surprising amount of heat.8 Draping this over your garden beds can give you an extra 3 to 5 degrees of protection. It’s light enough that it won’t crush your spinach, but dense enough to stop the “radiant cooling” that happens when the sky is clear and the heat wants to escape into space.
For even more protection, you can build mini-greenhouses (low tunnels) inside your main structure using PVC hoops and a thin layer of plastic. I call this the “Russian Doll” method. By the time the cold tries to penetrate the outer glass, the inner plastic, and then the frost cloth, it has lost most of its teeth. It’s a modular system that allows you to protect only the beds that need it most.
7. Strategic Siting and Windbreaks
Sometimes the best way to heat a greenhouse is to stop it from cooling down in the first place. Wind is a major thief of heat; a cold breeze can strip warmth away through convection faster than you can generate it.9 If your greenhouse is sitting in the middle of a wind-swept field, you’re fighting an uphill battle.
I always suggest looking at the “windward” side of your property—usually the north or west. Planting a row of evergreens or setting up a temporary straw-bale wall can divert the wind over and around your greenhouse. These natural barriers create a “pocket” of calm air that stays significantly warmer than the surrounding area, acting as a buffer against the elements.
Lastly, don’t forget the power of “berming.” If you have extra soil or mulch, you can pile it up against the base of your greenhouse walls. This helps insulate the perimeter where the cold ground usually sucks heat out of the structure. It’s a bit of heavy lifting, but it grounds the building and mimics the thermal stability of a basement, keeping the “toes” of your greenhouse warm.
Wrap Up
Turning your greenhouse into a winter-resilient sanctuary isn’t about one single “magic” solution; it’s about stacking these simple, low-tech habits until they form a shield against the cold. When you stop looking for a plug and start looking at the sun, the soil, and the wind, you realize that nature has already provided the tools you need. It might take a little more planning and a few more layers of bubble wrap, but there is a unique joy in picking a fresh salad when the world outside is buried in snow.