

I used to treat my garden like a battlefield. Every weekend was a relentless campaign against weeds, followed by watering drills to keep expensive, fussy exotic plants from wilting in the summer heat, and finally, a nervous patrol for the next aphid or fungal invasion. I loved the look of a lush border, but the constant maintenance felt like a never-ending chore that stole my weekends and left me feeling more defeated than refreshed. If you’ve ever looked out at your yard and felt that familiar pang of guilt or exhaustion, you know exactly what I mean.
But what if I told you there’s a way to step off that battlefield entirely? The solution isn’t a new chemical or a fancier tool; it’s a fundamental shift to working with nature instead of against it. By switching to native plant borders, you’re adopting the ultimate gardening hack: creating a beautiful, functional landscape that requires minimal input from you. These plants are built for your climate, they know how to handle the local pests, and they practically thrive on neglect once established.
In the end, this isn’t just about saving time (though we will certainly save a lot of it). It’s about building a small, self-regulating ecosystem right outside your window. The dual benefit is undeniable: you get your weekends back, and the local bees, butterflies, and birds get the vital food and habitat they need to survive. We’re going to cover the simple planning steps, reveal three specific planting “recipes,” and detail the shockingly little care required to keep these borders flourishing for years to come.
The Native Advantage — Why They Thrive Where Others Fail
Built for the Neighborhood
When we talk about “native” plants, we aren’t just using a buzzword; we’re referring to plants that have evolved in your specific region over thousands of years. Think of it this way: a native plant isn’t an immigrant trying to adapt to a foreign climate; it’s a long-time resident with deep roots and generations of knowledge about the neighborhood’s quirks. This means they are genetically programmed to handle the exact highs, lows, and extremes of your local weather.
This built-in natural resilience translates directly into less labor for you. Since these plants are adapted to the typical rainfall and drought cycles of your area, they become incredibly self-sufficient once their root systems are established. After that crucial first year, you can largely put the hose away, especially when compared to non-native annuals or ornamentals that demand constant supplemental watering just to survive a mild dry spell. I distinctly remember the year I gave up trying to keep a fussy, imported rose bush alive during a two-week heat wave; now, my native Switchgrass just shrugs and keeps on growing.
Furthermore, this co-evolution provides a robust defense against pests and diseases. Local insects are a natural part of the ecosystem, and native plants have developed their own chemical and physical defenses against them. If you’ve struggled with powdery mildew, rust, or an army of aphids on a non-native species, the native alternative often has natural resistance, meaning you can eliminate pesticides and save yourself the time and expense of constant diagnosis and treatment.

Ecological Superstars
Moving beyond the definition of “native,” we recognize that these borders represent a functional upgrade to your property. By planting species that local wildlife depend on, you are elevating your garden from a mere ornamental display to a true, working ecosystem. This is especially true when we embrace the “host plant” concept—plants like Milkweed, which is absolutely essential for the Monarch butterfly to lay its eggs. Without these specific native hosts, many insect lifecycles simply cannot continue.
These borders become vibrant, living corridors that benefit more than just the charismatic butterflies. They provide essential food sources for a variety of pollinators, from specialist bees that feed on only one type of flower to migrating birds that rely on the seeds and the insects the plants support. When you see a Goldfinch feeding on the dried seed heads of a native Coneflower in late fall, you realize you’re not just supporting nature, you’re hosting it, which is an immensely rewarding feeling.
Finally, native plants are budget and soil superheroes. Their deep root systems naturally break up compacted soil, improving water penetration and reducing erosion, all without requiring you to lift a shovel or rent a tiller. Because they are adapted to your native soil conditions, they absolutely do not require expensive fertilizers or rich, amended soil. They happily flourish in the average dirt you already have, saving you time mixing bags and money on store-bought nutrients that non-native plants demand every season.
Border Planning for the Lazy Gardener
The 5-Minute Site Analysis
The secret to a low-maintenance border is simple: be extremely diligent about the planning stage so you can be extremely lazy later. The very first step requires a quick, five-minute site analysis. You need to map two things: sunlight and soil. For sunlight, grab a notebook and observe your site throughout the day, looking for periods where the area receives full sun (six or more hours), partial sun (three to six hours), or deep shade. Guessing here guarantees that your beautiful but misplaced plants will struggle and die, requiring effort you don’t want to spend.
Next, you must assess your soil’s drainage. Is your soil heavy, sticky clay that holds water for days, or is it fast-draining, sandy loam? The quick “drainage test” is easy: dig a small hole, fill it with water, and see how long it takes to drain. The key, and this is crucial for the lazy gardener, is to work with what you have. Trying to plant a species that loves wet feet into a sun-baked, sandy spot, or vice versa, means you will be constantly fighting the environment with endless watering or soil amendments.
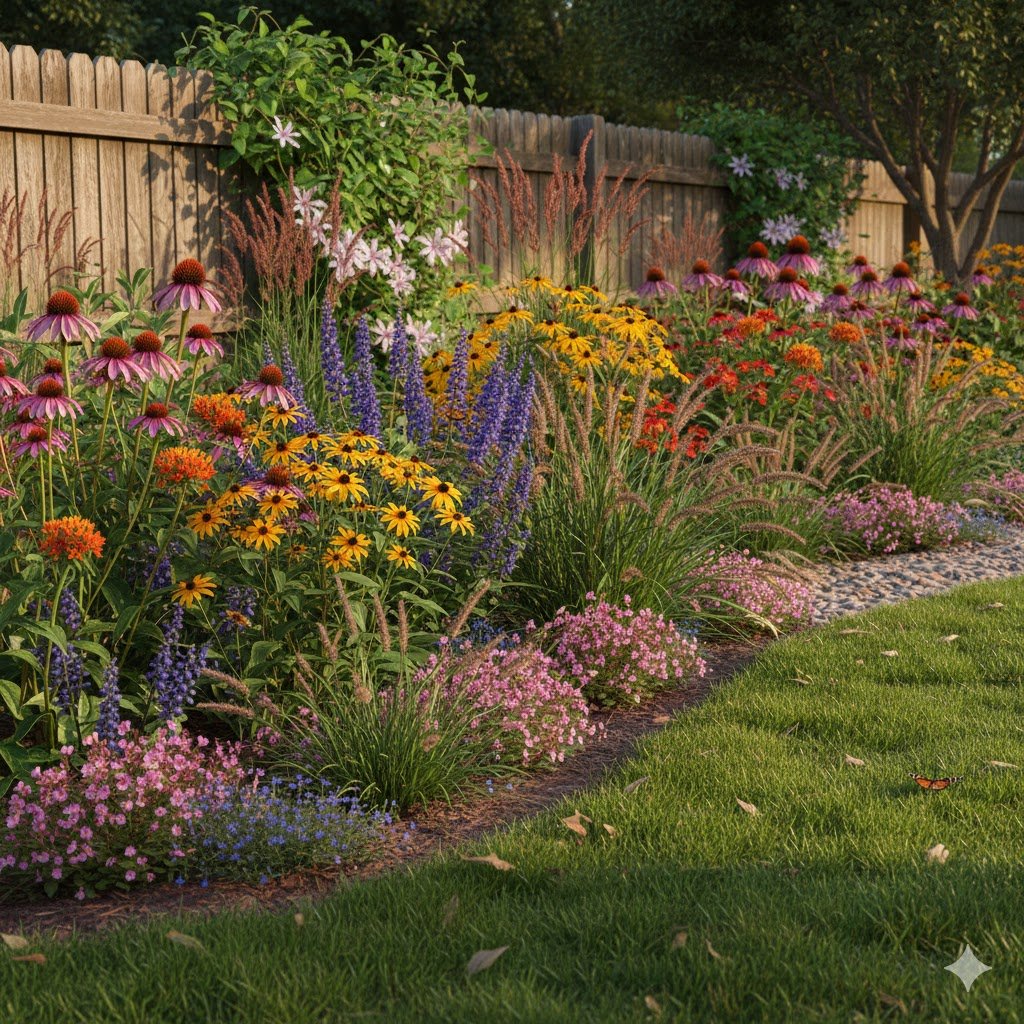
The final piece of analysis is border dimensions. I strongly recommend aiming for a border that is at least three to five feet deep, not just a thin, two-foot strip along a fence. A narrow border is easily overrun by nearby lawn grass and opportunistic weeds from the edge. A deep border, however, allows for effective layered planting, which, as we’ll see, is the ultimate way to eliminate bare soil and suppress weeds before they even start.
Designing with Layers
Once you know your site, the fun part begins: designing the layers. We’re adapting the classic “Thriller, Filler, Spiller” rule to create dense, functional borders. This layering system is not just for visual appeal; it’s a strategic defense against weeds. Bare soil is an invitation for weeds, and dense layering ensures the entire space is covered with desirable foliage.
The Back Layer (The Thrillers) should consist of the tallest, most structural plants. Think vertical accents that provide a backbone to the border, like elegant native grasses such as Prairie Dropseed, or bold, towering blooms like Joe Pye Weed or tall native Coneflowers. These plants help frame the border and give it year-round interest, especially in winter.
The Middle Layer (The Fillers) forms the bulk of your visual interest, providing the main color and volume. This is where you place reliable bloomers like various types of native Milkweed, Black-Eyed Susans, or Bee Balm. They should be planted densely enough that their foliage nearly touches, creating a “filler” that quickly shades out any weed seedlings trying to emerge.
Finally, the Front Edge (The Spillers/Edgers) uses low-growing, neat plants that spill over the edge or form a clean line between the border and the lawn. Think low native Sedum varieties or Wild Strawberry. Most importantly, you must embrace Mass Planting. Instead of buying one of everything, buy large groupings (odd numbers like five, seven, or nine) of the same plant and place them tightly together. This aesthetic choice is the single best way to reduce weeding.
The Best Low-Maintenance Native Plant Recipes
We are focusing only on plants that require no staking, no deadheading, and can handle occasional drought.
A. Recipe 1: Full Sun & Dry/Poor Soil (The Drought-Proof Border)
We’ve all got that one spot: the south-facing strip along the driveway, the section under the eaves, or the thin, rocky soil near the mailbox. These are the areas where traditional plants struggle and die, but they are exactly where this drought-proof native recipe shines. This border requires almost zero supplemental watering after its first establishment year.
For the structural Tall Layer, I recommend the subtle elegance of Prairie Dropseed (Sporobolus heterolepis). This native grass forms neat, graceful mounds that never flop over and provide wonderful straw-colored texture and structure through the winter. It’s tough as nails, tolerates heat and poor soil, and needs almost nothing from you but an annual trim in the spring.
The Mid Layer is the star: Butterfly Milkweed (Asclepias tuberosa). This plant is famous as the host plant for Monarch butterflies, but it’s also a drought hero with vibrant orange or yellow blooms. Unlike some other milkweeds, it grows neatly in clumps, doesn’t spread aggressively, and thrives in lean, dry soil. To knit the front edge together, use Wild Geranium (Geranium maculatum)—a fast-spreading groundcover with pretty pink/purple flowers in the spring that crowds out emerging weeds effectively.
B. Recipe 2: Partial Sun & Average Moisture (The Shade-Tolerant Border)
Not every yard is a sun trap; many of us deal with the dappled light of mature trees or the tricky shade of a north-facing wall. This recipe is designed for those semi-shaded spots, creating a lush, peaceful look with plants that offer a major low-maintenance bonus: they manage themselves.
For a unique and truly effortless Tall Layer, use Virginia Bluebells (Mertensia virginica). These beauties offer a stunning display of pink buds opening to blue bells in early spring, but here is the trick: they are spring ephemerals. They complete their lifecycle and disappear completely by early summer when the trees leaf out, leaving you with absolutely zero summer maintenance for that spot.
The Mid Layer needs more persistent foliage, which is where Native Hostas (many varieties of Hosta plantaginea or H. ventricosa) come in. While all Hostas are non-native, there are tough, regionally adapted heirloom varieties that are much more slug-resistant and robust than their common counterparts. Underplant them with Tiarella (Foamflower), a delicate-looking but incredibly tough plant for the Low Layer. It spreads into a dense, attractive mat, eliminating the need to add mulch year after year because the plant is the mulch.
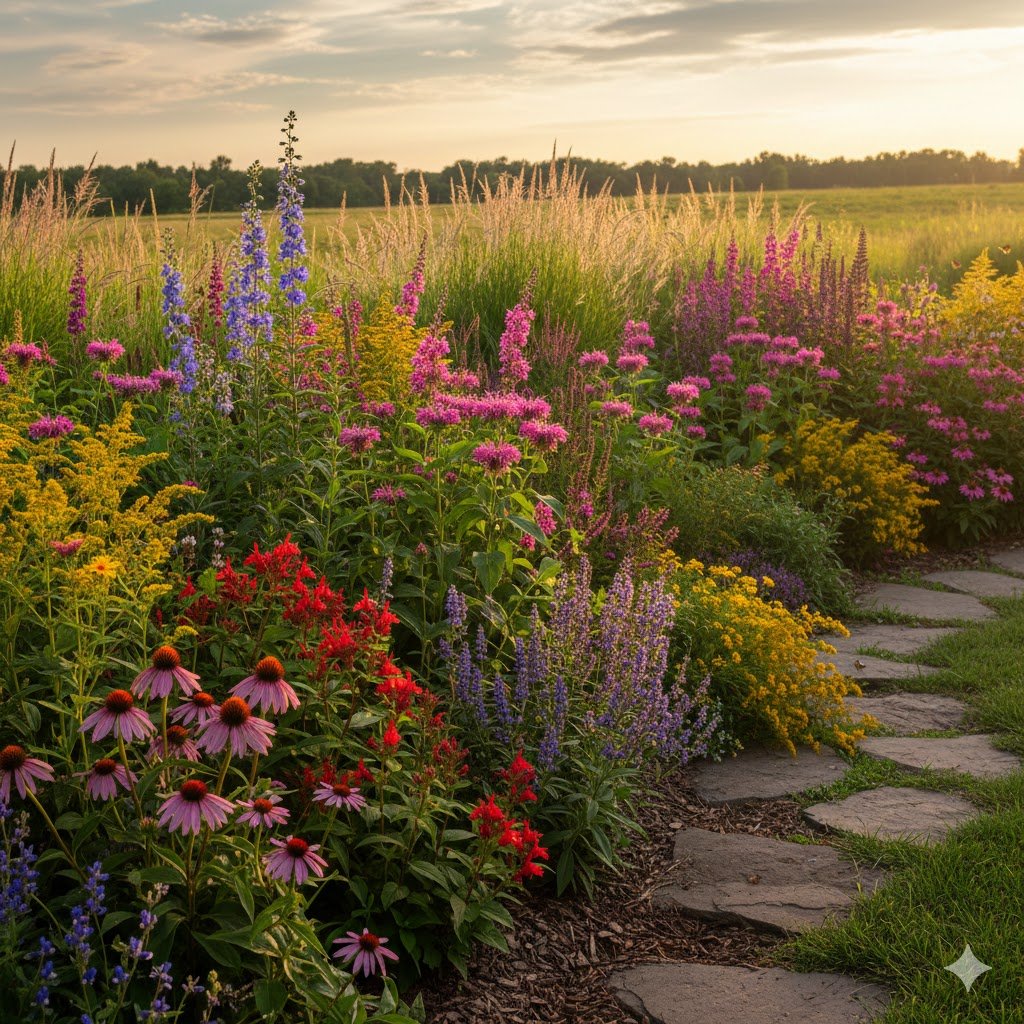
C. Recipe 3: Late Bloom & Structure (Fall Pollinator Feast)
The biggest maintenance saver in the fall is creating a border that looks good right up to the frost and requires no intervention. This recipe provides essential late-season food for insects and birds, keeping your yard active and beautiful well into November.
The Tall Layer foundation is the incredibly tough Aromatic Aster (Symphyotrichum oblongifolium). This plant has a wonderful, herbal scent when its leaves are brushed, forms a dense, neat mound, and is absolutely covered in purple blooms in the fall. Pair it with the equally sturdy Smooth Blue Aster (Symphyotrichum laeve) in the Mid Layer. Both Asters are drought-tolerant and reliable, offering a huge, vital food source for late-season bees and butterflies desperately preparing for winter.
The essential component here is a well-behaved Goldenrod for the Low Layer. While often blamed for seasonal allergies (a crime usually committed by Ragweed), Goldenrod (Solidago species) is the lifeblood of late-season pollinators. Be sure to select clumping varieties that don’t spread aggressively. The combination of Asters and Goldenrod means your border maintains color and structure long after everything else has collapsed, providing seeds and structure well into winter.
Minimalist Maintenance (Establishment & Beyond)
A. Establishment (Year 1)
I want to be transparent: “Low-maintenance” doesn’t mean zero maintenance, especially not in the first year. This is the foundation-building period where a little effort now guarantees years of effortless gardening later. Your main task will be watering, but you must do it correctly: water deeply and infrequently only for the first six to eight weeks after planting. This encourages those native plants to push their roots down, down, down into the soil to seek out permanent moisture, which is the whole point of our drought-proofing strategy.
The second crucial step in Year One is mulching, and you need to do it immediately after planting. Don’t skimp here; use two to three inches of wood chips or, even better, shredded leaves. This mulch is your weed-suppressing shield and moisture-retaining layer. By covering all exposed soil, you prevent weed seeds from germinating and keep the ground cool and moist, reducing the frequency with which you’ll need to water the new transplants.
When selecting mulch, I highly prefer native wood chips or shredded leaves over store-bought alternatives. This natural material breaks down slowly, adding essential organic matter back into the soil and mimicking the natural process on the forest floor or prairie. This completes the natural cycle and means you won’t need to add external fertilizers, keeping your border maintenance truly self-sufficient and chemical-free.
B. Long-Term Care (Years 2+)
Once your border is established, your maintenance schedule becomes gloriously simple. In the fall, resist the urge to “tidy up.” This is the “No-Mow” Approach applied to your border. Leaving the dried stalks and seed heads standing over winter is not just a structural choice; it’s a vital one. The hollow stems provide essential nesting and overwintering sites for beneficial insects and native bees, while the seeds become a necessary winter food source for local birds.
Your only real chore comes in early spring. Wait until temperatures are consistently above 50 degrees Fahrenheit (usually late March or early April). This ensures that any insects overwintering in the stems have safely emerged. Then, simply cut the dead stalks and foliage back to about six inches. The most important tip: leave the cuttings right there. Chop them up lightly and let them rest on the soil. This debris will quickly decompose, returning nutrients and acting as the first layer of mulch for the new season.
Finally, we need to adjust our philosophy on weeding. The goal is no longer a perfectly sterile landscape; the goal is density. If you followed the mass-planting advice, the native plants should be so thick that they choke out most competitors. You should only be pulling out obvious, large, non-native bullies or highly invasive weeds. A few minor weeds here and there are perfectly fine and do no harm. Embrace the fact that your thriving, dense native plants are doing the weeding for you.
Wrapping Up
Stepping away from the battle mentality of traditional gardening and adopting a native plant border is one of the most liberating choices you can make for your yard. It’s a shift from being a demanding taskmaster to becoming a gracious host, collaborating with nature to create beauty. The initial effort of planning and planting is a small investment that pays monumental dividends in saved time, saved money, and a richer, more vibrant local ecosystem.
You’re not just trading petunias for perennials; you’re trading constant labor for effortless enjoyment. Your new border will be self-watering, pest-resistant, and chemically independent, leaving you free to simply sit back and watch the bees, hummingbirds, and butterflies put on a show all season long. That’s the true definition of a successful garden, isn’t it?
The beautiful thing about this kind of gardening is that you don’t have to overhaul your entire property at once. Why not commit to a small, five-by-ten-foot corner this weekend? I’d love to know what recipe you’re trying out first. Share your starting point and your general location (e.g., “I’m doing the Full Sun recipe in my front yard in Zone 6!”) in the comments below, and we can discuss specific local plant alternatives for your area!