
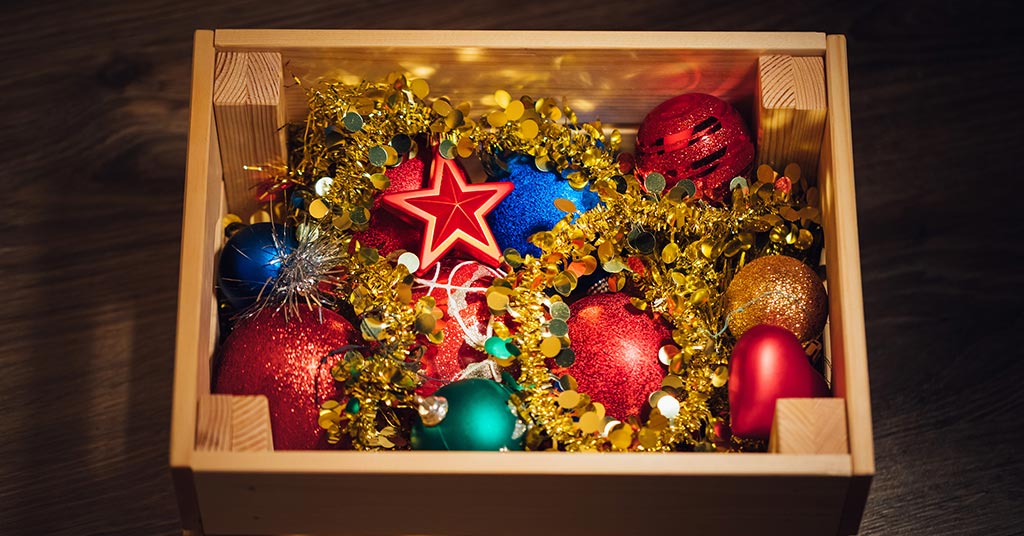
Taking down Christmas decorations always feels bittersweet. One minute, the house is glowing with holiday magic; the next, I’m surrounded by glittery chaos—tangles of lights, ornaments rolling across the floor, and pine needles that somehow multiply by the second. Over the years, I’ve noticed that storing Christmas ornaments properly isn’t just about tidiness—it’s about protecting memories. Those little glass globes and handmade trinkets often carry stories, and it’s worth keeping them safe for years to come.
Proper ornament storage saves time, money, and heartache. There’s nothing worse than opening a bin next December only to find your favorite glass reindeer shattered or your child’s first handmade ornament missing a piece. It might take a bit of effort now, but thoughtful organization can make next year’s decorating feel like a joyful reunion instead of a rescue mission.
In this guide, I’ll walk you through simple, creative, and effective ways to store your ornaments safely all year long. From sorting and cleaning to clever DIY storage hacks, these methods will help you protect your cherished decorations and make next Christmas setup a breeze.
Sort and Declutter Before You Store
Before diving into boxes and bins, start by sorting everything. Spread your ornaments on a large surface—your dining table, a bed, or even the floor if space allows. Group them by type: glass, wooden, shatterproof, handmade, or sentimental. Seeing them all laid out helps you take stock of what you have and what deserves the most protection.
This is also the perfect time to declutter. Over the years, we all accumulate ornaments that don’t fit our current style or theme. Maybe some are broken, faded, or simply not your favorite anymore. Donate gently used ones, repurpose them into crafts, or let go of the ones that no longer bring joy. The fewer items you have to store, the easier the process becomes.
Finally, label small piles or boxes as you sort. Having sections for “Glass,” “Plastic,” or “Sentimental” ornaments makes packing smoother. When next Christmas rolls around, you’ll be grateful to know exactly where everything is instead of rummaging through an endless sea of tinsel and glitter.
Clean and Prepare Ornaments for Storage
Once sorted, it’s time to clean. Dust and sap can cling to ornaments, especially if you’ve used a real tree. Use a soft, dry microfiber cloth to gently wipe each ornament. Avoid using water or cleaning sprays, especially on painted or glittered surfaces, as they can dull the finish. A few extra minutes of cleaning ensures your ornaments look as beautiful next year as they did this season.
While cleaning, inspect each piece carefully. Small cracks, loose glitter, or chipped paint can worsen over time. If something is repairable, fix it with a dab of clear-drying craft glue. But if it’s too damaged to save, it’s best to let it go now instead of keeping it only to be disappointed next year.
Lastly, remove any metal hooks, ribbons, or strings. These can tangle or scratch ornaments when packed together. Store them separately in a small labeled bag so you can easily reattach them later. This small step keeps everything tidy and prevents unnecessary damage.
Choose the Right Containers
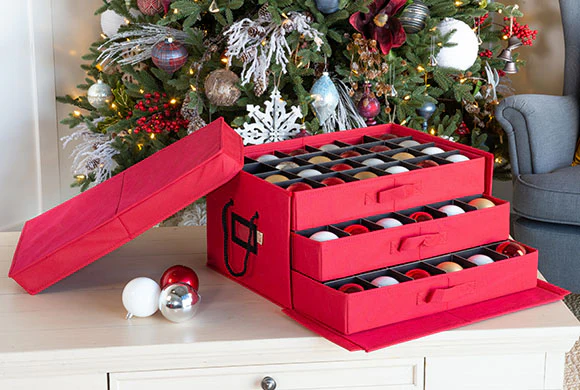
Choosing the right storage containers can make all the difference. For fragile ornaments, I swear by hard plastic bins with divided sections. They’re sturdy, stackable, and easy to label. Many come with adjustable inserts that can be tailored to fit different ornament sizes.
For lightweight or shatterproof decorations, soft-sided or cardboard boxes work just fine. They’re affordable and can easily fit in closets or under beds. If you have a growing collection, consider investing in a few specialty ornament organizers—they’re designed with padding and compartments to keep each piece snug and secure.
If you’re on a budget, don’t worry. You can mix and match storage options depending on what you have. The key is consistency—use containers that are durable and easy to carry. And always make sure lids close tightly to keep dust and moisture out.
Cushion and Protect Fragile Ornaments
Even the best containers need proper cushioning. Wrap each fragile ornament individually in soft tissue paper, bubble wrap, or felt squares. This keeps them from bumping into each other during storage or transport. I’ve found that felt fabric is particularly gentle and reusable year after year.
You can also get creative with what you already have. Old socks make perfect little sleeves for delicate ornaments, and coffee filters or cupcake liners work great for smaller pieces. These upcycled materials add padding without costing extra.
Avoid using newspaper—it’s tempting, but the ink can rub off and stain ornaments. Instead, stick to colorless, acid-free materials that won’t discolor your decorations over time. It’s worth the small effort now to avoid disappointment later.
Label and Categorize Everything
Labeling is the secret to stress-free unpacking. Start by marking each box with clear, descriptive labels like “Glass Ornaments,” “Wooden Décor,” or “Tree Toppers.” Use waterproof markers or printed labels that won’t fade over time.
For visual organization, I like to tape a small photo of the box’s contents on the lid or side. This trick saves so much time when you’re looking for specific ornaments next season. Instead of opening every box, you’ll know exactly where to find what you need.
If you’re extra organized, keep a digital inventory. A simple spreadsheet listing your boxes, their contents, and where they’re stored can be surprisingly handy. You’ll never have to guess where that special ornament ended up.
Protect from Temperature and Humidity
Ornaments are sensitive to temperature and humidity. Store them in a cool, dry place—ideally a closet, under the bed, or a temperature-controlled storage room. Avoid attics, basements, or garages, which often experience extreme temperature swings that can warp or crack delicate materials.
Moisture can also cause mold, rust, or discoloration. To prevent this, toss a few silica gel packs or moisture absorbers into each container. They help keep everything dry and fresh throughout the year.
If your only option is a less stable environment, consider adding airtight bins and desiccant packs for extra protection. And always keep ornament containers off the floor—especially in basements—to avoid water damage from leaks or condensation.
Use Space-Saving Tricks
Even if you’re tight on storage space, there are ways to keep things organized without cluttering your home. Stack bins vertically, with heavier ones on the bottom and lighter ones on top. This prevents damage and makes the most of your space.
Under-bed storage boxes are lifesavers for small homes or apartments. They slide neatly out of sight but keep your decorations accessible. You can also use closet shelves or linen cabinets if space allows.
Another tip I’ve found helpful is organizing by color or theme—such as “Red and Gold Tree” or “Rustic Woodland.” This makes next year’s decorating faster and more enjoyable because you can pull out the exact boxes that match your theme.
Creative DIY Ornament Storage Ideas
You don’t have to buy expensive storage containers to keep ornaments safe. Wine boxes, egg cartons, or even apple crates can be repurposed into clever organizers. Their built-in compartments naturally protect small and delicate pieces.
One of my favorite DIY tricks is gluing plastic cups inside a larger box. Each ornament gets its own mini “compartment,” and the box stays lightweight yet sturdy. This method is great for families with kids, as it keeps everything visible and easy to handle.
For lights and garlands, wrap them around a piece of cardboard or an empty coffee can to prevent tangling. Label each bundle so you know which tree or area they belong to next year. Simple, practical, and mess-free.
Storing Other Christmas Accessories
While ornaments take the spotlight, don’t forget the rest of your holiday décor. Tree toppers can be fragile, so wrap them in bubble wrap or store them in garment bags to prevent scratches. Tree skirts can be folded and kept in fabric pouches or large zippered bags to stay dust-free.
Wreaths and garlands are best stored hanging up to maintain their shape. A spare closet or garment rack works perfectly for this. If you need to store them in boxes, use circular wreath containers that fit snugly without flattening the greenery.
Light strands deserve a little attention too. Wind each one around a cardboard reel or spool and tuck the ends into a small bag. Labeling them by color or length can save you tons of frustration when you’re decorating again next year.
Year-Round Maintenance Tips
Even with perfect packing, it’s smart to check on your ornament boxes mid-year. Look for signs of moisture, pests, or cracking plastic bins. A quick five-minute inspection can prevent surprises when you open them again next December.
Refresh silica gel packs or moisture absorbers every few months to maintain their effectiveness. If you’re storing in a basement or garage, consider placing your bins on wire racks to keep them off the floor and improve airflow.
Finally, keep a checklist of what you own and where it’s stored. Update it each year after decorating and again after taking things down. This small habit ensures you always know what you have and helps you plan future purchases or DIY projects.
Wrap Up
Packing away Christmas decorations doesn’t have to feel like a chore. When done right, it’s almost like tucking your memories safely away until next year’s celebrations. With a little organization, the right containers, and some clever hacks, you’ll never again face a box of broken ornaments or tangled lights.
Taking care of your decorations is really about preserving joy. Each ornament tells a story—of family traditions, laughter, or that one perfect holiday moment. By storing them properly, you’re not just protecting fragile glass; you’re keeping those memories alive and ready to shine again next Christmas.
So, as you close the final storage bin and slide it neatly onto the shelf, take a moment to smile. You’ve just given your holiday treasures the care they deserve—and next year, you’ll be grateful for the calm, organized magic waiting to be unwrapped.