

In a world where mass-produced home décor dominates store shelves, there’s something special about creating your own art using the gifts of nature. Foraged nature wall art combines creativity, sustainability, and a touch of the wild to add earthy charm to your home. Whether you live near a lush forest or a sunlit park, you’re just a few steps away from discovering your next masterpiece—on the ground beneath your feet.
Foraged art is exactly what it sounds like—art made from naturally found materials such as leaves, bark, twigs, flowers, pinecones, and even pebbles. It’s not just cost-effective and eco-friendly, but also offers a therapeutic experience. The process invites you to slow down, notice the beauty in small things, and connect with nature while bringing it into your home in a meaningful way.
Ready to bring nature indoors? In this post, we’ll walk you through 11 unique and inspiring DIY wall art ideas you can create using foraged treasures. Each project is beginner-friendly, budget-conscious, and endlessly customizable to your personal style.
Getting Started: Tips Before You Begin
Before you start collecting nature’s treasures, keep a few things in mind. Always forage responsibly—never take more than you need, avoid endangered species, and stay out of protected areas. Be sure to leave your environment as undisturbed as possible and give thanks to nature for its gifts.
You’ll also want to gather a few basic crafting supplies. Depending on the project, you might need a hot glue gun, scissors, frames, twine, a sealant spray (like clear acrylic), and tools for pressing or drying natural materials. A flat workspace and a little patience will also go a long way!
Lastly, try to collect materials that are already dry or easy to preserve. Wilted or fresh materials will decompose quickly unless properly treated. Store your finds in paper bags or boxes to prevent mold and sort them by type before beginning your project.
11 Unique Foraged Nature Wall Art DIY Ideas
1. Pressed Botanical Gallery
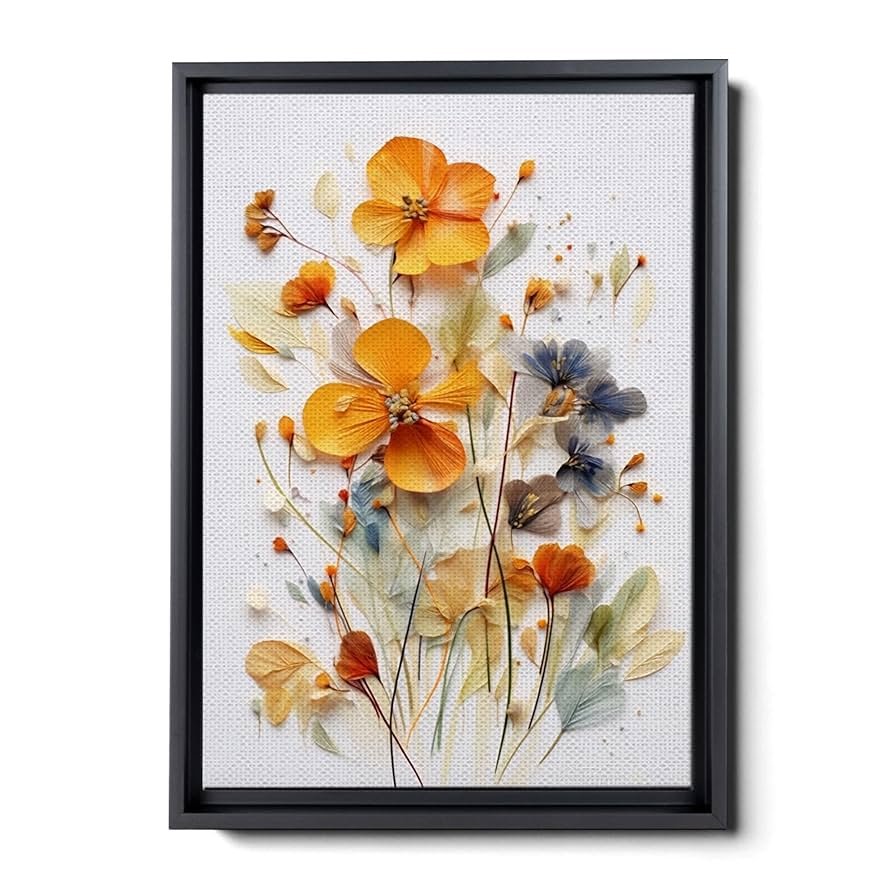
Pressed flower and leaf art is timeless, elegant, and incredibly easy to personalize. Using a simple flower press or heavy books, you can flatten your foraged finds and preserve their delicate beauty. Once pressed and dried, arrange them between two sheets of glass or inside a float frame for a stunning botanical display.
This type of art works beautifully when you group several small frames together to form a gallery wall. You can organize them by color scheme, plant type, or season, allowing you to rotate your display throughout the year. Minimalist homes especially benefit from this soft, organic touch.
For best results, choose plants with a low moisture content and vivid colors. Ferns, eucalyptus, violets, pansies, and autumn leaves are popular options. Consider labeling each specimen for a vintage scientific look, or simply allow the natural shapes and hues to speak for themselves.
2. Stick & Twig Mandala Wall Piece

Mandalas made from sticks and twigs are a beautiful way to add symmetry and texture to your walls. These earthy designs mimic ancient symbols of balance and unity. Collect a variety of twigs in different lengths and arrange them in a radial pattern on a circular board or canvas.
Start by drawing your mandala outline, then hot glue each twig in place, working from the center outward. You can leave the sticks natural for a raw, woodland vibe or paint them in tonal shades for a more modern effect. This piece looks particularly striking as a focal point in bohemian or rustic interiors.
What makes this idea so flexible is its ability to reflect your personal style and environment. Try combining twigs with other materials like dried seed pods or feathers for added interest. Hang the finished piece over a bed, in an entryway, or as a conversation starter in your living room.
3. Mossy Woodland Initials

If you love personalized décor, creating mossy initials is the perfect nature-inspired twist. Foraged moss, bark, and small pebbles can be layered onto wooden or cardboard cut-out letters to form textured wall art with a woodland feel. These look fantastic in entryways, nurseries, or even as wedding décor.
To make your initials, trace and cut out large letters from wood or sturdy cardboard. Using craft glue or a hot glue gun, start layering moss and bark onto the letter, mixing textures for a dynamic look. Accent the edges with tiny pinecones or acorns for extra detail.
You can use real dried moss or preserved craft moss for easier handling. Once completed, seal the surface with a clear matte spray to keep it fresh-looking. Mount the letter on a contrasting background or display it freestanding on a shelf for natural charm.
4. Bark & Stone Mosaic Panels
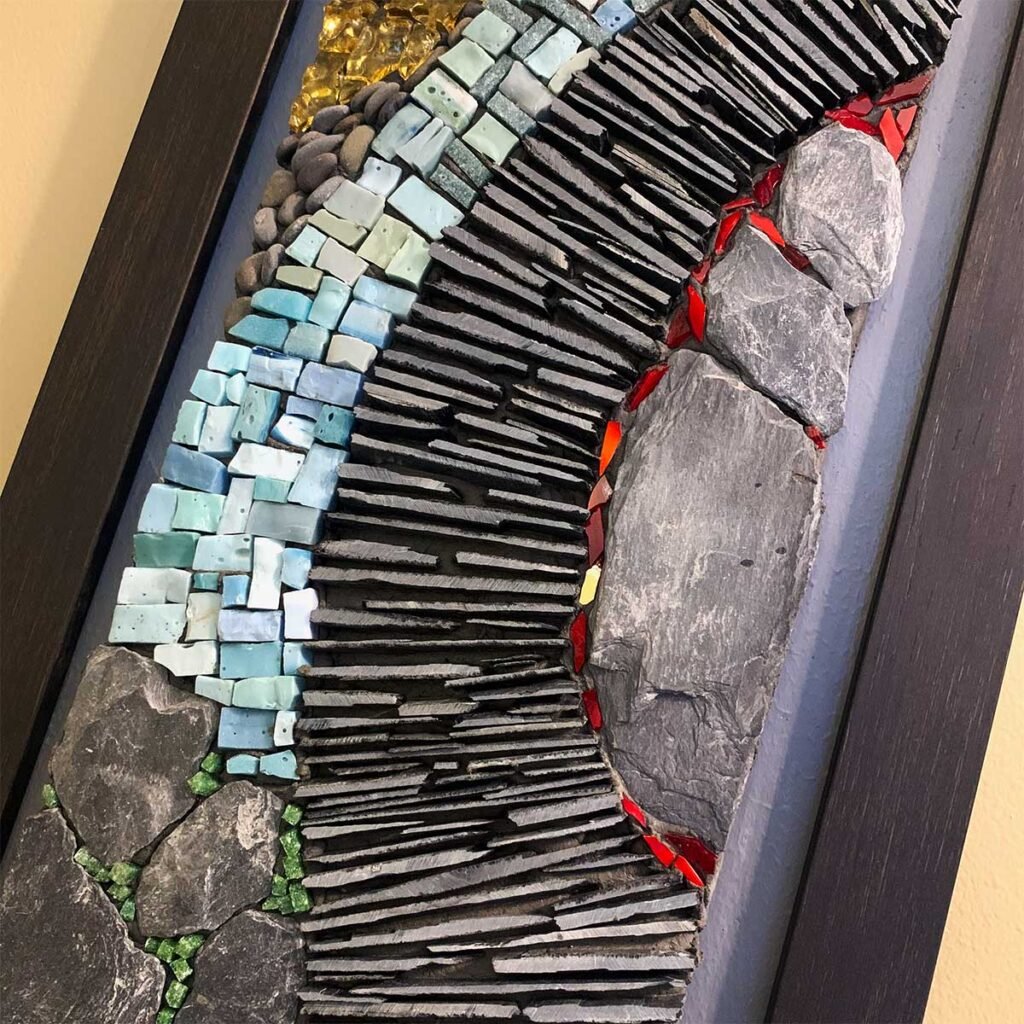
Turn rough bark and smooth pebbles into striking mosaic wall panels that blend rustic and refined design elements. By arranging natural textures into geometric or abstract patterns, you create depth and visual interest while celebrating nature’s raw beauty.
To begin, collect flat bark pieces and small, flat pebbles in a variety of shades and sizes. Cut a baseboard to your desired dimensions and sketch a simple pattern or design. Then, glue the bark and stones in place like a puzzle, filling gaps tightly and varying colors to enhance the pattern.
These panels can be left raw for an organic feel or finished with a thin resin coat for a more polished, modern look. Consider creating a series of mini panels to hang in a row or grid for a gallery effect. This project is perfect for hallways, stairwells, or cozy reading nooks.
5. Leaf Shadow Silhouettes

Leaf shadow art plays with negative space and silhouette techniques to create modern, nature-inspired prints. Using foraged leaves as stencils, you can spray-paint or dab around them on a canvas to create striking outlines that celebrate natural form and structure.
Lay the leaves on your chosen background (like canvas or watercolor paper), then gently spray paint or sponge around the edges. When you lift the leaf, its silhouette will remain unpainted, revealing the background color. Use white paint on darker paper for a high-contrast effect or soft neutrals for subtle elegance.
Try grouping several silhouettes together or experimenting with overlapping shapes. This is a great project for kids and adults alike, and it pairs well with minimalist or Scandinavian interior styles. For added drama, frame your leaf silhouettes in matte black or gold frames.
6. Floating Nature in Resin Frames

Resin is a beautiful way to encapsulate delicate natural finds and turn them into modern, glossy wall pieces. This technique preserves flowers, leaves, feathers, and more in a clear, solid surface—perfect for framing or hanging as sun catchers.
To create resin art, arrange your foraged materials inside a silicone mold or tray and pour clear epoxy resin over the top. Let it cure completely (usually 24–48 hours), then pop the finished piece out and frame it or attach a hanging hook. Safety note: Always use gloves and a well-ventilated space when working with resin.
The result is a striking, glass-like window into nature that looks incredible in bright, sunny areas. Mix and match elements for contrast—think yellow buttercups with green ferns, or white feathers over dark leaves. Floating nature art pairs beautifully with contemporary or eclectic décor.
7. Driftwood Wall Hanging

Driftwood offers a unique weathered texture that feels coastal, cozy, and artistic. It can be transformed into minimalist horizontal hangings or vertical mobiles that feel both relaxed and stylish. The natural color variations and curves add visual appeal without any need for paint or polish.
To make one, gather a mix of driftwood pieces in various lengths and shapes. Tie them together with twine or fishing line, spacing them evenly. You can add beach stones, shells, or beads between the wood pieces for extra charm. Hang your piece from a larger branch or dowel.
This idea works especially well in beach-inspired interiors or relaxed boho spaces. Hang it over a bed or couch, or in a bathroom for that breezy coastal vibe. You can also create a set of mini driftwood hangings to fill narrow vertical wall spaces.
8. Acorn & Pinecone Wall Grid

Pinecones and acorns are classic symbols of the forest, and they lend themselves well to structured wall art. By arranging these small foraged items in a geometric grid or hexagon pattern, you create a balance of symmetry and organic texture.
Start by cleaning and drying your acorns and pinecones to prevent mold. You can leave them natural or give them a touch of color by dip-dyeing the tips or applying a metallic finish. Mount each item onto a canvas or board in a uniform grid layout using hot glue.
This idea is especially striking when framed or when using contrasting background colors. Try mounting natural brown cones on a white canvas or using black backgrounds with gold-dipped acorns. It adds a cozy, woodland touch to entryways, kitchens, or kids’ rooms.
9. Herb & Flower Swag Garland

A swag-style garland made from foraged herbs and flowers brings scent, color, and softness to your walls. Ideal for kitchen walls or windows, this project uses dried bundles of lavender, rosemary, wheat, wildflowers, and grasses to form rustic, cascading bundles.
Tie your dried foraged finds into small bunches using twine or raffia, then attach them to a long string or wire. Hang the garland horizontally like a banner, allowing each bunch to dangle freely. You can mix in small citrus slices, cinnamon sticks, or feathers for added personality.
Not only is it beautiful to look at, but this garland also smells amazing and brings seasonal charm indoors. It’s a great rotating décor idea for spring, summer, and fall. Once dry, the swag will last for months—just keep it out of direct sunlight to preserve the color.
10. Nature-Inspired Embroidery Hoops
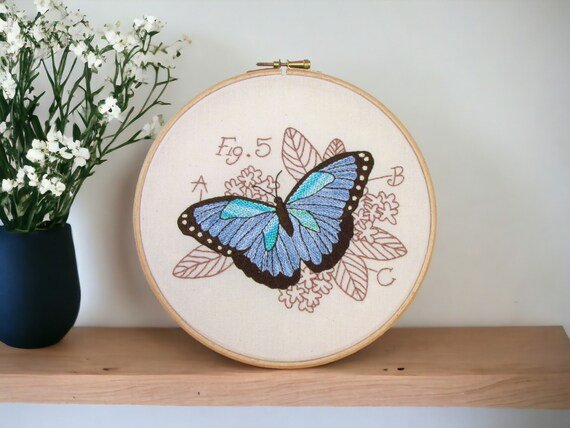
Embroidery hoops aren’t just for stitching—they’re also a great way to frame delicate nature scenes using foraged items. Think tiny leaves layered over linen, bark fragments sewn onto canvas, or flowers pressed between tulle and fabric.
Start by stretching your chosen fabric inside the embroidery hoop. Then glue or hand-stitch natural elements onto the surface, creating a balanced composition. You can combine foraged bits with a few lines of hand embroidery for a mixed-media effect.
These hoops look beautiful hung in clusters or arranged in staggered rows on narrow walls. They work especially well in vintage, farmhouse, or nature-inspired interiors. Use different sizes for variety and texture across your display.
11. Pebble Art Scenes

Pebbles can be transformed into minimalist art that tells a story. With a bit of creativity, you can use smooth stones to create simple but expressive scenes—like birds on branches, family silhouettes, or abstract landscapes.
Arrange your pebbles on a white or neutral canvas before securing them with strong glue. Consider using driftwood pieces or twigs as branches, and paint subtle details like beaks or legs for extra charm. Each piece can be uniquely personal and symbolic.
Pebble art is a favorite for gifts or family-themed displays. Frame your finished piece in a shadow box or rustic frame and hang it where it can be admired up close. It’s a gentle reminder of nature’s beauty and your own artistic voice.
Finishing & Display Tips
Once your art is complete, consider preserving it with a spray sealant—especially if it includes organic materials like flowers, moss, or bark. This helps prevent decay and keeps colors vibrant. For a polished look, use floating frames, rustic wood frames, or shadow boxes.
Think creatively about where to hang your foraged wall art. These pieces work beautifully in entryways, living rooms, bathrooms, or even covered outdoor patios. Group several smaller pieces for a gallery-style wall, or spotlight one larger item as a focal point.
To keep things fresh, consider rotating pieces by season. Spring florals, summer grasses, autumn leaves, and winter branches all bring different moods to your home. It’s a lovely way to stay connected with the rhythm of nature all year round.
Wrapping Up
Foraged nature wall art is more than just décor—it’s a creative ritual, a personal connection with the outdoors, and a celebration of sustainable living. Each piece you make tells a story of the land around you and the hands that shaped it.
Whether you’re decorating on a budget, personalizing your space, or simply looking for a peaceful hobby, these 11 ideas are a great place to start. Remember: nature is your art store, and your imagination is the only limit.
Have you tried foraged art before? Share your creations in the comments or tag us on social media with your favorite project!