
Tired of the same old boring walkway leading to your patio or garden? Do you crave a touch of creativity and sustainability in your outdoor space? Look no further than recycled rubber! This readily available material offers a wealth of possibilities for creating unique, durable, and eco-friendly walkways.
Recycled rubber comes in various forms, from interlocking pavers and tiles to stall mats and even used tires. Its inherent durability makes it perfect for withstanding the elements, while its eco-friendly nature allows you to repurpose waste into something beautiful. From classic paver walkways to artistic tire tread paths, this blog explores 11 DIY recycled rubber walkway ideas that are sure to elevate your outdoor space.
1. The Classic Paver Walkway: Easy and Elegant
This is a fantastic option for beginners who want a clean and polished look. Recycled rubber pavers come in a variety of colors and shapes, allowing you to create a timeless design that complements your yard.
Materials:
- Recycled rubber pavers (enough to cover your desired walkway area)
- Edging material (plastic, metal, or stone)
- Base material (gravel, crushed stone, or compacted soil)
- Landscape fabric (optional, for weed control)
- Shovel
- Tamper
- Level
- Utility knife (if edging needs cutting)
Instructions:
- Plan Your Path: Sketch your desired walkway design on paper, taking into account the starting and ending points, width, and any curves. Mark the path on the ground with spray paint or landscaping stones.
- Prepare the Ground: Excavate the area to a depth slightly deeper than the thickness of the pavers (typically 2-4 inches). Level the base using a rake and tamper to create a firm, even surface. Consider adding a layer of landscape fabric to prevent weed growth.
- Install the Edging: Secure your chosen edging material along the sides of the excavated area. Ensure it’s level and firmly anchored to the ground.
- Lay the Pavers: Starting from a corner, begin laying the pavers in your desired pattern. Use a rubber mallet to gently tap them into place, ensuring a tight fit. Maintain a consistent spacing between pavers and regularly check for level with your level tool.
- Fill the Gaps: Once all the pavers are laid, use a fine gravel or sand to fill the gaps between them. Sweep the excess material off the top with a broom.
Customization Tips:
- Play with color combinations to create a patterned walkway. Alternate between light and dark colored pavers for a classic checkerboard design, or get creative with geometric patterns.
- Arrange the pavers in different directions for a more dynamic look. Herringbone or basketweave patterns can add visual interest.
2. Playful Tire Stepping Stones: A Whimsical Touch
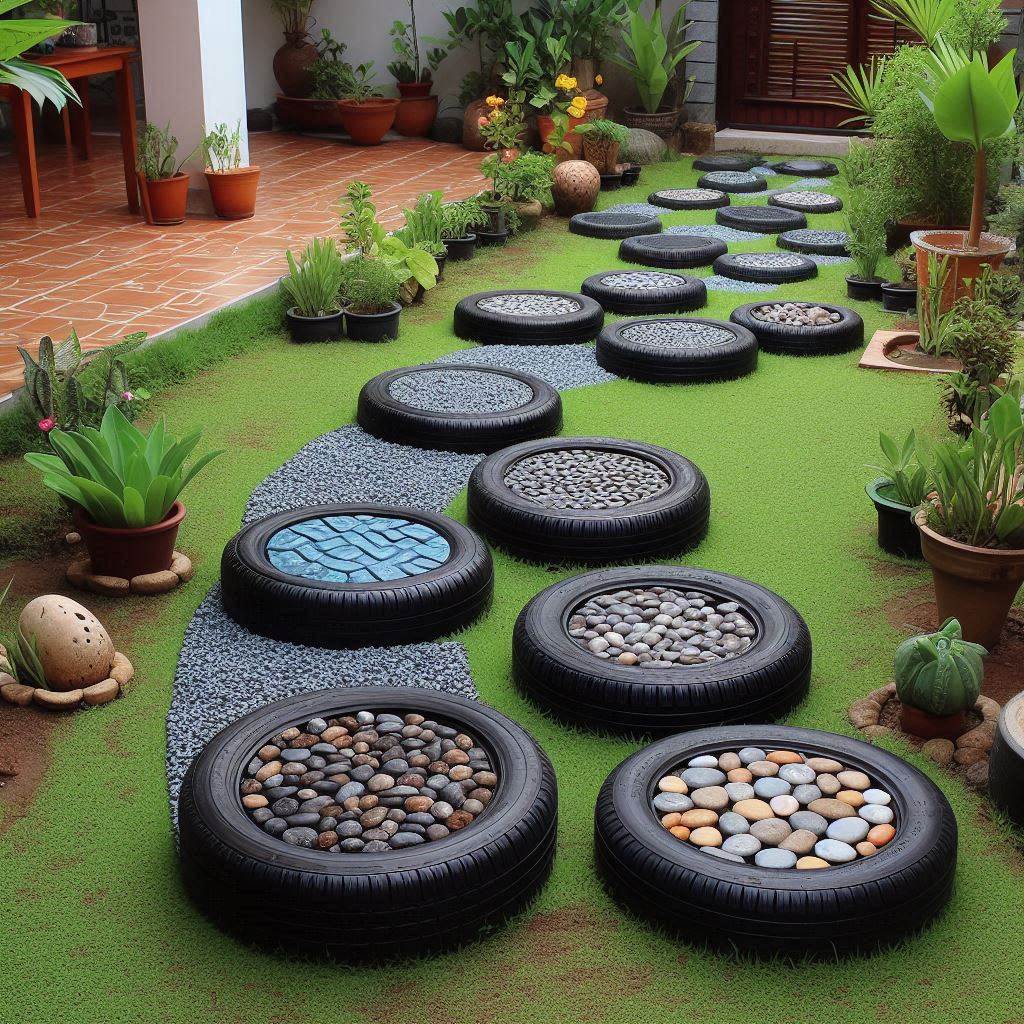
This project is perfect for adding a touch of whimsy to your garden path. Repurpose old tires into colorful stepping stones that are both fun and functional.
Materials:
- Used tires (various sizes, depending on desired stepping stone size)
- Dish soap and water
- Wire brush or scrubbing pad
- Sandpaper (optional)
- Outdoor paint in desired colors
- Stencils (optional)
- Paintbrushes
- Sealant (optional)
Instructions:
- Clean the Tires: Thoroughly clean the tires with a solution of dish soap and water. Use a wire brush or scrubbing pad to remove stubborn dirt and debris. Let the tires dry completely.
- Prepare the Tires: You can use the tires whole for large stepping stones, or cut them into smaller circles or shapes using a sharp utility knife (be extra cautious!). Sand down any rough edges with sandpaper for a smoother finish (optional).
- Paint Your Design: Paint the tires with your chosen outdoor paint. Apply multiple coats for a vibrant and even finish. You can use solid colors, create patterns, or use stencils for intricate designs.
- Seal the Paint (Optional): Once the paint is completely dry, apply a coat of sealant to protect the artwork from the elements.
Tips:
- Choose tires of different sizes to create a more playful and natural look in your walkway.
- Get creative with your paint job! Use stencils for animal prints, flowers, or geometric shapes. Let your imagination run wild!
- Consider incorporating reflective paint for nighttime visibility.
3. Winding Rubber Mulch Path: Low-Maintenance Beauty
This is a quick and easy solution for creating a natural-looking pathway. Recycled rubber mulch offers a comfortable walking surface while suppressing weeds and adding a touch of color to your landscape.
Materials:
- Recycled rubber mulch (enough to cover your desired walkway area, with a depth of 2-3 inches)
- Edging material (plastic, metal, or stone)
- Weed barrier
- Shovel
- Tamper
Instructions:
- Plan Your Path: Sketch your desired walkway design on paper, considering the starting and ending points, width, and any curves. Mark the path on the ground with spray paint or landscaping stones.
- Prepare the Ground: Mark the path boundaries and excavate the area slightly (around 1 inch) to create a defined space for the mulch. Remove any weeds or unwanted vegetation.
- Install Weed Barrier: Lay down weed barrier fabric over the entire excavated area. This will prevent weeds from growing through the mulch. Secure the edges of the fabric with landscape staples to prevent it from shifting.
- Install Edging (Optional): Edging is not essential for a rubber mulch path, but it can create a more defined look and help contain the mulch. Secure your chosen edging material along the sides of the path.
- Spread the Mulch: Evenly spread the recycled rubber mulch over the weed barrier, ensuring a depth of 2-3 inches. Use a shovel or rake to distribute the mulch evenly.
Tips:
- Choose a color of rubber mulch that complements your landscaping. Black, brown, and red are popular choices, but bolder colors like green or blue can add a unique touch.
- To create a curved path, lay the weed barrier first and cut it to follow the desired curve.
- For a more finished look, top the edges of the mulch with decorative gravel or stones.
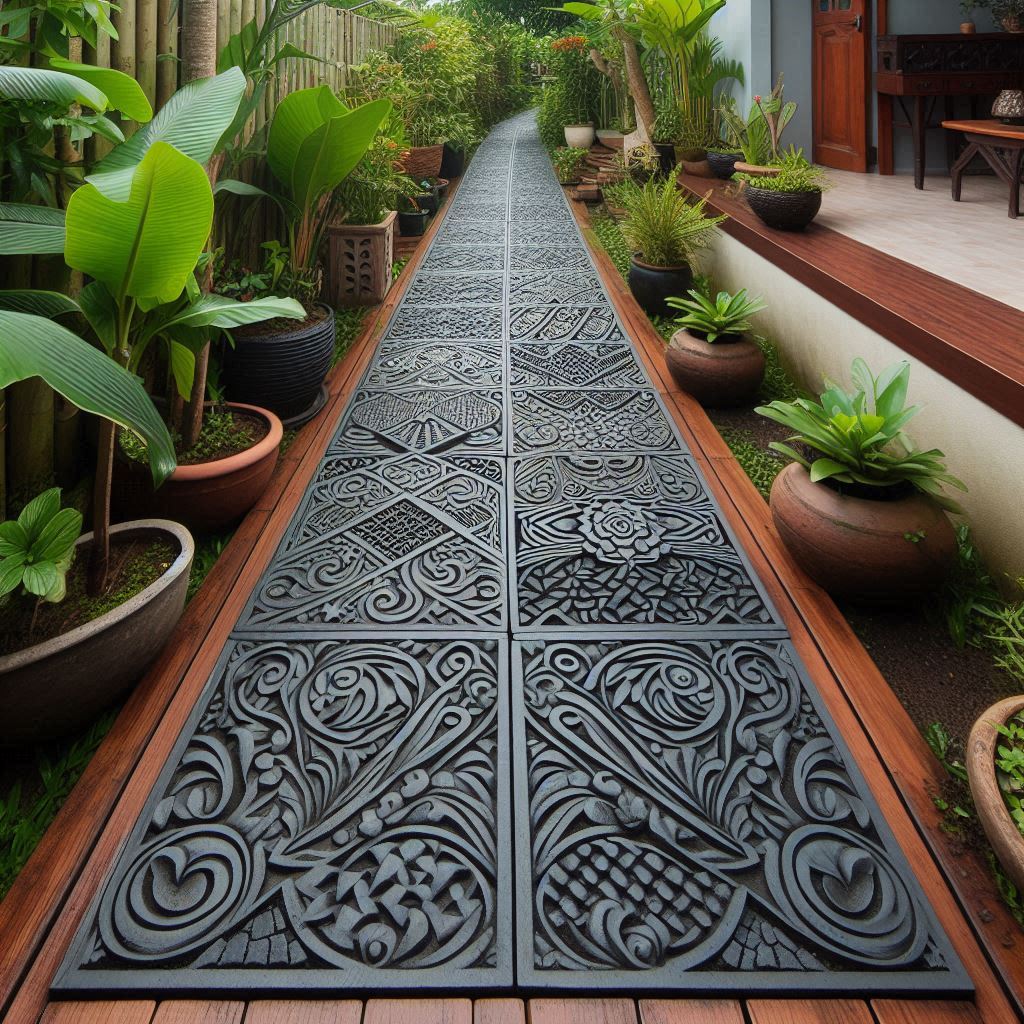
4. Interlocking Rubber Tile Mosaic: Unleash Your Creativity
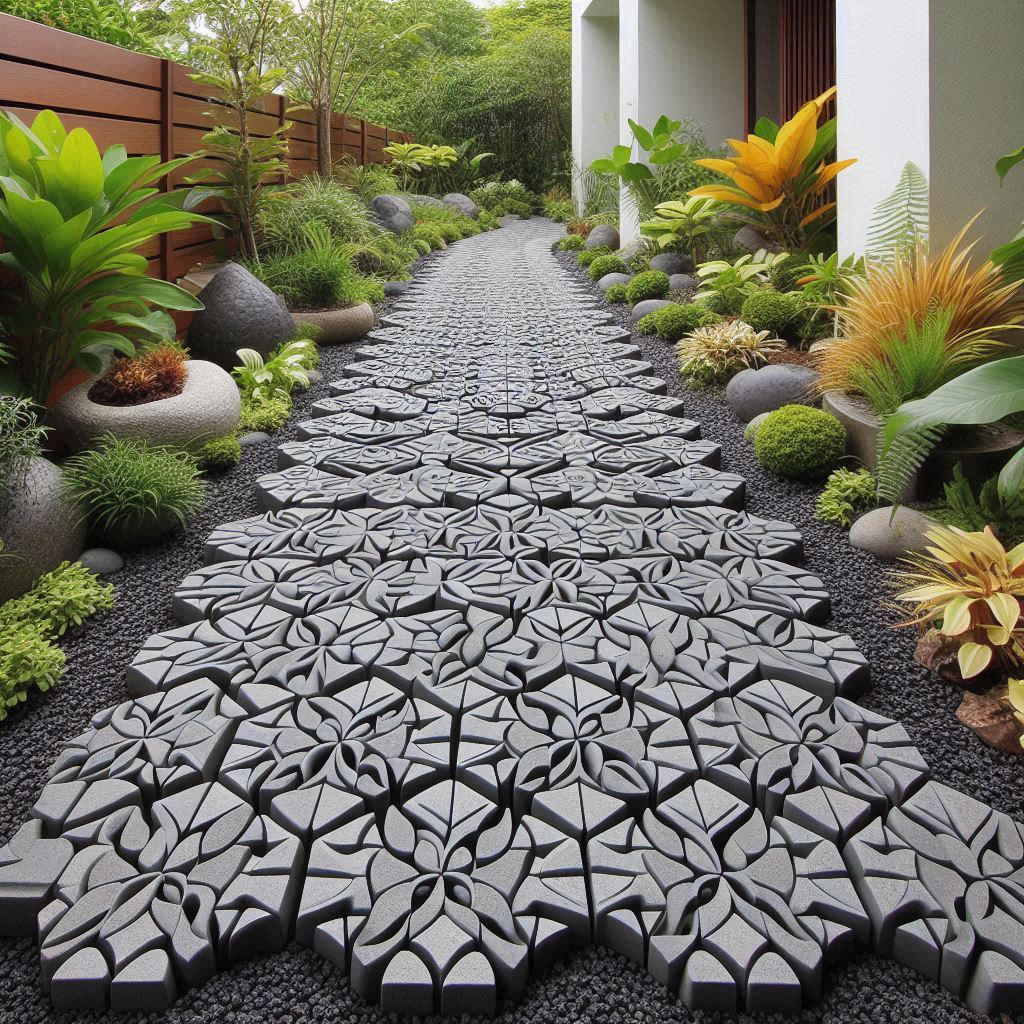
This project is perfect for those who enjoy a bit more challenge and want to create a truly unique walkway. Recycled rubber tiles come in various shapes, sizes, and colors, allowing you to create a stunning mosaic design.
Materials:
- Assorted recycled rubber tiles in different colors and textures (enough to cover your desired walkway area)
- Utility knife
- Construction adhesive (suitable for outdoor use)
- Level
- Rubber mallet (optional)
Instructions:
- Plan Your Design: Sketch your desired mosaic pattern on paper. Consider using graph paper to ensure accurate sizing and placement of the tiles. You can find inspiration online or create your own unique design.
- Prepare the Ground: Decide on a base for your tiles. You can lay them directly on a compacted and level soil base, or create a concrete or gravel base for added stability. Ensure the base is smooth and even.
- Prepare the Tiles: If necessary, use a utility knife to cut tiles to fit your design. Be cautious and wear gloves and safety glasses while cutting.
- Lay the Tiles: Starting from a corner and following your design, begin applying construction adhesive to the back of each tile and carefully laying it in its designated place. Use a rubber mallet (optional) to gently tap the tiles into place and ensure a level surface throughout.
- Allow to Cure: Once all the tiles are laid, follow the adhesive manufacturer’s instructions for curing time. Let the adhesive completely dry before walking on the walkway.
Tips:
- Use a mix of large and small tiles to create a more dynamic look.
- Experiment with contrasting colors and textures for a bolder statement.
- You can incorporate decorative elements like pebbles or glass stones into your design for added visual interest.
5. Budget-Friendly Rubber Mat Walkway: Easy and Practical

This is a cost-effective option for creating a temporary or permanent walkway. Recycled rubber stall mats, often used in stables and gyms, offer a durable and slip-resistant surface.
Materials:
- Recycled rubber stall mats (enough to cover your desired walkway area, cut to size)
- Utility knife
- Ground anchors (optional)
Instructions:
- Measure and Cut the Mats: Measure the desired walkway area and cut the rubber stall mats to size using a sharp utility knife. Wear gloves and safety glasses while cutting.
- Prepare the Ground: Level the ground where you plan to install the walkway. You can leave it as compacted soil or add a layer of gravel for better drainage.
- Lay the Mats: Carefully position the cut rubber mats on the prepared ground, ensuring they lie flat and create a seamless walkway.
- Secure the Mats (Optional): If your walkway experiences high foot traffic or is in a windy location, consider securing the mats with ground anchors. These are typically U-shaped metal stakes that are driven into the ground through pre-drilled holes in the mats.
Tips:
- Overlap the edges of the mats slightly to create a smooth transition between them.
- You can use a jigsaw to cut curved edges or create interesting shapes in the mats for a more customized look.
- To add a decorative touch, consider painting the rubber mats with outdoor paint. Choose stencils or create your own designs to personalize your walkway.
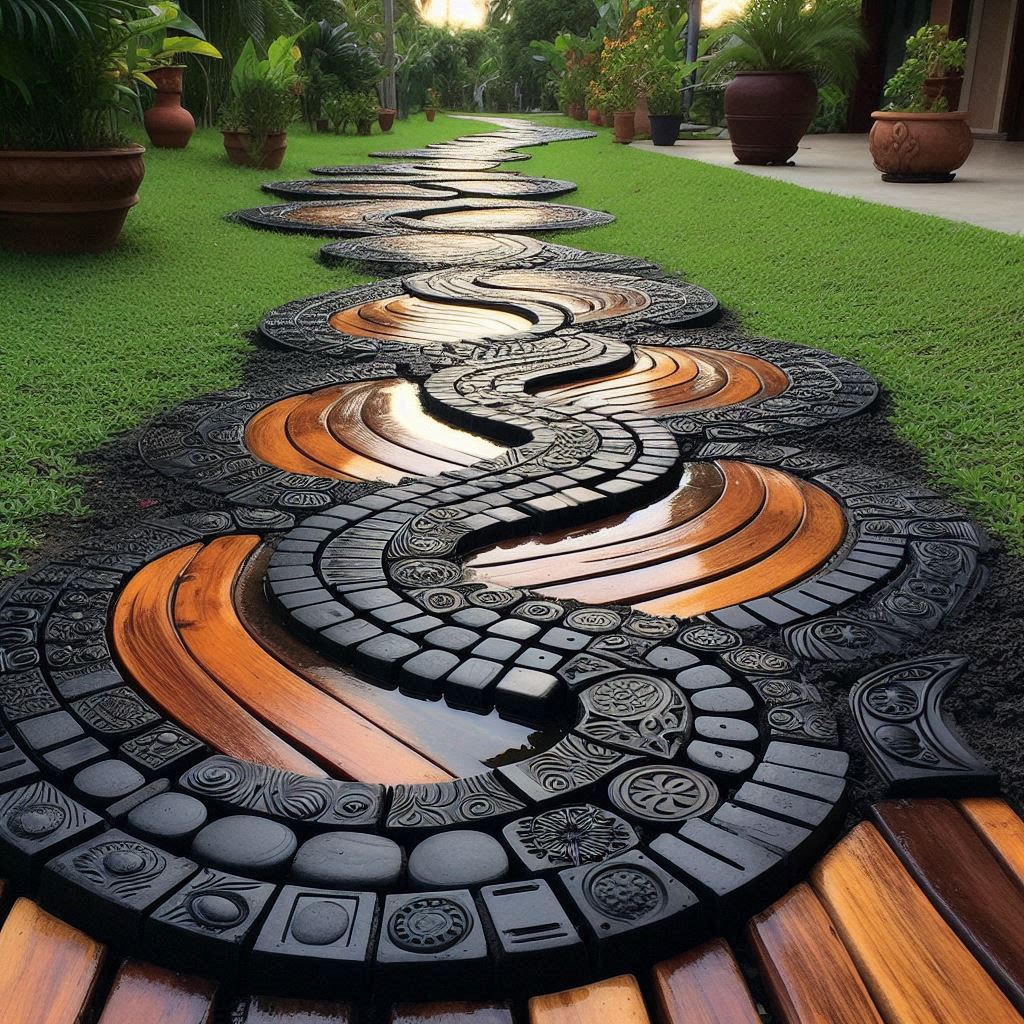
6. Artistic Tire Tread Pathway: A Textured Masterpiece
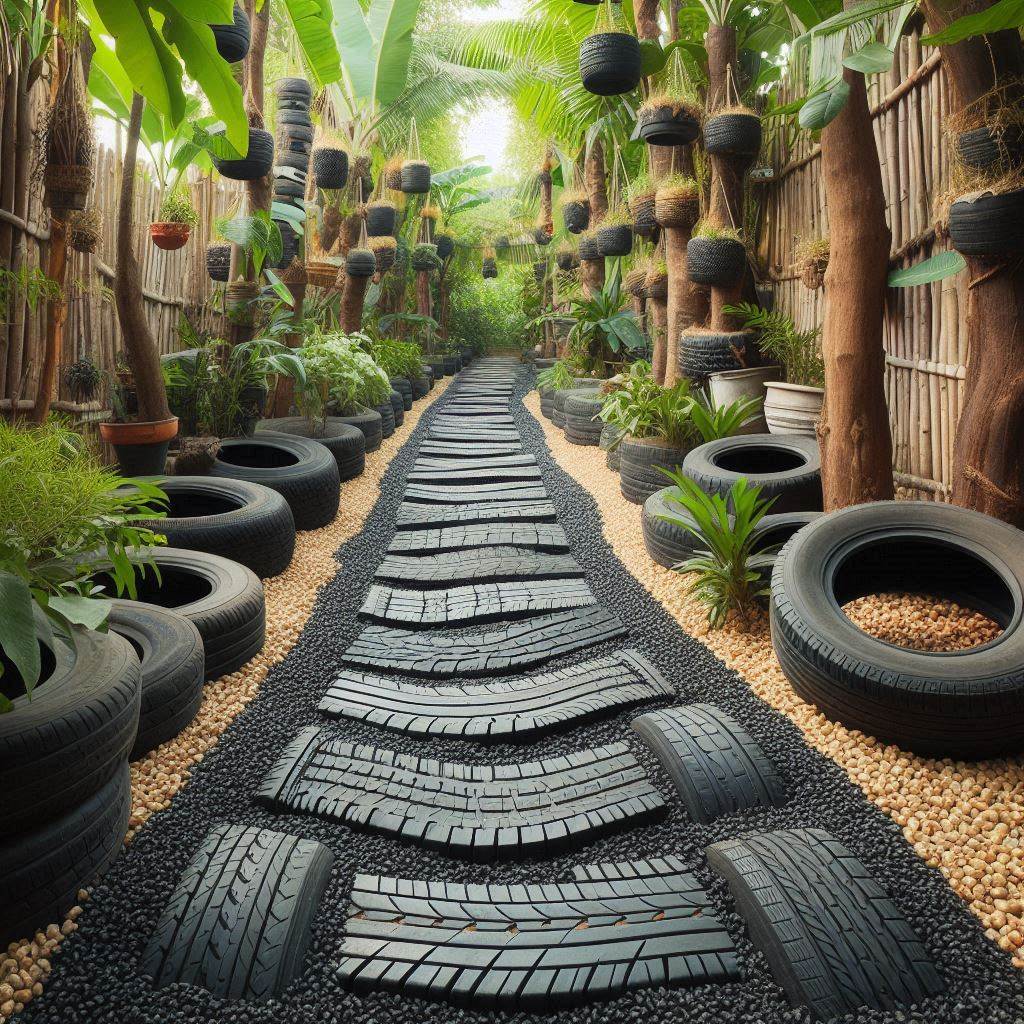
This project is ideal for upcycling used tires with unique tread patterns. By carefully arranging the tire strips, you can create a visually stunning and functional walkway.
Materials:
- Used tires with interesting tread patterns (enough to cover your desired walkway area)
- Sharp utility knife and safety gear (gloves, goggles)
- Sealant (optional)
- Outdoor paint (optional)
- Shovel
- Tamper (optional)
- Gravel (optional)
Instructions:
- Tire Selection: Choose used tires with interesting tread patterns that complement your desired design. Look for tires with bold block patterns, wavy lines, or herringbone textures.
- Tire Preparation: Cut the tires into strips of desired width using a sharp utility knife. Wear gloves and safety goggles for protection. Be cautious while cutting and dispose of tire sidewalls responsibly.
- Plan Your Design: Sketch your desired walkway layout on paper. Consider alternating different tread patterns for a more dynamic look. You can also create stripes, curves, or geometric shapes with the tire strips.
- Prepare the Ground: Decide on a base for your walkway. You can lay the tire strips directly on compacted soil, or create a base of gravel (1-2 inches thick) for added stability. Level the base with a shovel and tamper (optional).
- Arrange the Tire Strips: Following your design, begin laying out the tire strips in the desired pattern. Ensure they lie flat and create a smooth walking surface.
- Securing the Strips (Optional): If your walkway is in a high-traffic area, consider securing the tire strips with landscape staples pushed through the bottom of the strips into the ground.
- Finishing Touches (Optional): For a more polished look, apply a coat of sealant to the tire strips to protect them from the elements. You can also paint the strips with outdoor paint to create a colorful walkway.
Tips:
- Experiment with different tire sizes and tread patterns to create a unique design.
- Use contrasting colors of paint on the tire strips for a bolder statement.
- You can incorporate other recycled materials like glass pebbles or broken ceramic pieces into the gaps between the tire strips for added visual interest.
7. Raised Rubber Herb Garden Path: Functional and Beautiful
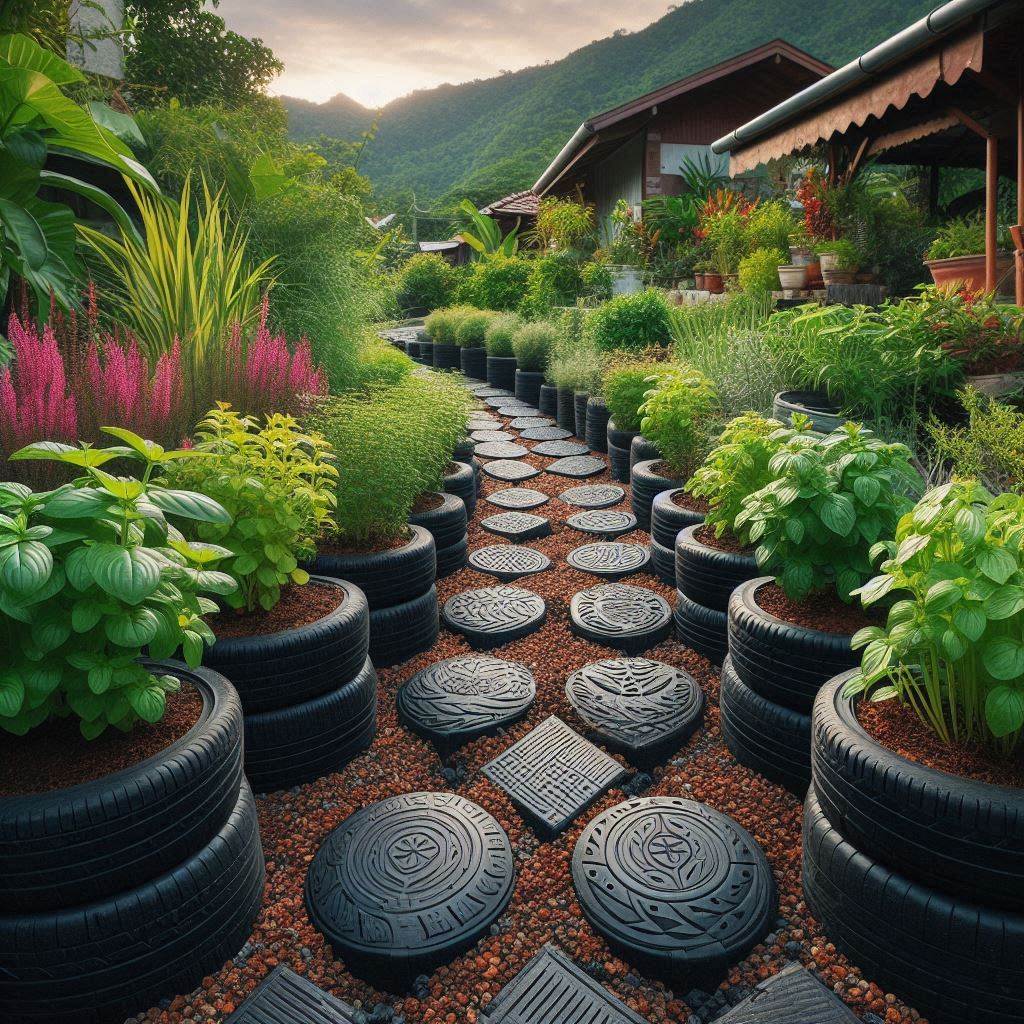
This project combines a functional walkway with a beautiful herb garden. Recycled rubber pavers are used to create a raised path, perfect for planting a variety of herbs right at your fingertips.
Materials:
- Recycled rubber pavers (enough to create a raised path of desired size and height)
- Bricks or wooden planks (for raised planters)
- Landscape fabric
- Shovel
- Tamper
- Potting soil
- Selection of herb plants
Instructions:
- Plan Your Path: Sketch your desired walkway design on paper, including the width, length, and height of the raised planters. Mark the path boundaries on the ground.
- Prepare the Ground: Excavate the area for the walkway to the desired depth (consider the height of your chosen pavers and planters). Ensure the base is level and tamp it down for stability.
- Lay Landscape Fabric: Cut and lay landscape fabric over the entire excavated area. This will prevent weeds from growing through the walkway and planters.
- Create the Raised Planters: Using bricks or wooden planks, create raised planters along the sides of the walkway according to your design. Ensure the structures are sturdy and level.
- Build the Walkway with Pavers: Lay the recycled rubber pavers on the prepared base within the walkway boundaries. Follow the classic paver walkway instructions (mentioned earlier) for laying and securing the pavers.
- Fill the Planters with Soil: Fill the raised planters with high-quality potting soil suitable for herbs.
- Plant Your Herbs: Choose a variety of herbs that thrive in your climate and planting zone. Plant them in the raised planters, following recommended spacing for each type of herb.
Tips:
- Select herbs that complement each other in terms of size, color, and fragrance.
- Consider using drought-tolerant herbs to minimize watering needs.
- Add decorative elements like small statues or birdbaths along the walkway for a touch of whimsy.
8. Crumb Rubber Pathway with Decorative Borders: Affordable and Appealing
This walkway offers a cost-effective solution using recycled rubber crumb, a loose material made from shredded tires. It provides a soft walking surface and can be easily customized with decorative borders.
Materials:
- Recycled rubber crumb (enough to cover your desired walkway area at a depth of 2-3 inches)
- Landscape fabric
- Edging material (plastic, metal, stone, or brick)
- Shovel
- Tamper
- Rake
Instructions:
- Plan Your Path: Sketch your desired walkway design on paper, considering the starting and ending points, width, and any curves. Mark the path boundaries on the ground.
- Prepare the Ground: Excavate the area to a depth slightly deeper than the desired thickness of the rubber crumb (typically 2-3 inches). Ensure the base is level and tamp it down firmly.
- Install Landscape Fabric: Lay down landscape fabric over the entire excavated area. This will prevent weeds from growing through the rubber crumb. Secure the edges of the fabric with landscape staples to prevent it from shifting.
- Install Edging: Secure your chosen edging material along the sides of the path. This will help contain the rubber crumb and create a more defined look for your walkway.
- Spread the Rubber Crumb: Evenly spread the recycled rubber crumb over the weed barrier, ensuring a depth of 2-3 inches. Use a rake to distribute the crumb evenly throughout the walkway.
Tips:
- Choose a color of rubber crumb that complements your landscaping. Black, brown, and red are popular options.
- For a more finished look, top the edges of the rubber crumb with decorative gravel or stones in contrasting colors.
- You can incorporate edging materials like bricks or stones laid on their side to create a raised border and add visual interest.
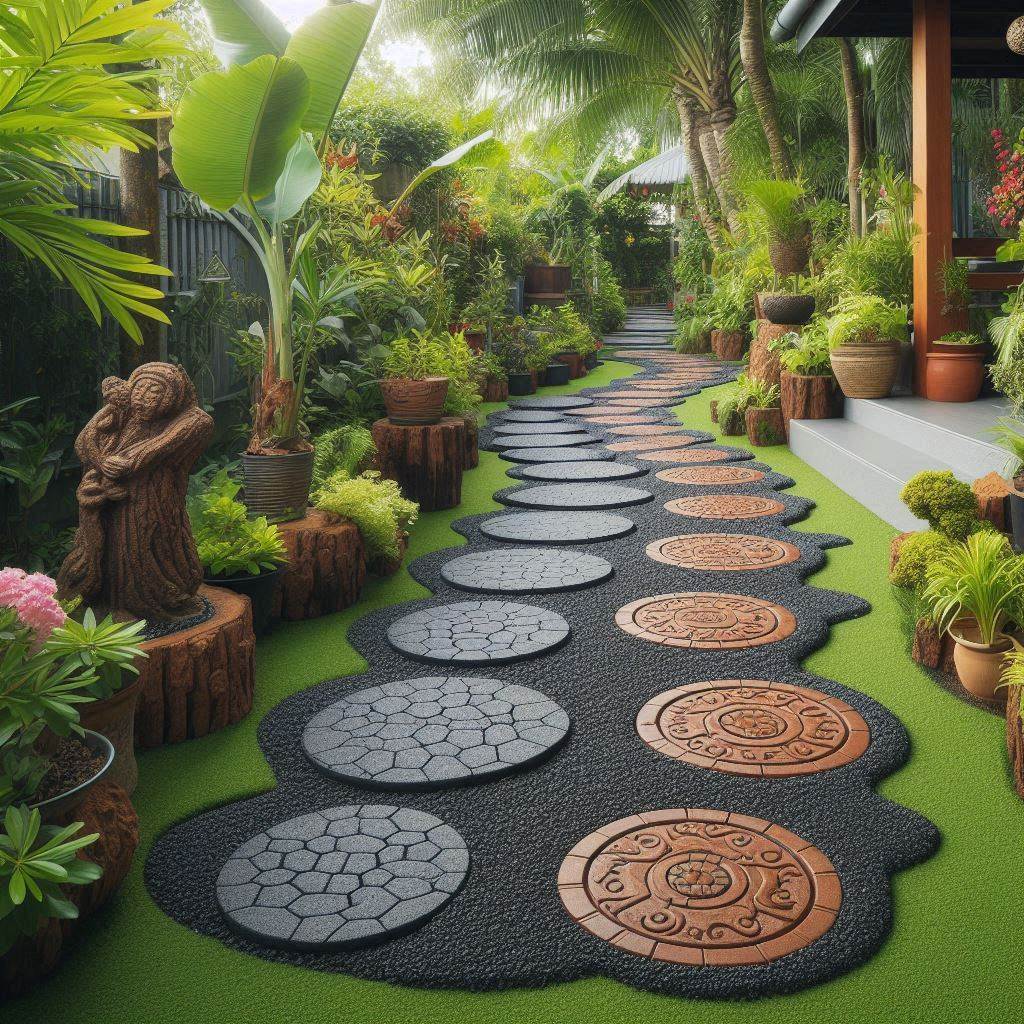
9. Textured Rubber Tile Pathway with Stenciled Designs: A Touch of Elegance
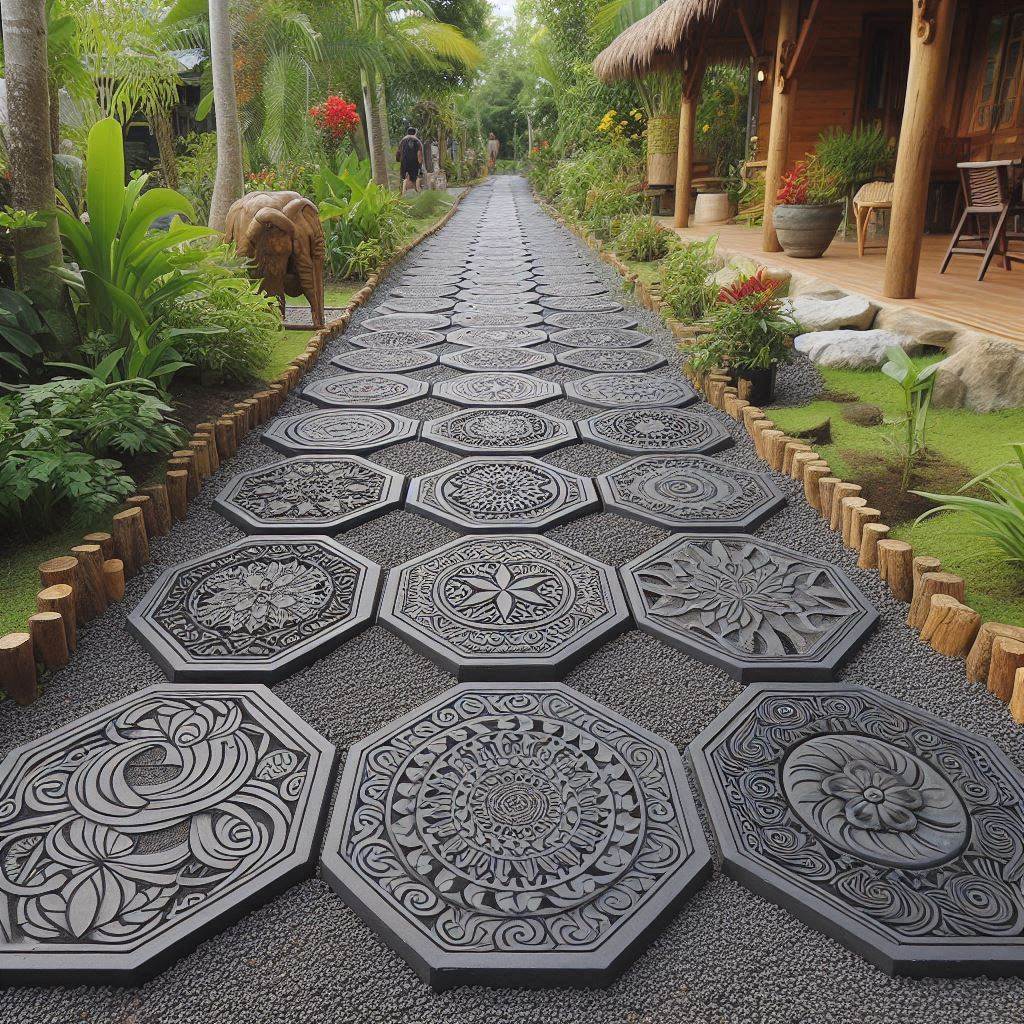
This project utilizes pre-textured recycled rubber tiles for a sophisticated walkway. Stenciling allows you to add personalized designs for a touch of elegance.
Materials:
- Textured recycled rubber tiles (enough to cover your desired walkway area)
- Utility knife (if edging or cutting tiles needed)
- Construction adhesive (suitable for outdoor use)
- Level
- Rubber mallet (optional)
- Stencils (optional)
- Outdoor paint (optional)
- Paintbrushes (optional)
Instructions:
- Plan Your Design: Choose pre-textured recycled rubber tiles that complement your desired look. Sketch a design for any stenciled patterns you want to add (optional).
- Prepare the Ground: Decide on a base for your tiles. You can lay them directly on a compacted and level soil base, or create a concrete or gravel base for added stability. Ensure the base is smooth and even.
- Prepare the Tiles: If necessary, use a utility knife to cut tiles to fit your design or edging needs. Be cautious and wear gloves and safety glasses while cutting.
- Lay the Tiles: Starting from a corner and following your design, begin applying construction adhesive to the back of each tile and carefully laying it in its designated place. Use a rubber mallet (optional) to gently tap the tiles into place and ensure a level surface throughout.
- Stenciling (Optional): Once all the tiles are laid and the adhesive is cured, apply stencils (if desired) and paint them with outdoor paint according to your design.
Tips:
- Choose rubber tiles with a textured surface for added visual interest and slip resistance.
- Experiment with different stencil designs to create a unique and personalized walkway.
- You can use a combination of textured and smooth tiles for a more dynamic look.
10. Recycled Rubber Pathway with Integrated Lighting: Illuminate Your Steps
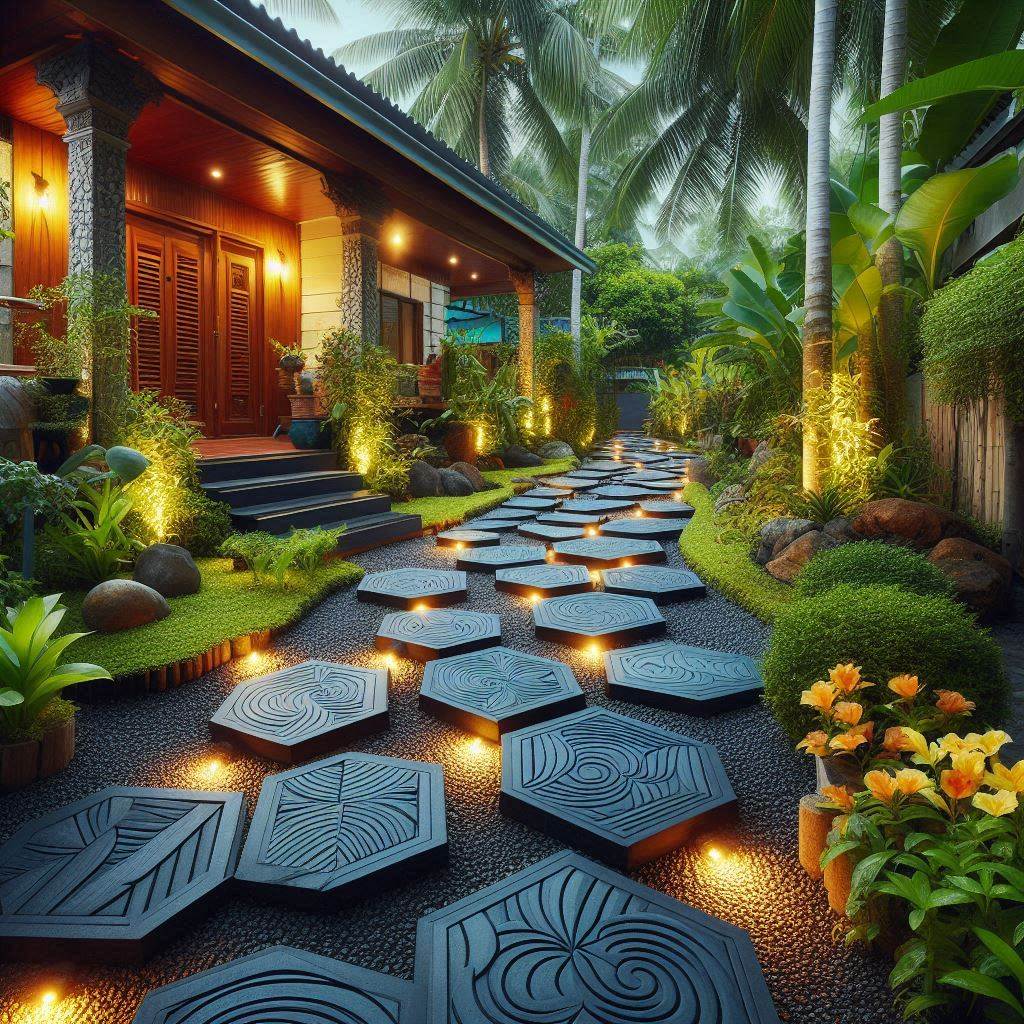
This project adds a functional element to your walkway by incorporating recycled rubber pavers with built-in LED lights. This creates a beautiful and safe path for nighttime strolls.
Materials:
- Recycled rubber pavers with integrated LED lights (enough to cover your desired walkway area)
- Base material (gravel, crushed stone, or compacted soil)
- Shovel
- Tamper
- Level
Instructions:
- Plan Your Path: Sketch your desired walkway design on paper, considering the starting and ending points, width, and any curves. Mark the path boundaries on the ground. Ensure proper spacing for the pavers with integrated lights.
- Prepare the Ground: Excavate the area to a depth slightly deeper than the thickness of the pavers (typically 2-4 inches). Level the base using a rake and tamper to create a firm, even surface.
- Lay the Pavers: Starting from a corner, begin laying the pavers with integrated lights in your desired pattern. Ensure the electrical connections between the pavers align correctly (consult the manufacturer’s instructions).
- Secure the Connections: Follow the manufacturer’s specific instructions for securing the electrical connections between the pavers. This might involve snapping them together or using waterproof connectors.
- Fill the Gaps (Optional): If desired, use a fine gravel or sand to fill the gaps between the pavers. Sweep the excess material off the top with a broom.
Tips:
- Choose the brightness and color temperature of the LED lights that best suit your needs and aesthetics.
- Plan the layout of the pavers with lights strategically placed to illuminate the entire walkway for safe nighttime use.
- Consider incorporating a timer or motion sensor to control the lighting automatically.
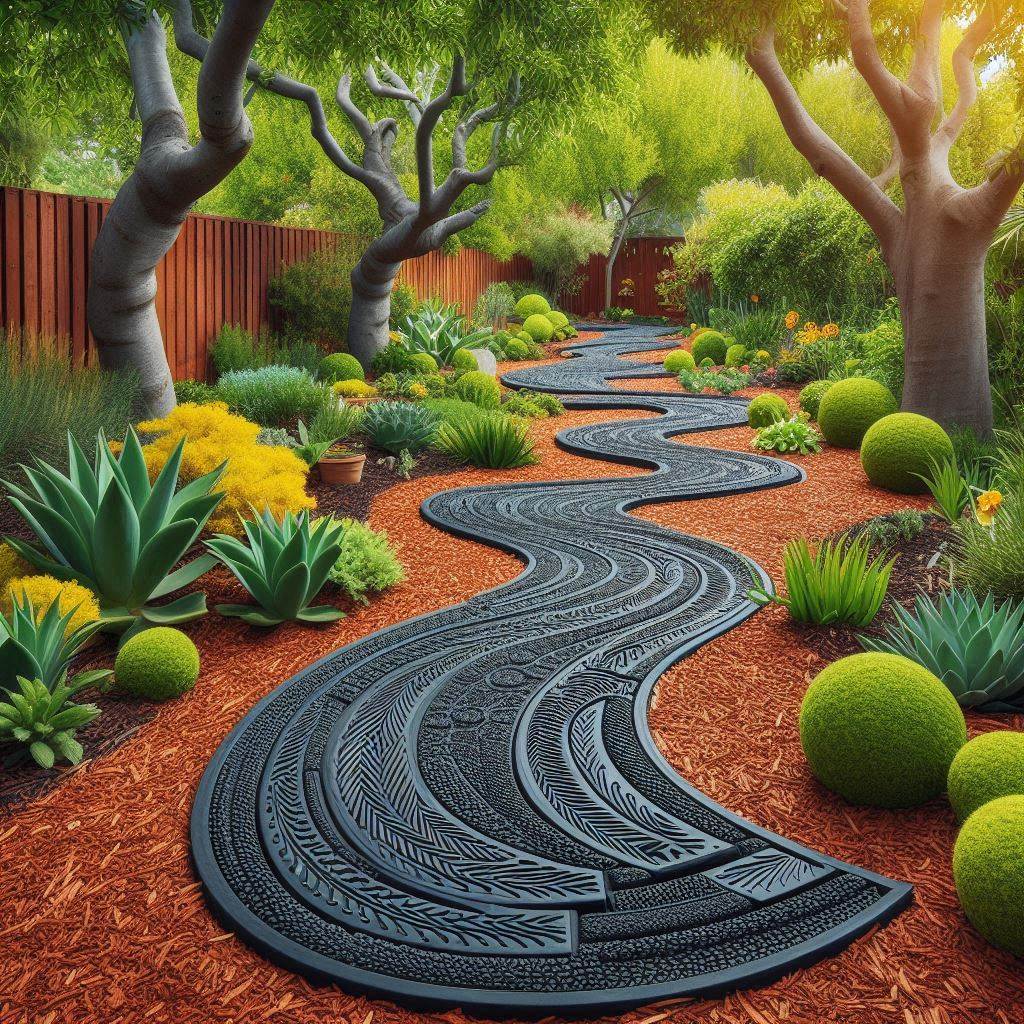
11. Wavy Rubber Mat Pathway with Decorative Inlay: A Playful Approach
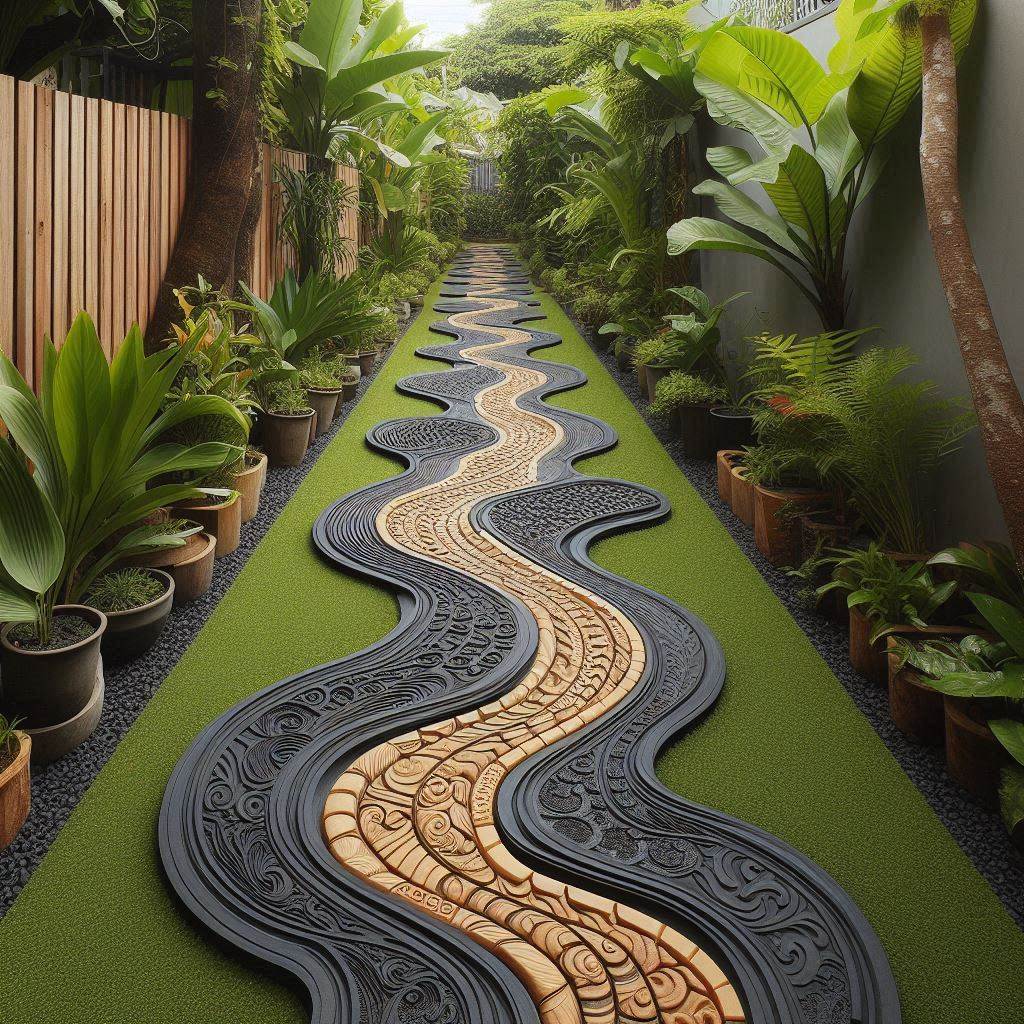
This project utilizes recycled rubber stall mats cut into wavy shapes and incorporates colorful inlays for a playful and unique walkway.
Materials:
- Recycled rubber stall mat (large enough to create your desired walkway size and wavy pattern)
- Utility knife and safety gear (gloves, goggles)
- Jigsaw (optional)
- Outdoor paint in contrasting colors
- Paintbrushes
- Stencils (optional)
- Construction adhesive (suitable for outdoor use)
Instructions:
- Plan Your Design: Sketch your desired walkway design on paper, focusing on a wavy pattern for the edges. You can create simple curves or more elaborate waves. Consider incorporating decorative inlays in contrasting colors.
- Prepare the Mat: Lay the rubber stall mat flat on a clean surface.
- Cut the Wavy Edges: Using a utility knife and safety gear, carefully cut the mat along the wavy lines you sketched in your design. For tighter curves, a jigsaw might be helpful.
- Paint the Base (Optional): Paint the main body of the rubber mat in your chosen base color. Allow for complete drying.
- Create the Inlays: Sketch the desired inlay shapes directly on the painted mat or use stencils for intricate designs. Paint these shapes in contrasting colors according to your design.
- Adhere Inlays (Optional): If you used cutouts for the inlays, paint them separately and then adhere them to the base mat using construction adhesive suitable for outdoor use.
Tips:
- Choose bright and contrasting colors for the base and inlay to create a visually striking walkway.
- You can incorporate different shapes for the inlays, such as stars, flowers, or geometric shapes.
- Consider adding reflective paint to the edges of the wavy path for increased nighttime visibility.
Conclusion
Recycled rubber offers a wealth of possibilities for creating unique, durable, and eco-friendly walkways in your outdoor space. From classic paver walkways to artistic tire artistic tire tread paths and raised herb gardens, the ideas explored in this blog provide a starting point for your creativity. Remember, the beauty lies in the customization! Don’t be afraid to experiment with colors, textures, and patterns to create a walkway that reflects your personal style and complements your existing landscape.
Here are some additional resources to help you on your DIY recycled rubber walkway journey:
- Finding Recycled Rubber Materials:
- Many local hardware stores or landscaping supply companies carry recycled rubber pavers, mats, and tiles.
- Online retailers offer a wider selection of recycled rubber walkway materials.
- Consider contacting tire recycling facilities in your area to inquire about used tires with interesting tread patterns.
- Additional Tips for Maintaining Your Rubber Walkway:
- Regularly sweep away leaves and debris to prevent them from accumulating and rotting on the surface.
- Rinse your rubber walkway with a hose occasionally to remove dirt and dust.
- For stubborn stains, use a mild soap and water solution and a gentle scrub brush. Avoid using harsh chemicals that could damage the rubber.
Simply follow these tips and let your creativity flow to transform your yard with a beautiful and eco-friendly recycled rubber walkway that will last for years to come. Now get out there, grab your recycled rubber materials, and start building your dream walkway!